
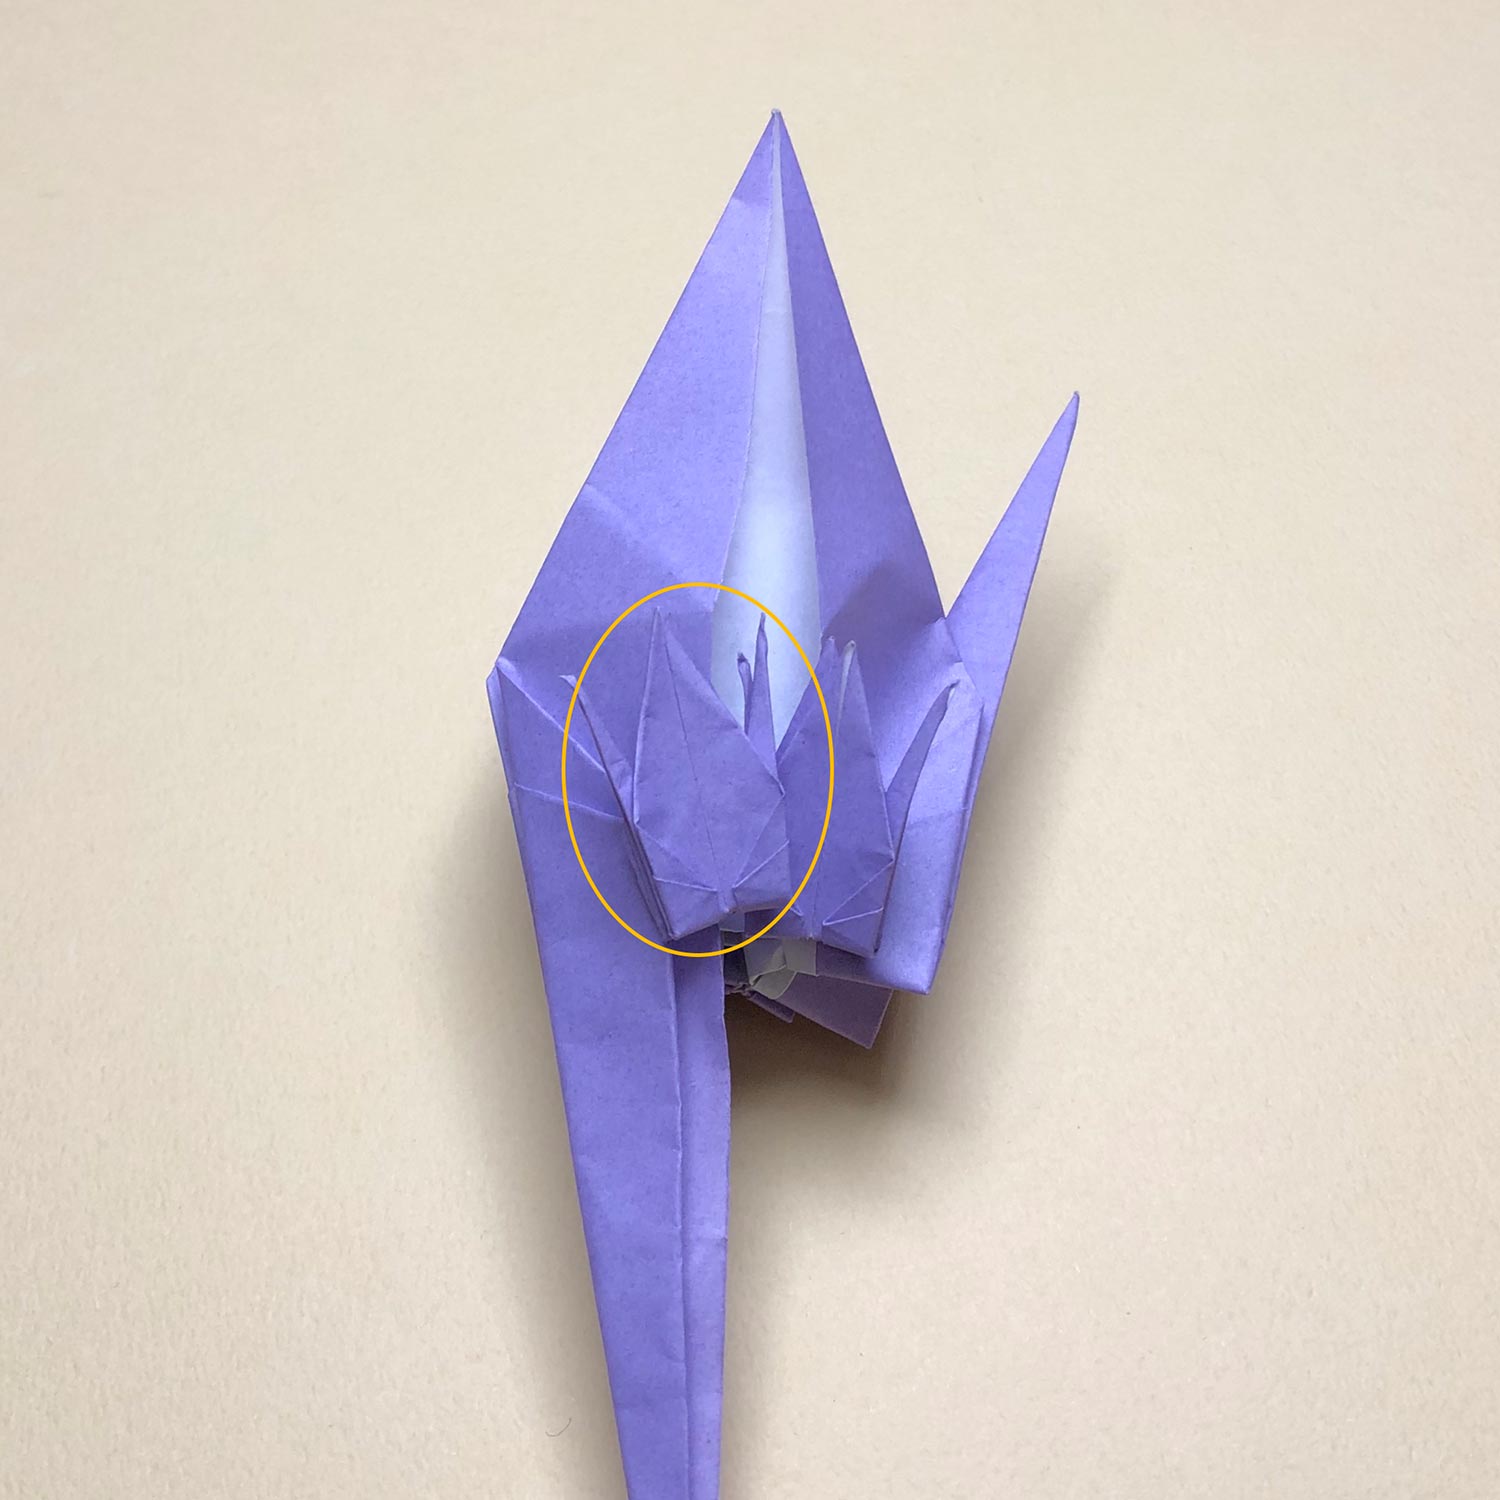
(25)
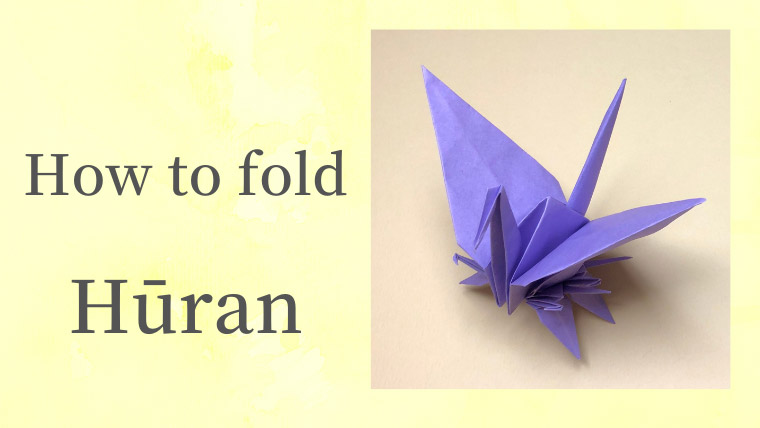
First, raise the head/tail which you have folded in the previous step.
Raise the head/tail while flipping the flap which has been circled in the direction of the arrow.
(On the opposite side, flip another flap as well.)
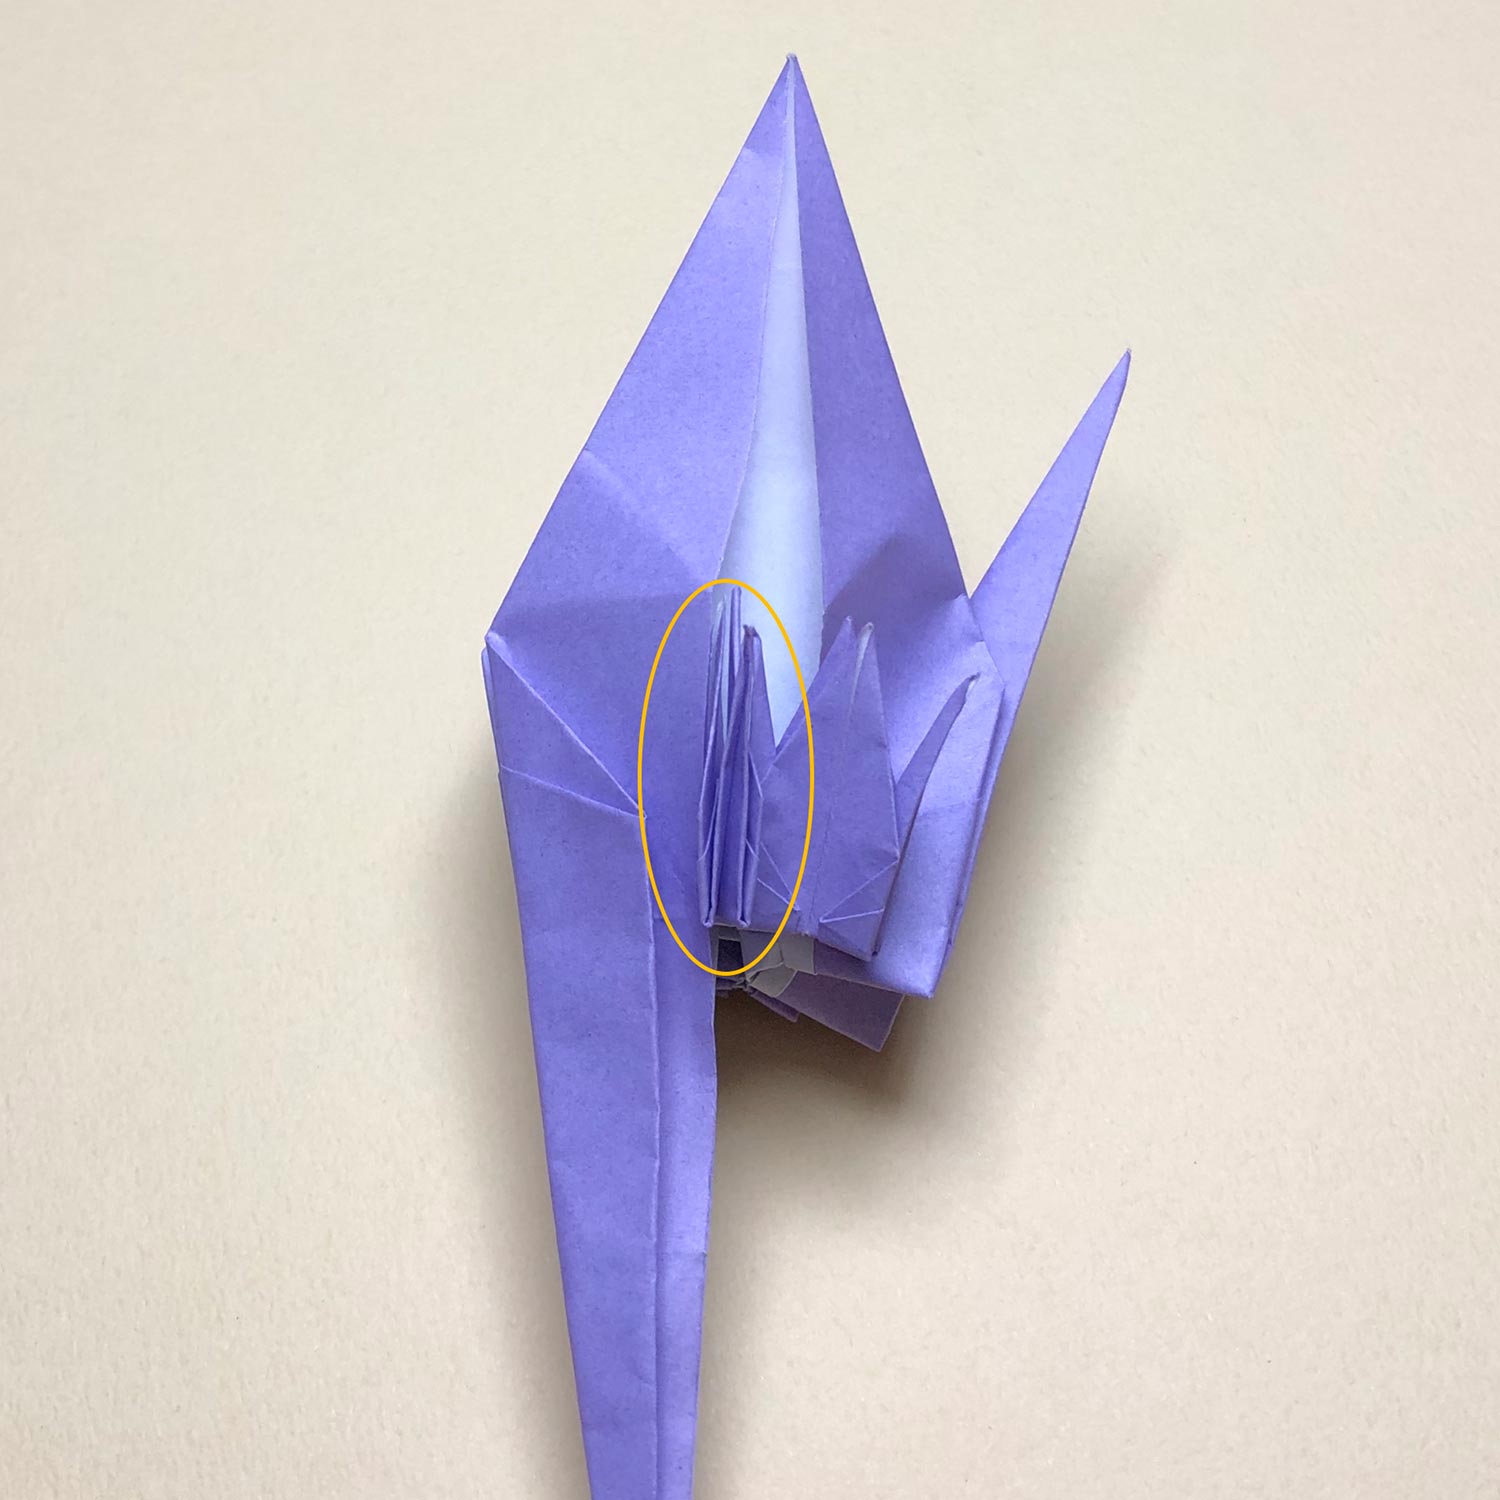
(26)
Flip the flaps like this picture.
Then raise the head/tail while flipping them.
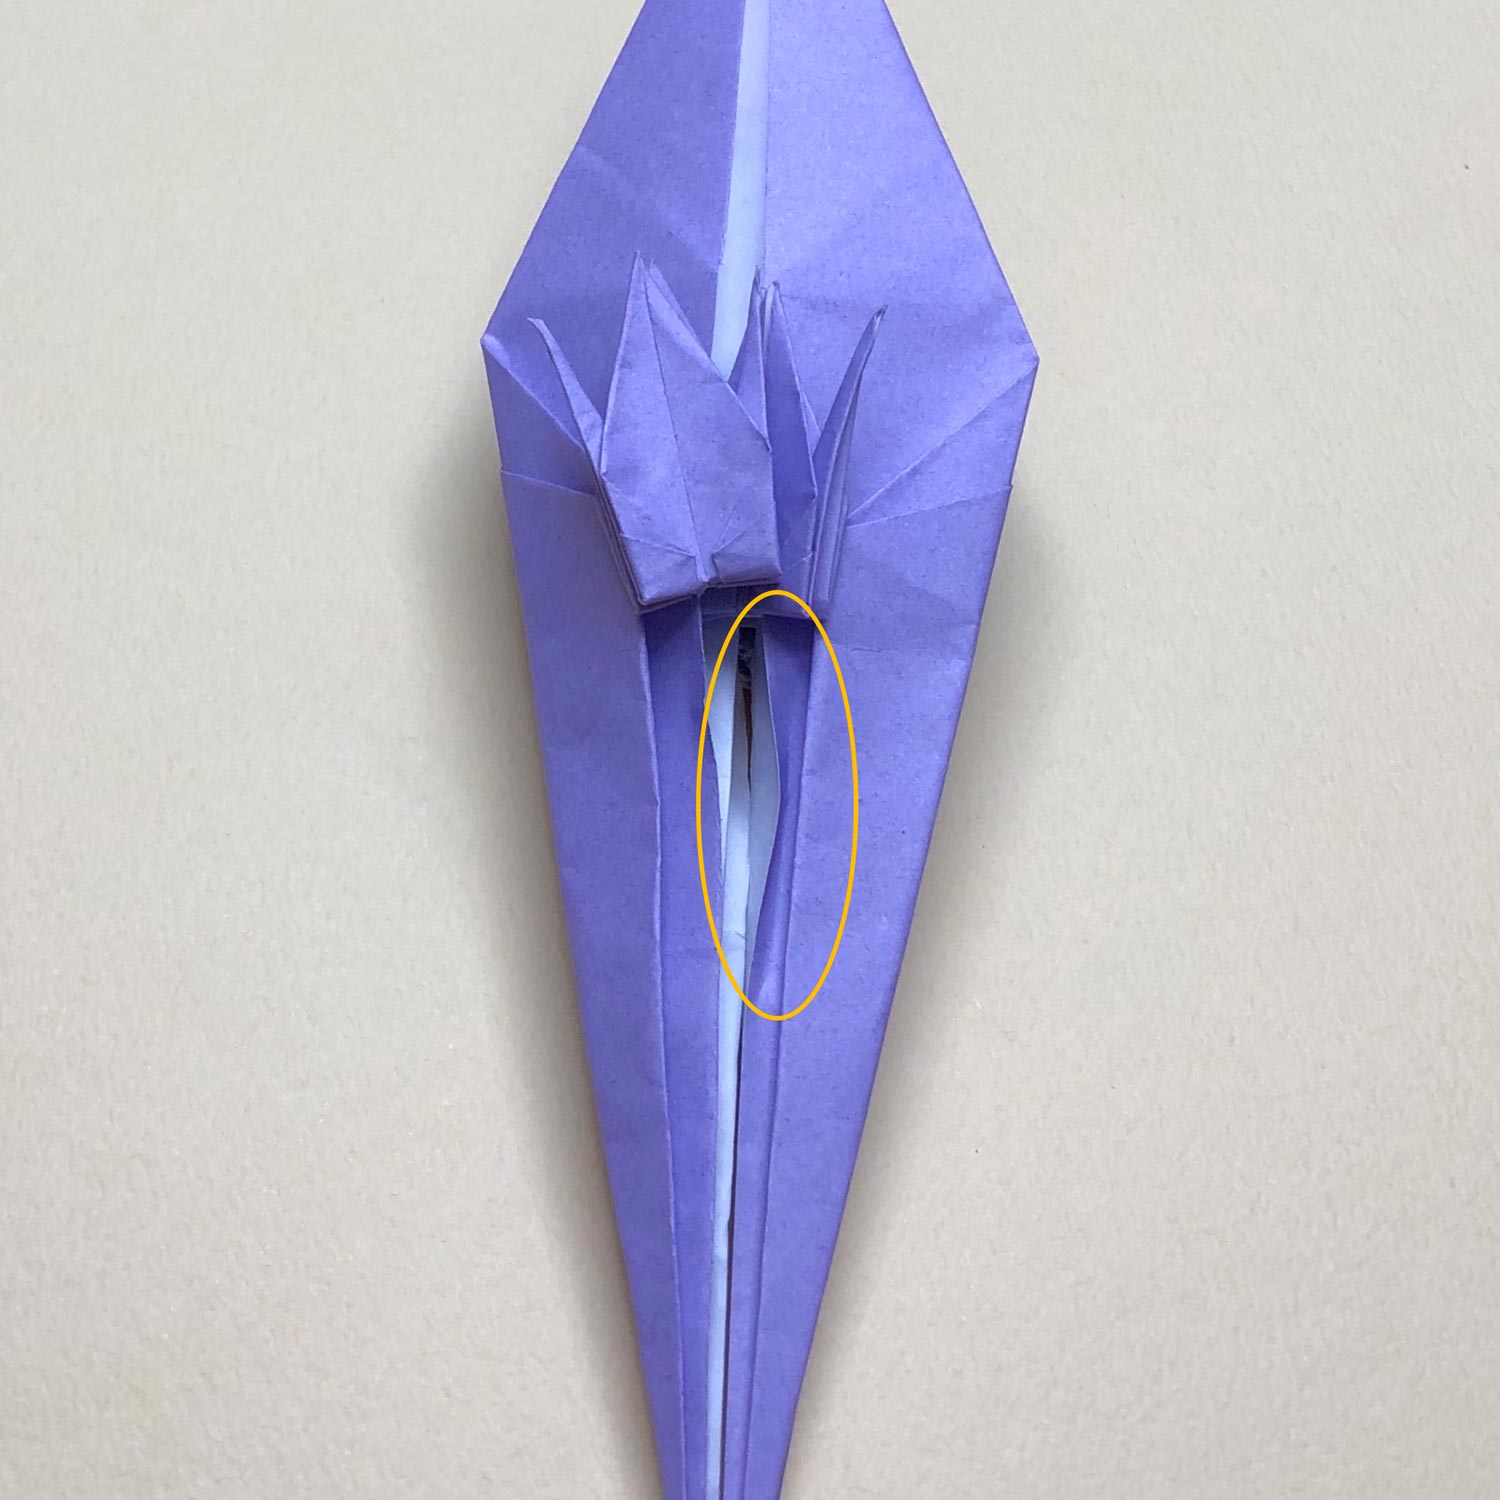
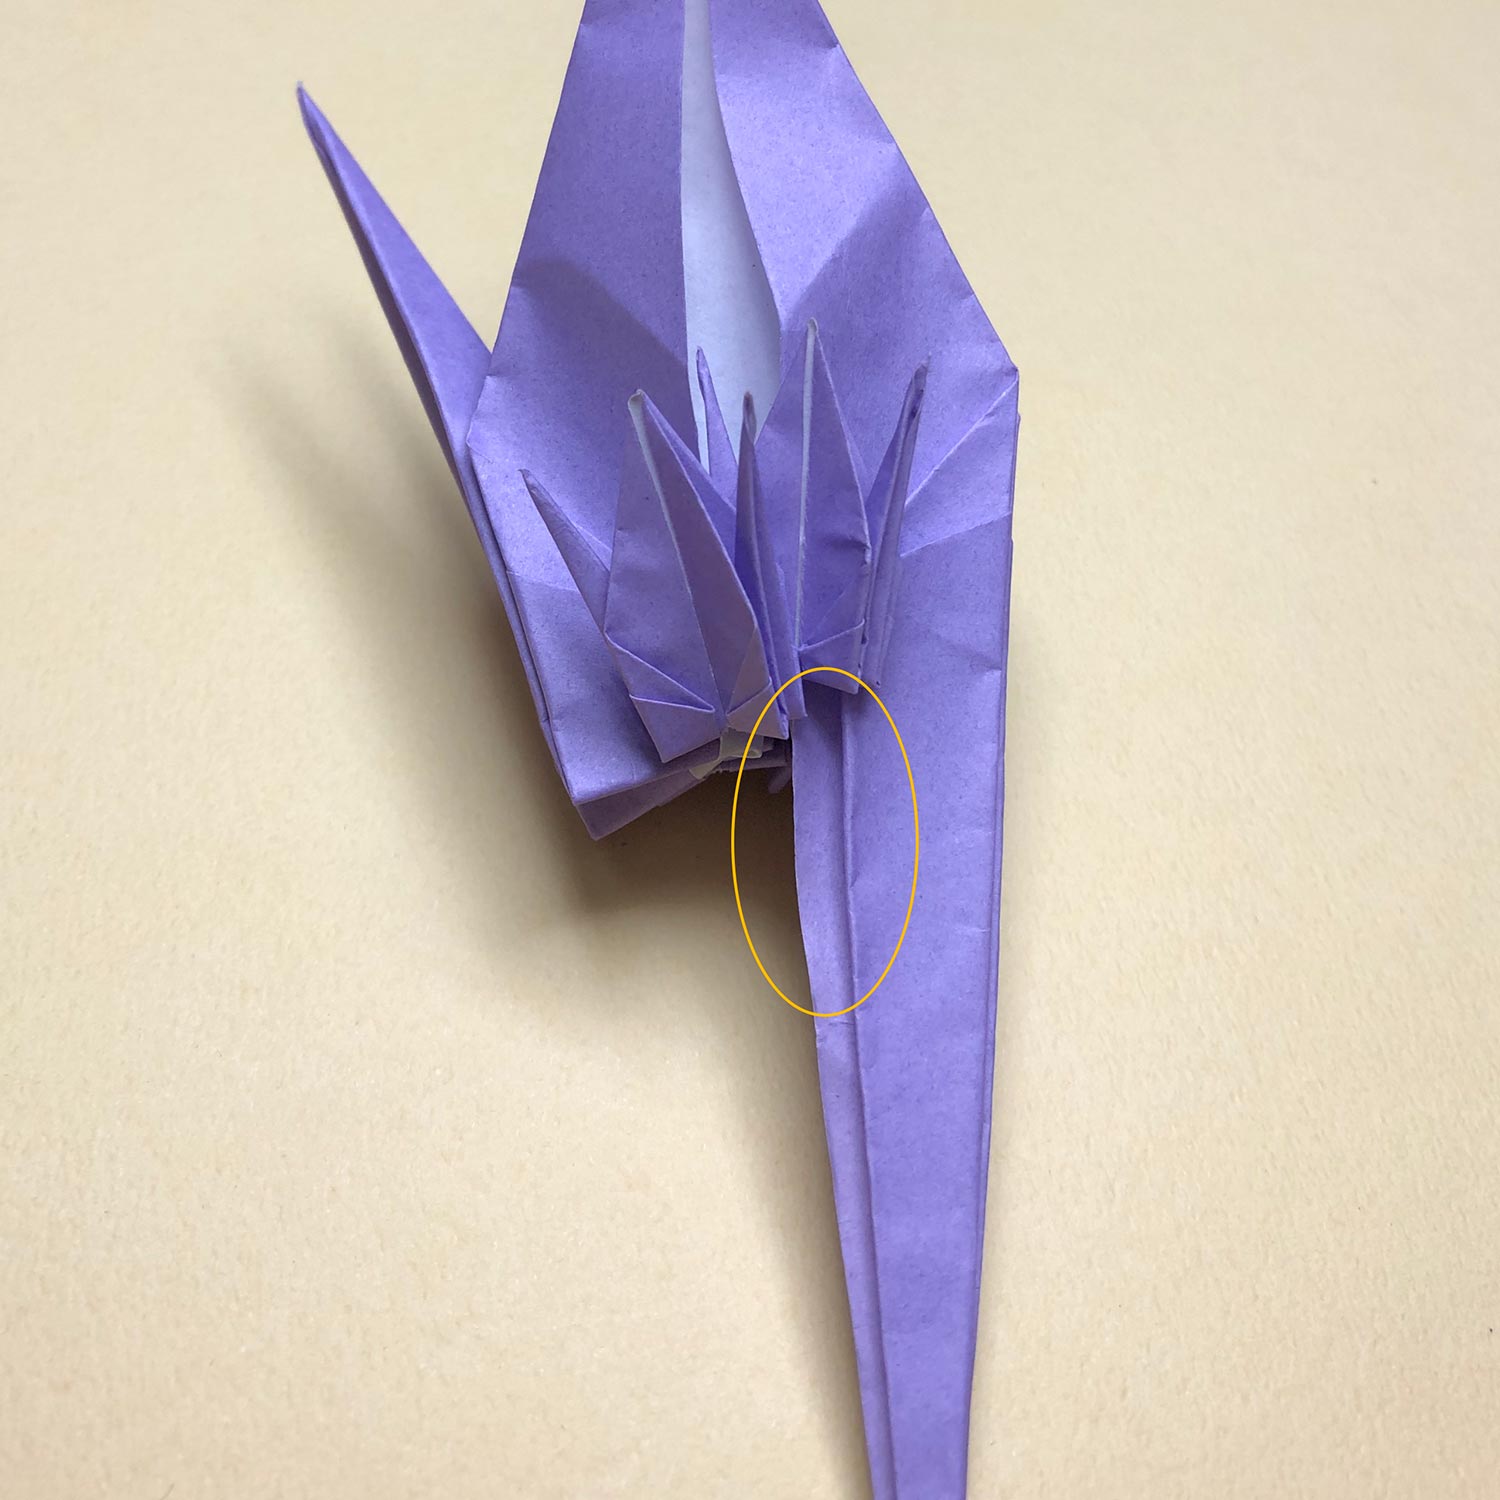
(27)
By raising the head/tail while flipping flaps, the parts which are shown by the arrows are flipped.
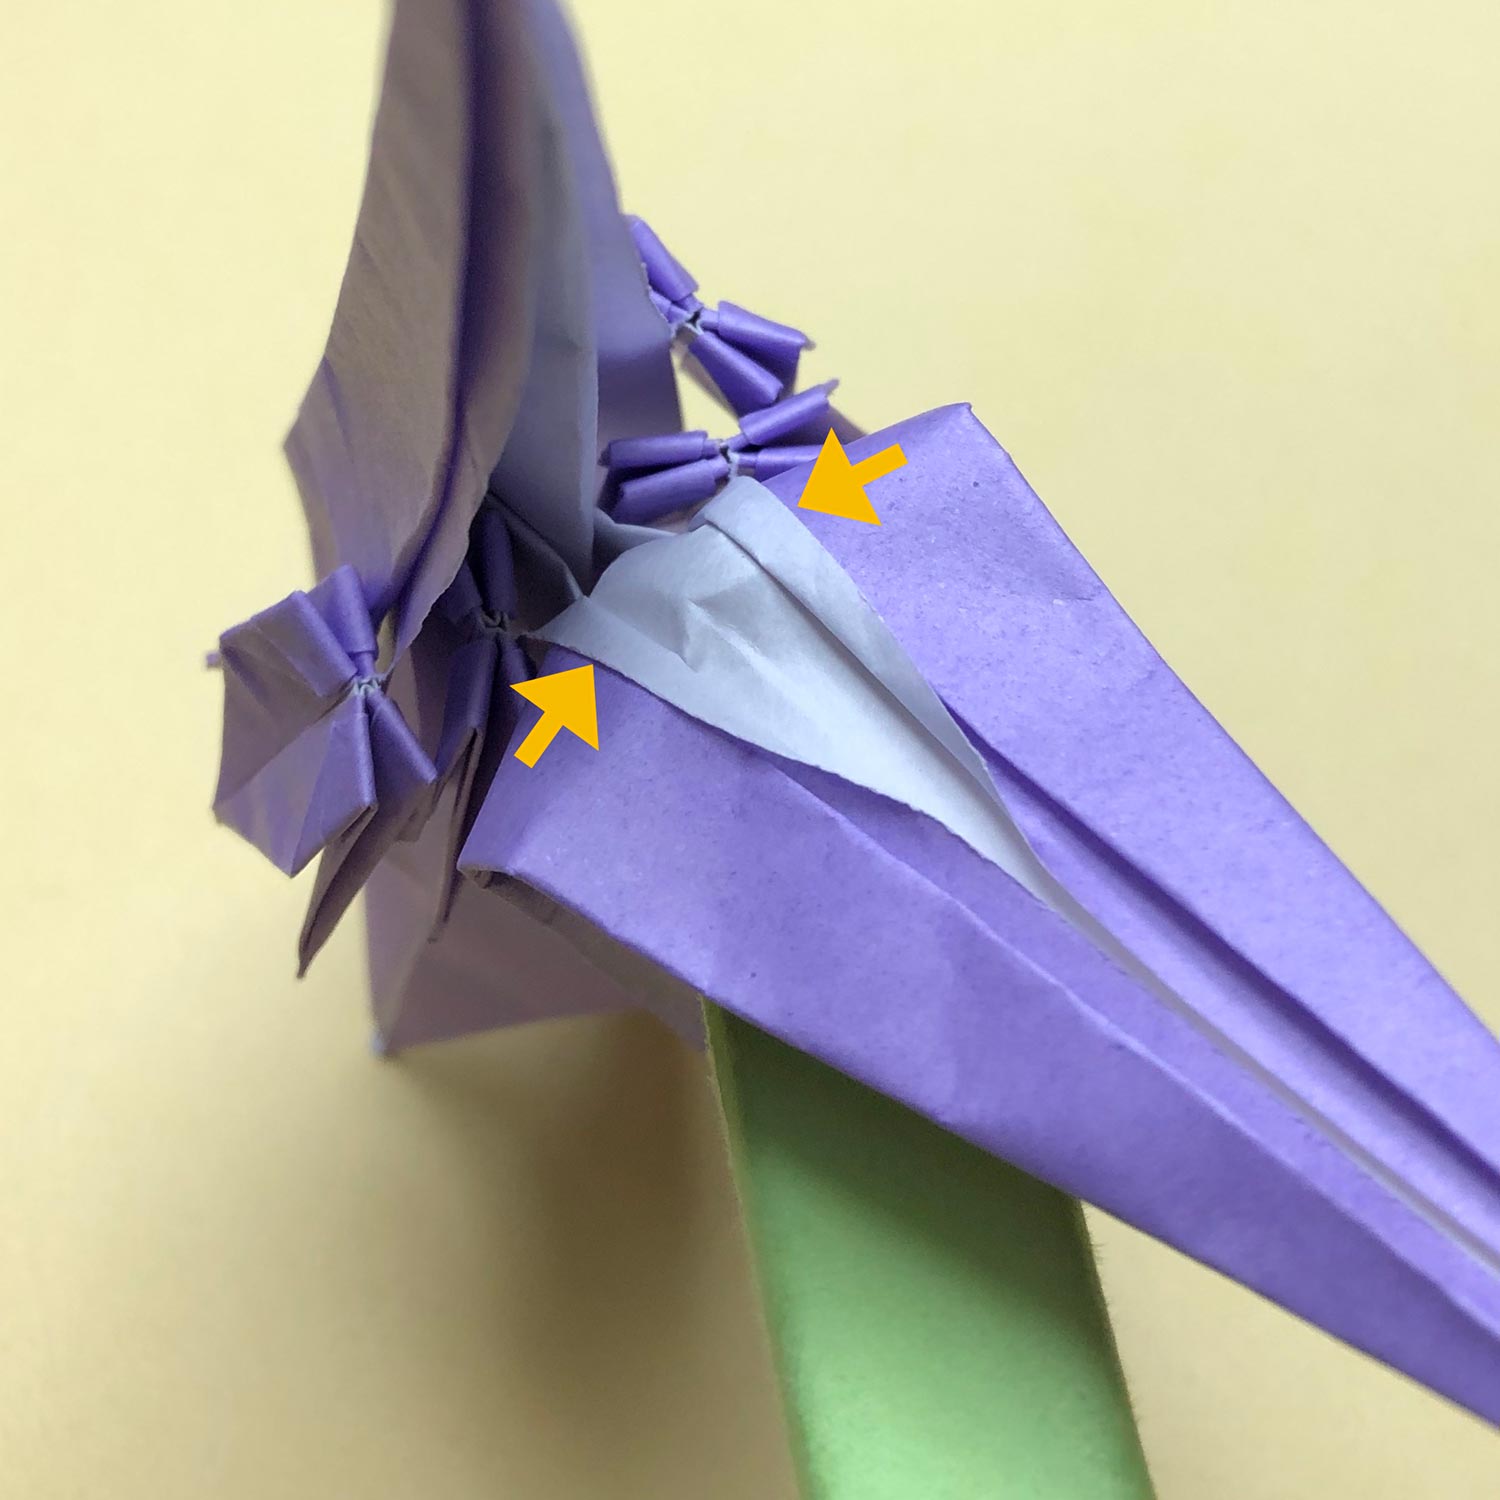
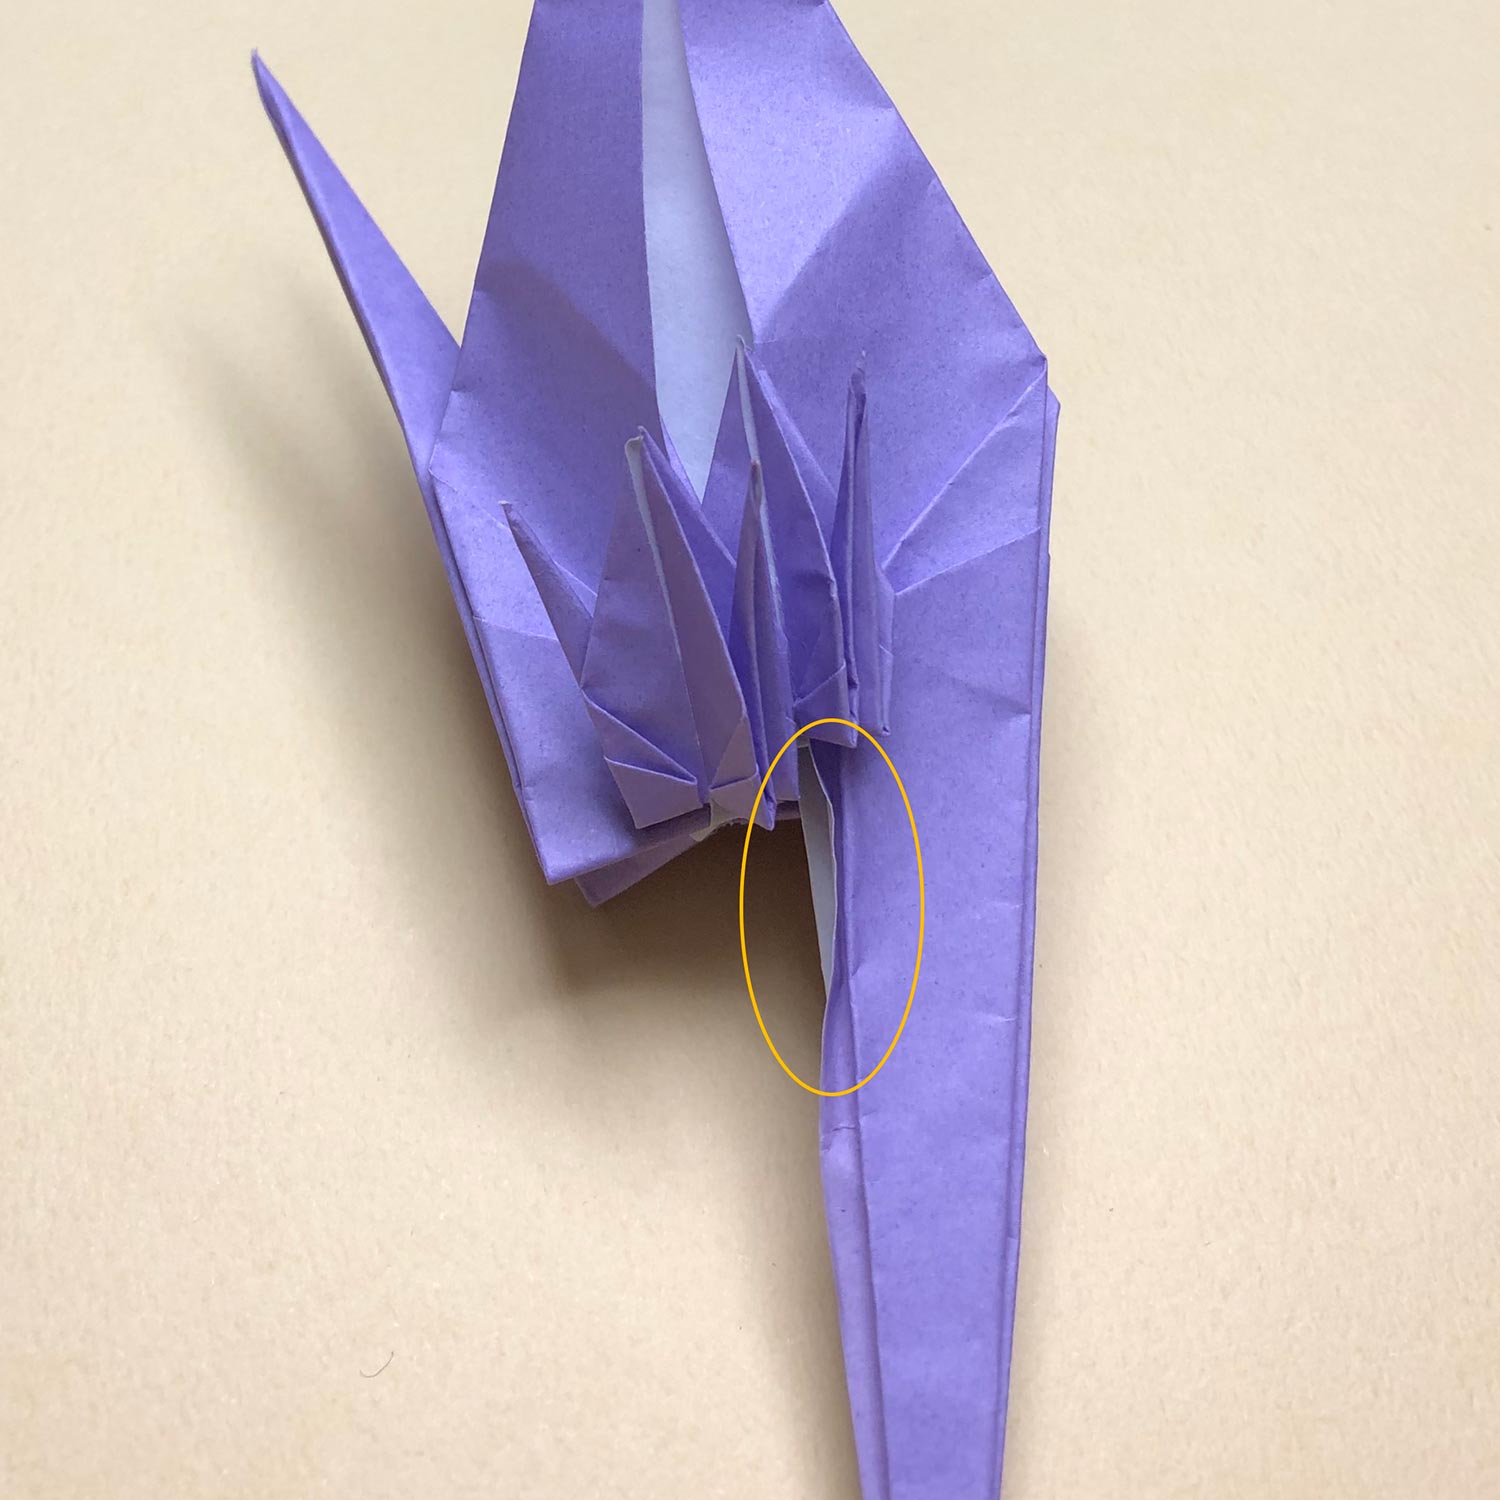
(28)
If you raise the head/tail all the way, connecting parts will tear.
Therefore, raise the head/tail away from connecting parts.
I raised the head/tail 3mm away from connecting parts.
(I used a 26x26cm paper.)
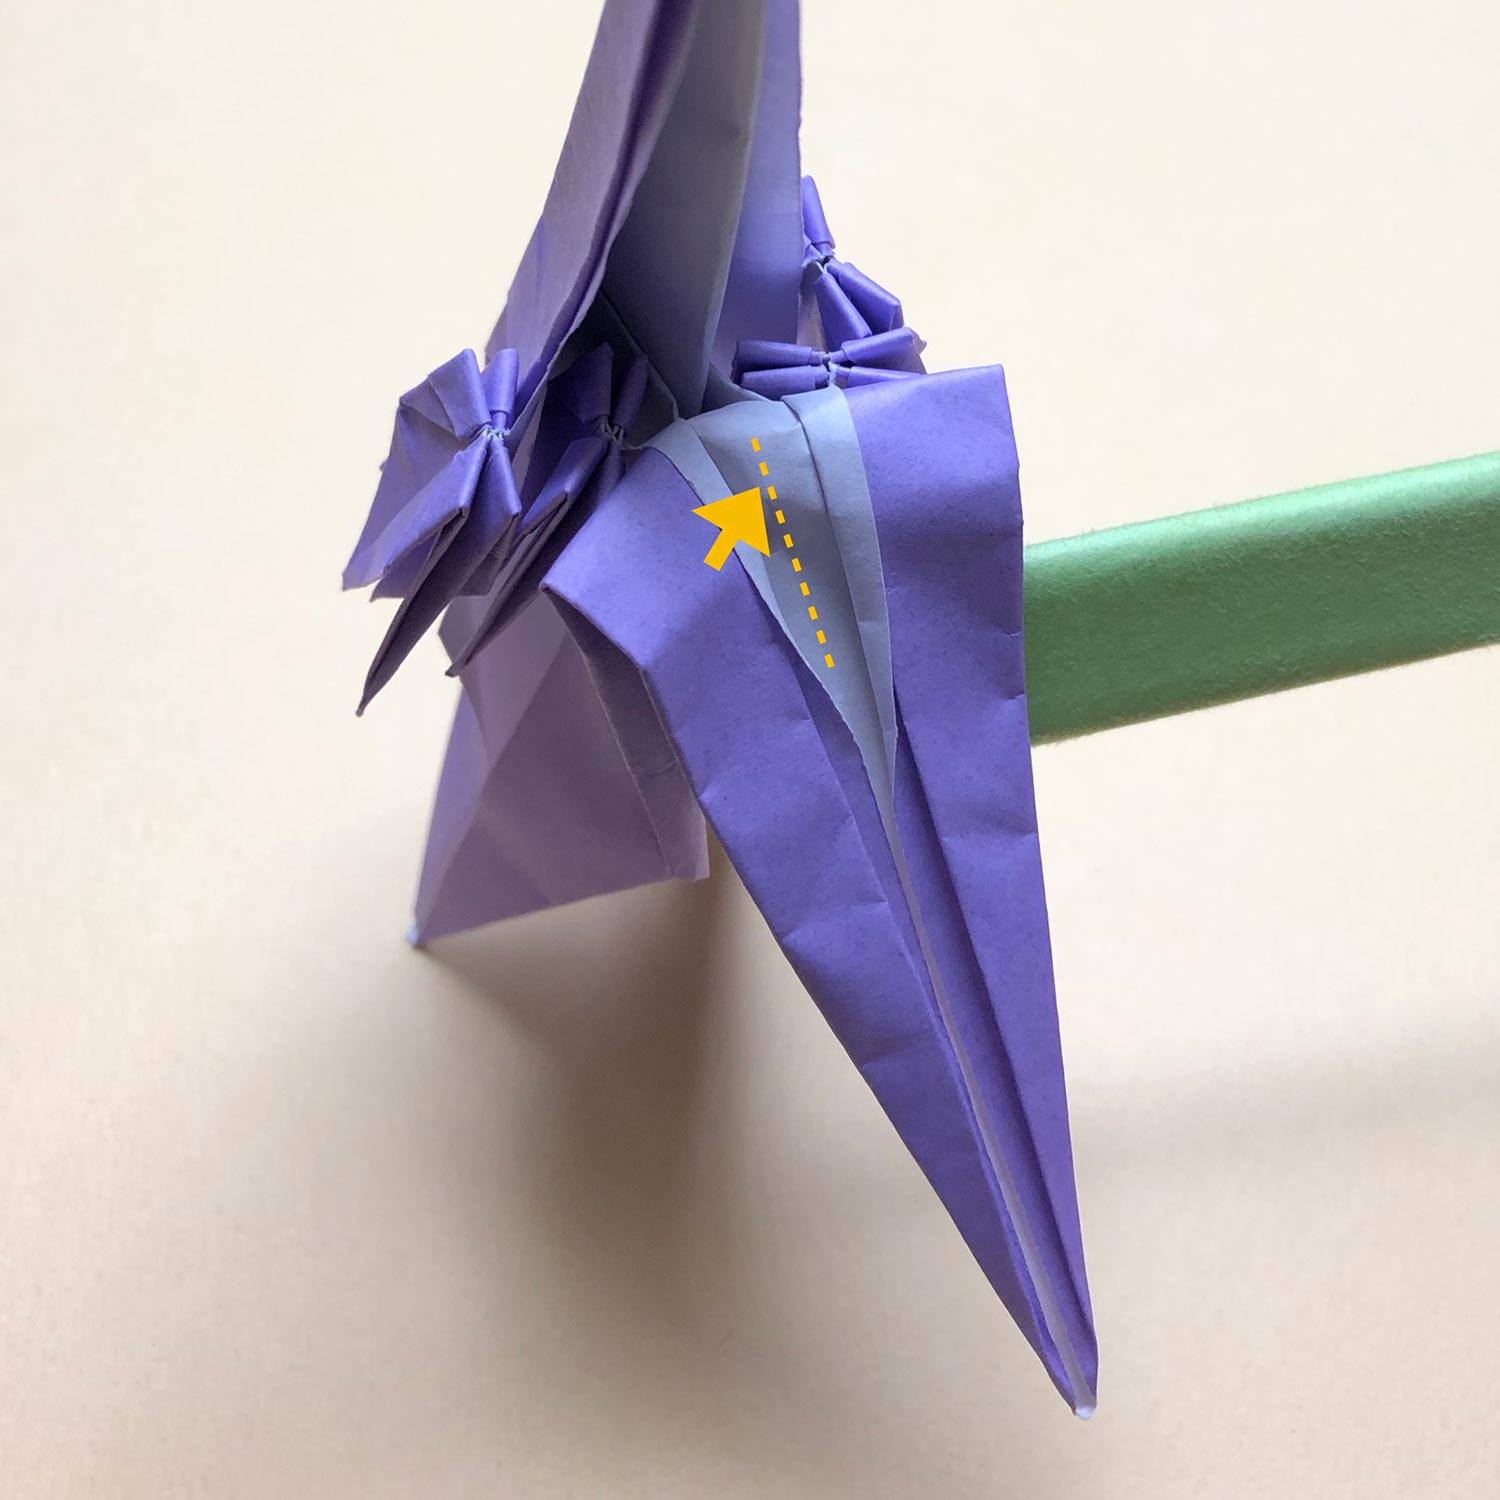
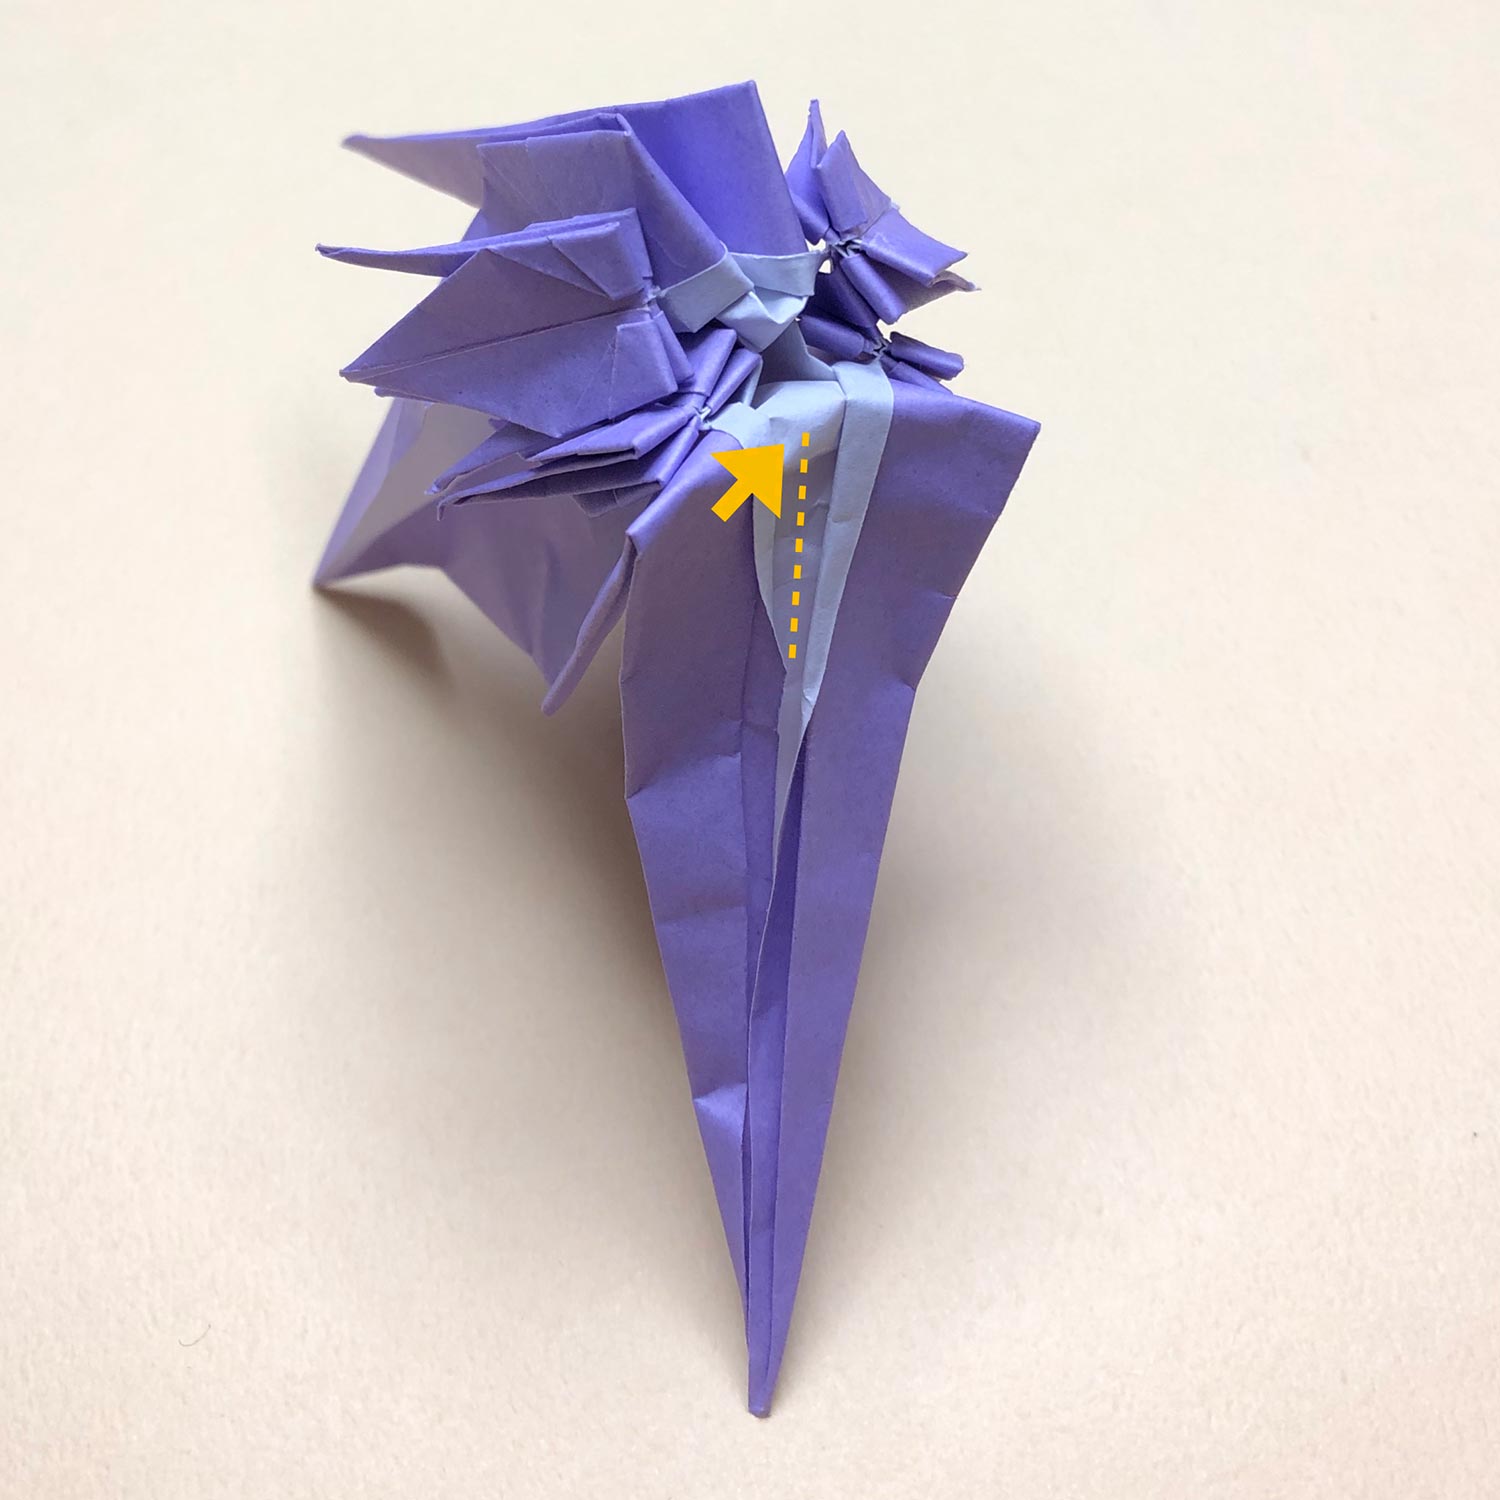
(29)
After raising it, push the part, which is shown by the arrow, with your nail to make a valley-fold at the dotted line.
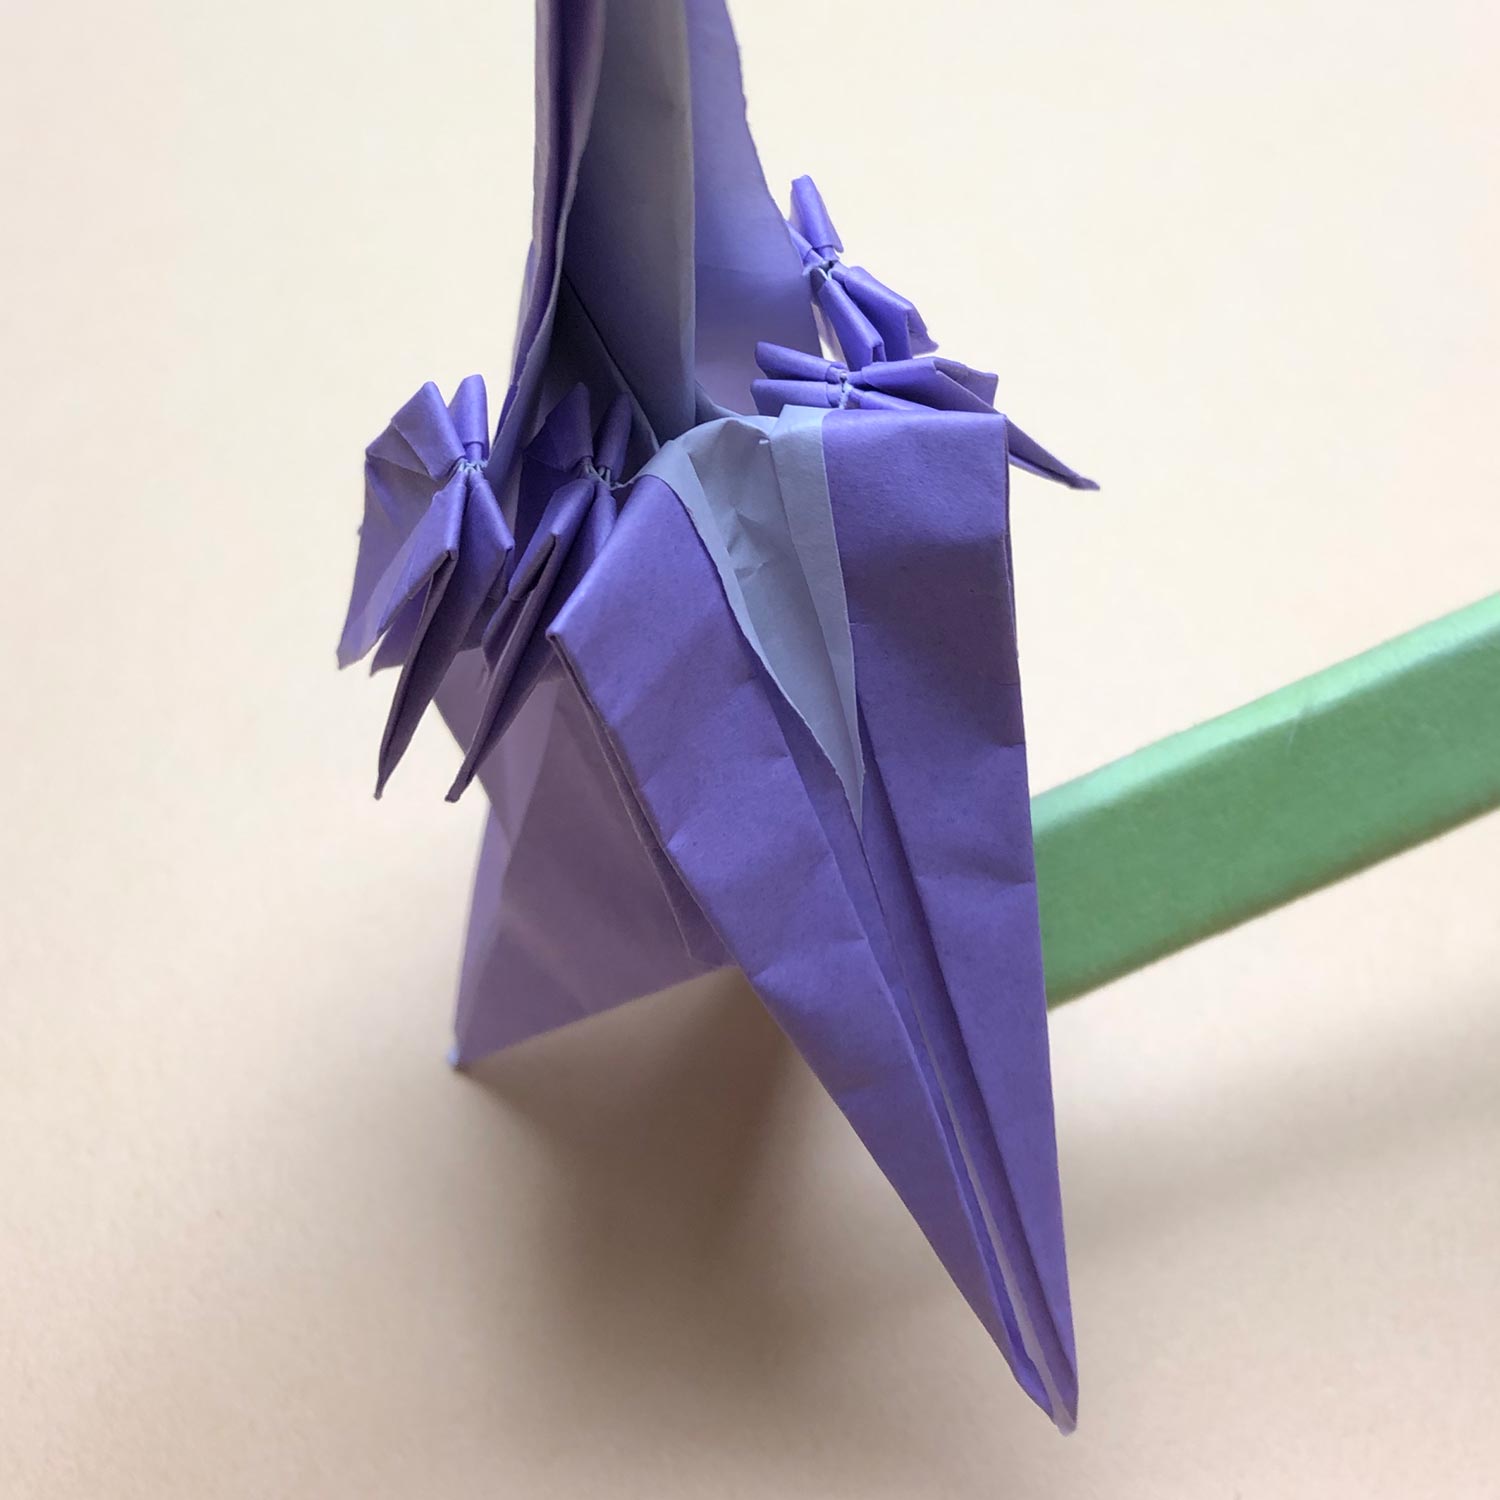
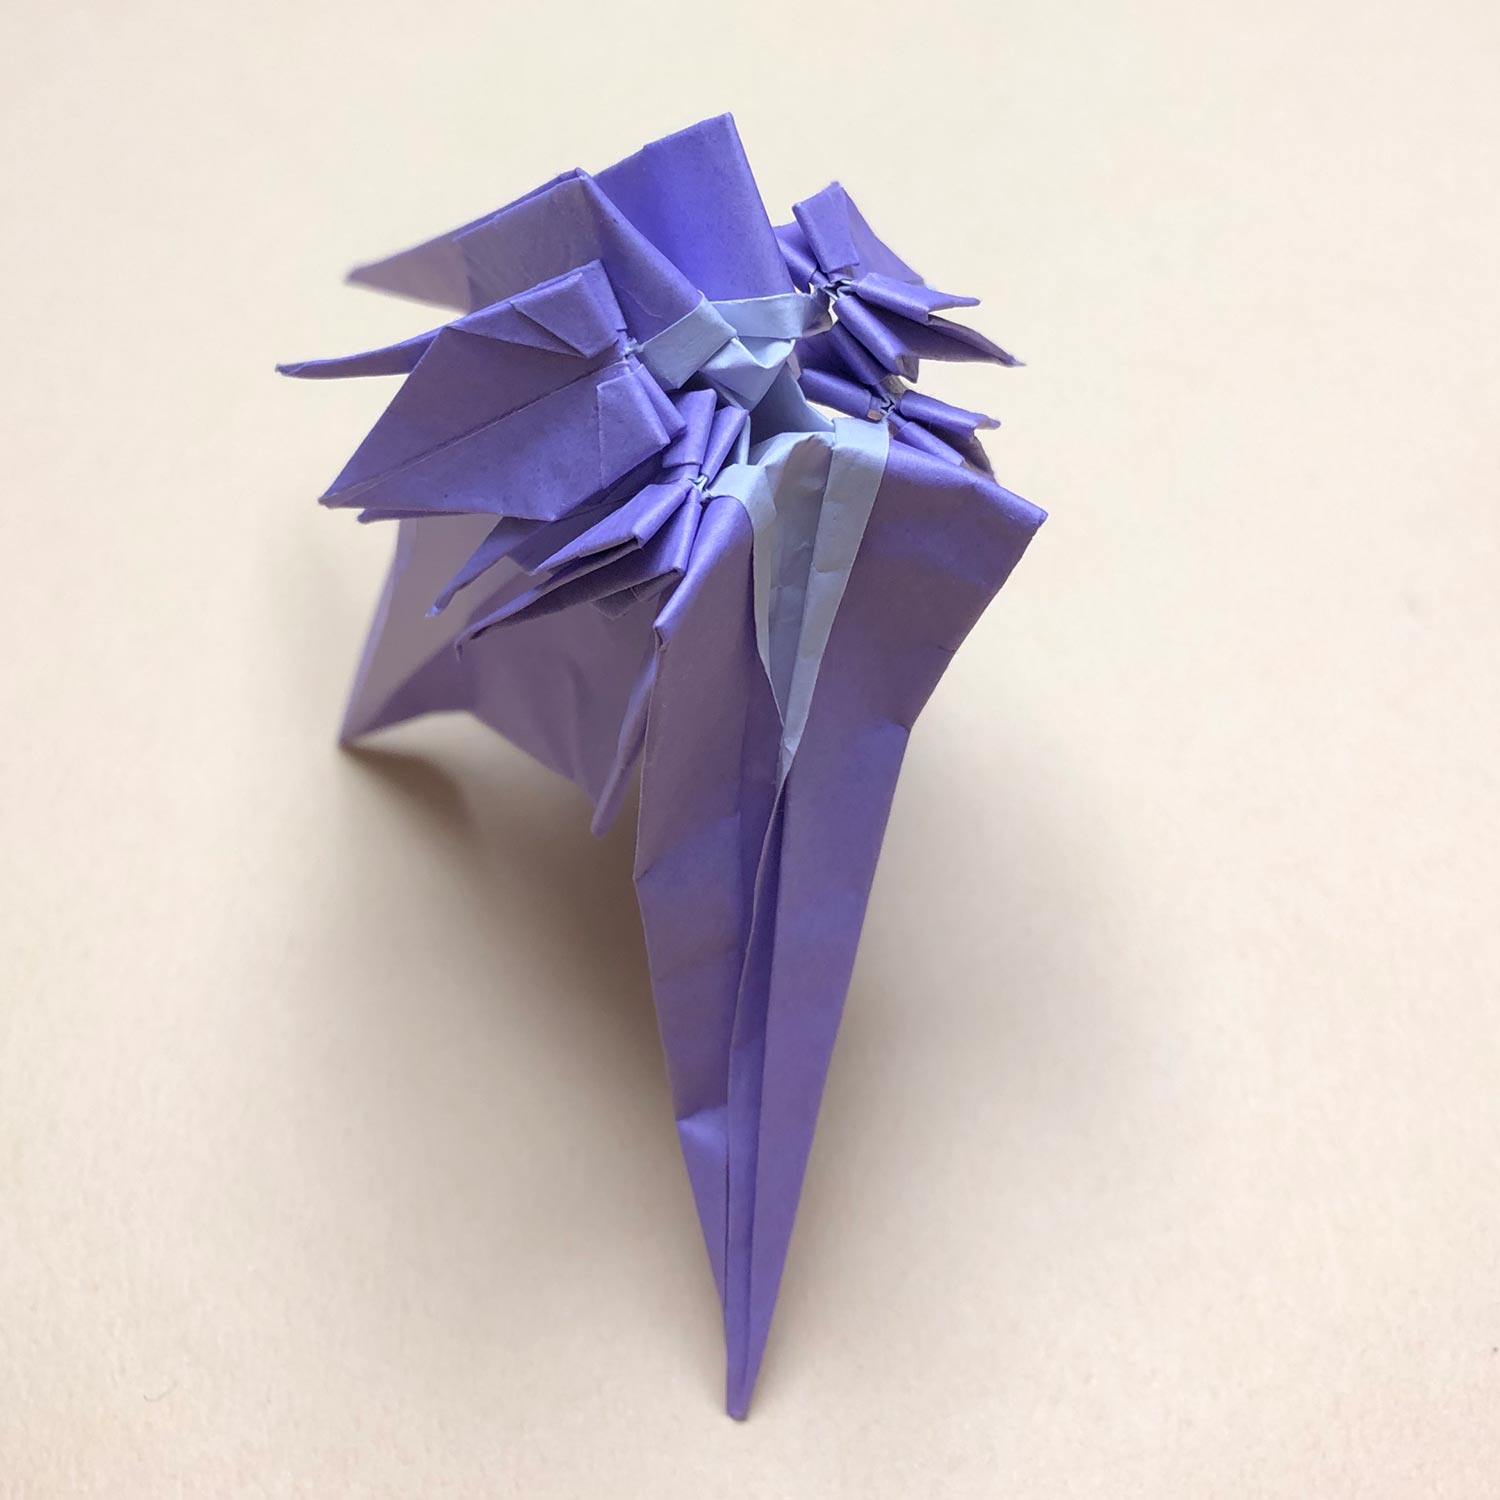
(30)
Make a valley-fold like this picture.
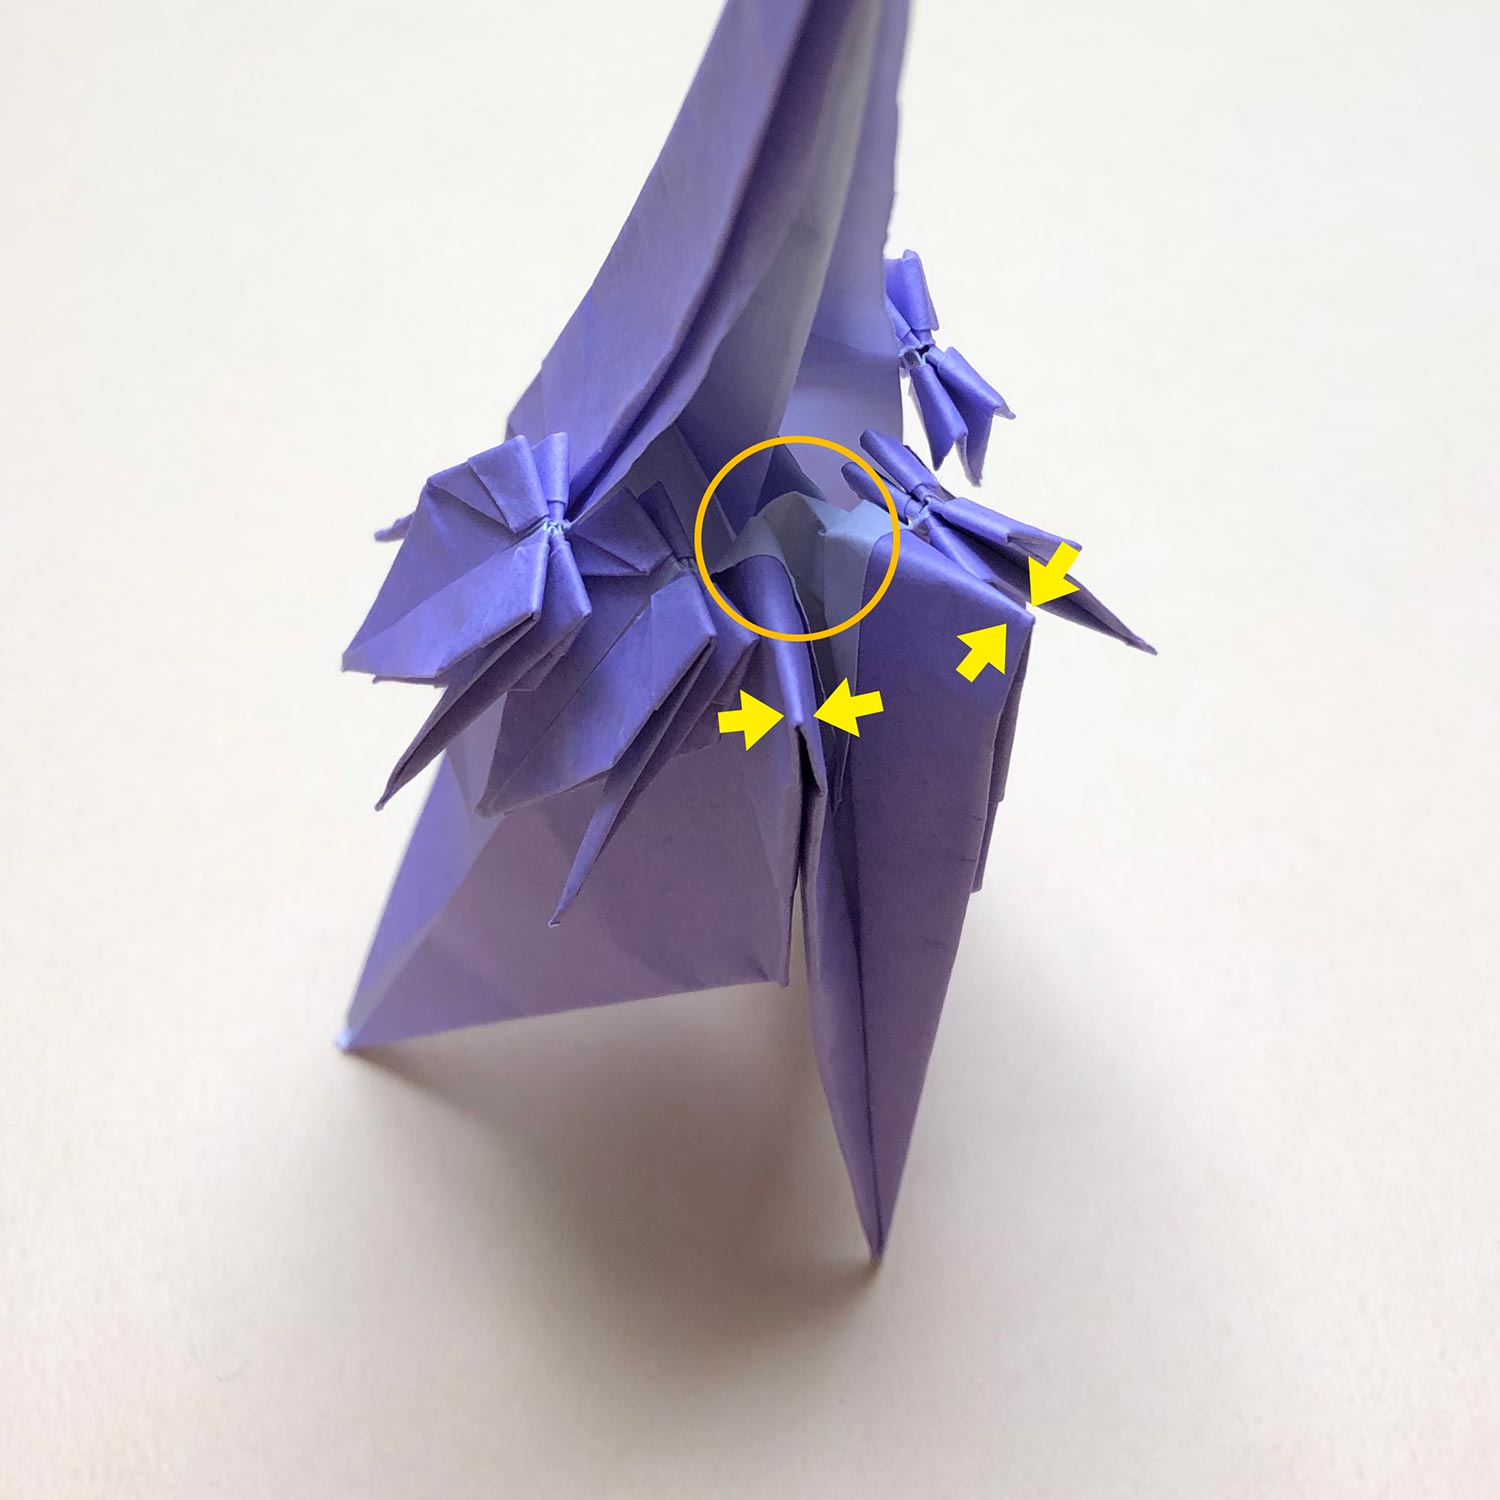
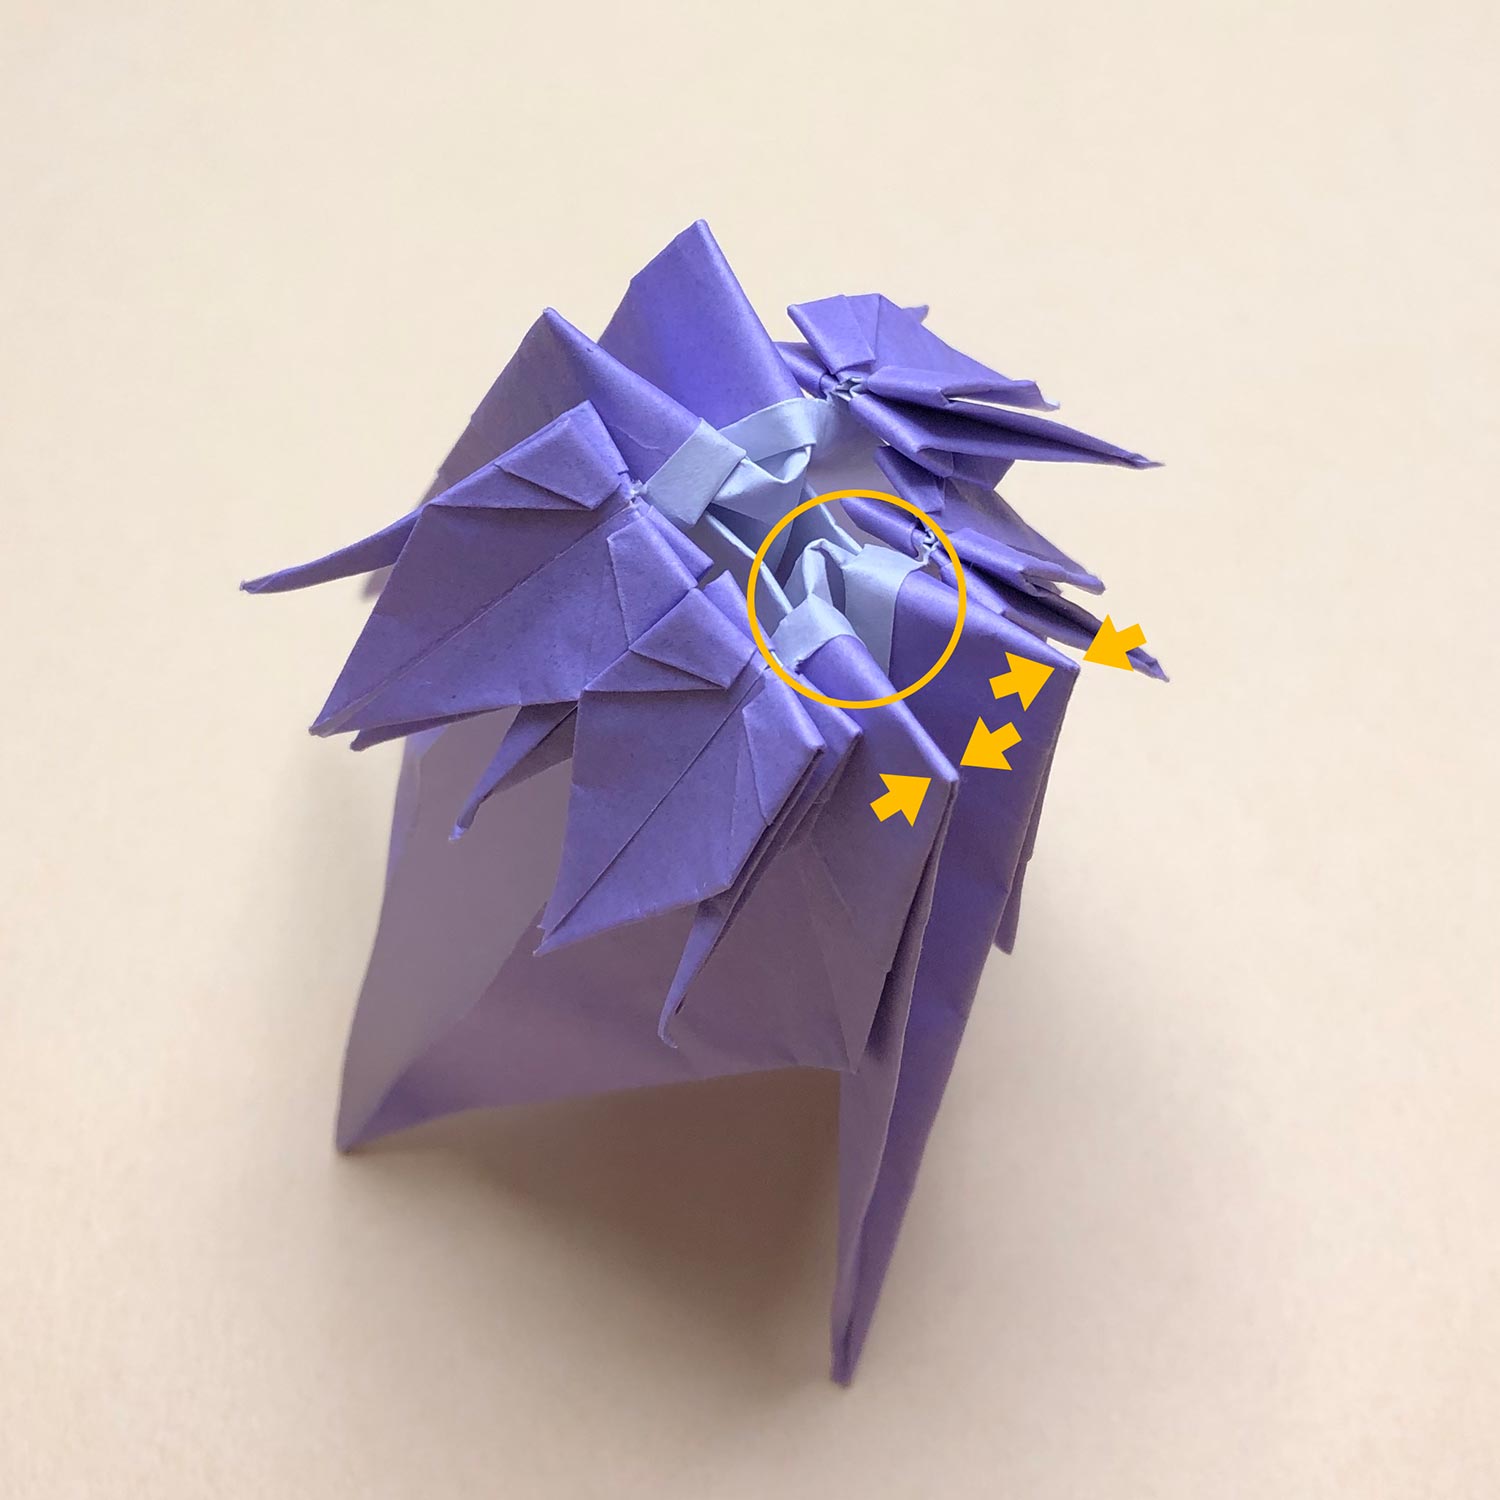
(31)
Then pinch the two corners in the direction of the arrows to make creases.
If you try to make creases neatly at the part which has been circled, connecting parts will tear.
Therefore, try not to touch the part which has been circled.
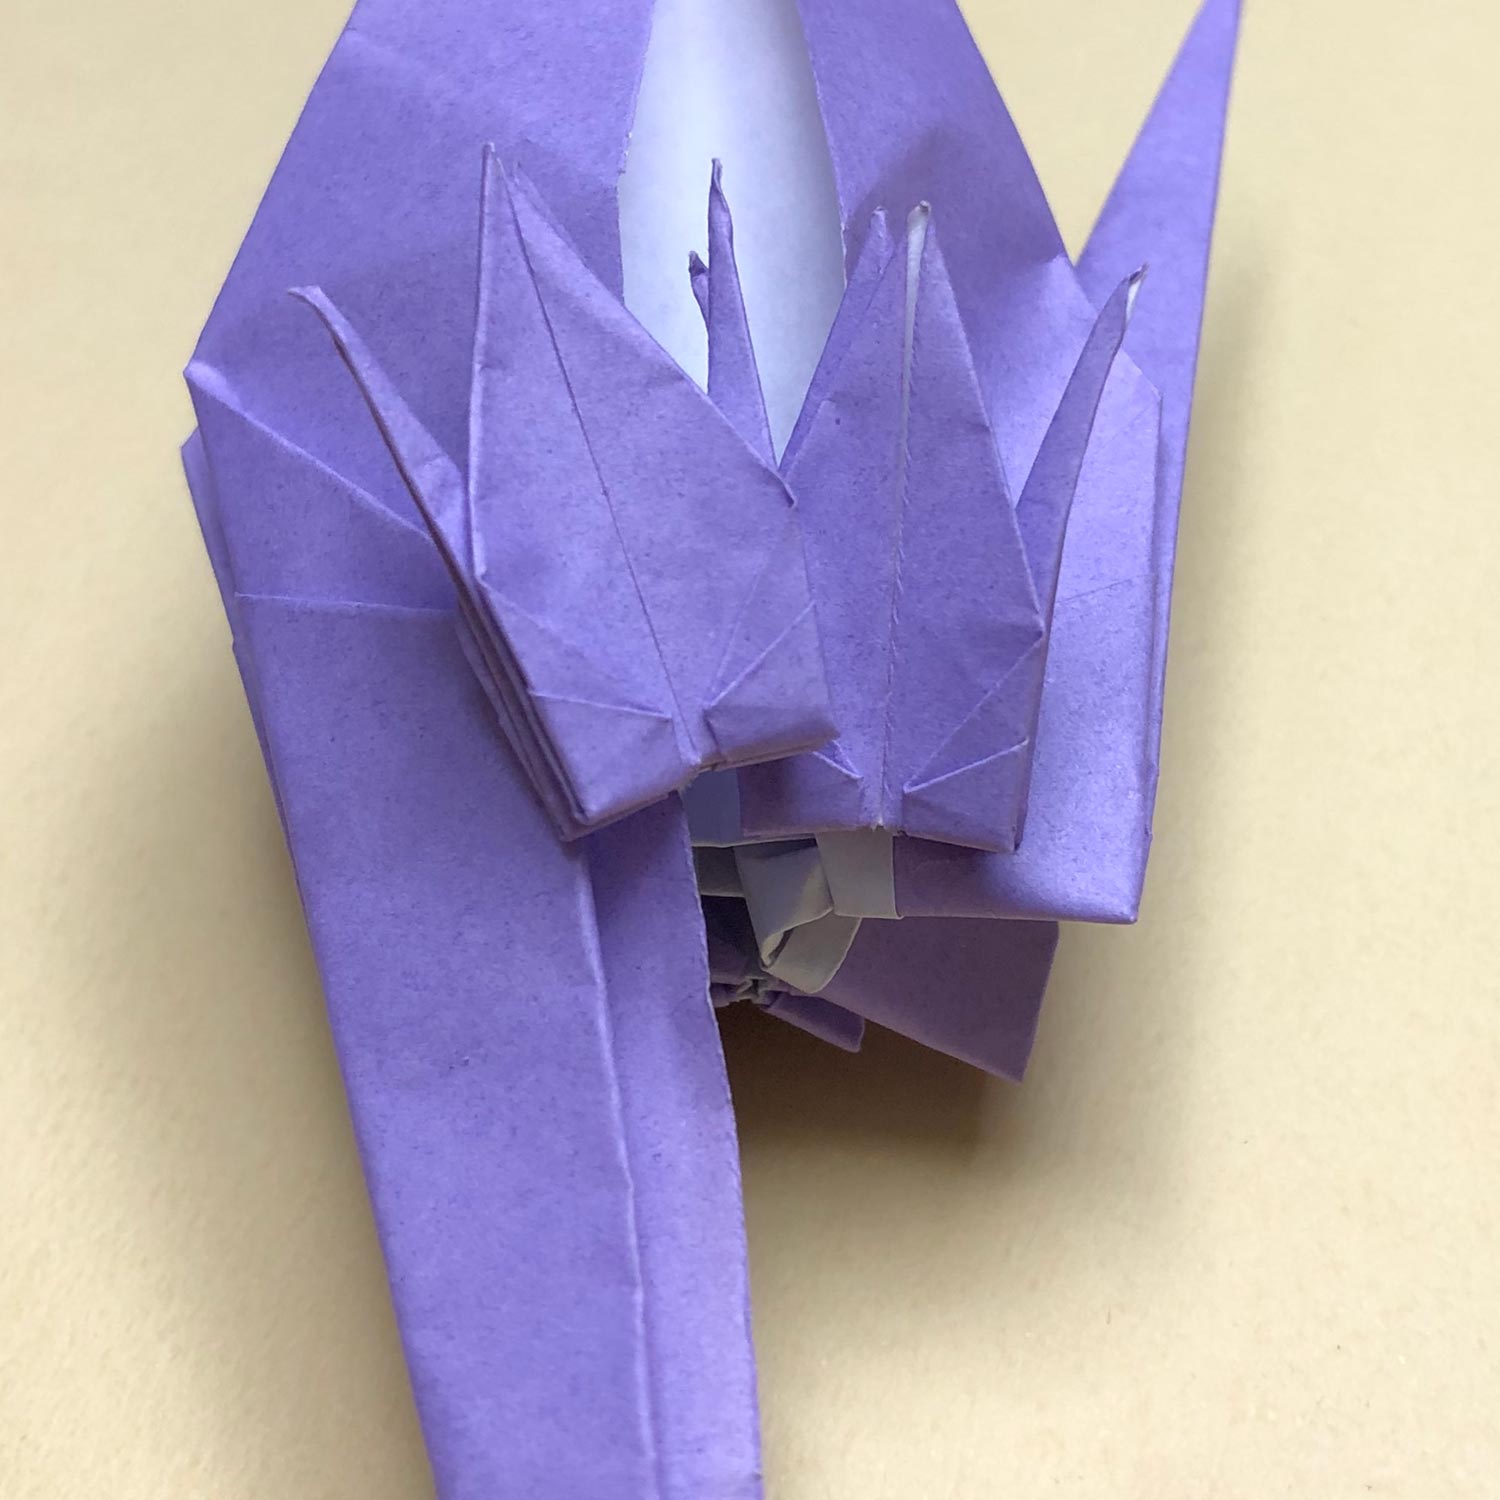
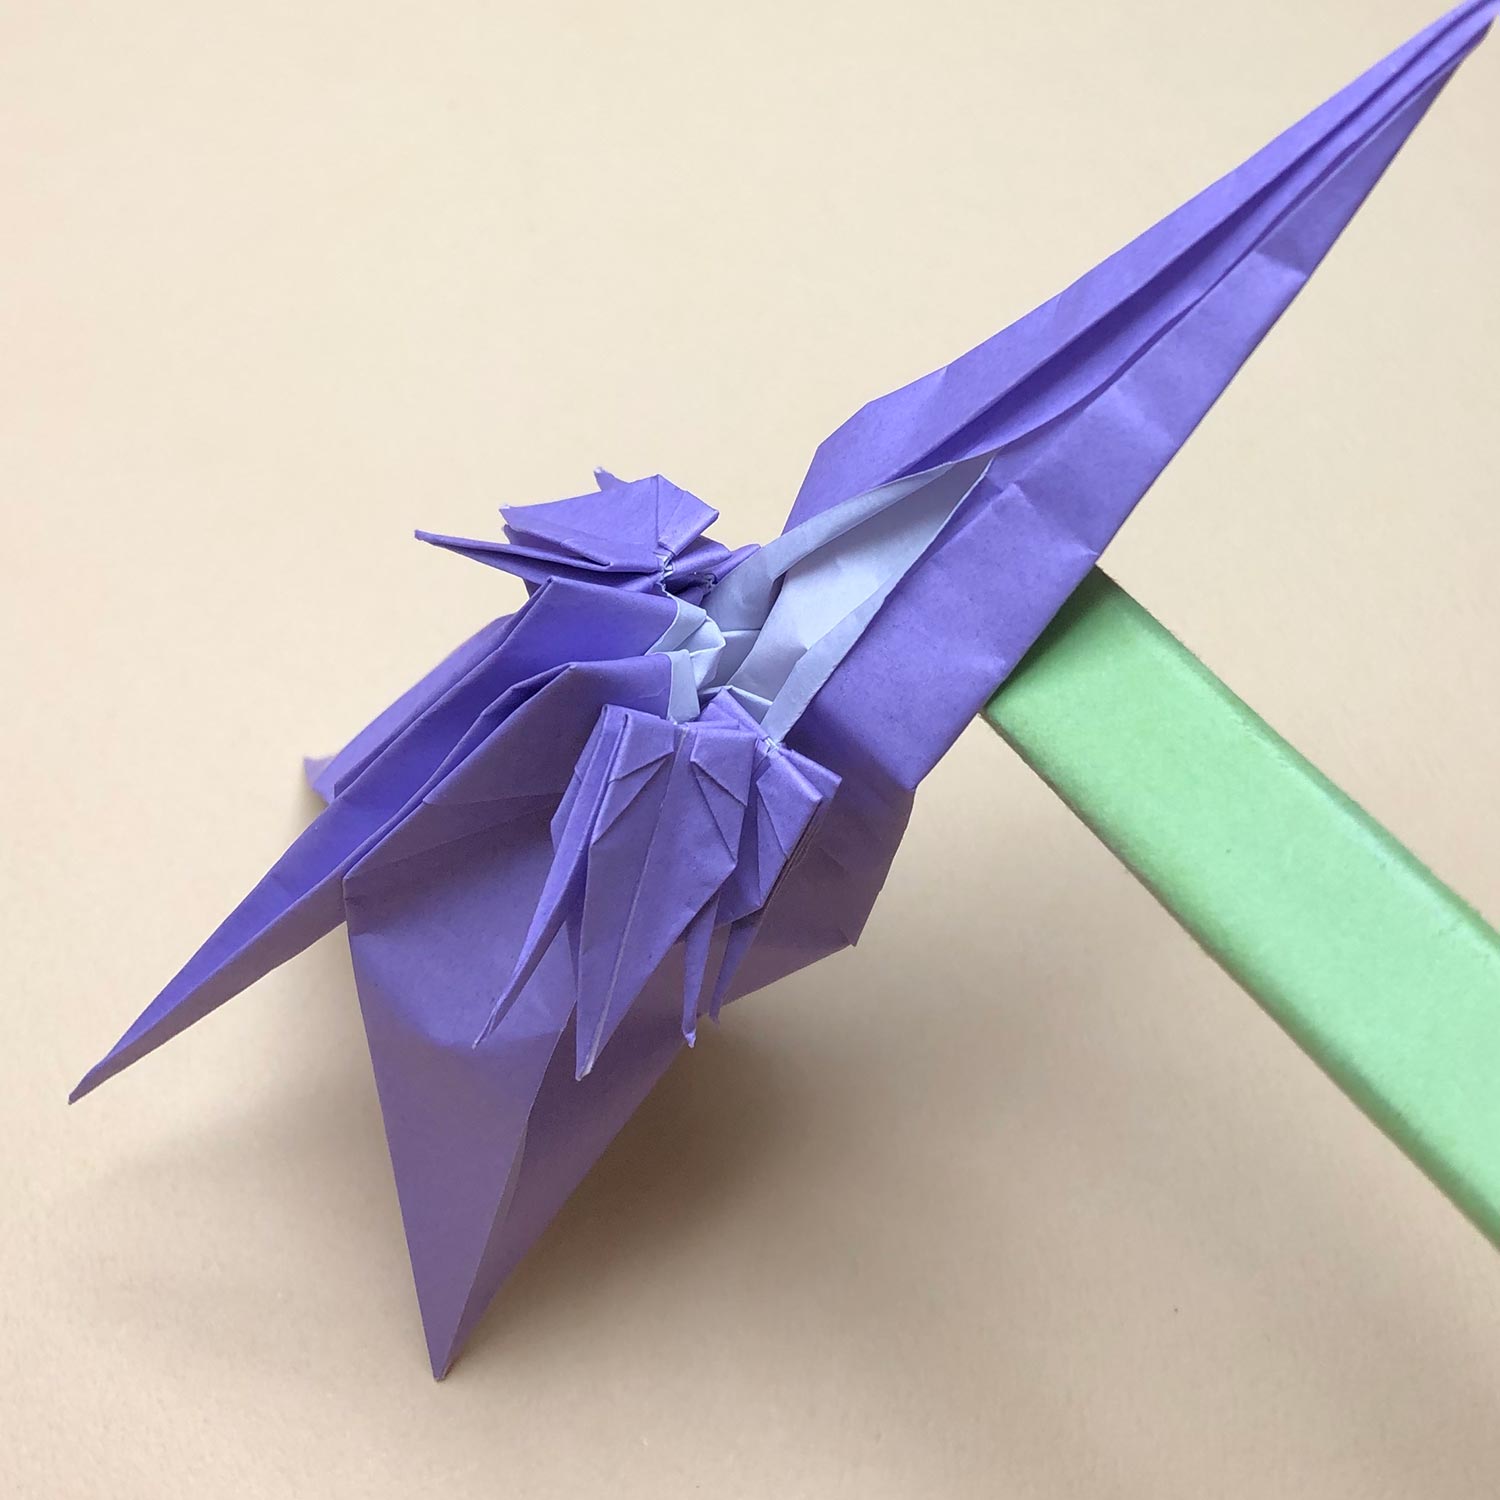
(32)
Raising the one side of the head/tail is finished.
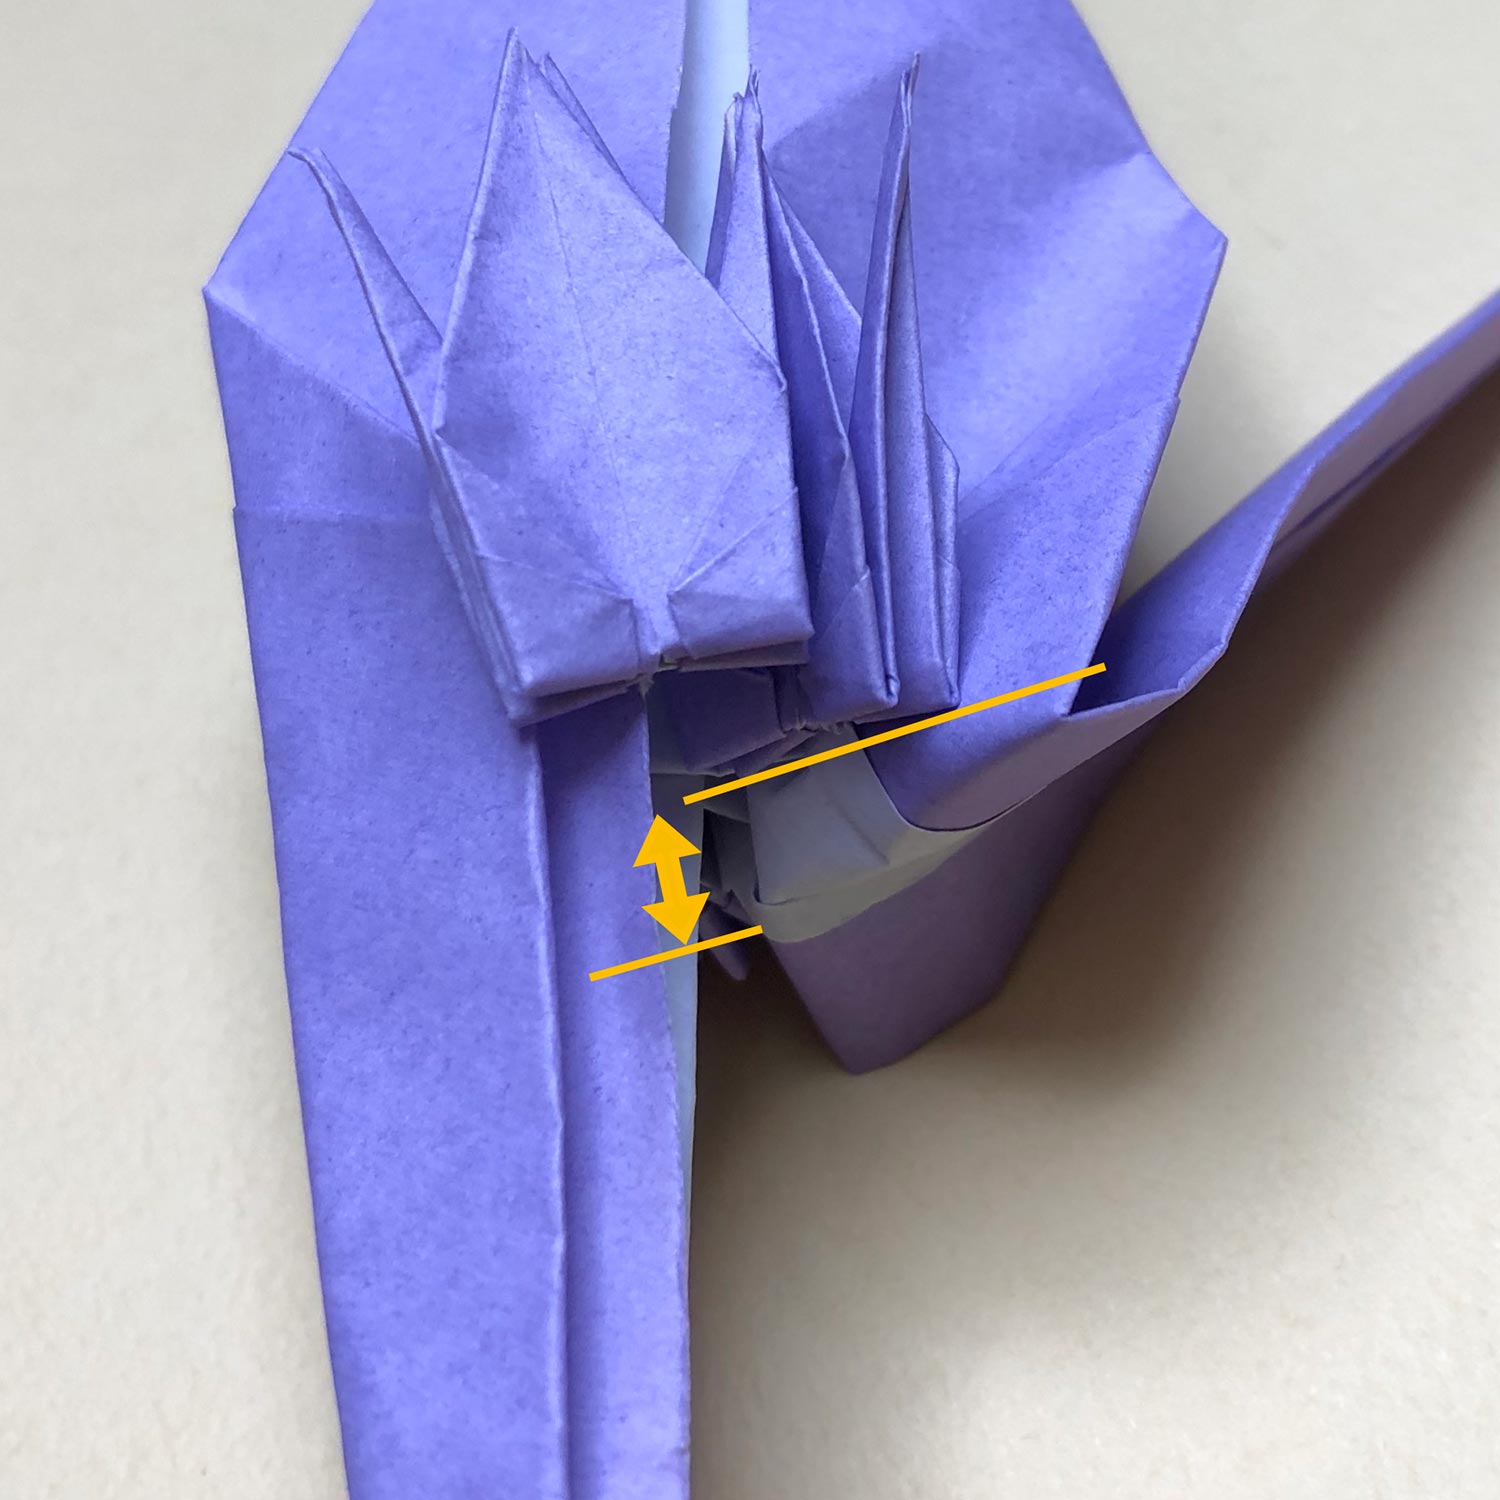
(33)
Before raising the other head/tail, move the left crane under the right crane.
(34)
Space is narrow because you raised one head/tail.
Therefore, move the left crane under the right crane like the left crane get caught the right crane.

(35)
On the opposite side, move the right crane under the left crane like the right crane get caught the left crane.

(36)
Move the right crane like this picture.
(37)
After moving small cranes, raise the head/tail while flipping the flap which has been circled.
(On the opposite side, flip another flap as well.)
(38)
Raise the head/tail while flipping the flaps like this picture.
(39)
This picture is halfway through.
Raise the head/tail at the same height as the first raised head/tail.
(40)
After raising it, push the part, which is shown by the arrow, with your nail to make a valley-fold at the dotted line.
(41)
Make a valley-fold like this picture.
(42)
Then pinch the two corners in the direction of the arrows to make creases.
Also, try not to touch the part which has been circled.

(43)
Raising the other side of the head/tail is finished.
I raised the head/tail 3mm away from connecting parts as well.