Make Mukashi-otoko
(1)
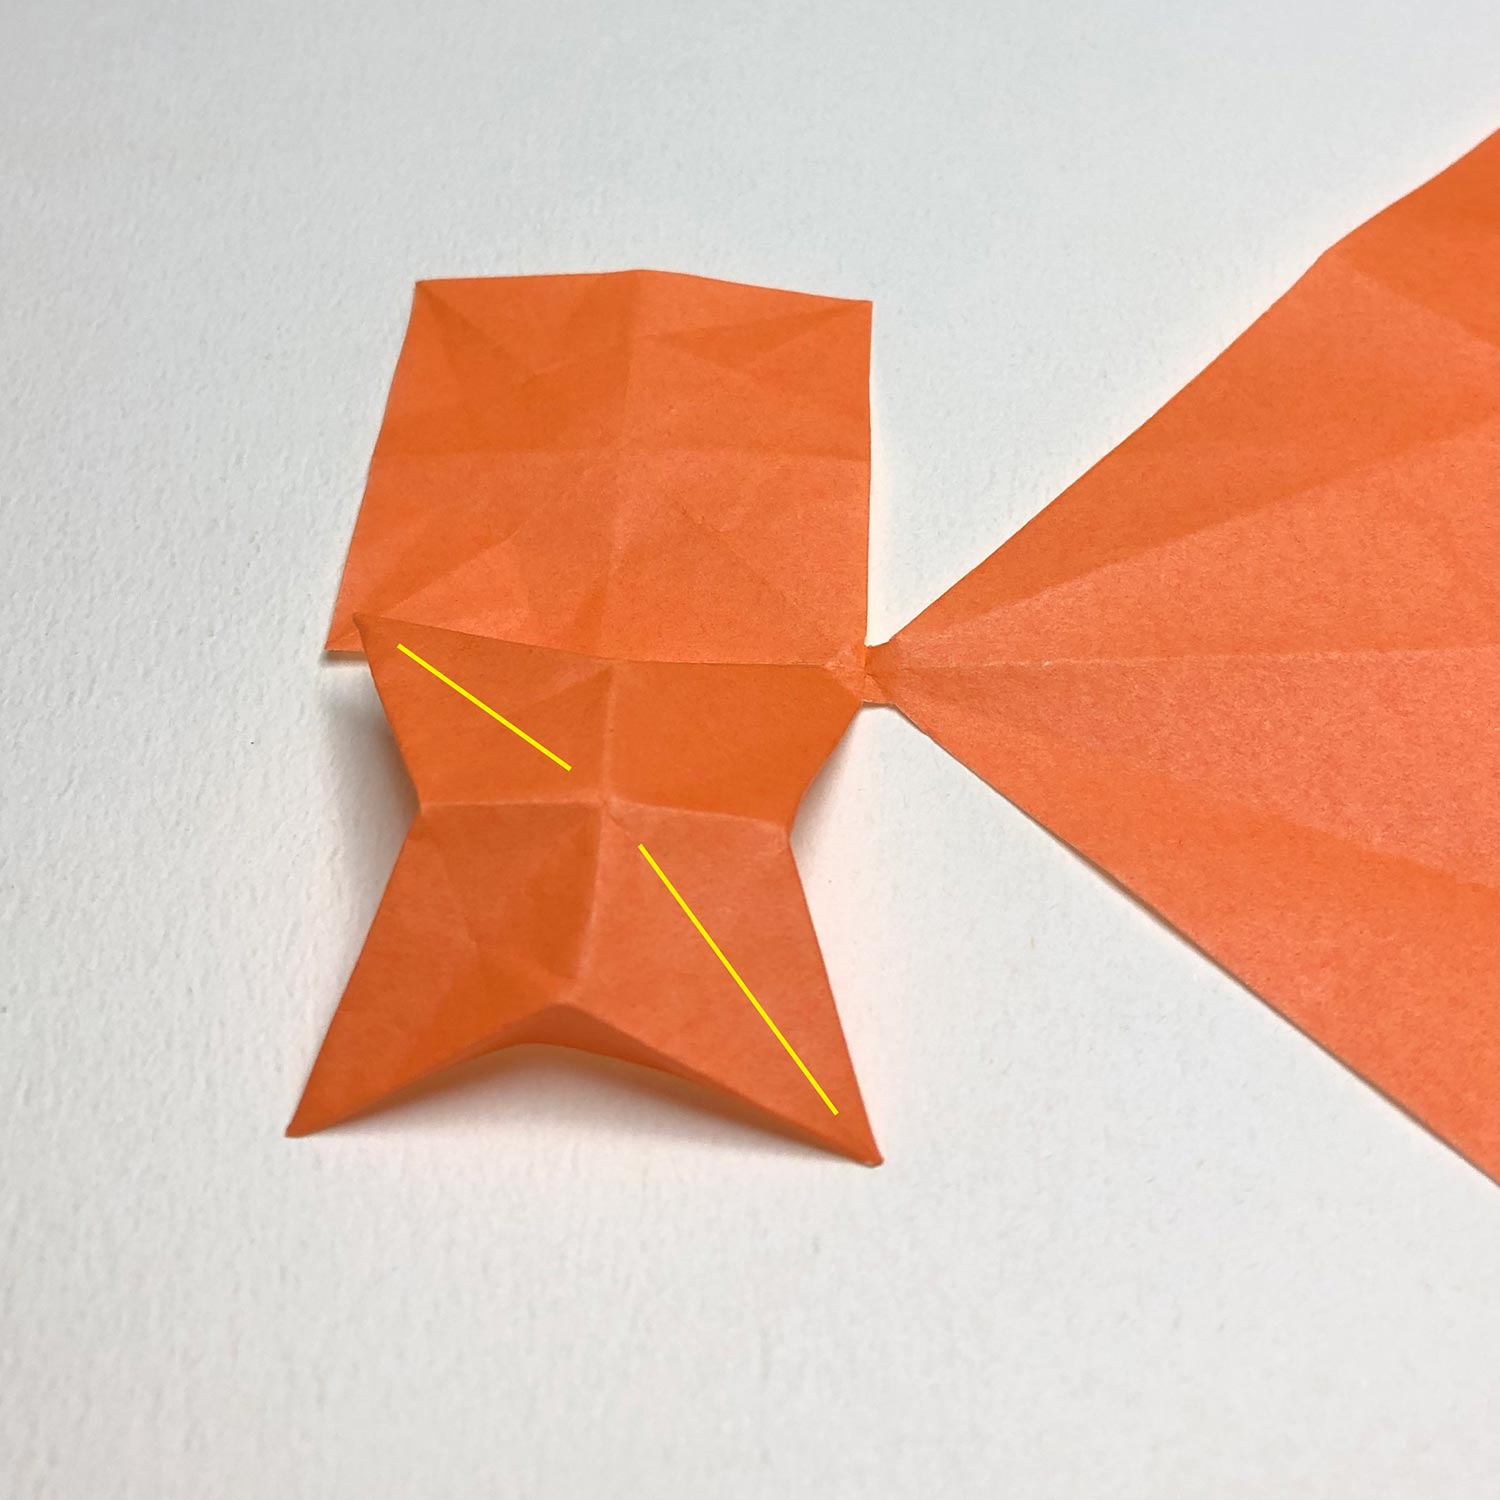
Start with folding a small square.
Make a star-shape like this picture.
Then make a bird-base so that the yellow lines are changed to wings.
(2)
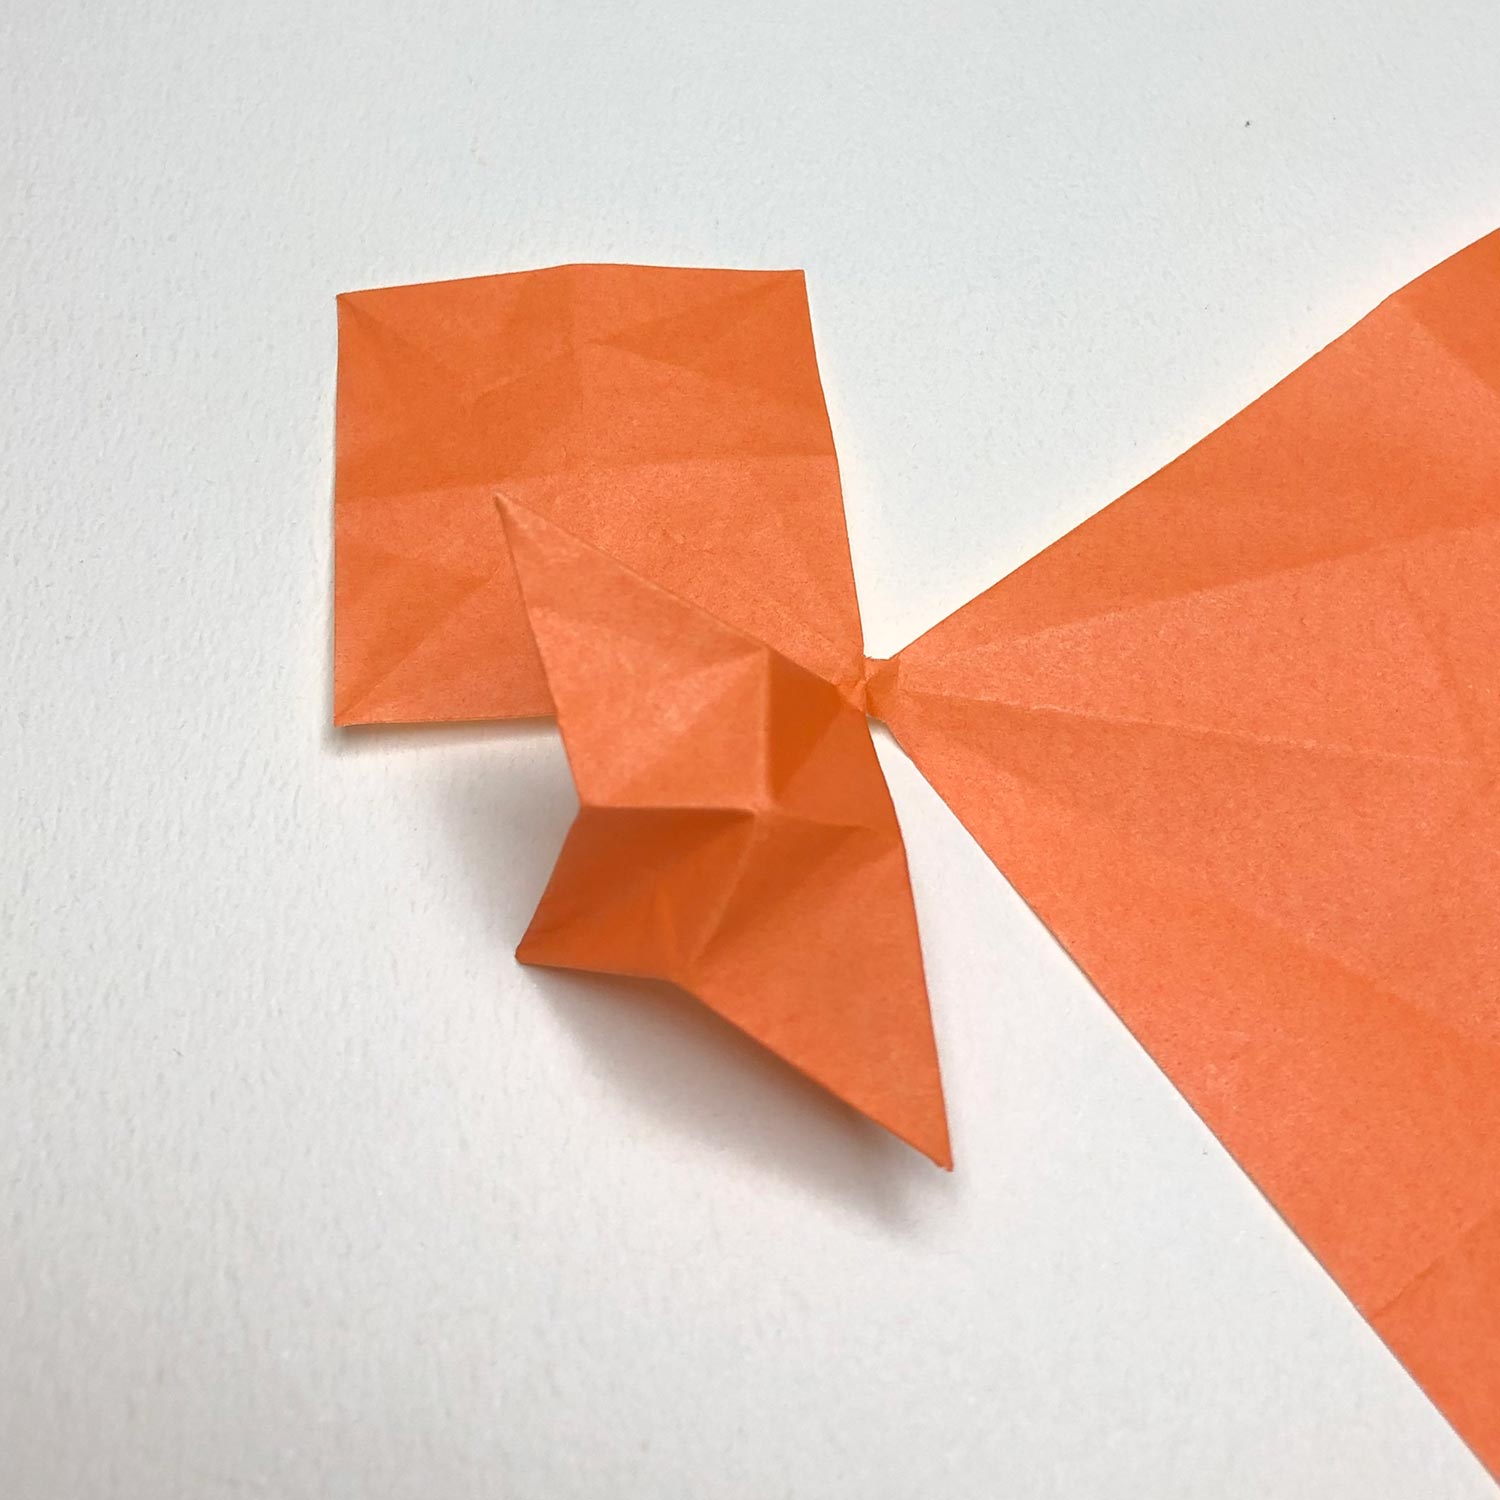
This picture is halfway through.

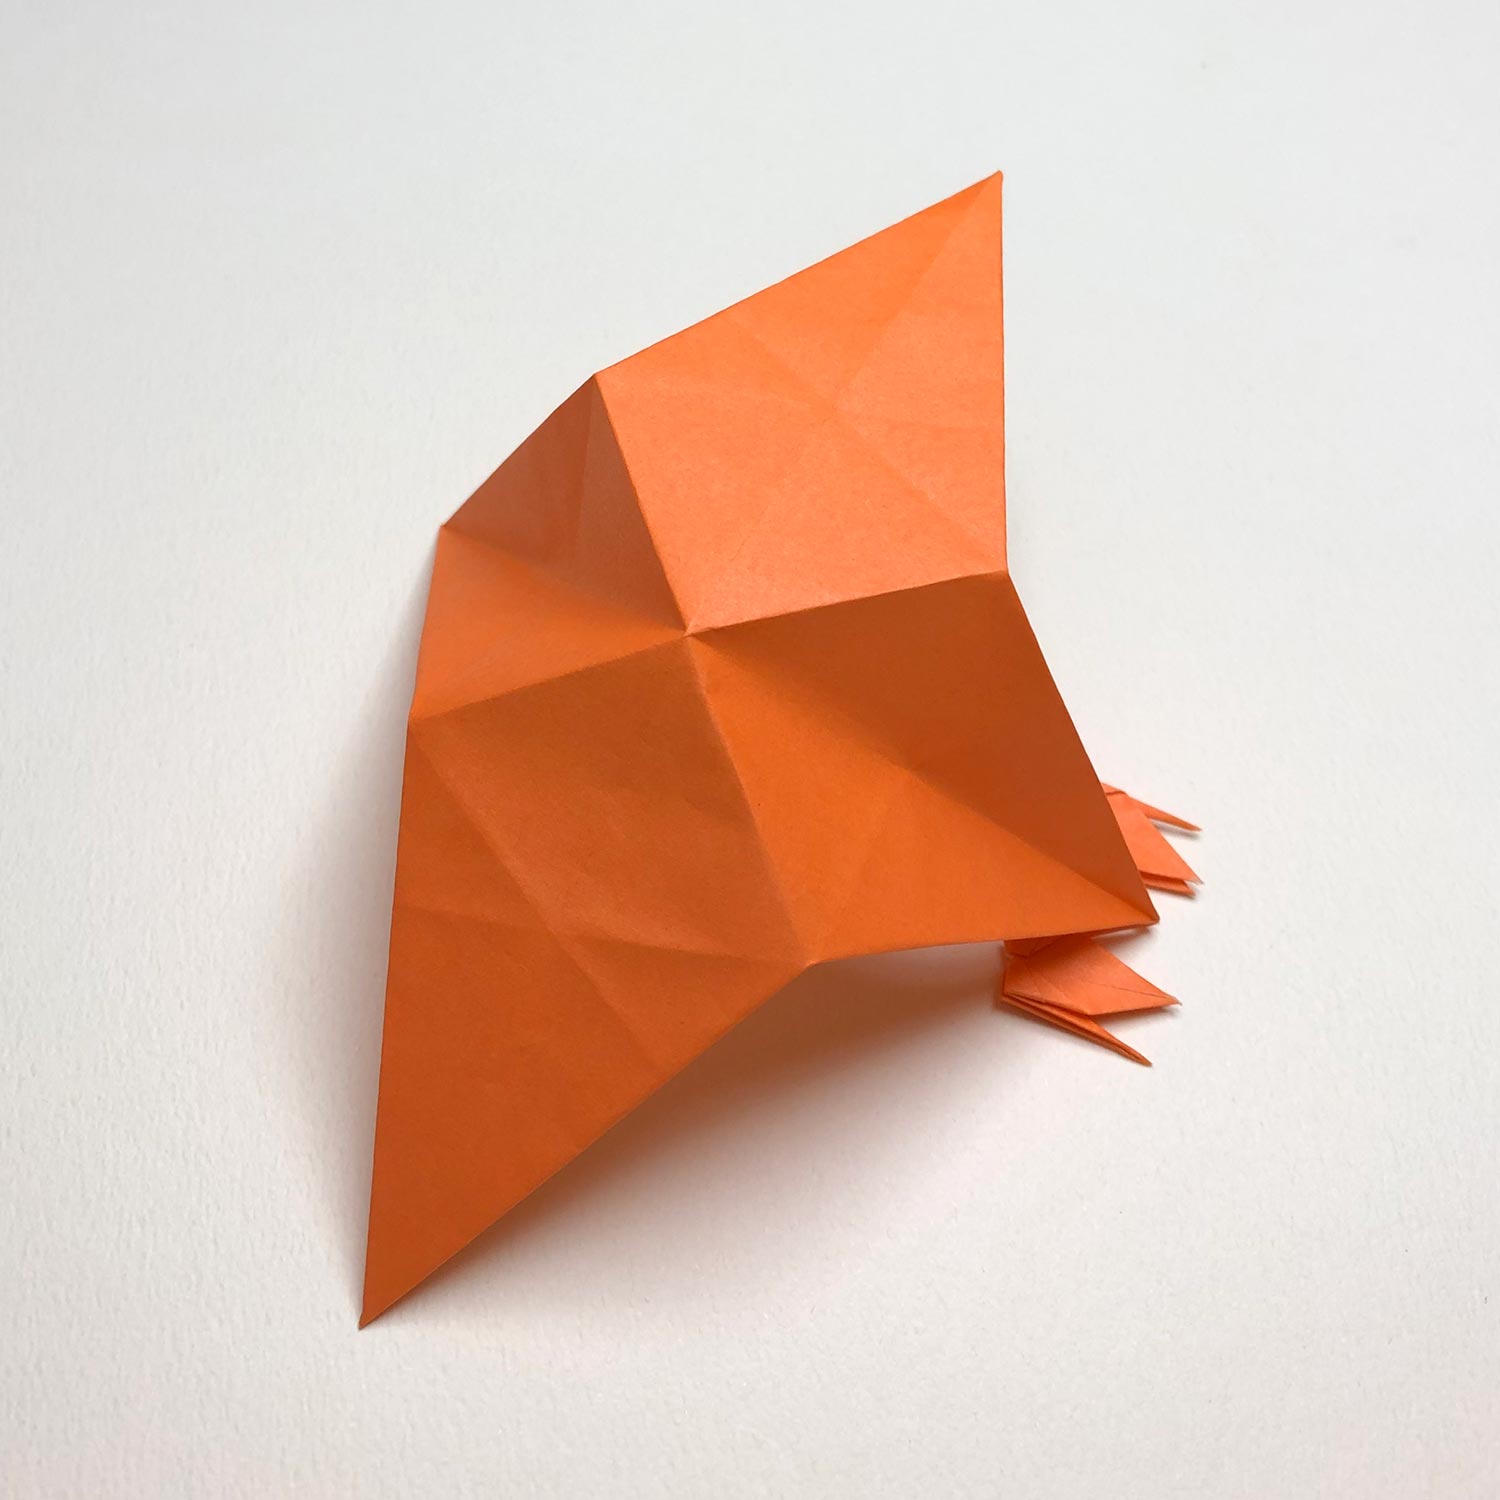
(3)
The bird-base is finished.
(4)
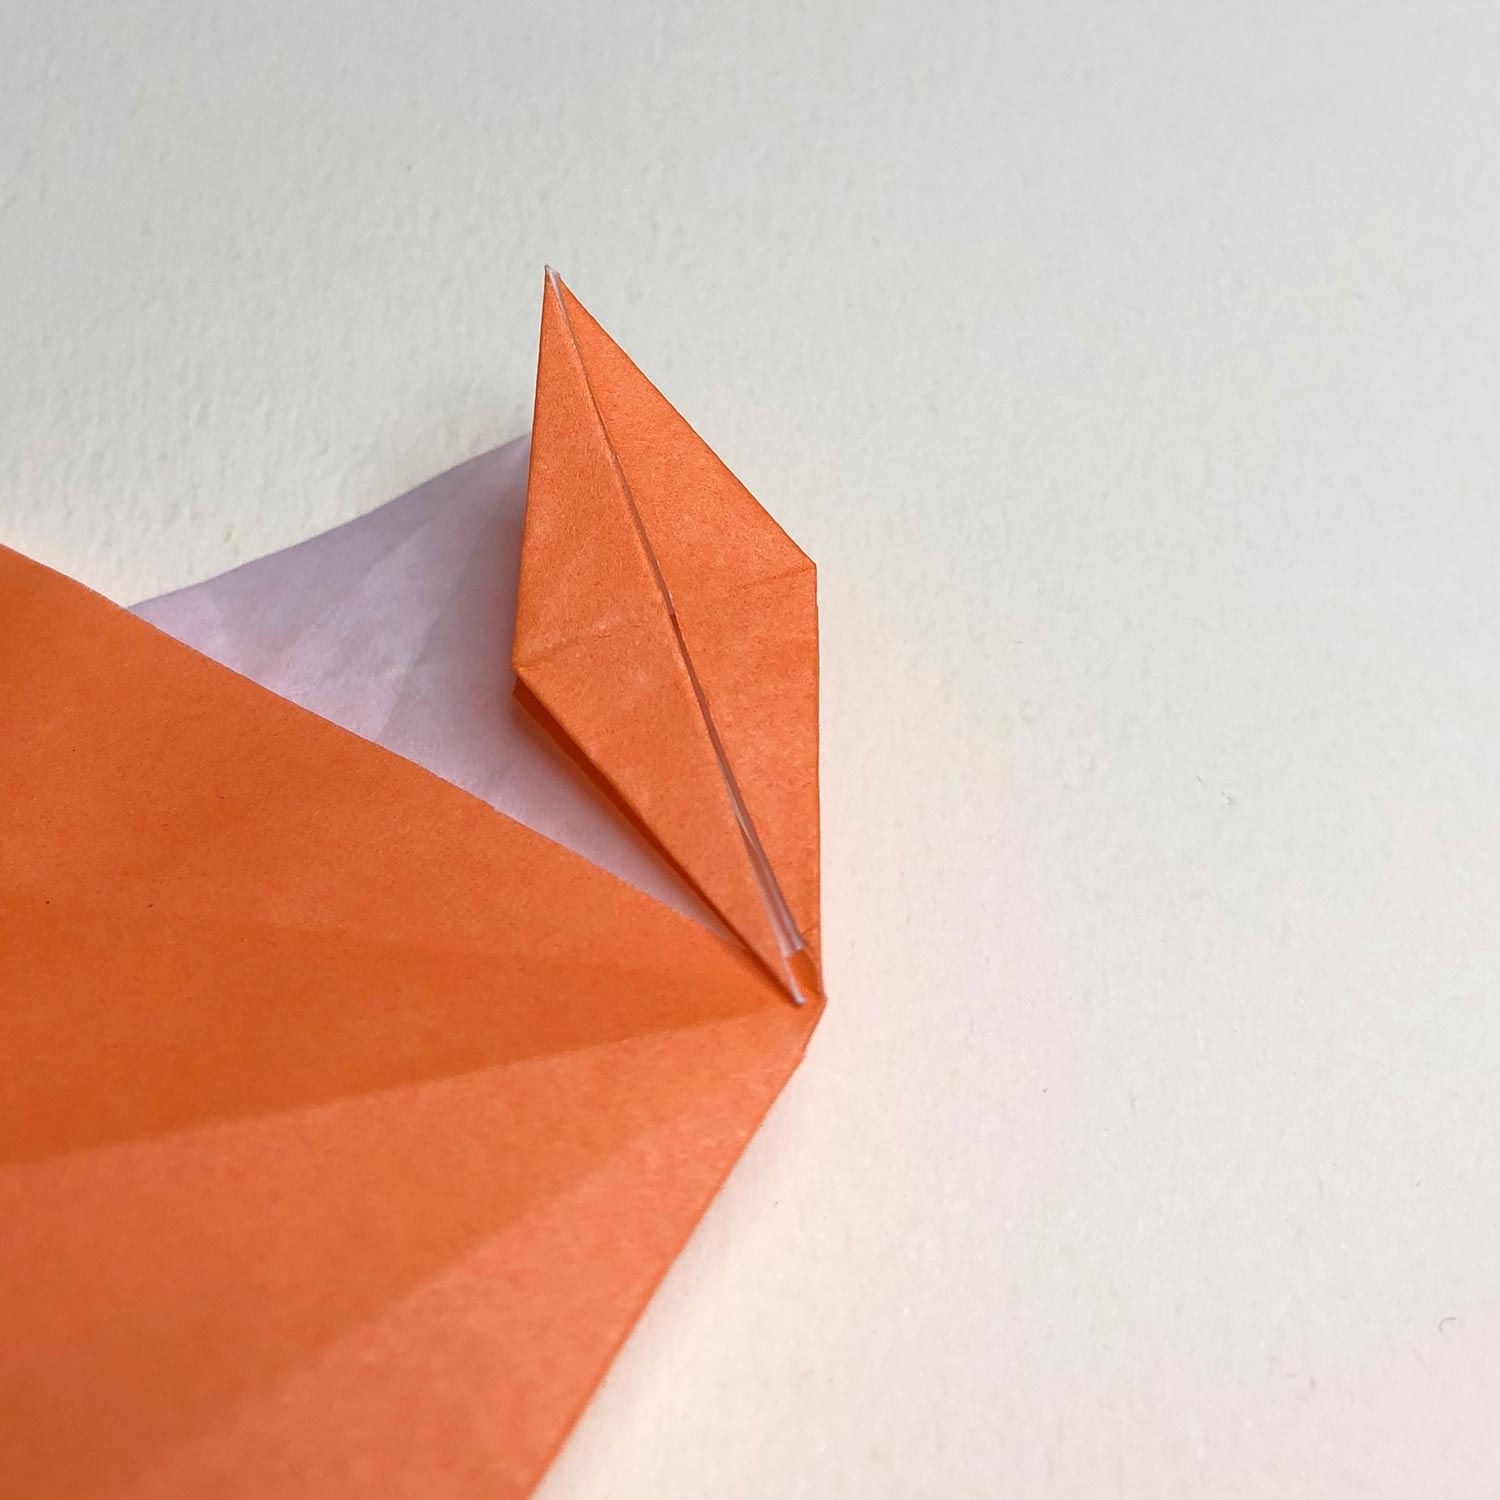
First, fold the head/tail, which is connected to other squares, to the center.
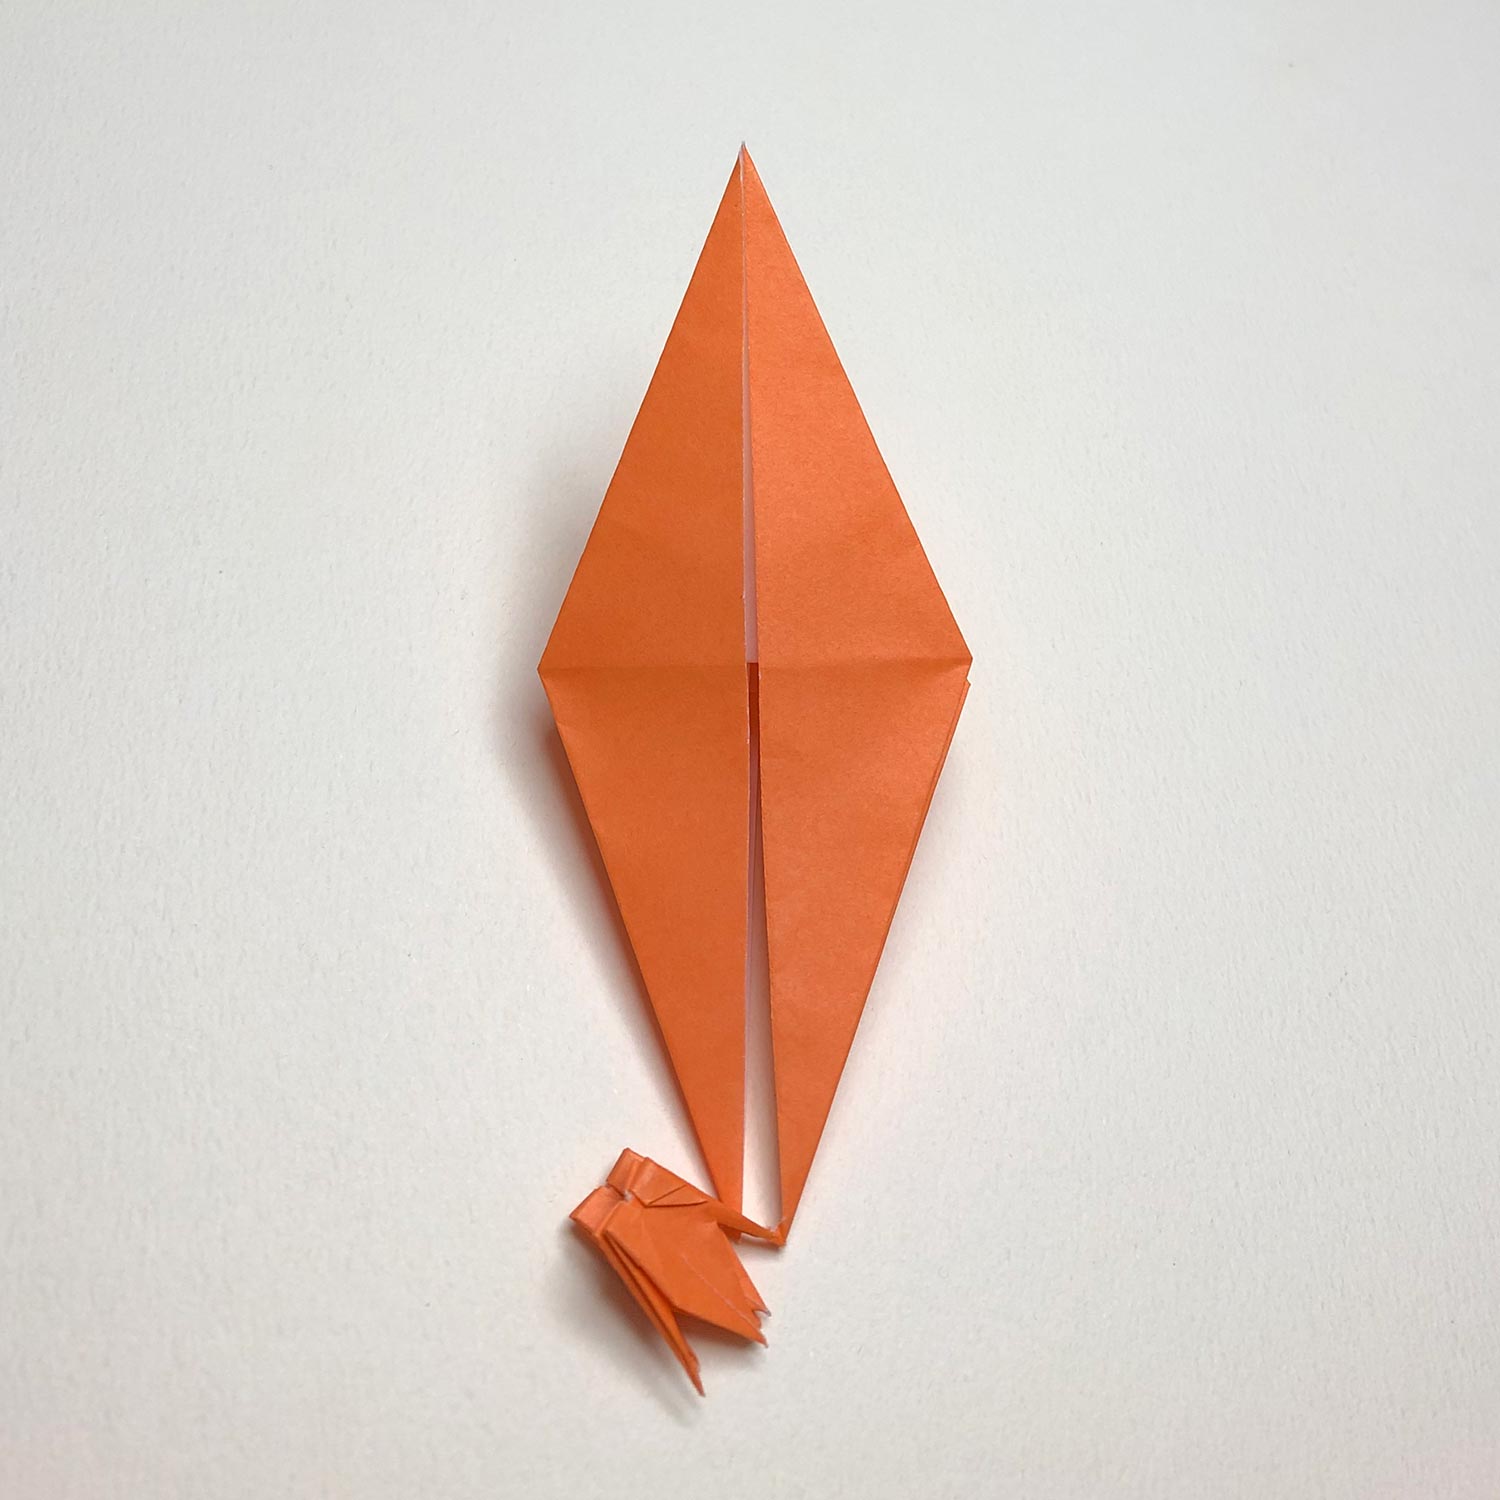
(5)
After folding the head/tail, raise it.
(6)
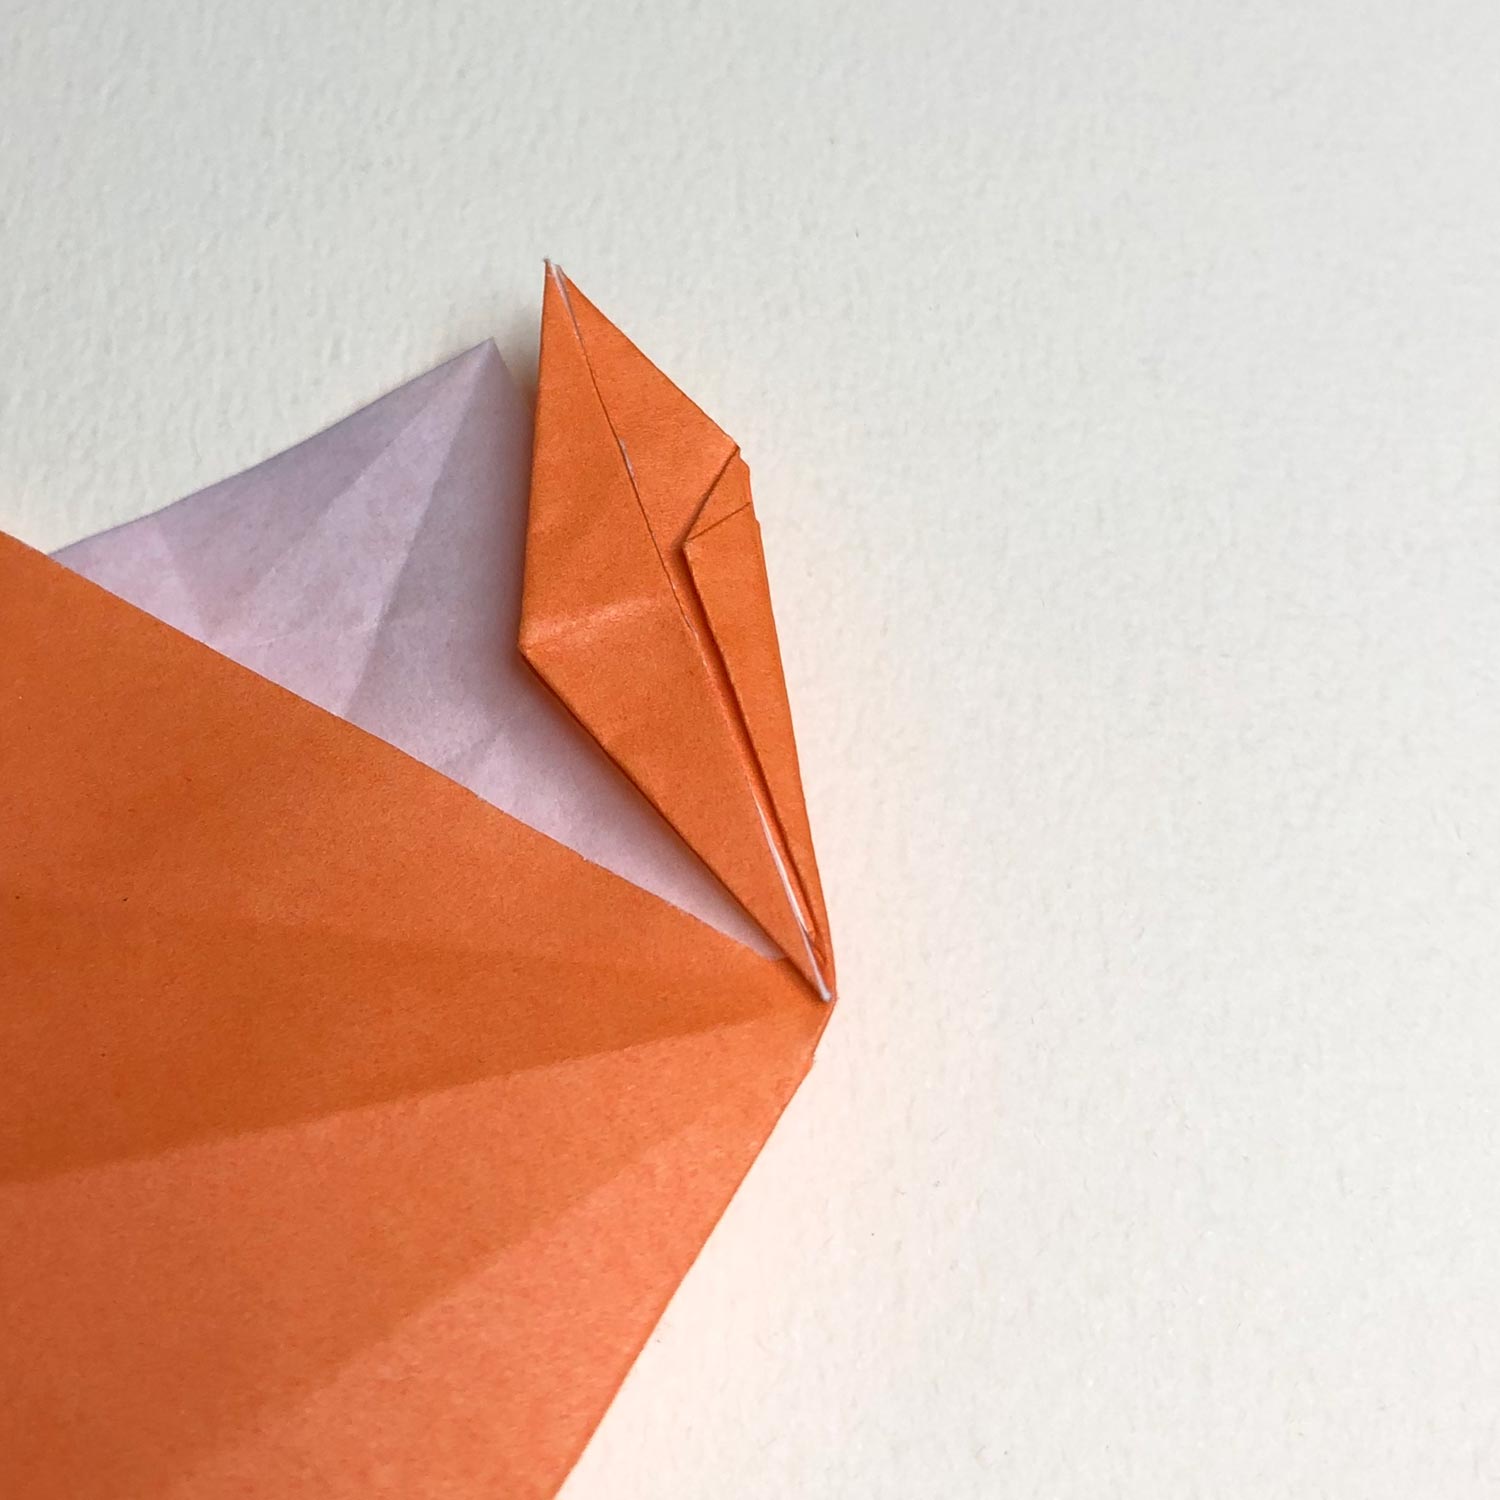
This picture is halfway through.
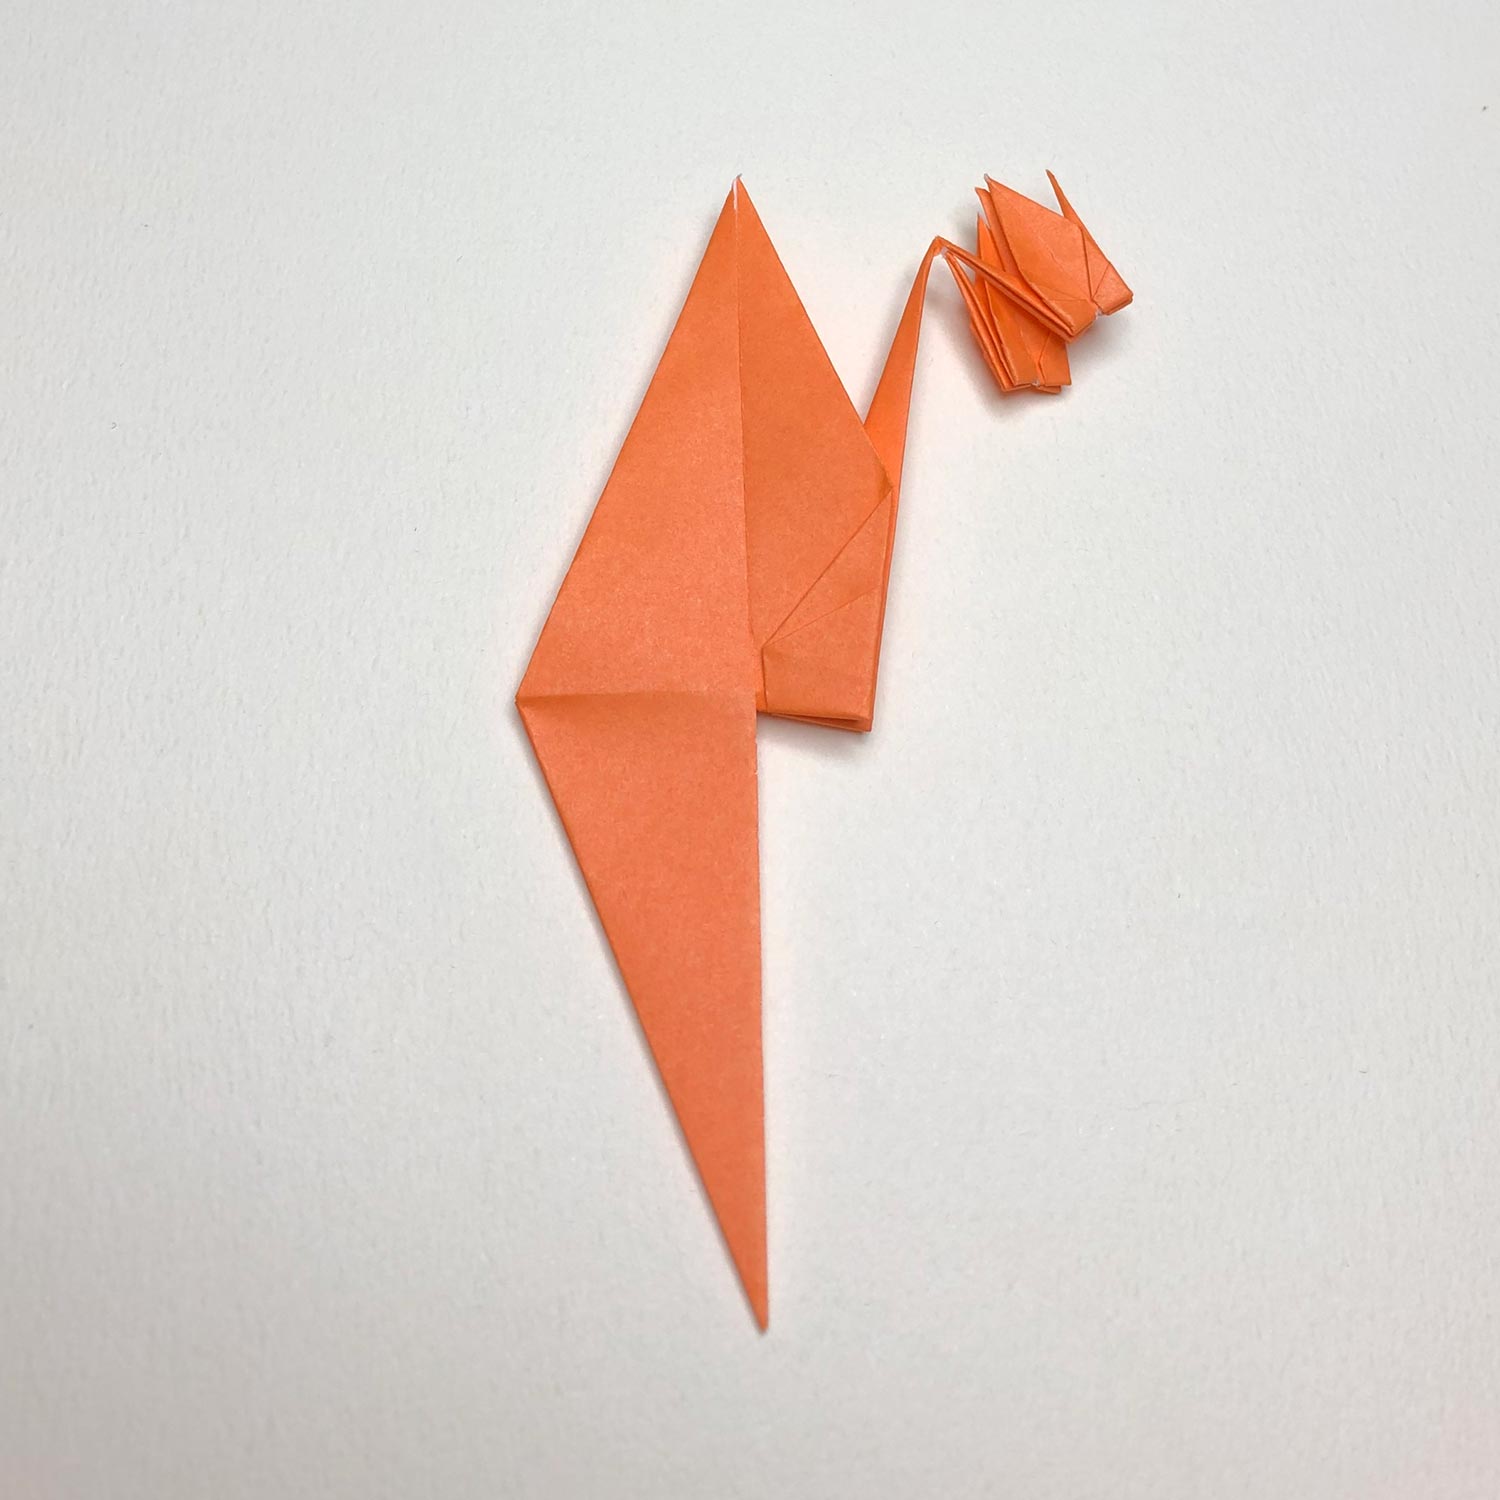
(7)
Raise the head/tail like this picture.
(8)
Fold the other head/tail to the center.

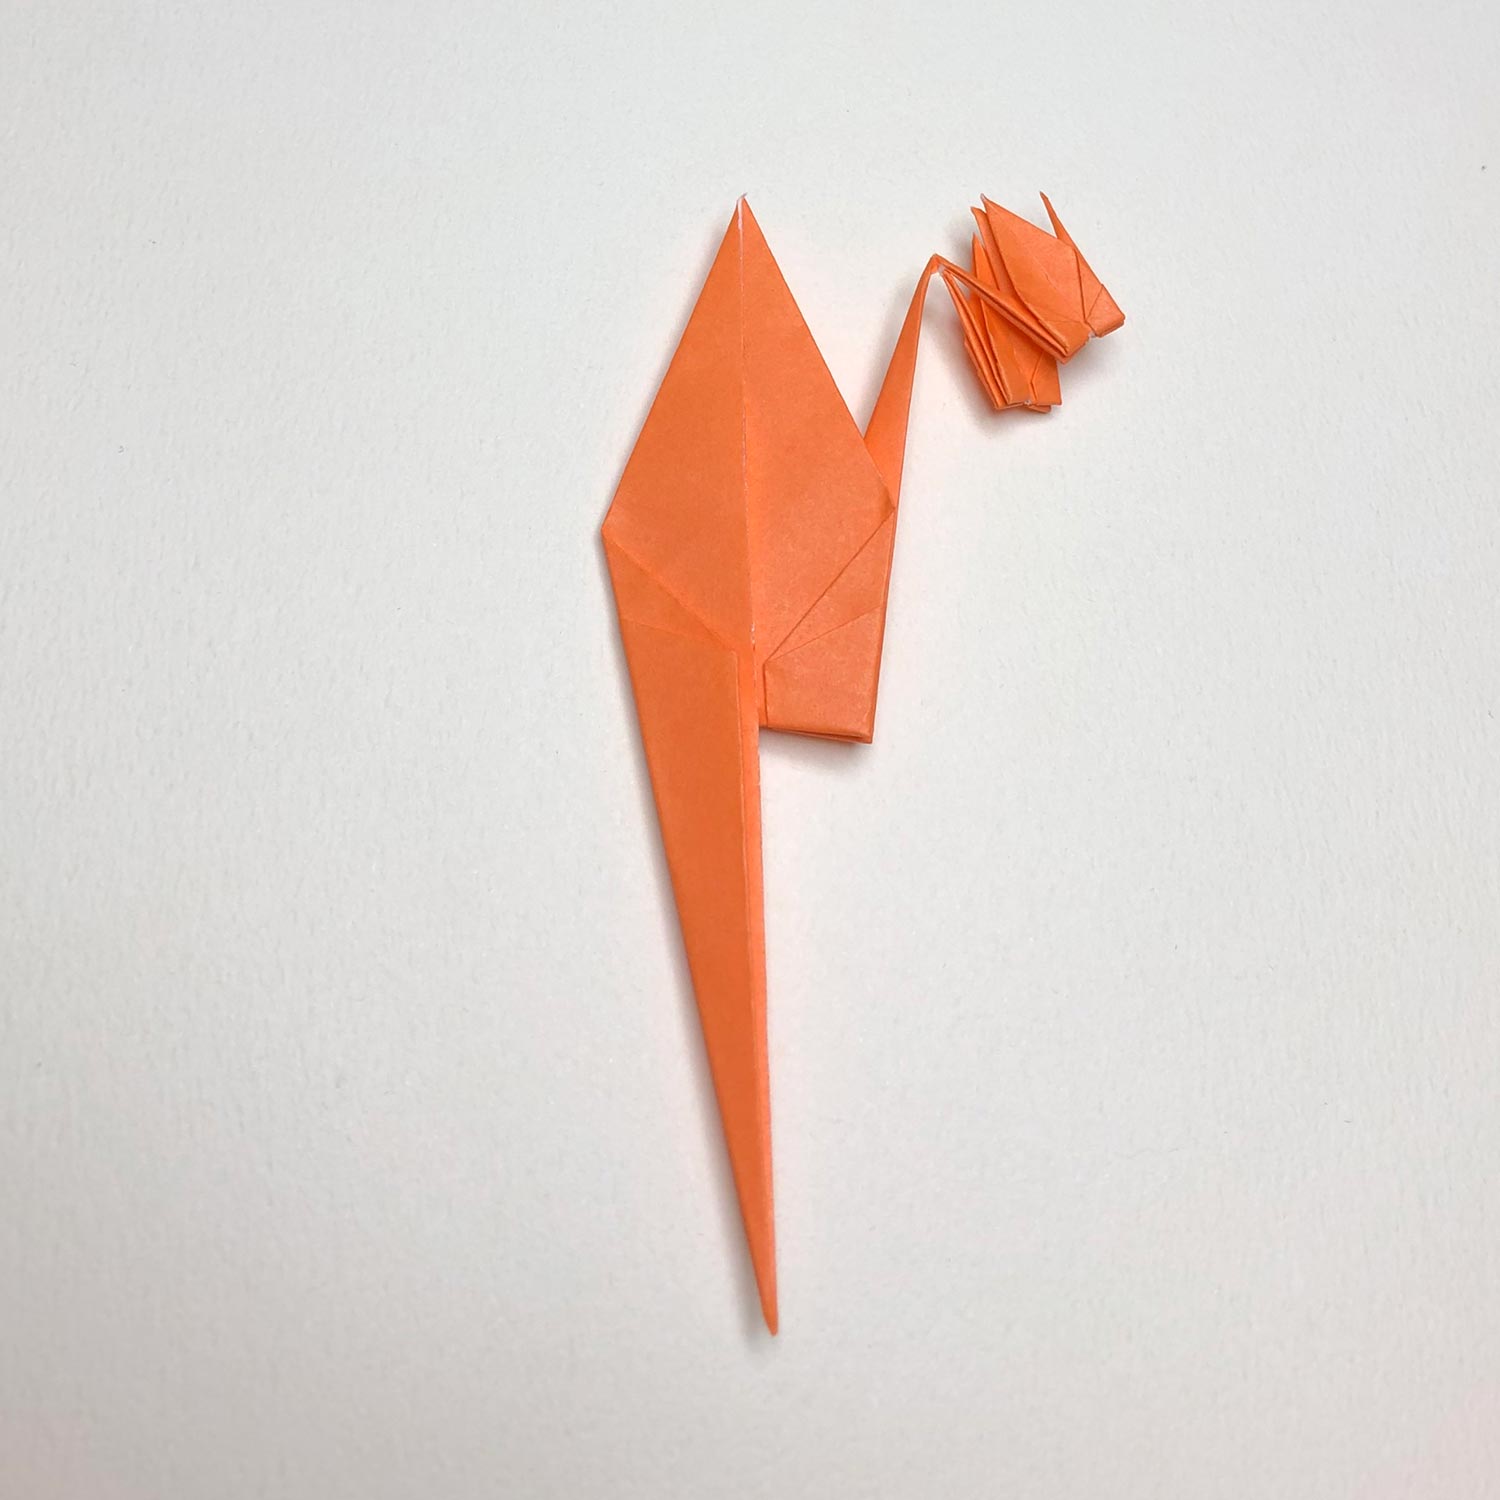
(9)
Raise it like this picture.
The first small crane is finished.

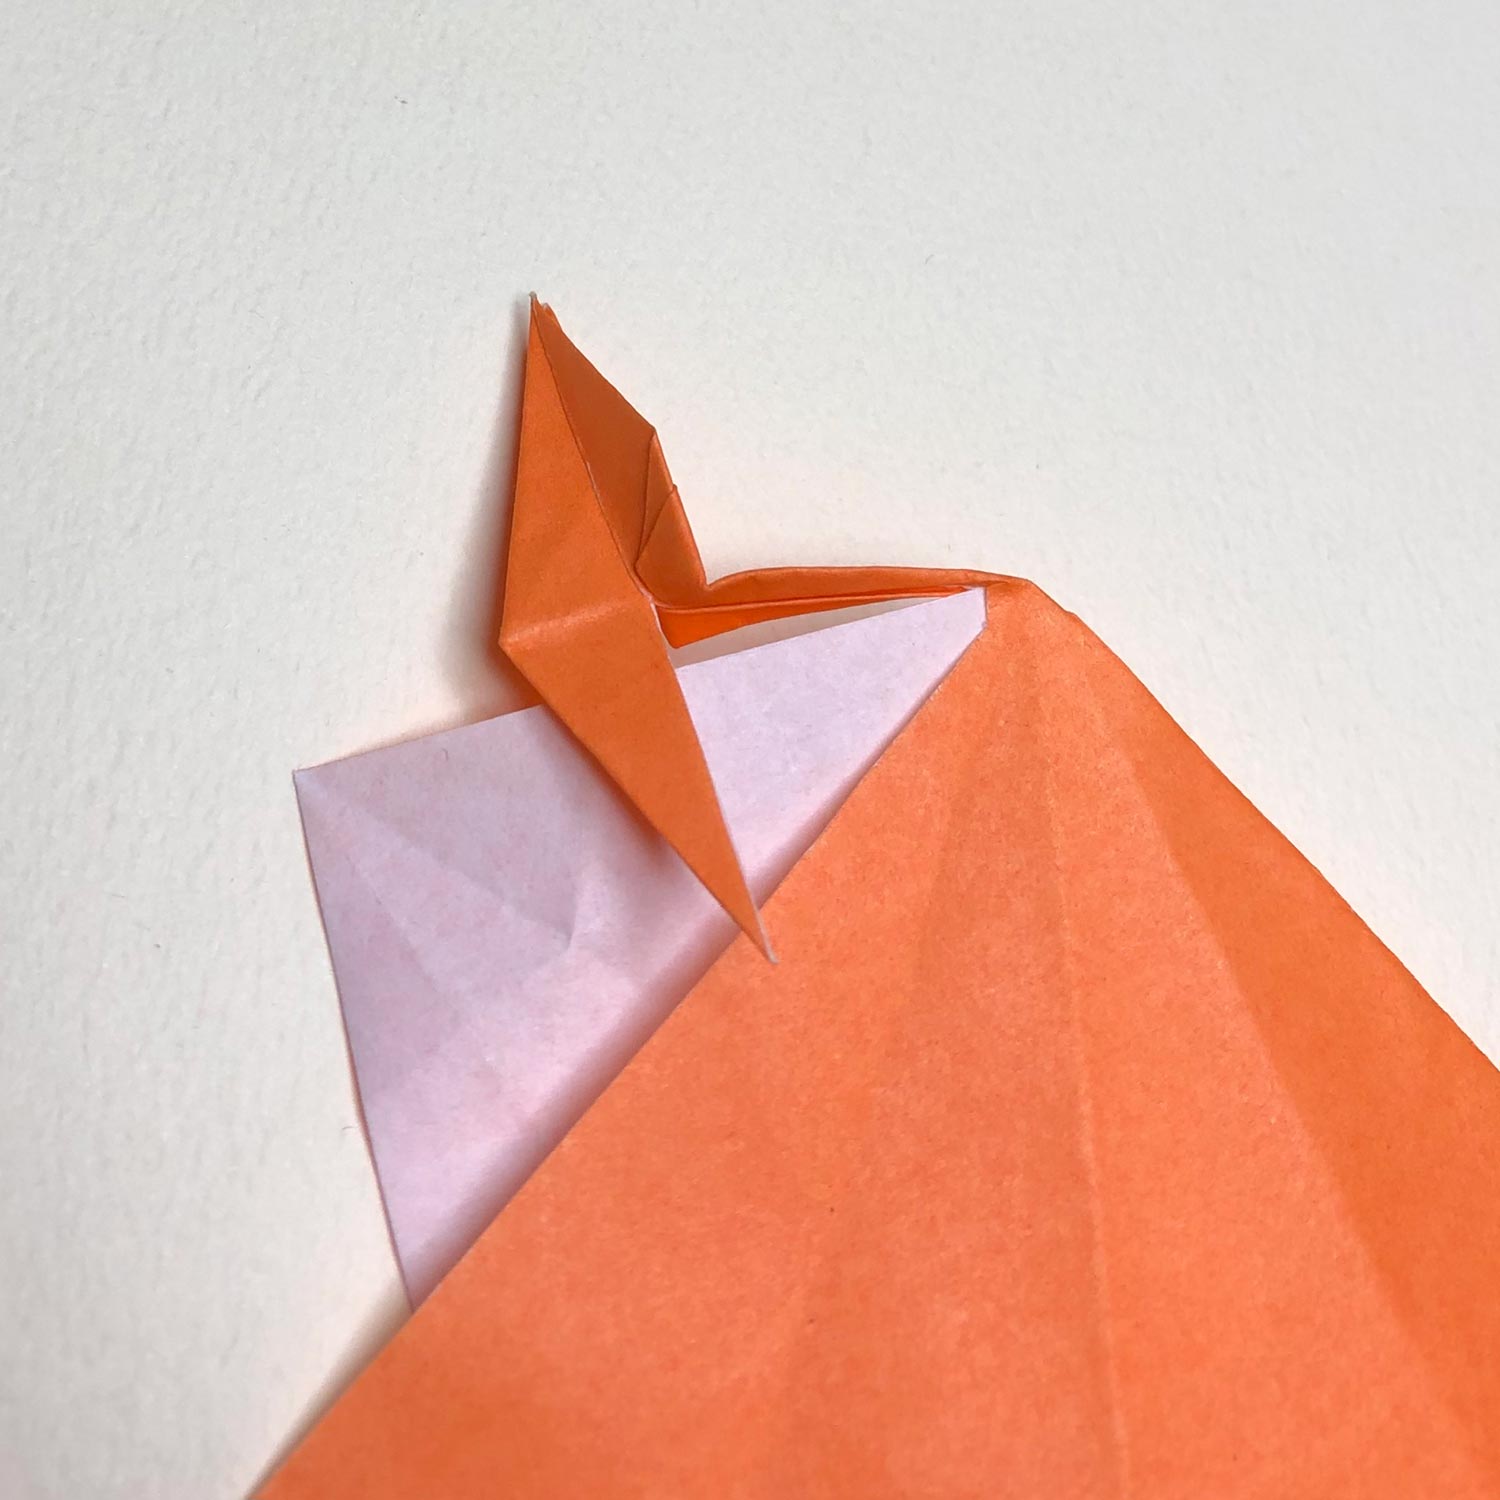
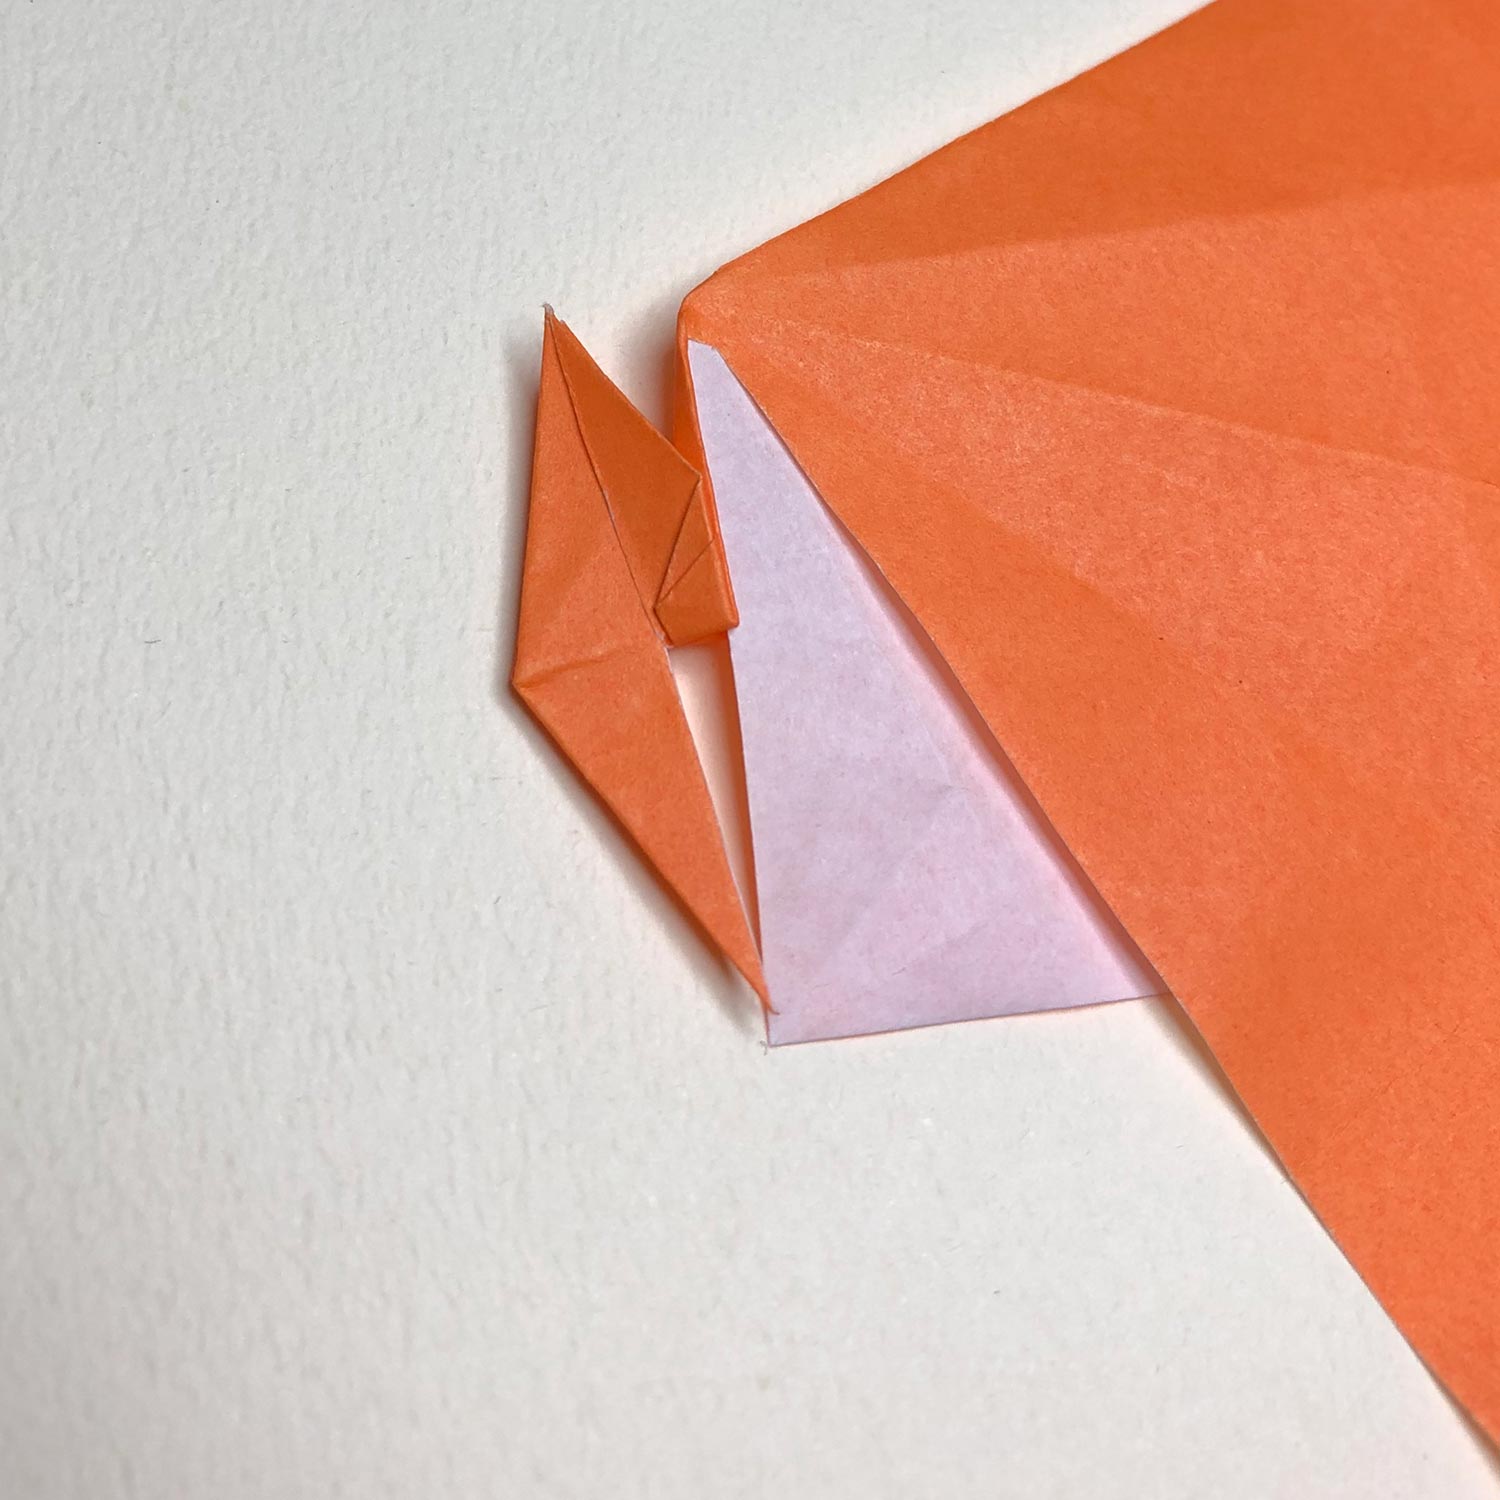
(10)
Then fold the other small square to make a crane so that a head/tail is connected to others.

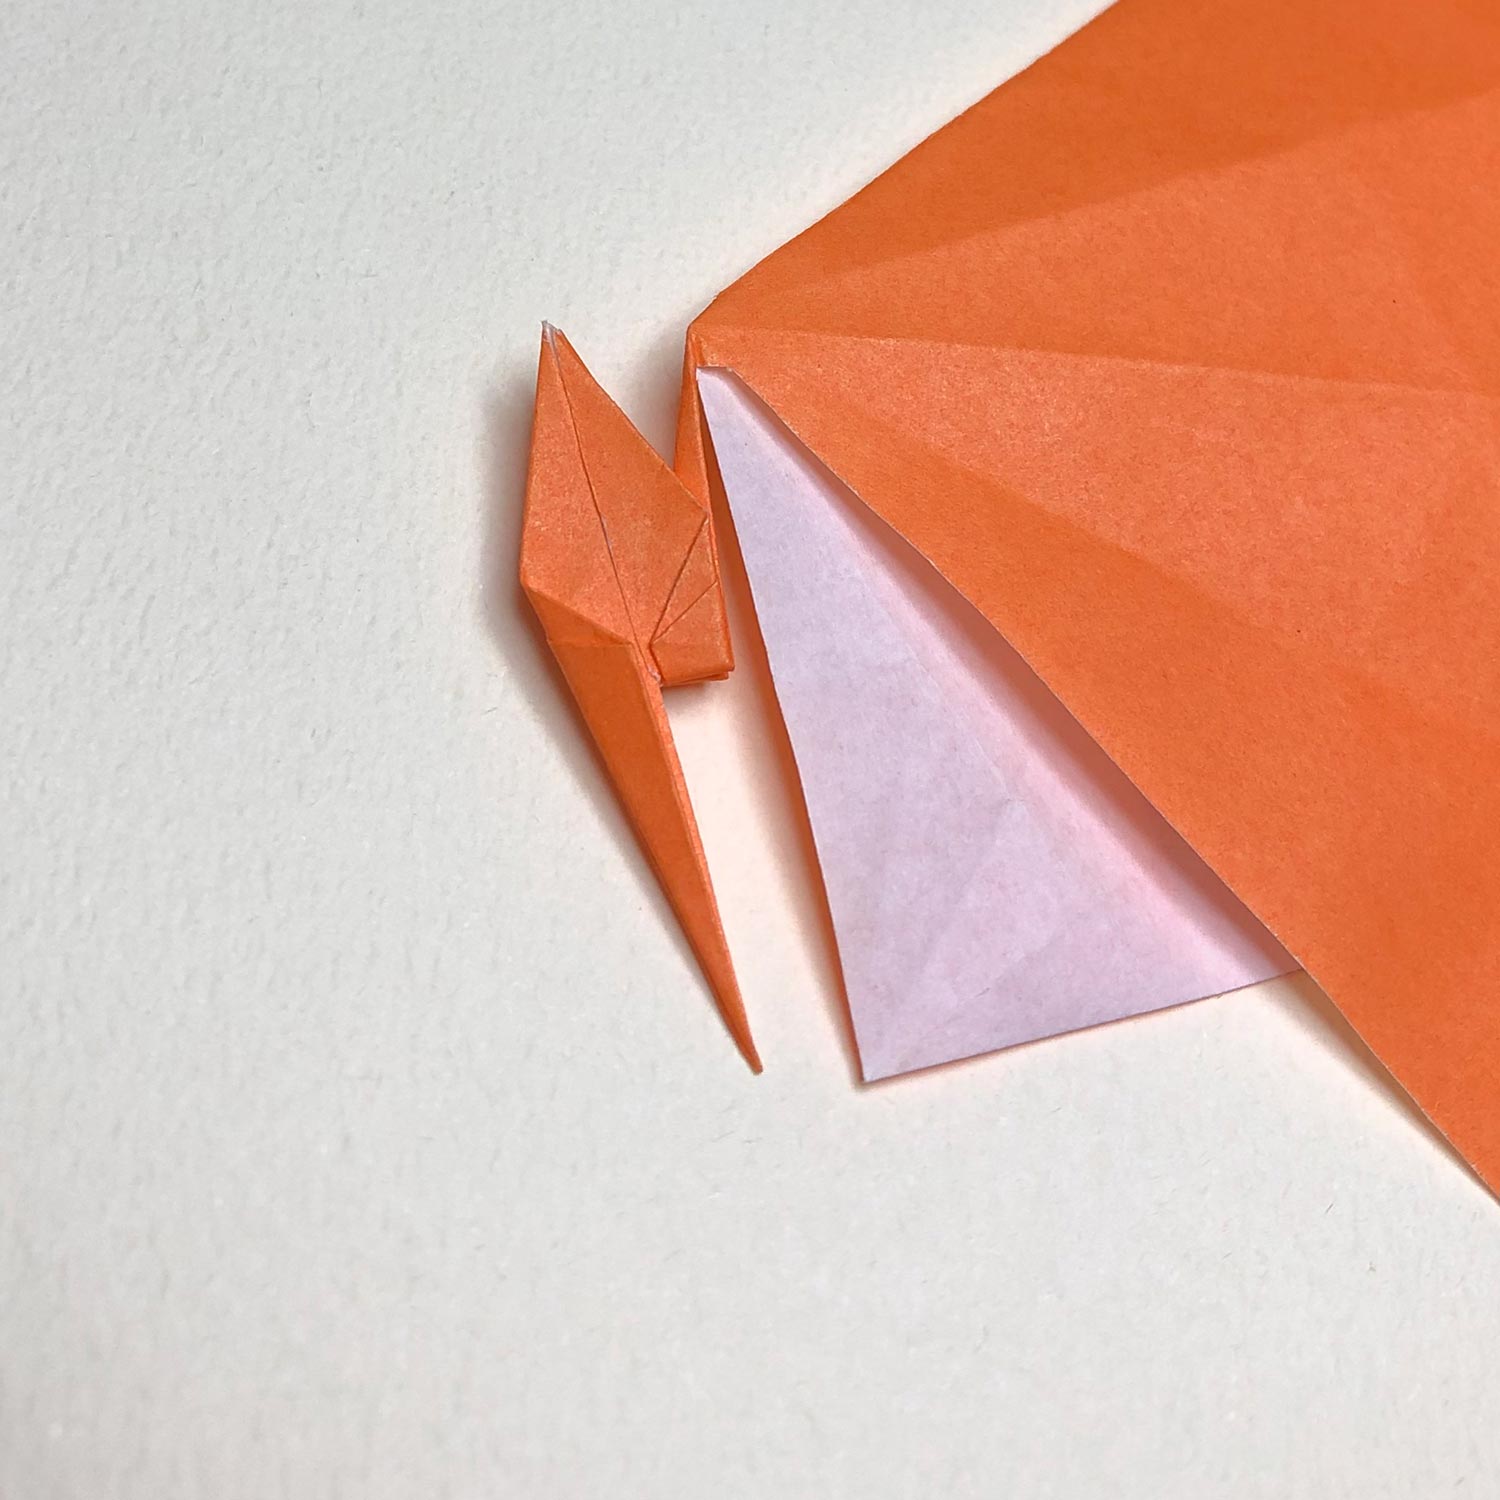
(11)
The second small crane is finished.
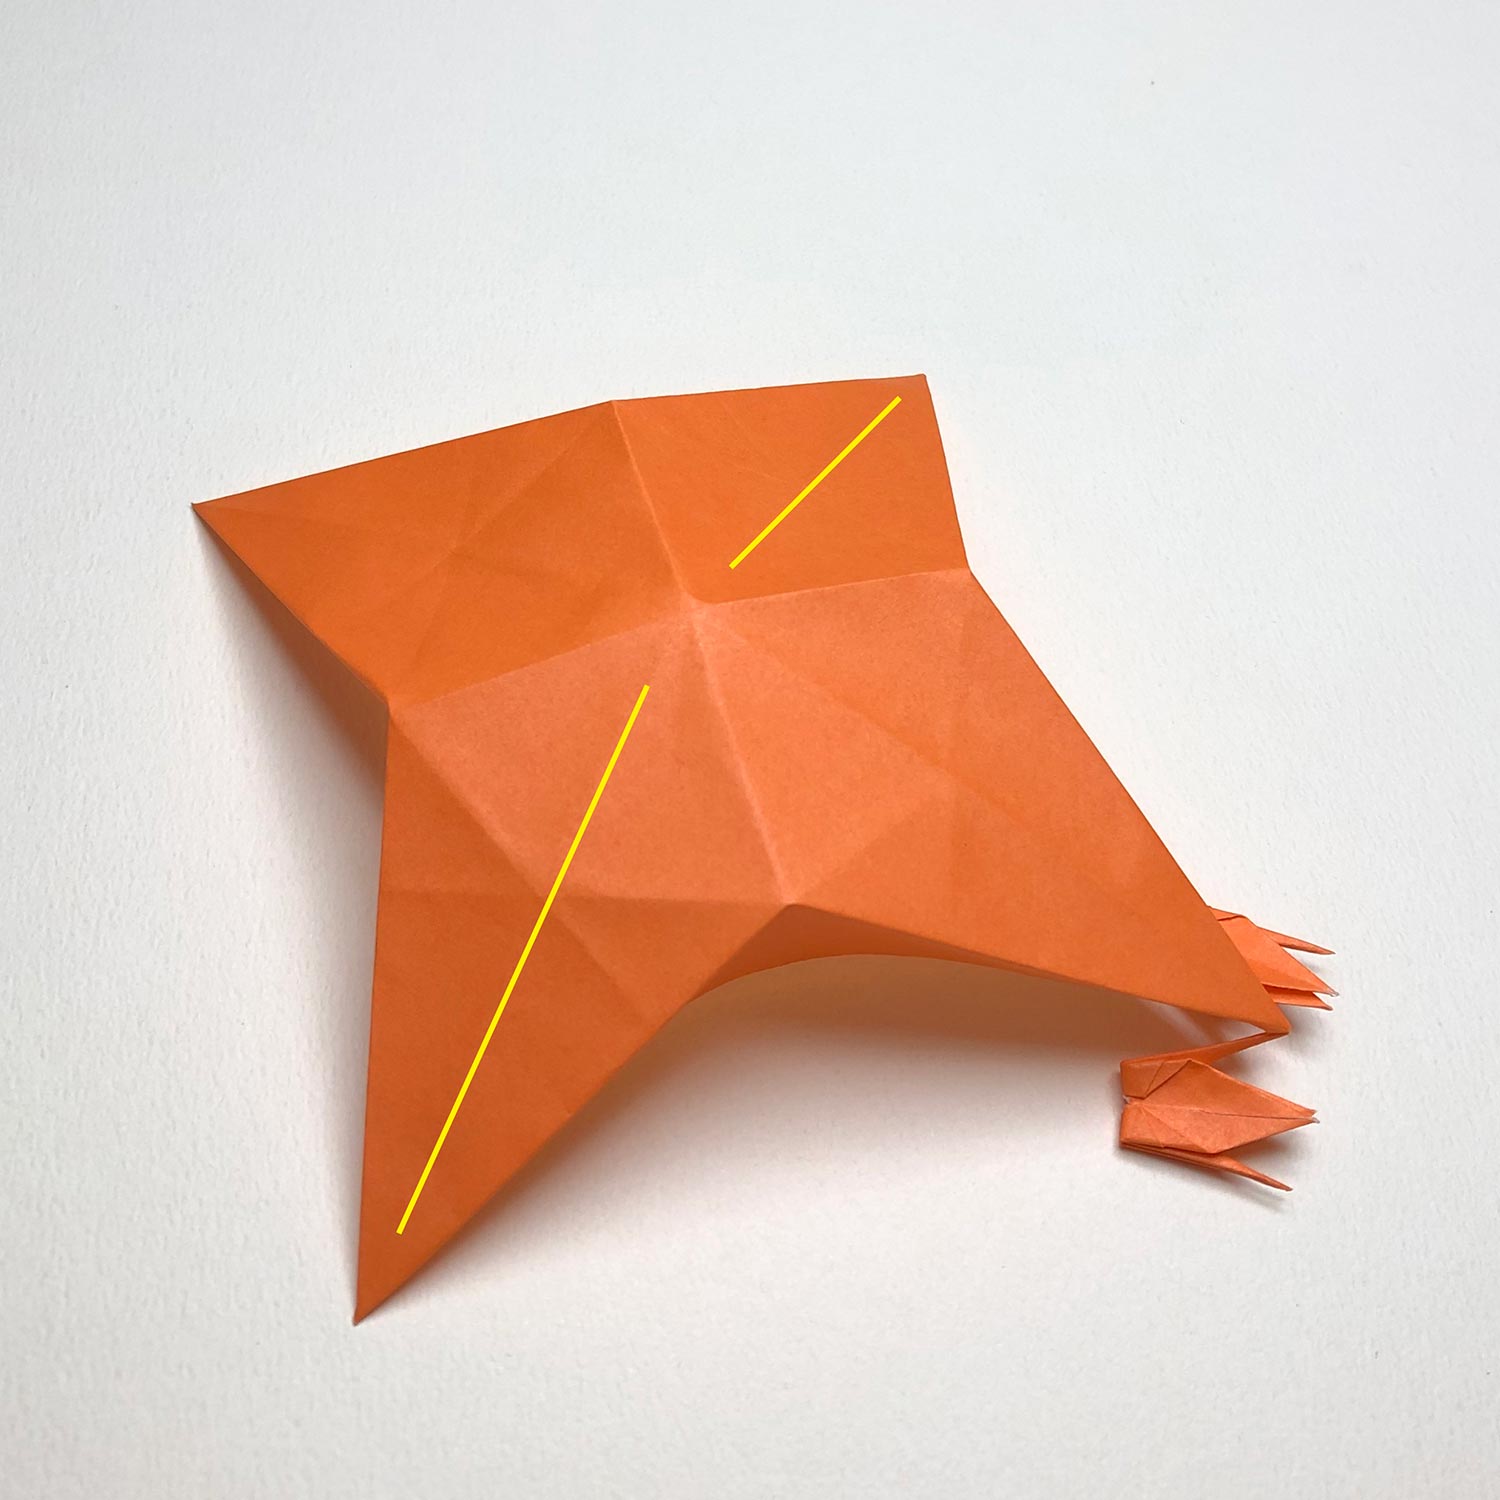
(12)
Then fold the big square.
Make a star-shape like this picture.
Then make a bird-base so that the yellow lines are changed to wings.
(13)
This picture is halfway through.
(14)
The bird-base is finished.

(15)
First, fold the head/tail, which is connected to small cranes, to the center.
(16)
After folding the head/tail, raise it.
(17)
Fold the other head/tail to the center.

(18)
Raise it like this picture.
All the cranes are finished.
Make each beak while referencing the next picture.
Finally, spread wings.
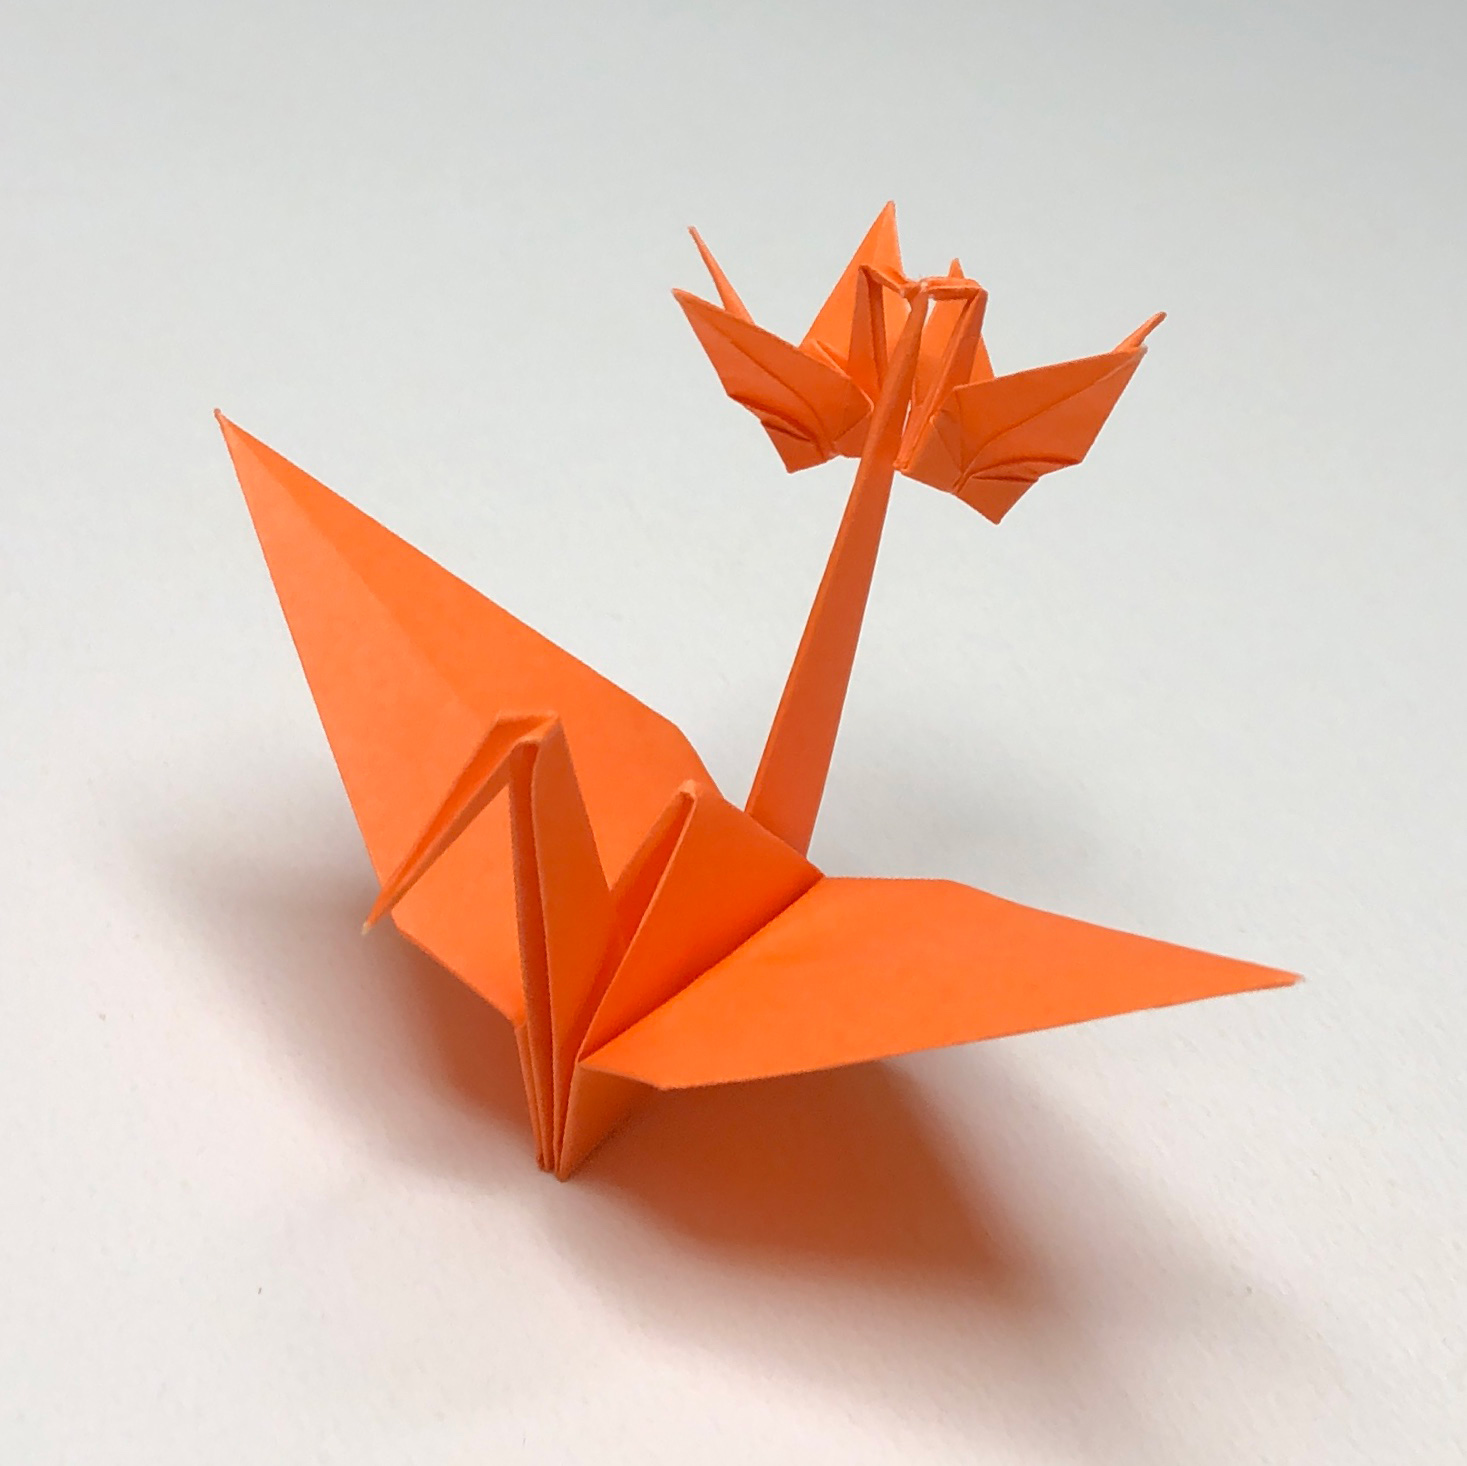
Mukashi-otoko is complete!
When you post pictures of your completed Renzuru works on social media,
please write my website’s name – “Tsuru-no-Goshiki” or paste the link!
On Instagram, if you write “@ritsu_cranes”,
I will be able to see your works and glad!😀
If you liked this Renzuru model,
please click the button below and share this pages on Twitter!