
Make creases
To make creases on a paper
To make creases on a paper before cutting the paper is very important.
If you cut a paper first before making creases, it will get harder to make creases on the paper.
Also, there’s a possibility that the paper is cut halfway when making creases.
This step is making basic-creases on each square.
On the other page, there is how to make basic-creases.
I will paste the link down below.

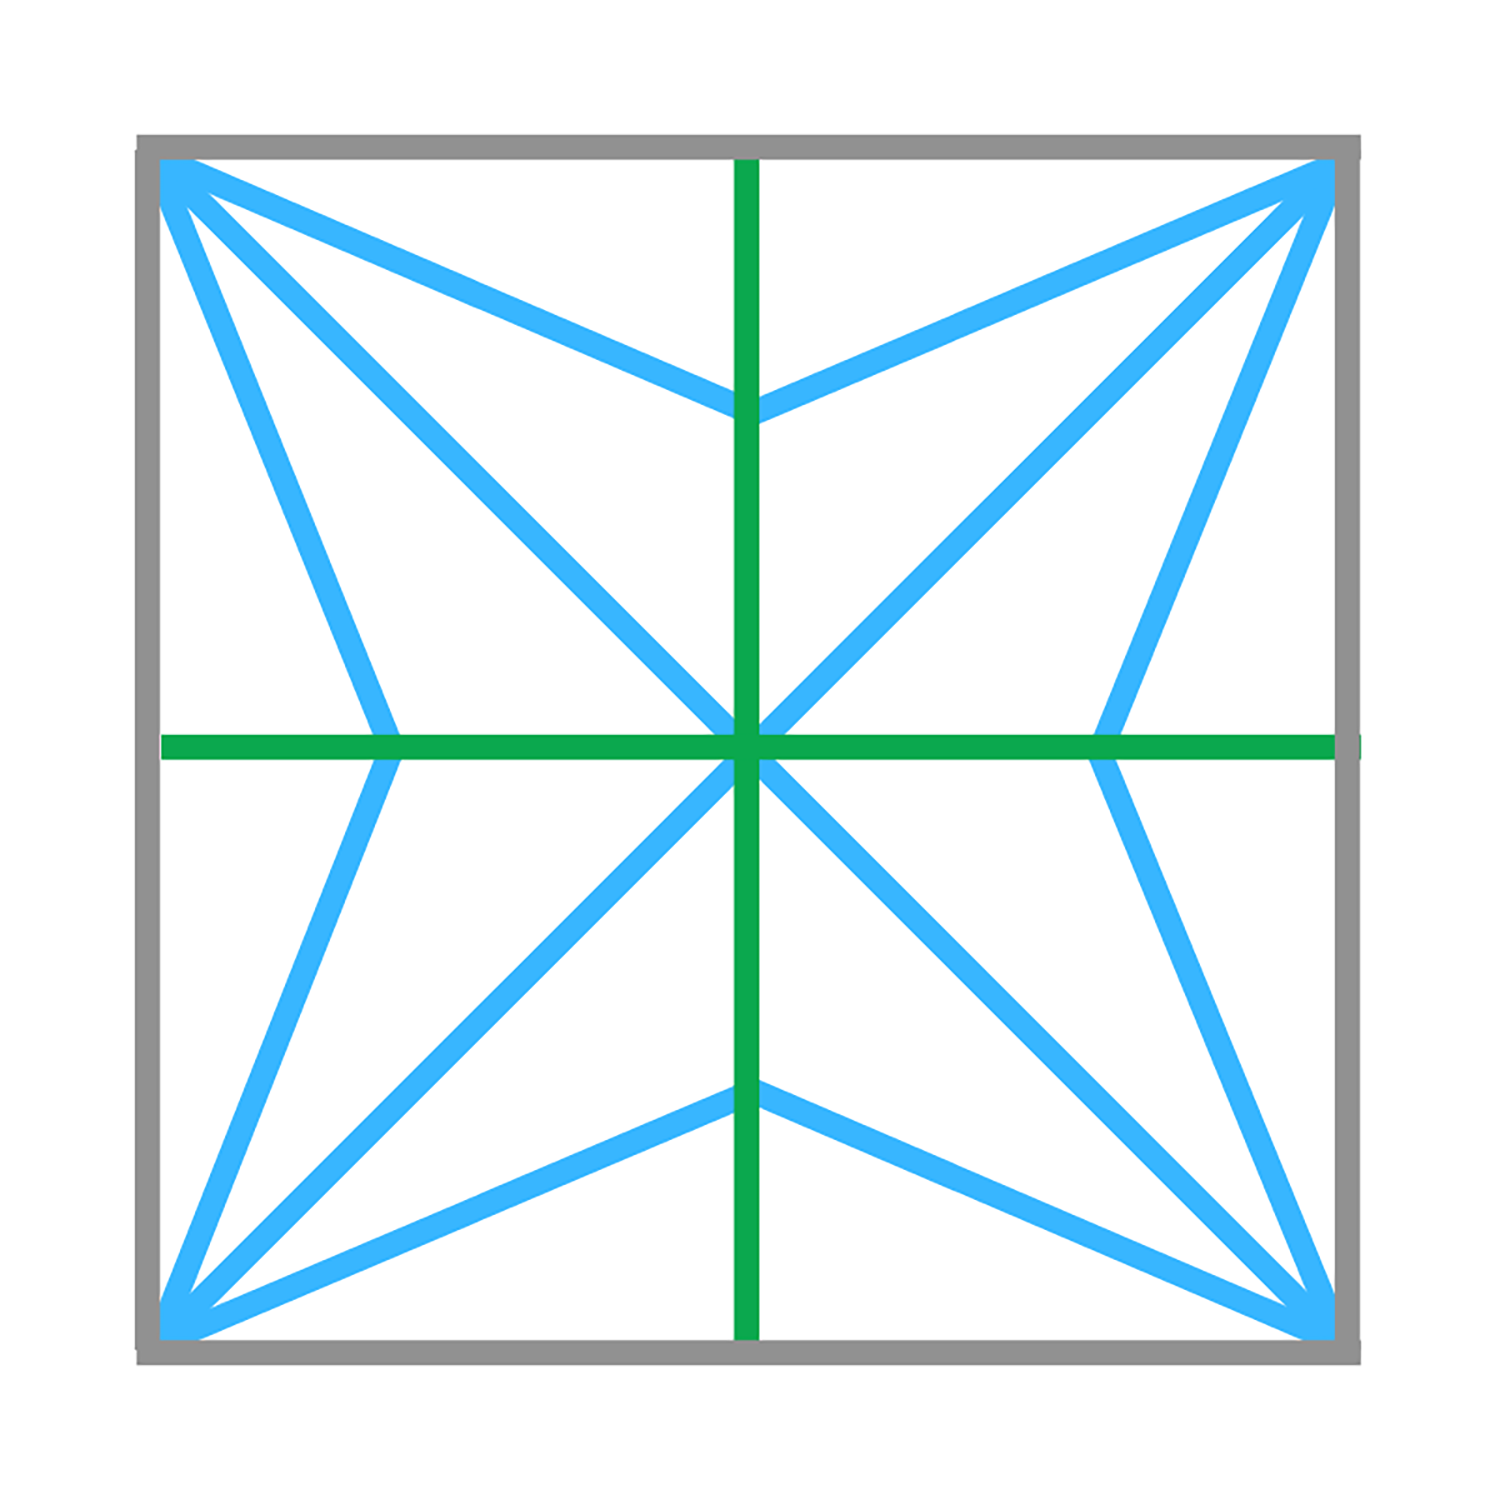
Make basic-creases, which are the green lines and the blue lines in this picture, on each square in the paper.

Make basic-creases in each yellow square.

This picture is taken after making basic-creases in each yellow square.
Please make sure whether there are the creases, which are the green lines and the blue lines in the 2 pictures ago, in each yellow square.
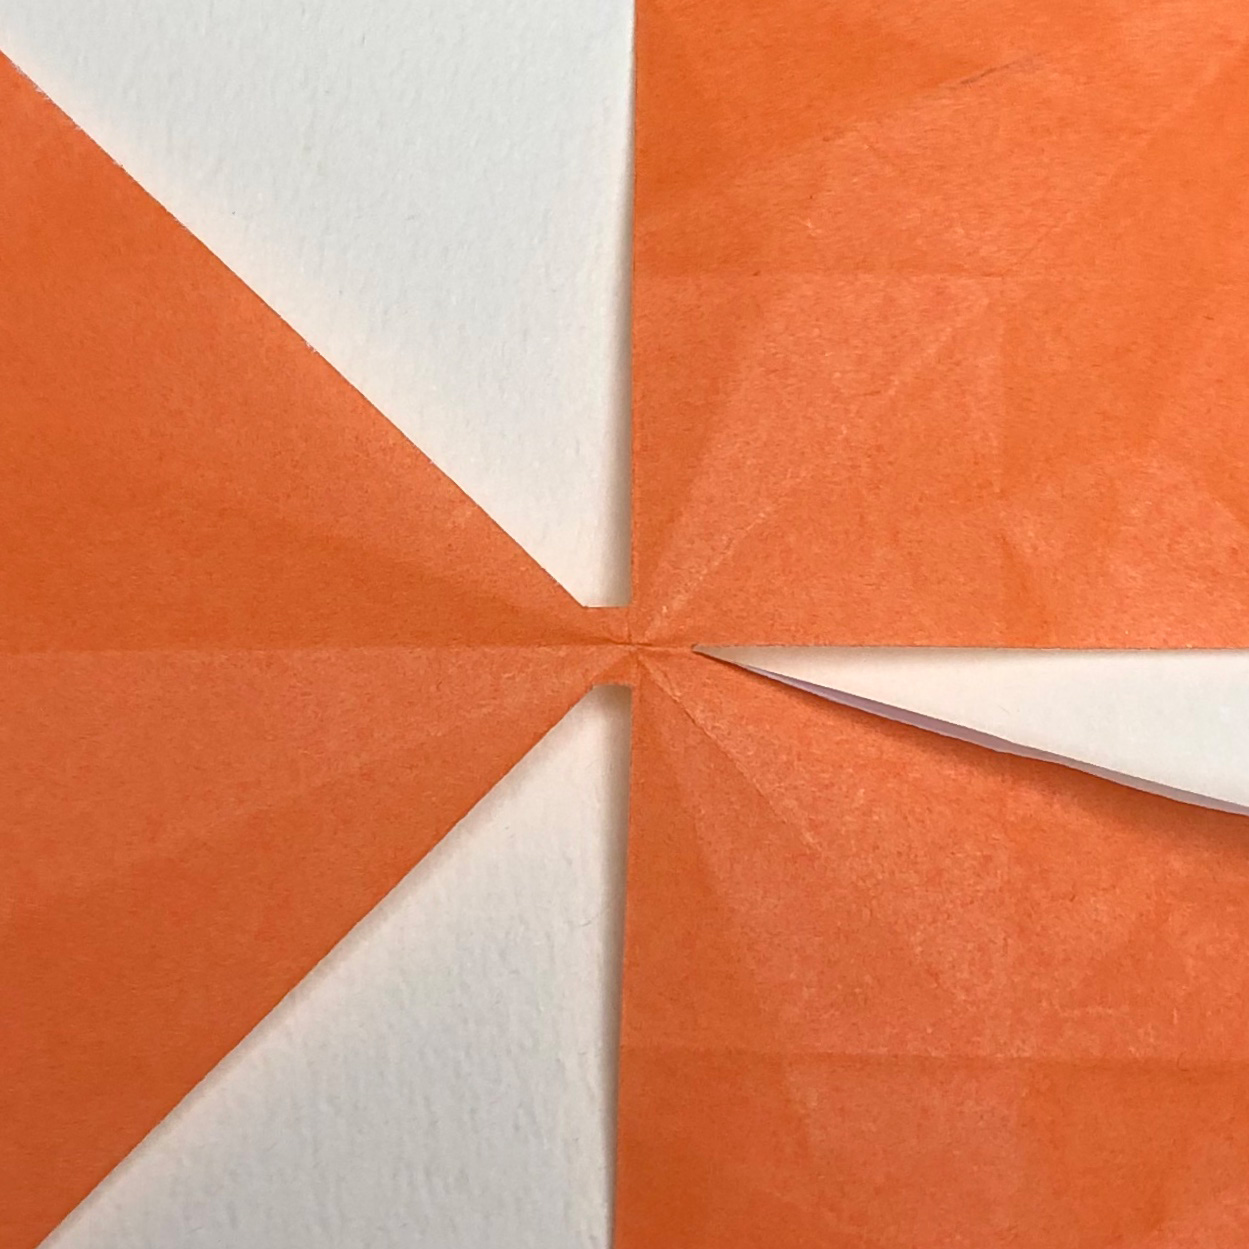
Cut the paper
Cut your paper after making creases!
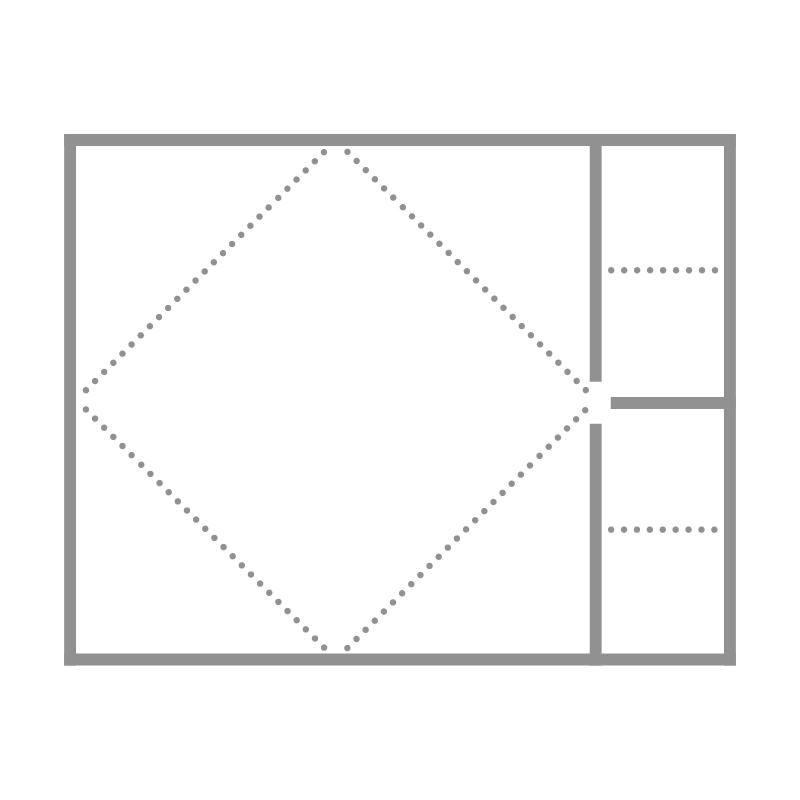
The diagram that I drew the new dotted lines.
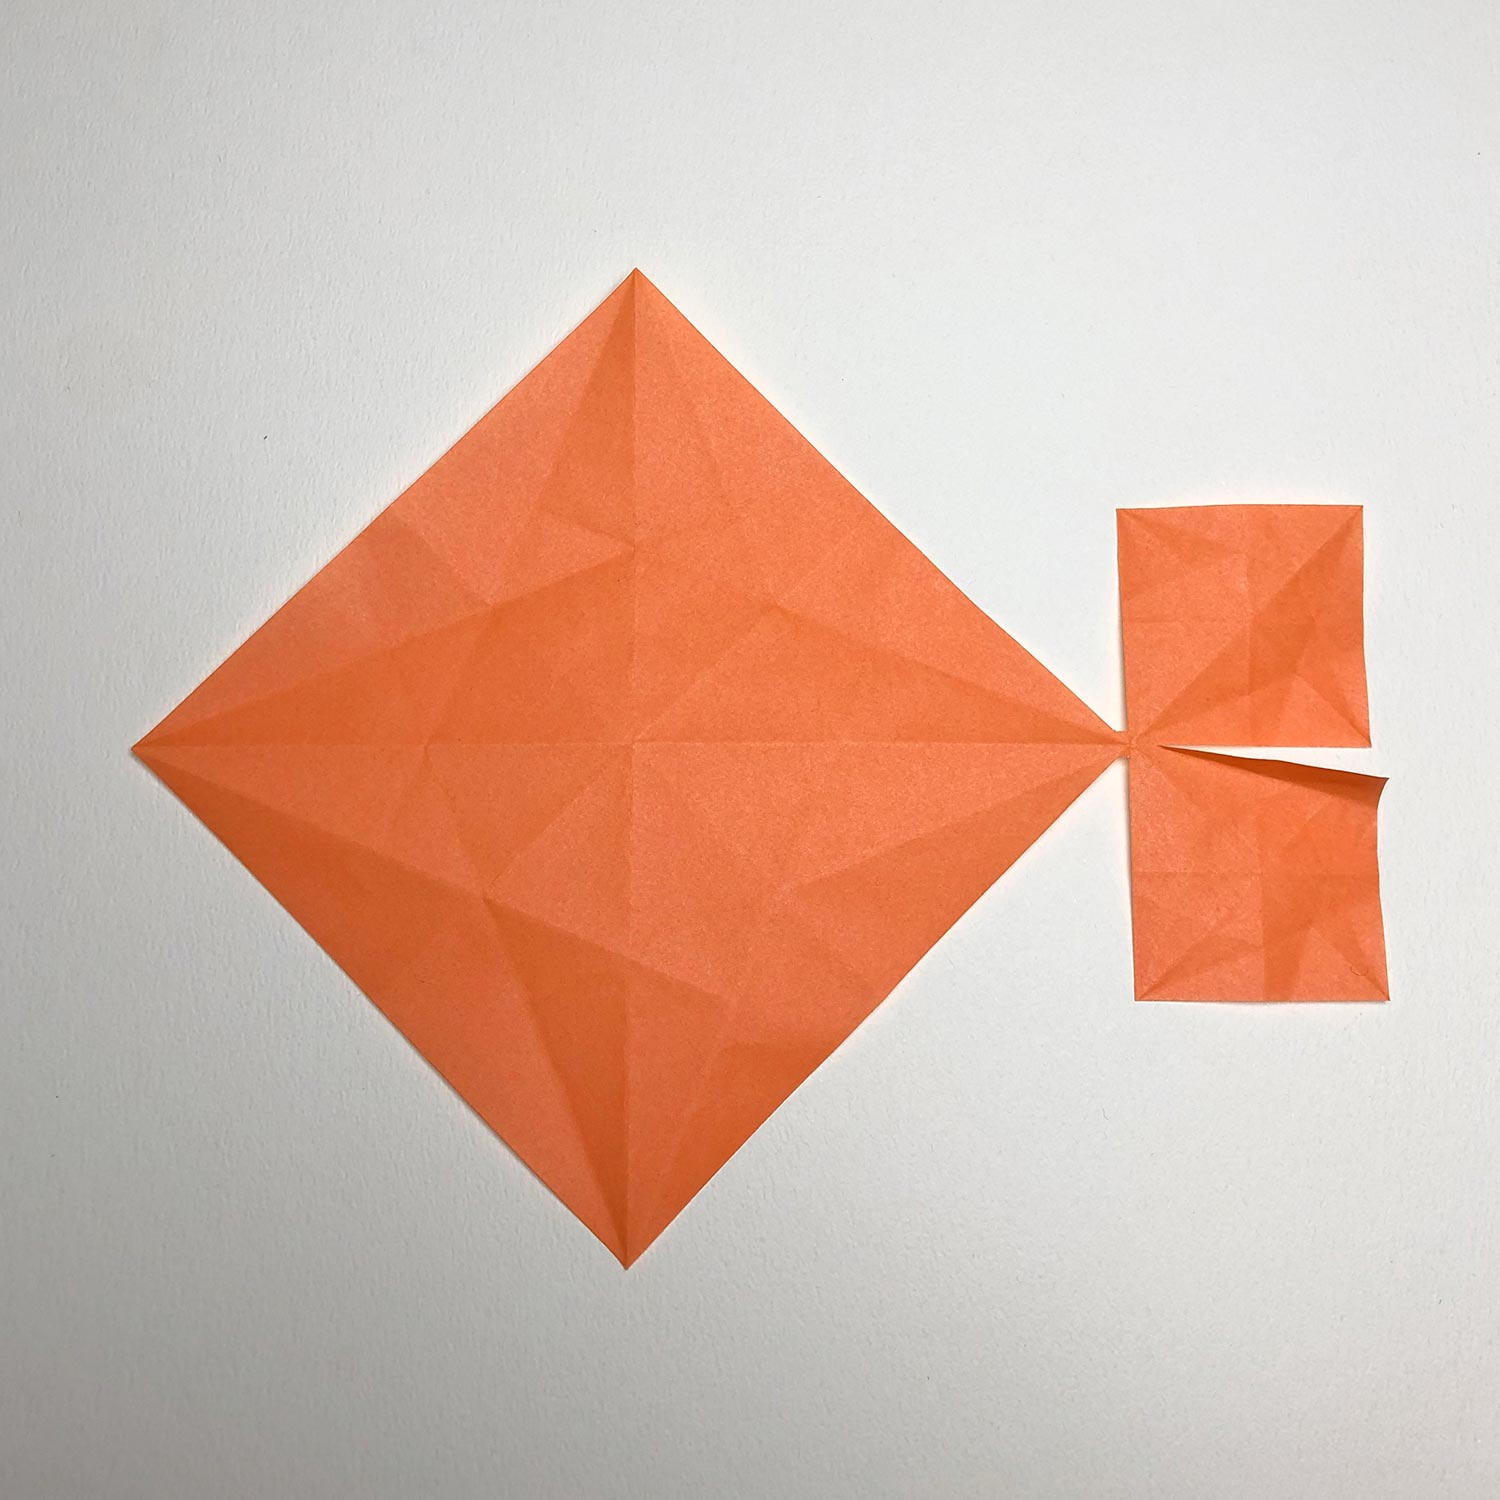
Cut the paper while referencing the diagram.
This is an enlarged picture.
I used a 17.5×17.5cm paper.
I left about 3mm for the width of the connecting part of the big square.
I left about 2.5mm for the length of the connecting part of the two small squares.
Make sure the direction of each crane
Make sure the direction of each crane
When making Renzuru, to fold cranes while making sure the direction of each crane is very important.
On this site, I will draw lines on each square in a picture.
Make cranes so that the lines are changed to wings.
I recommend that you draw lines lightly on the back in order not to make a mistake.

Make cranes so that the yellow lines are changed to wings.
After making sure the direction of each crane, make the model – Mukashi-otoko.
In the next pages, there is how to make the model.
If you try to make it by yourself, I recommend that you don’t look at the next page!