Make Temusubi
Make a new crease
In case of making a model which is connected to each other with wings such as Temusubi,
make a bird-base while making a new crease near a connecting part.
By making a new crease, it will get harder to put pressure on connecting parts.
First, look at three pictures that I made a new crease.
Then I will introduce how to make a new crease.
(Only when I explain how to make a new crease,
I use a 26x26cm paper.)
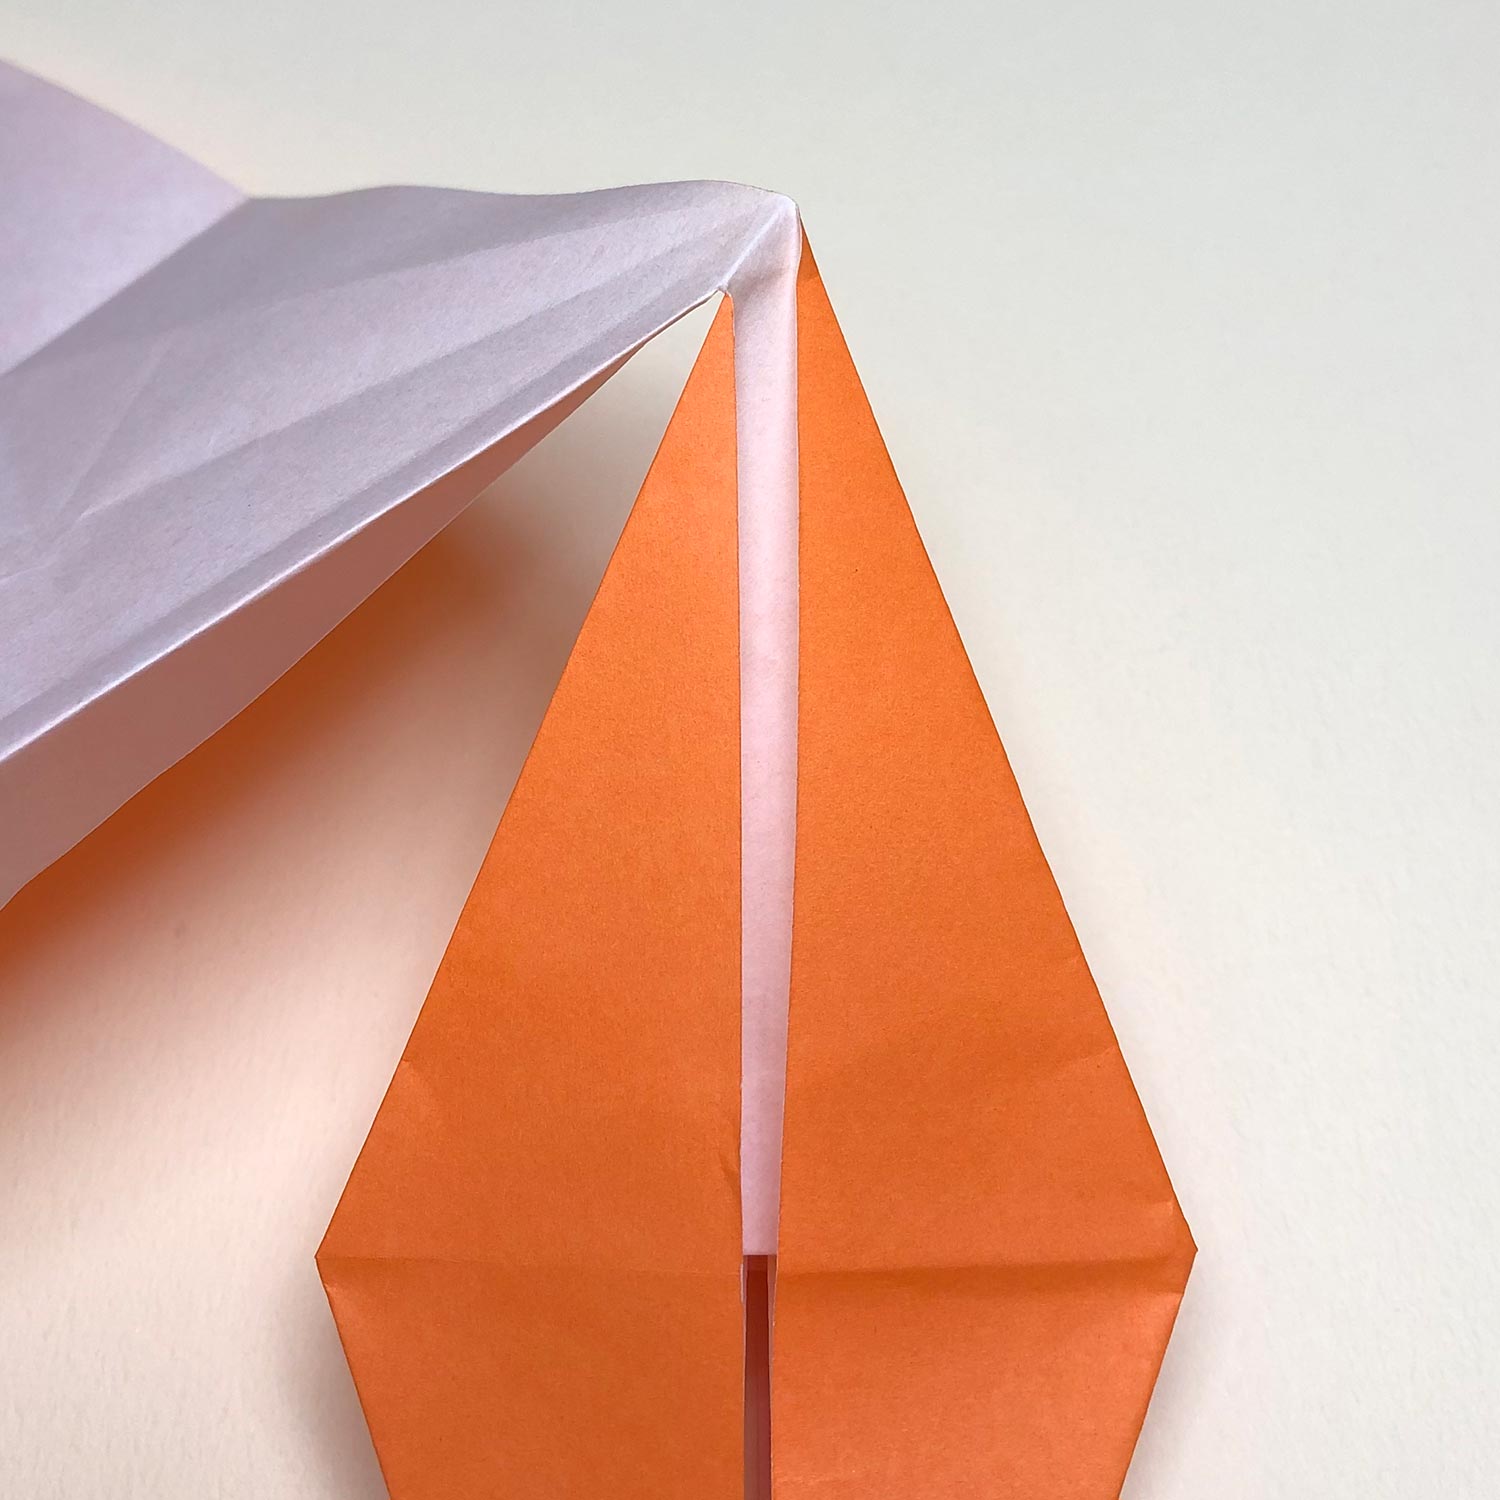
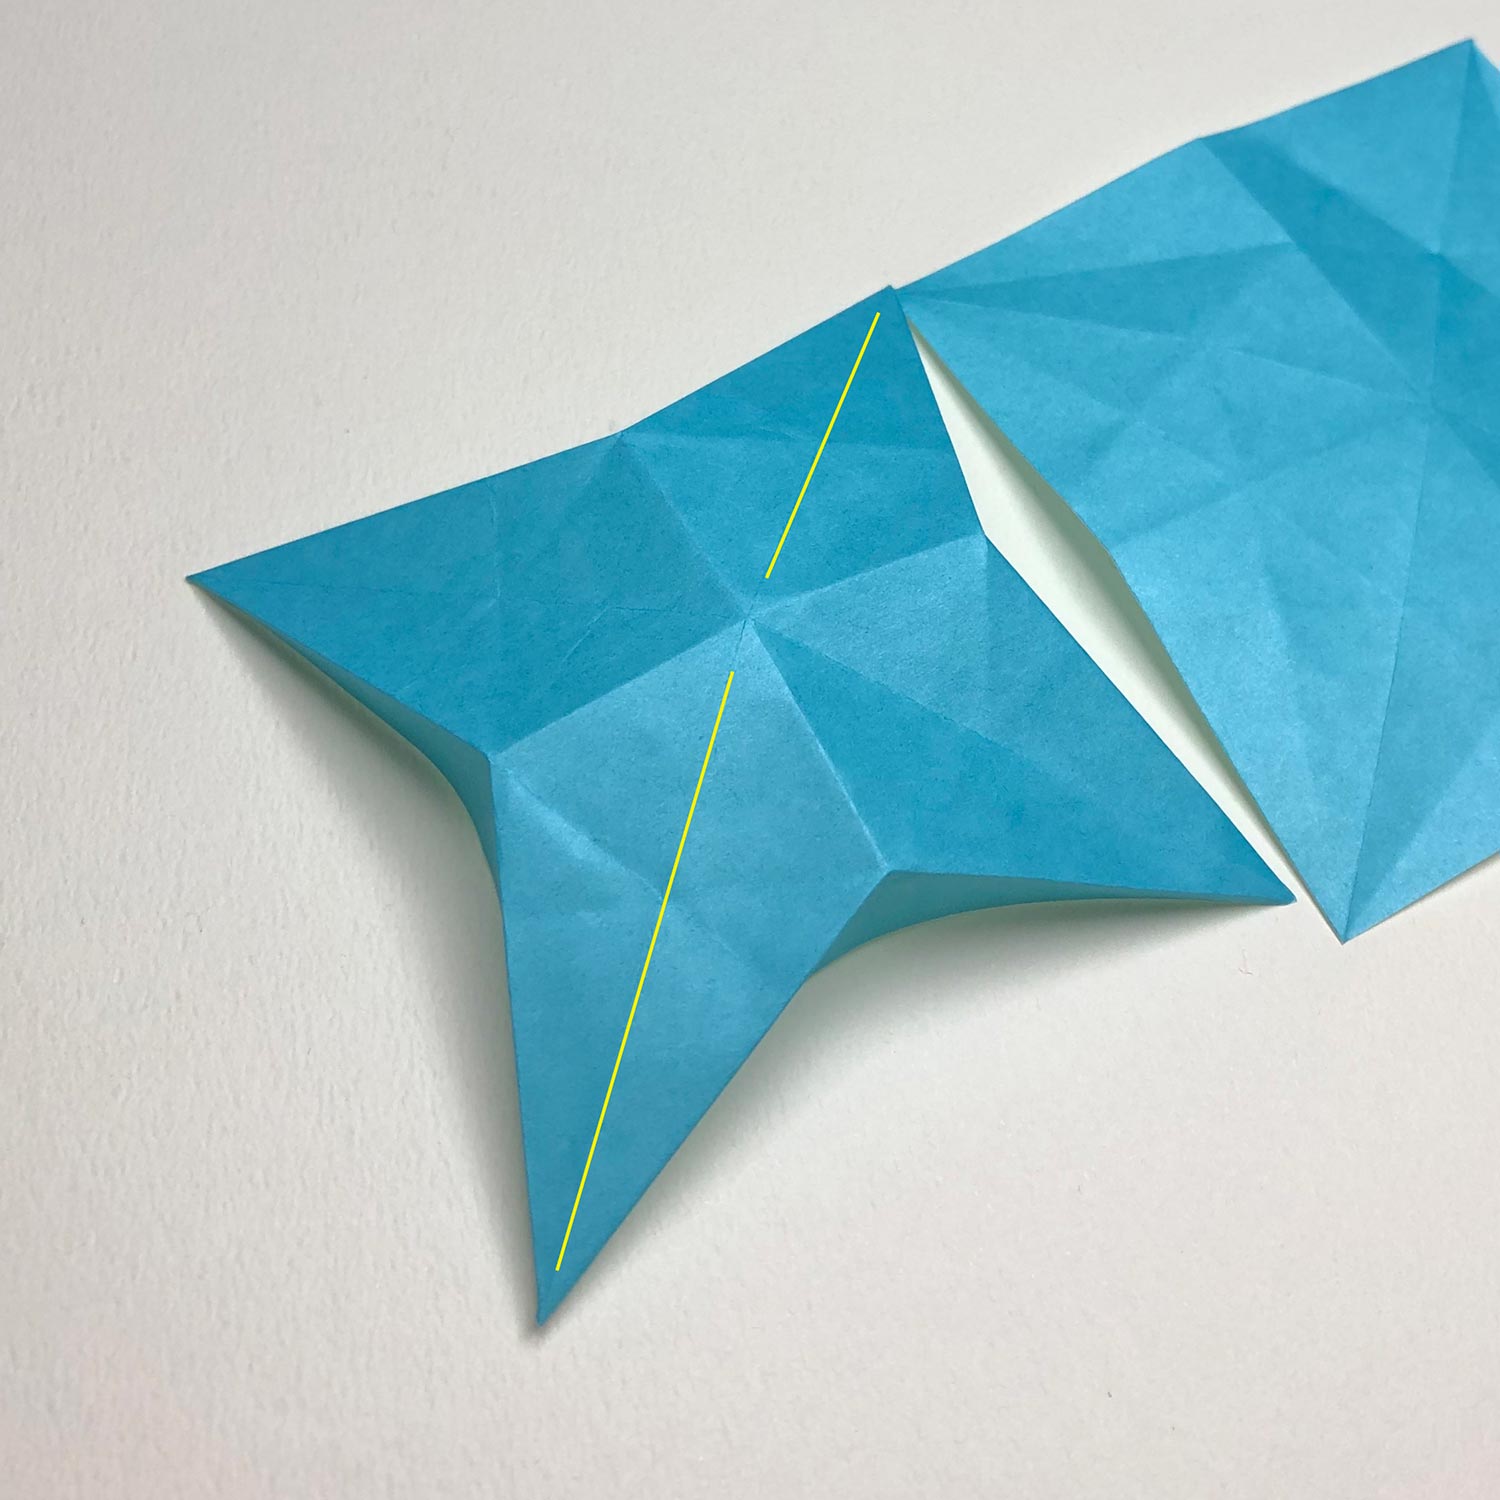
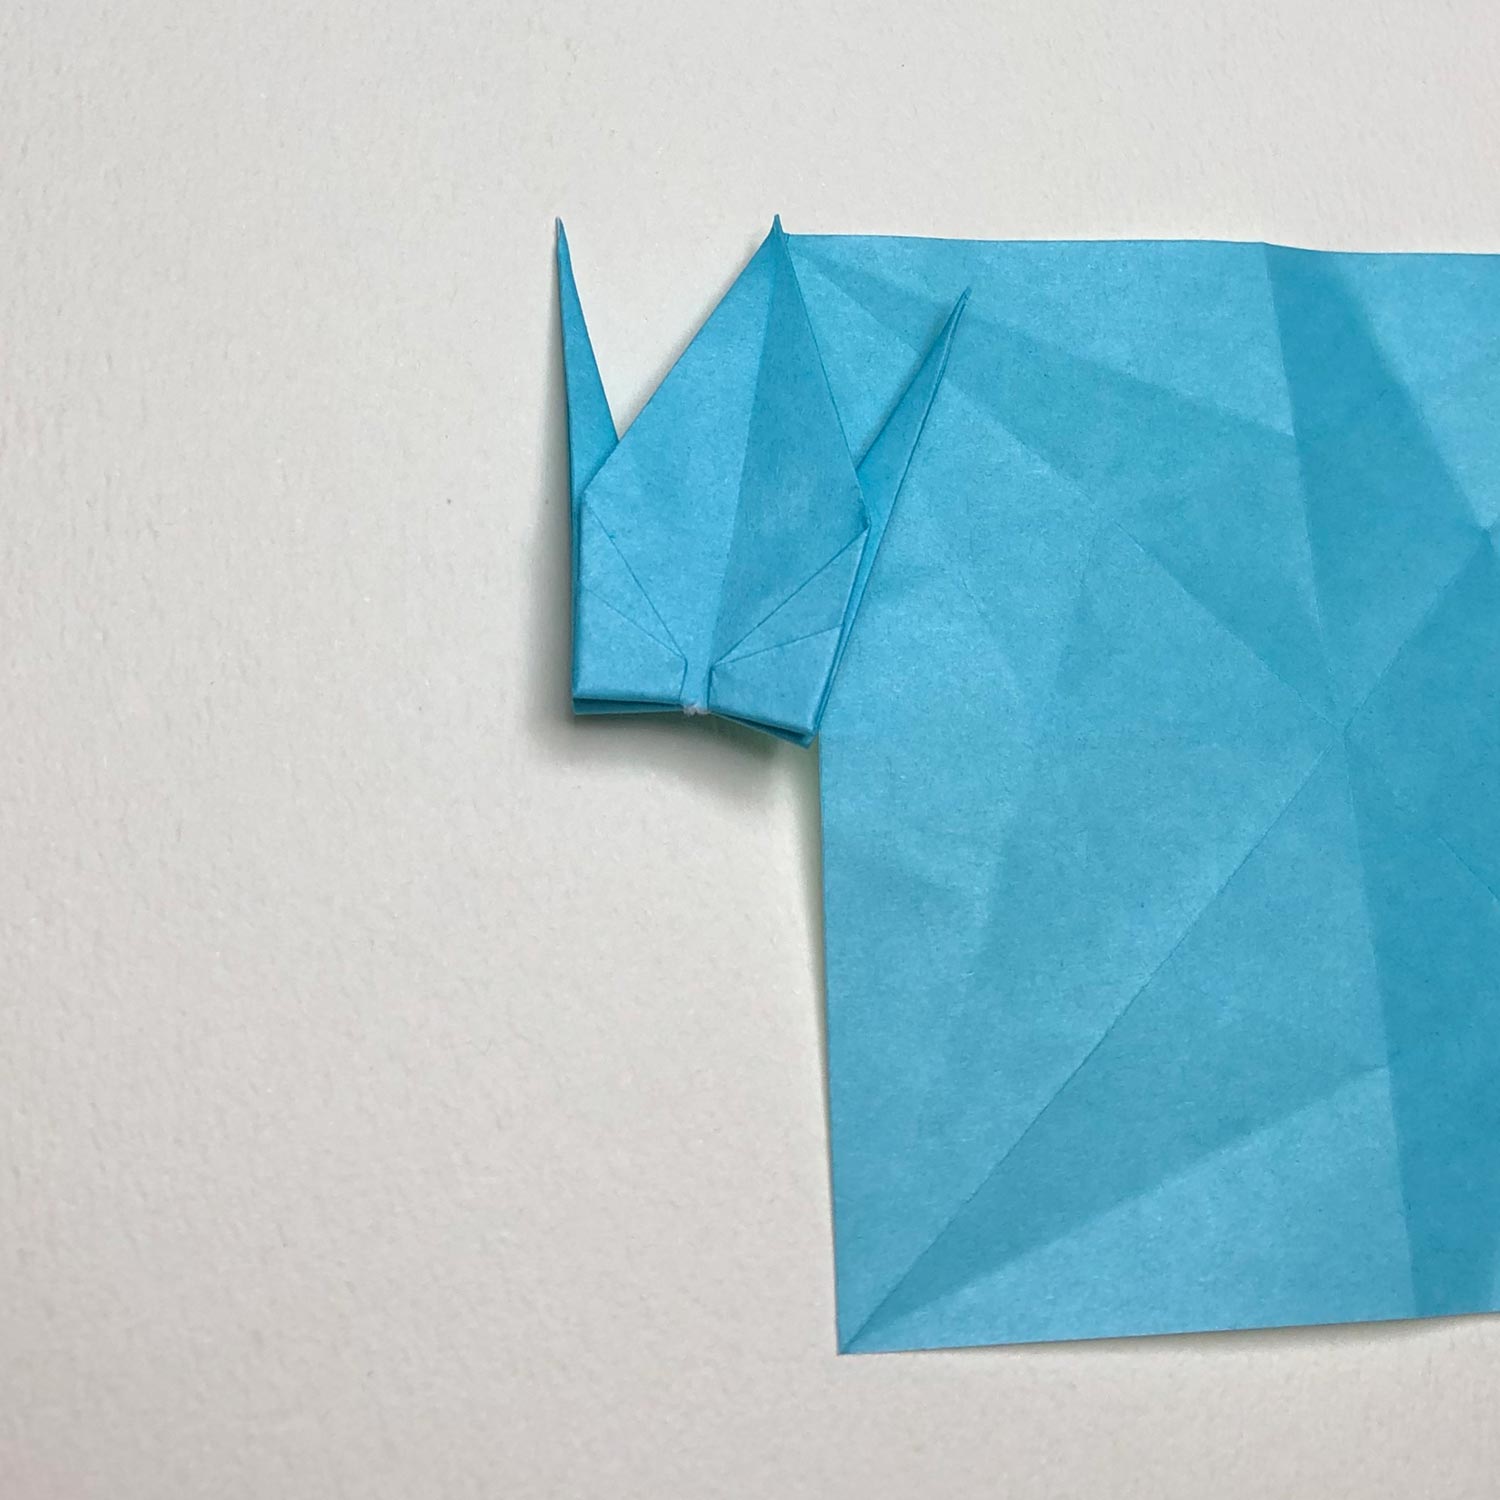
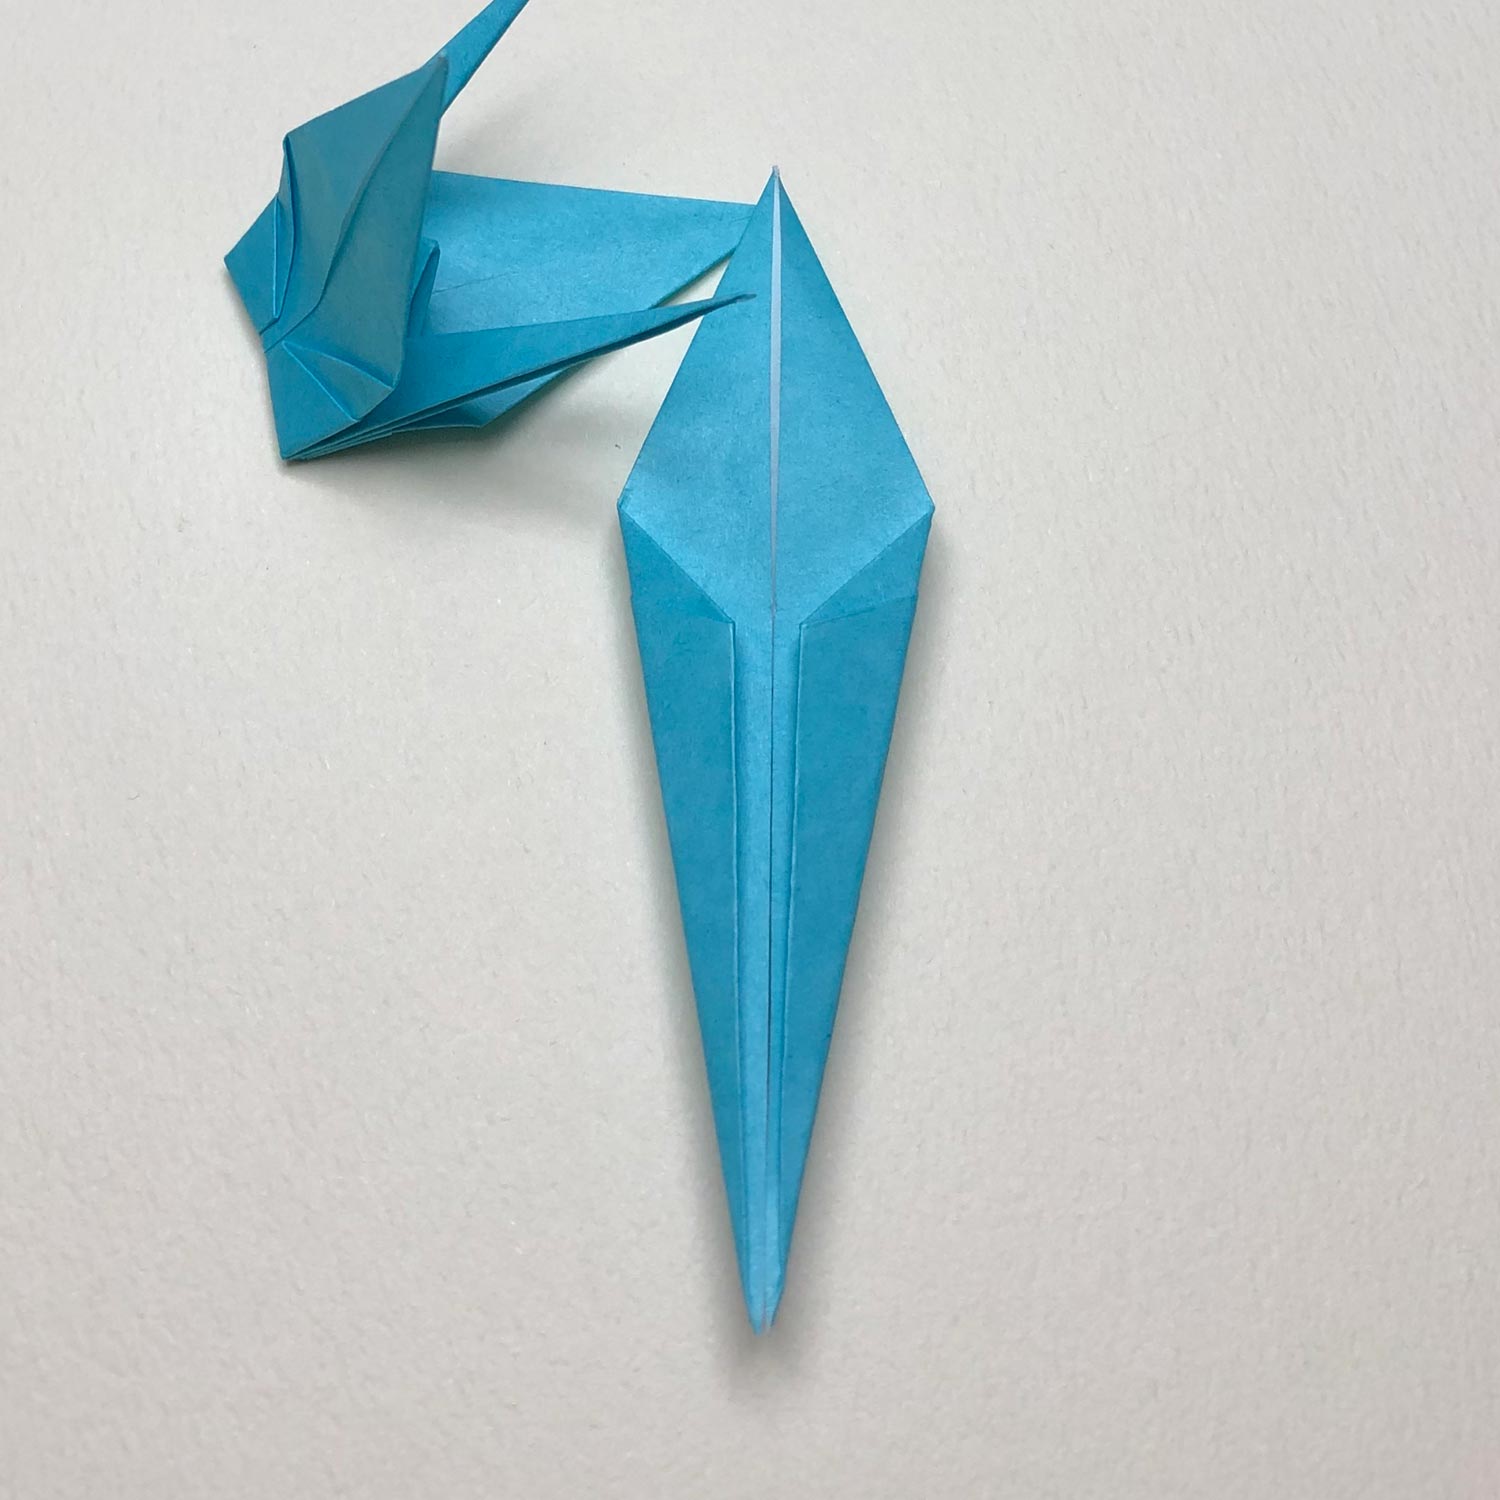
(Picture 1)
The tip become shape like this picture, after making a bird-base while making a new crease near a connecting part.
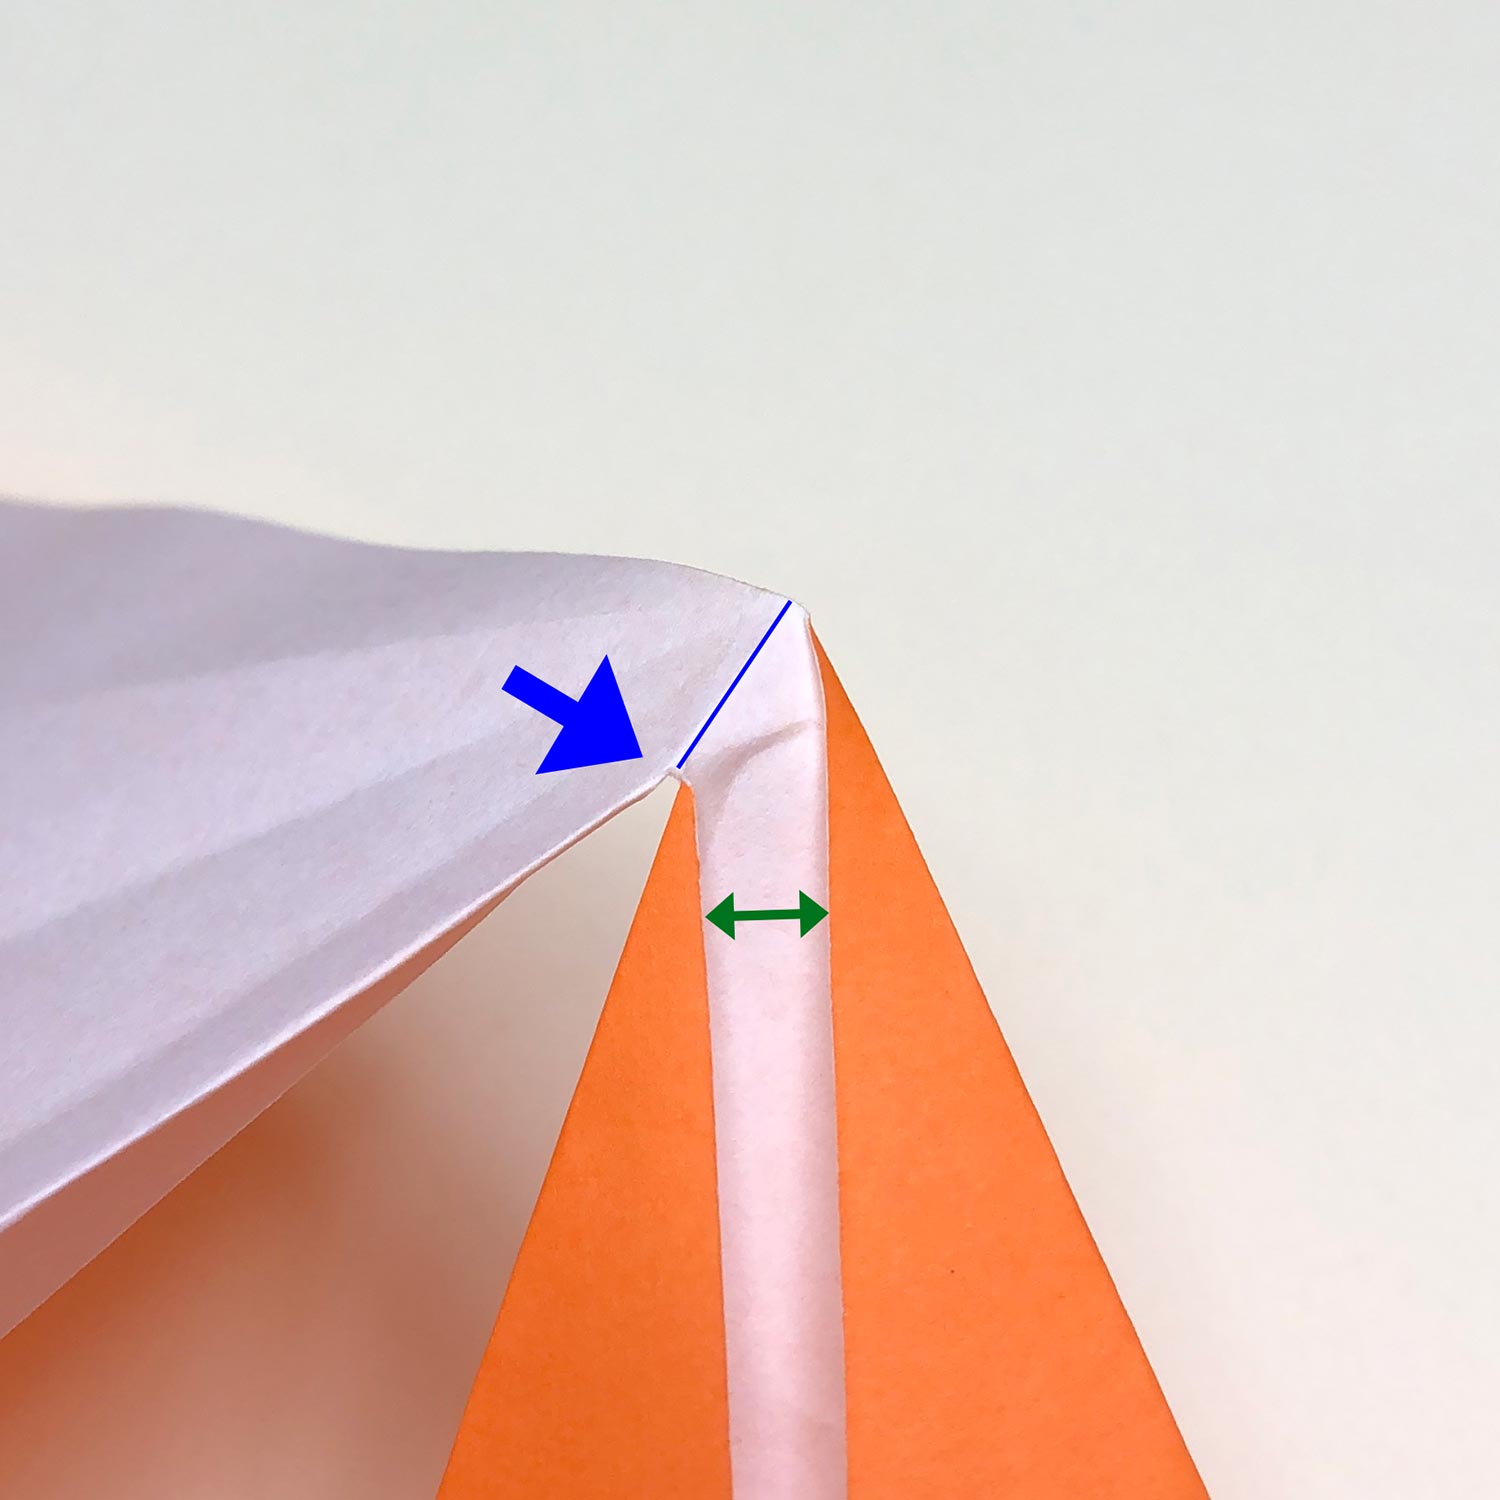
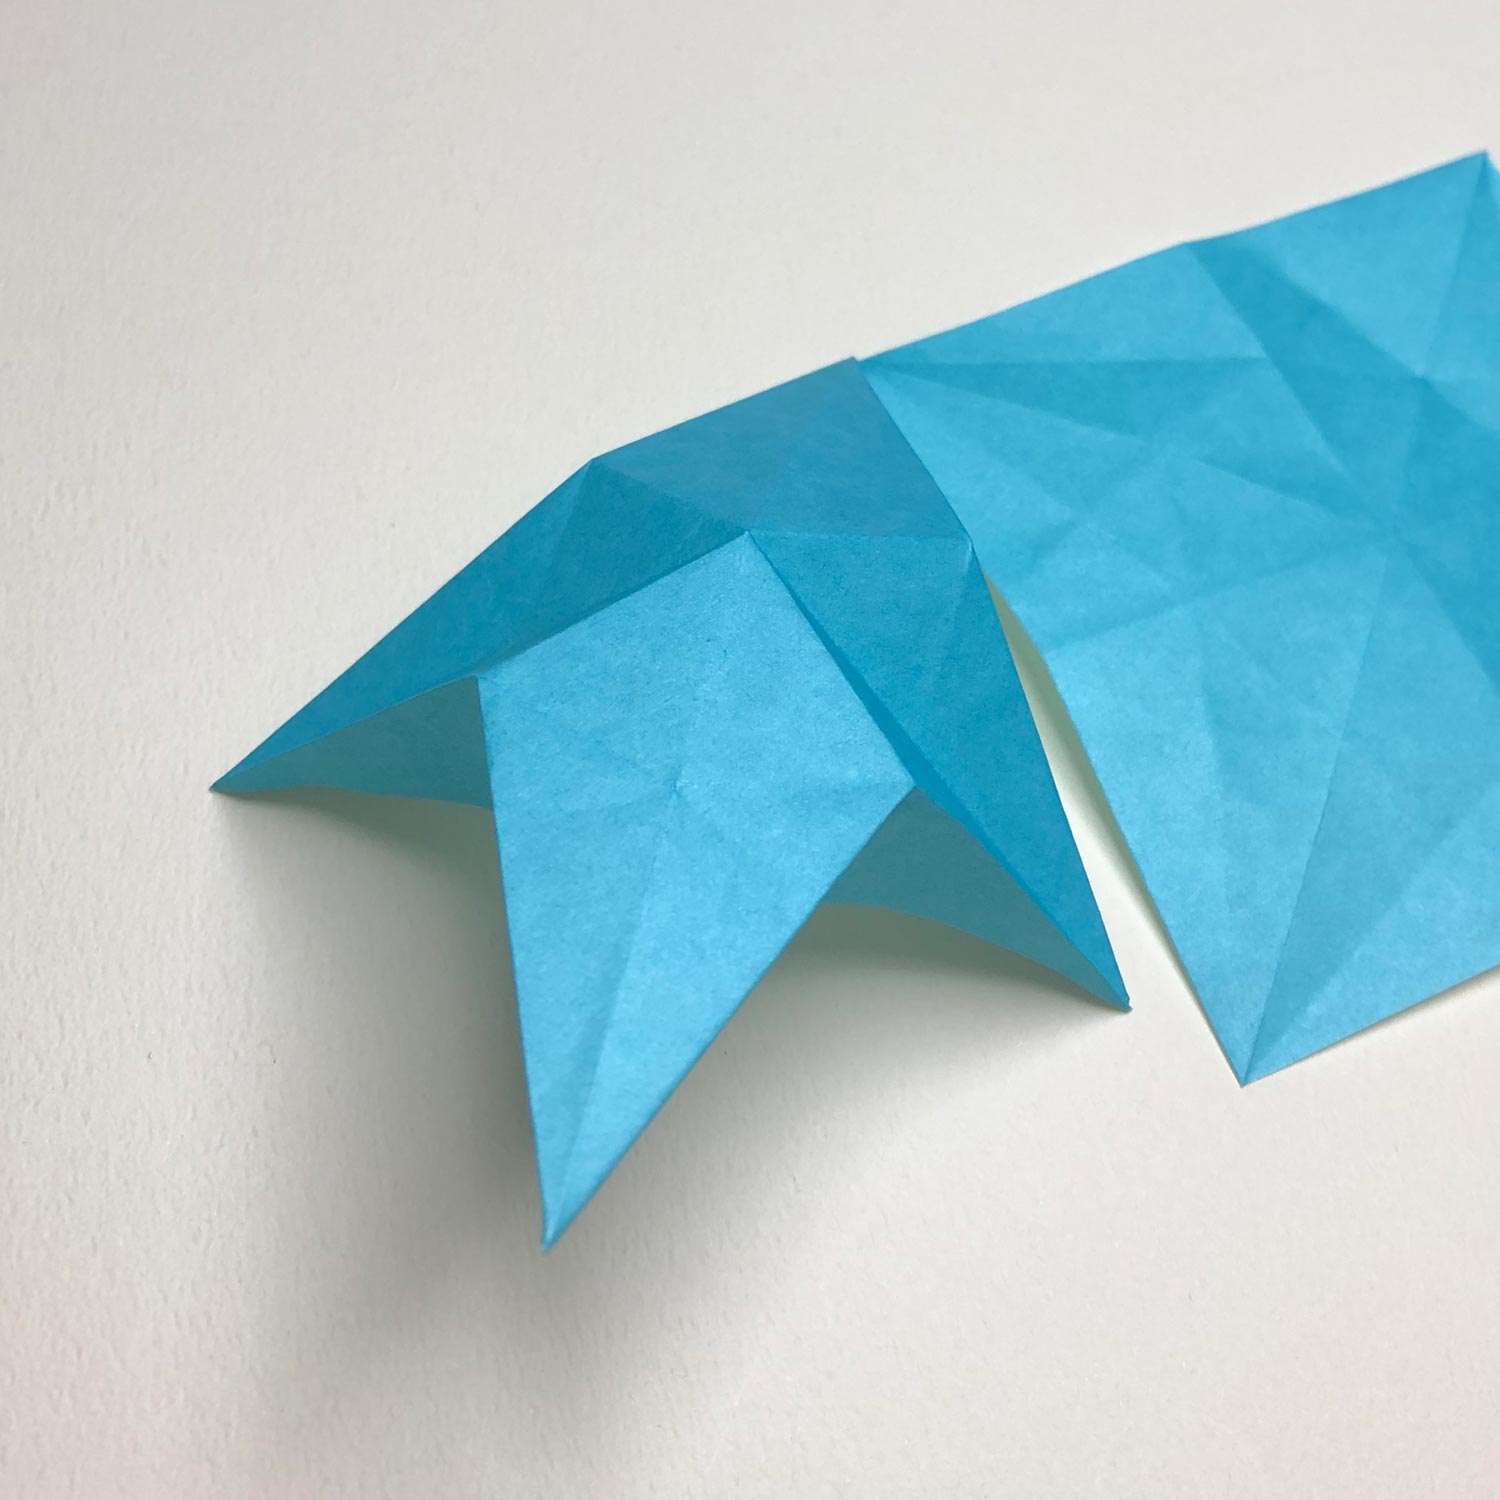
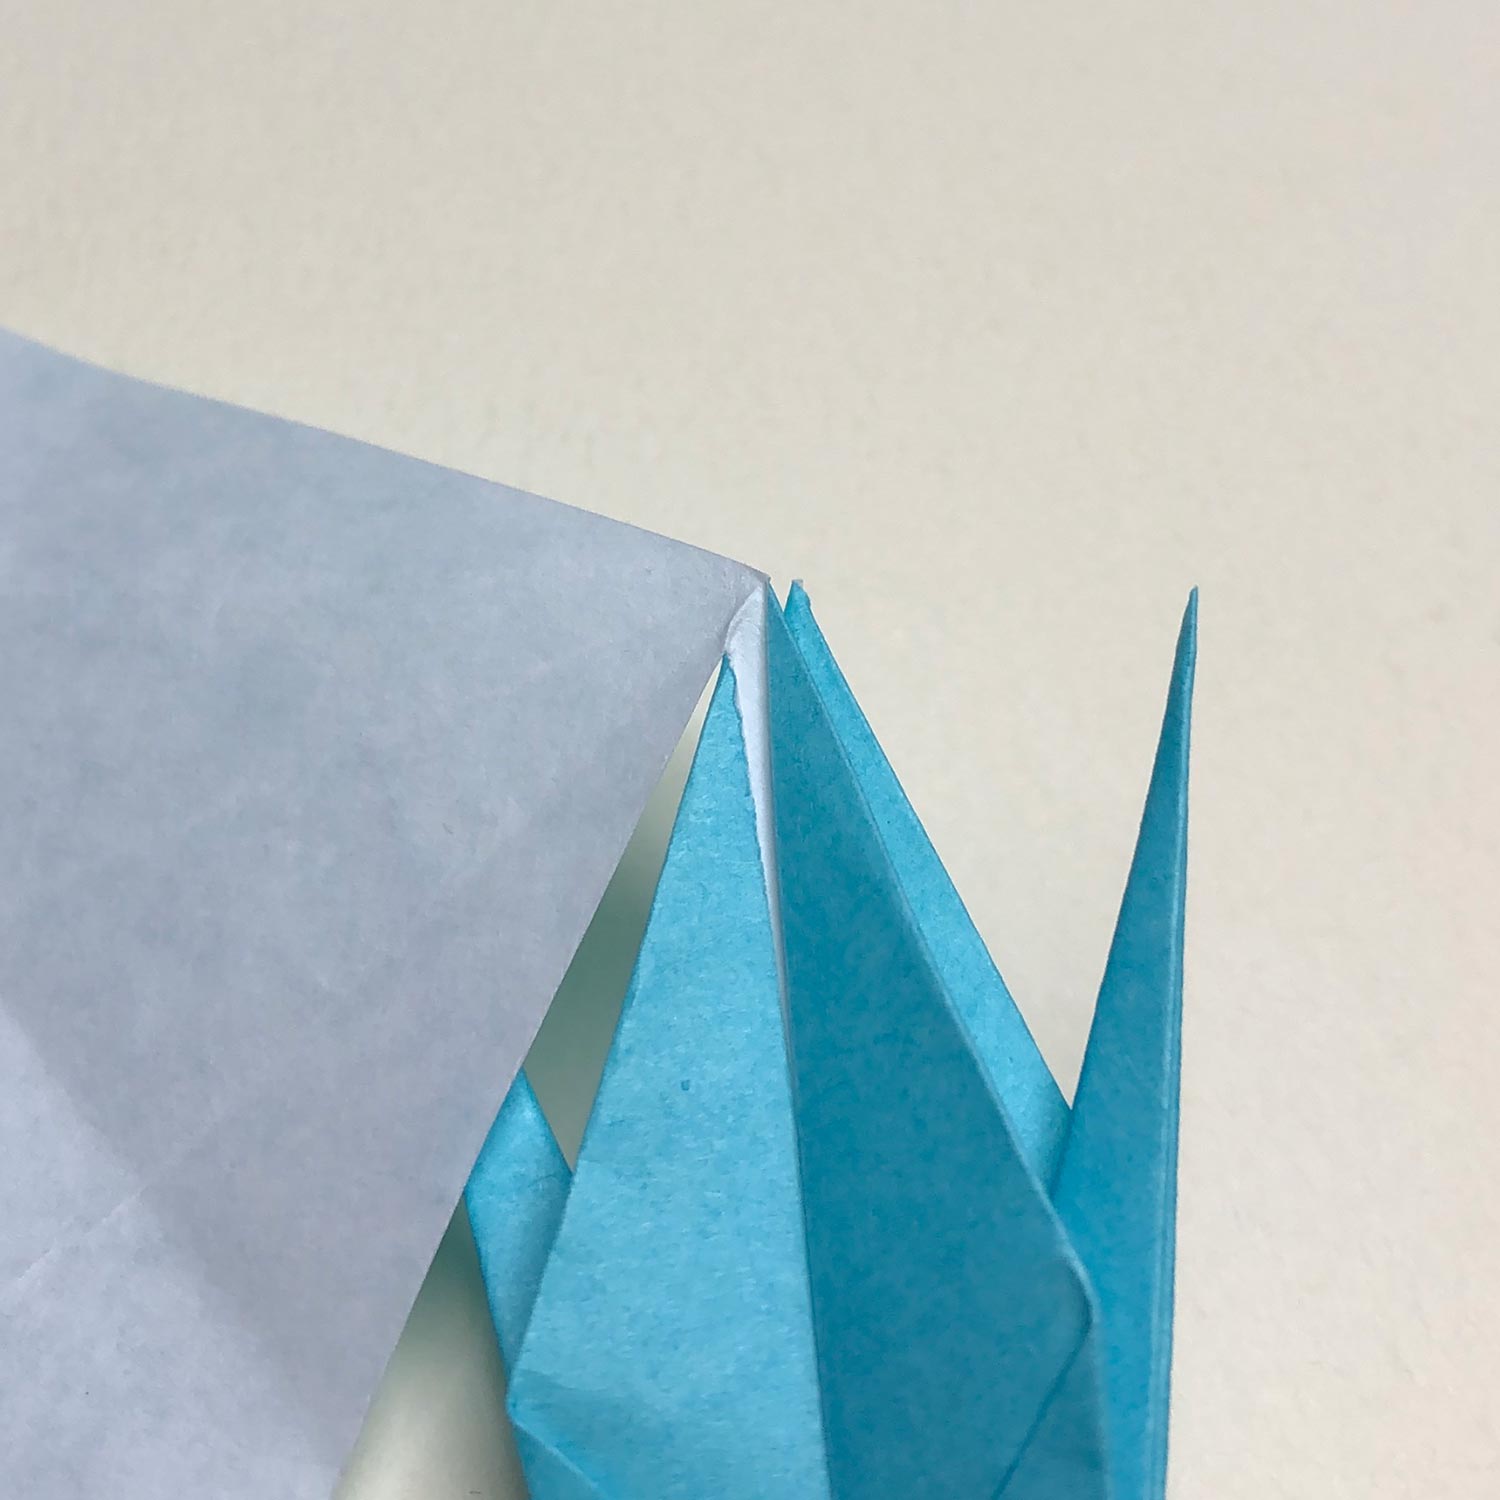
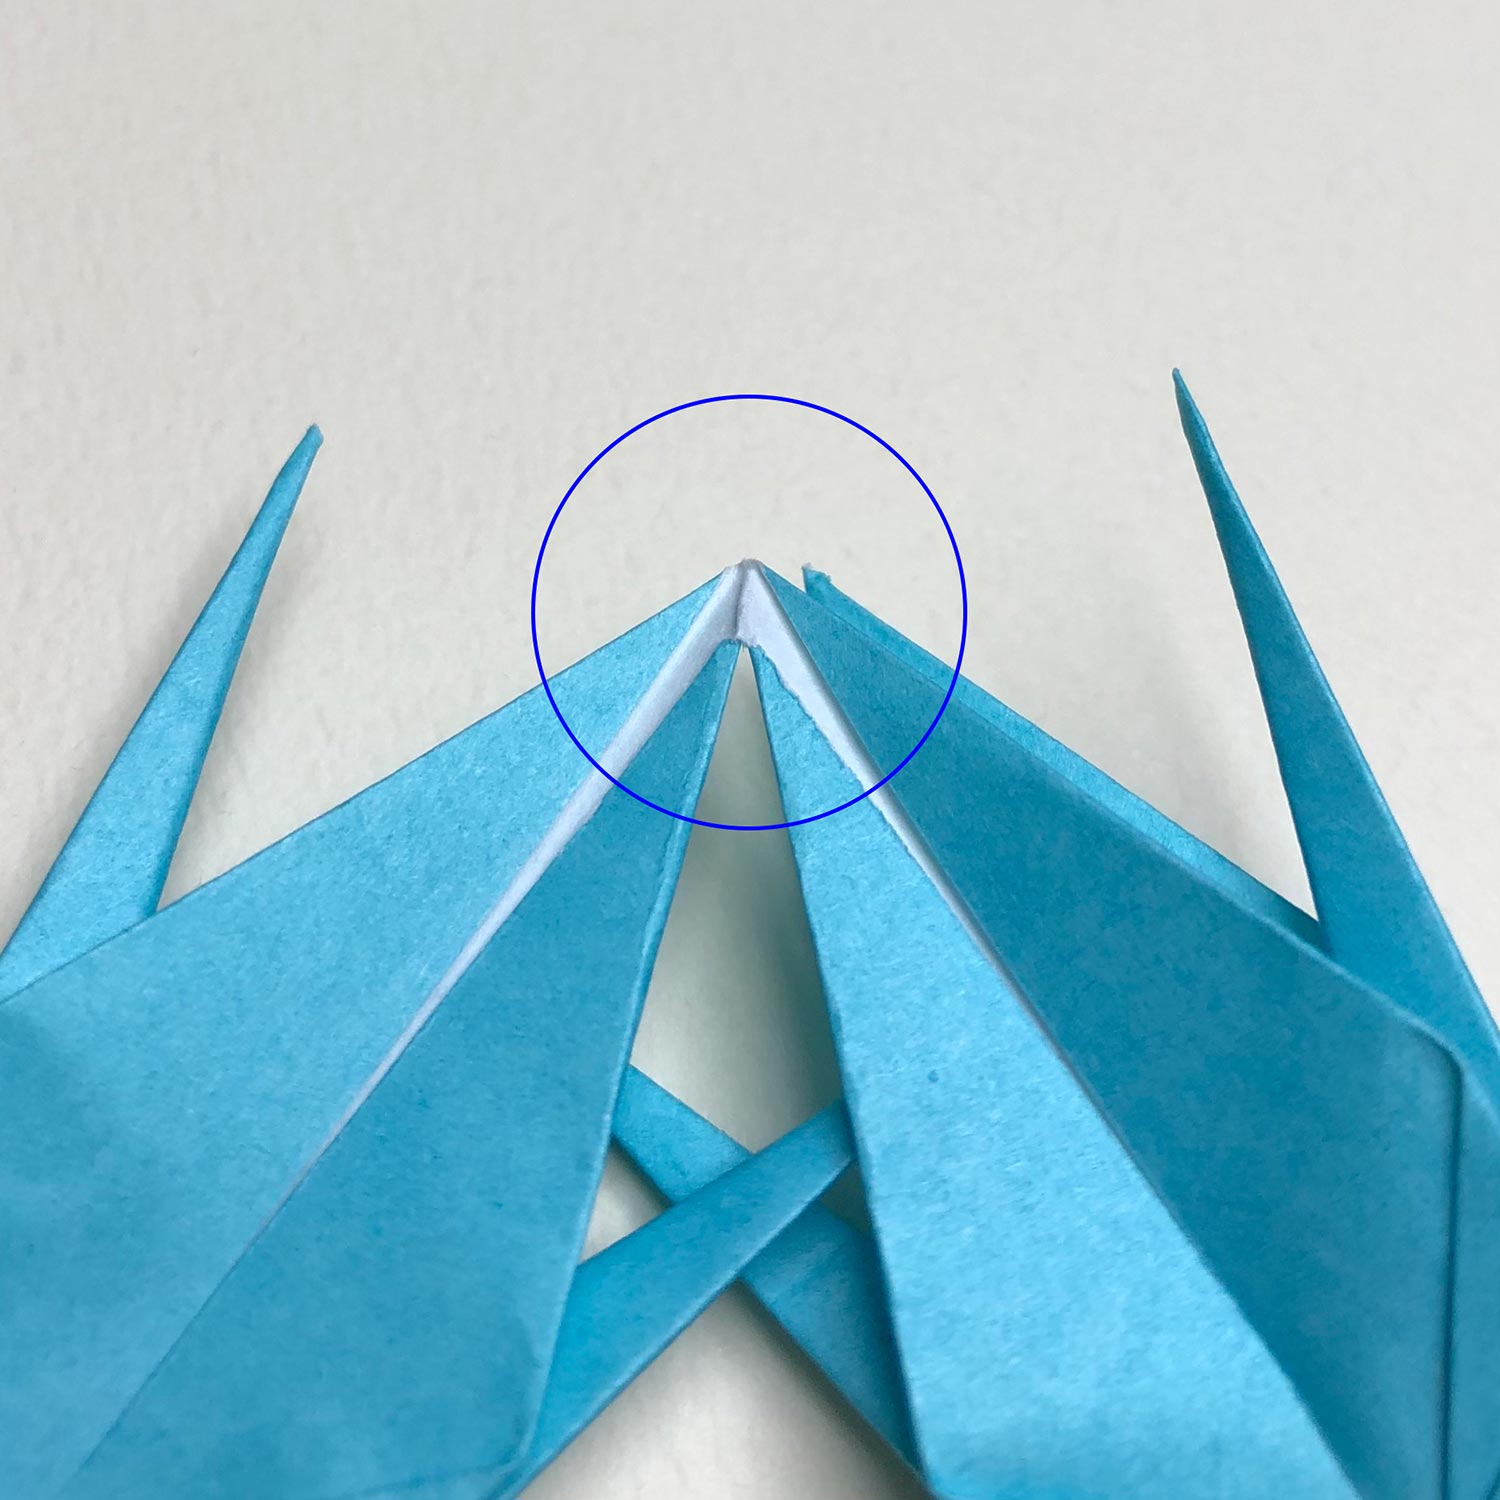
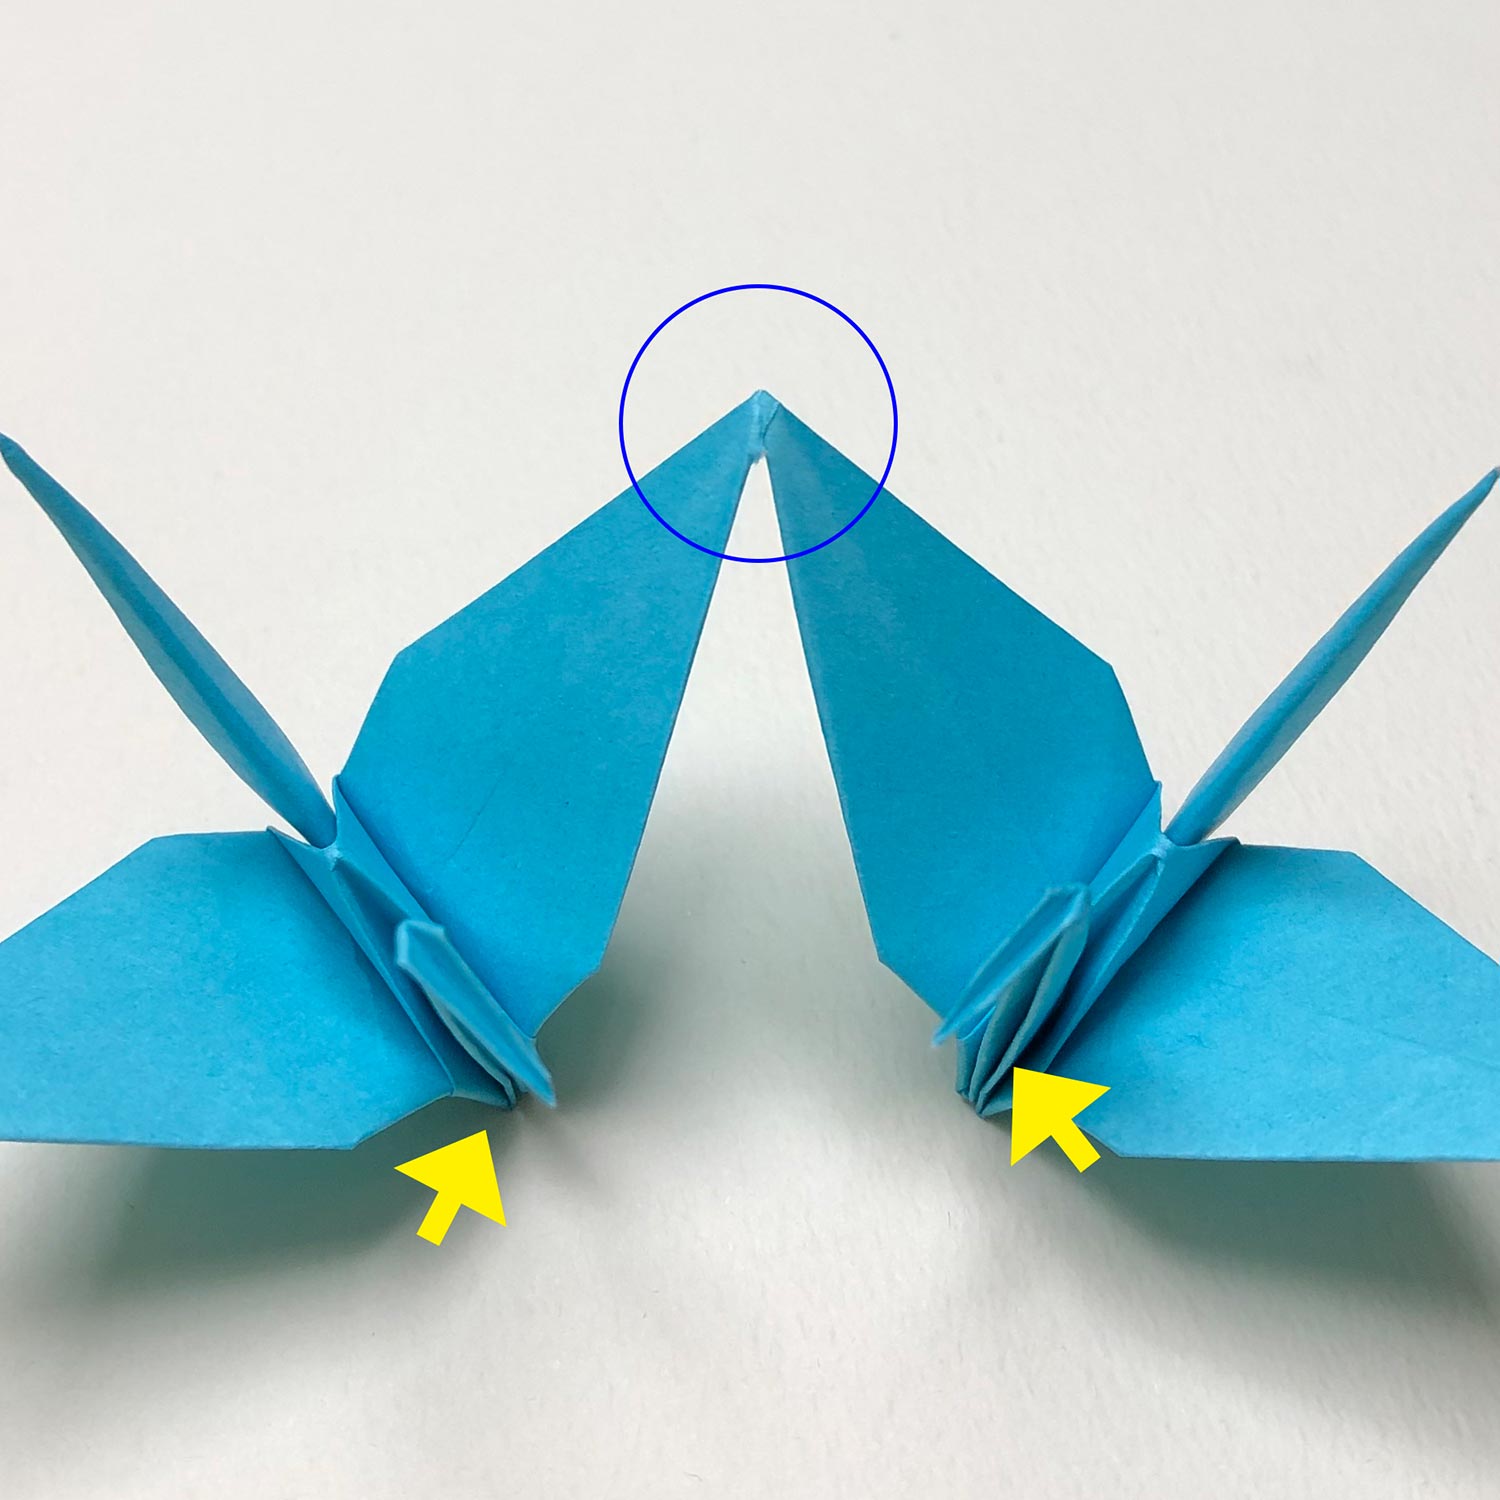
(Picture 2)
This is the enlarged picture.
Space is created like the green arrow because of making a new crease.
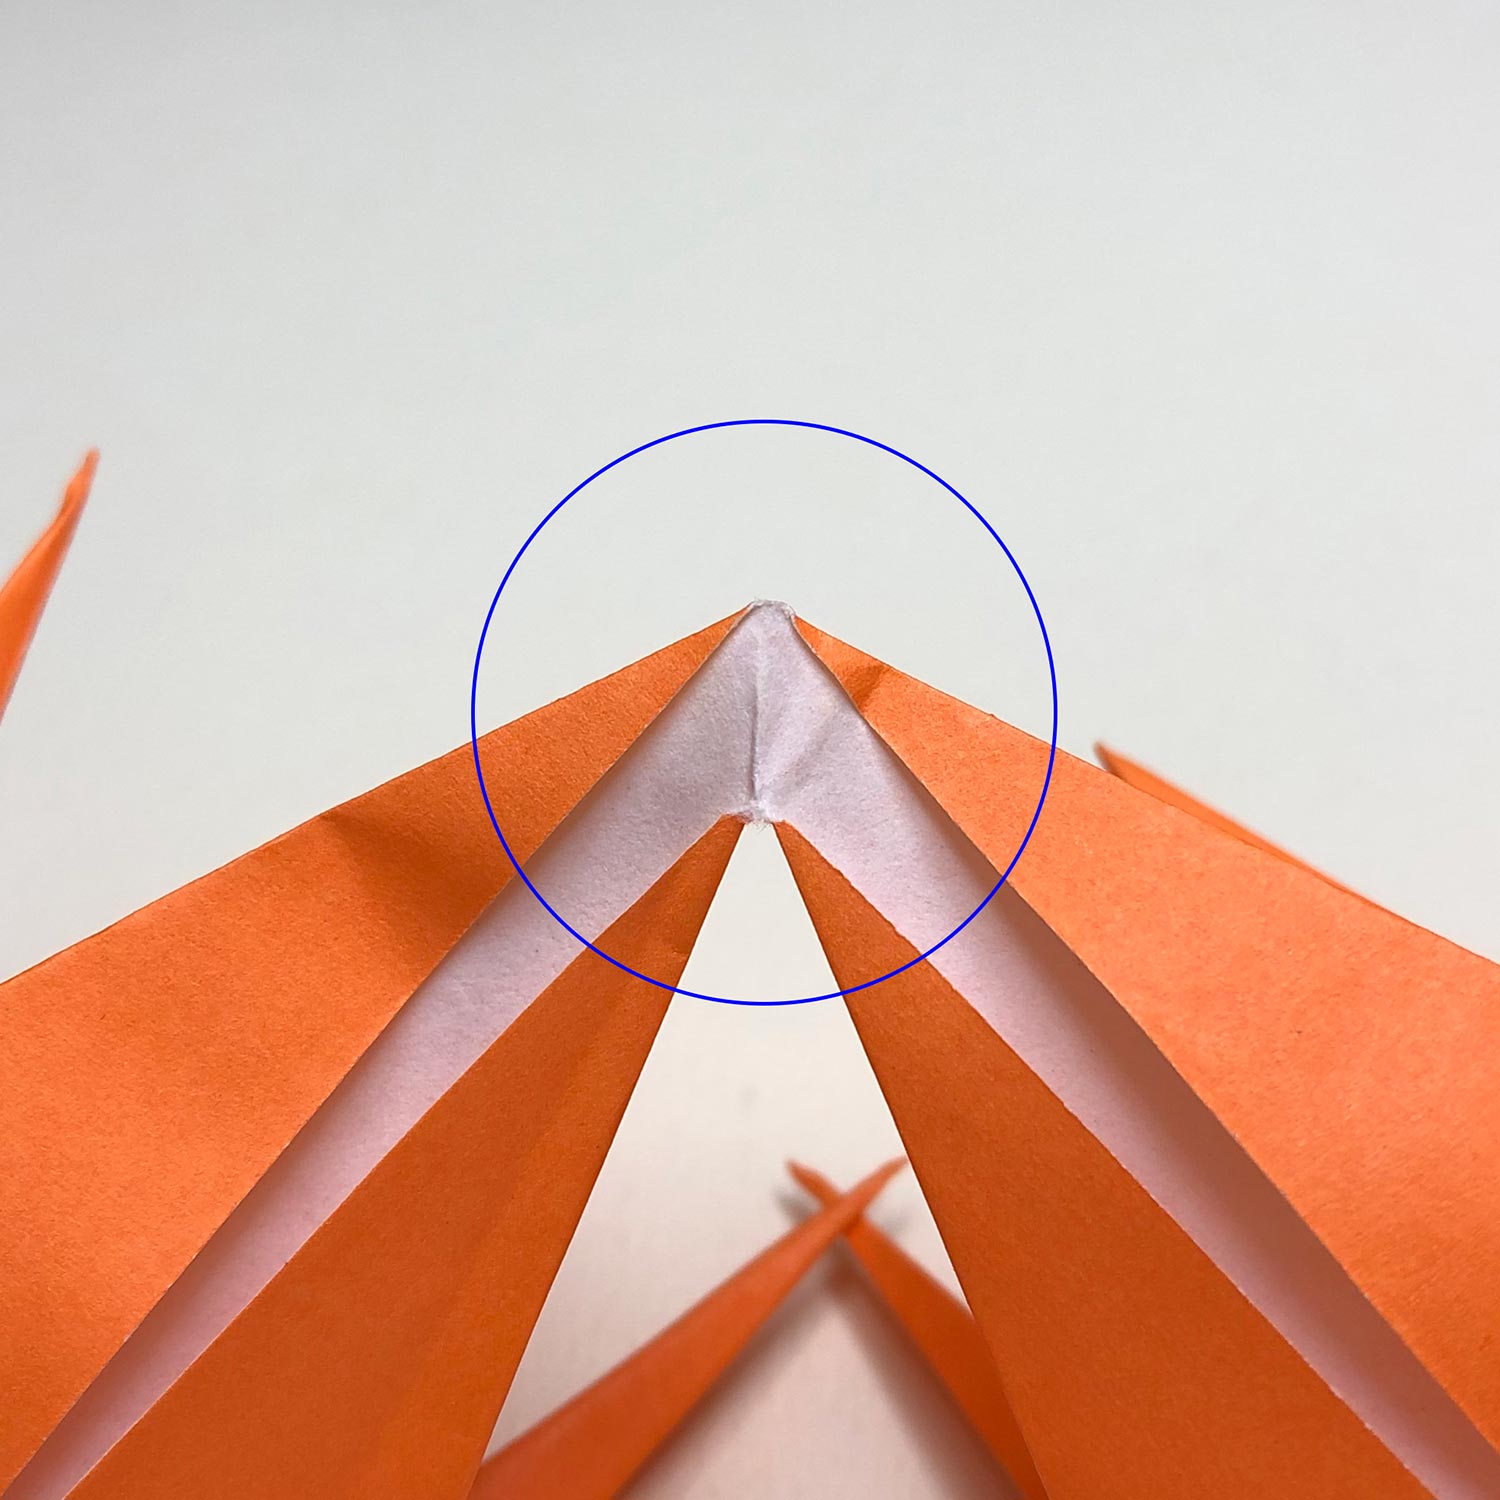
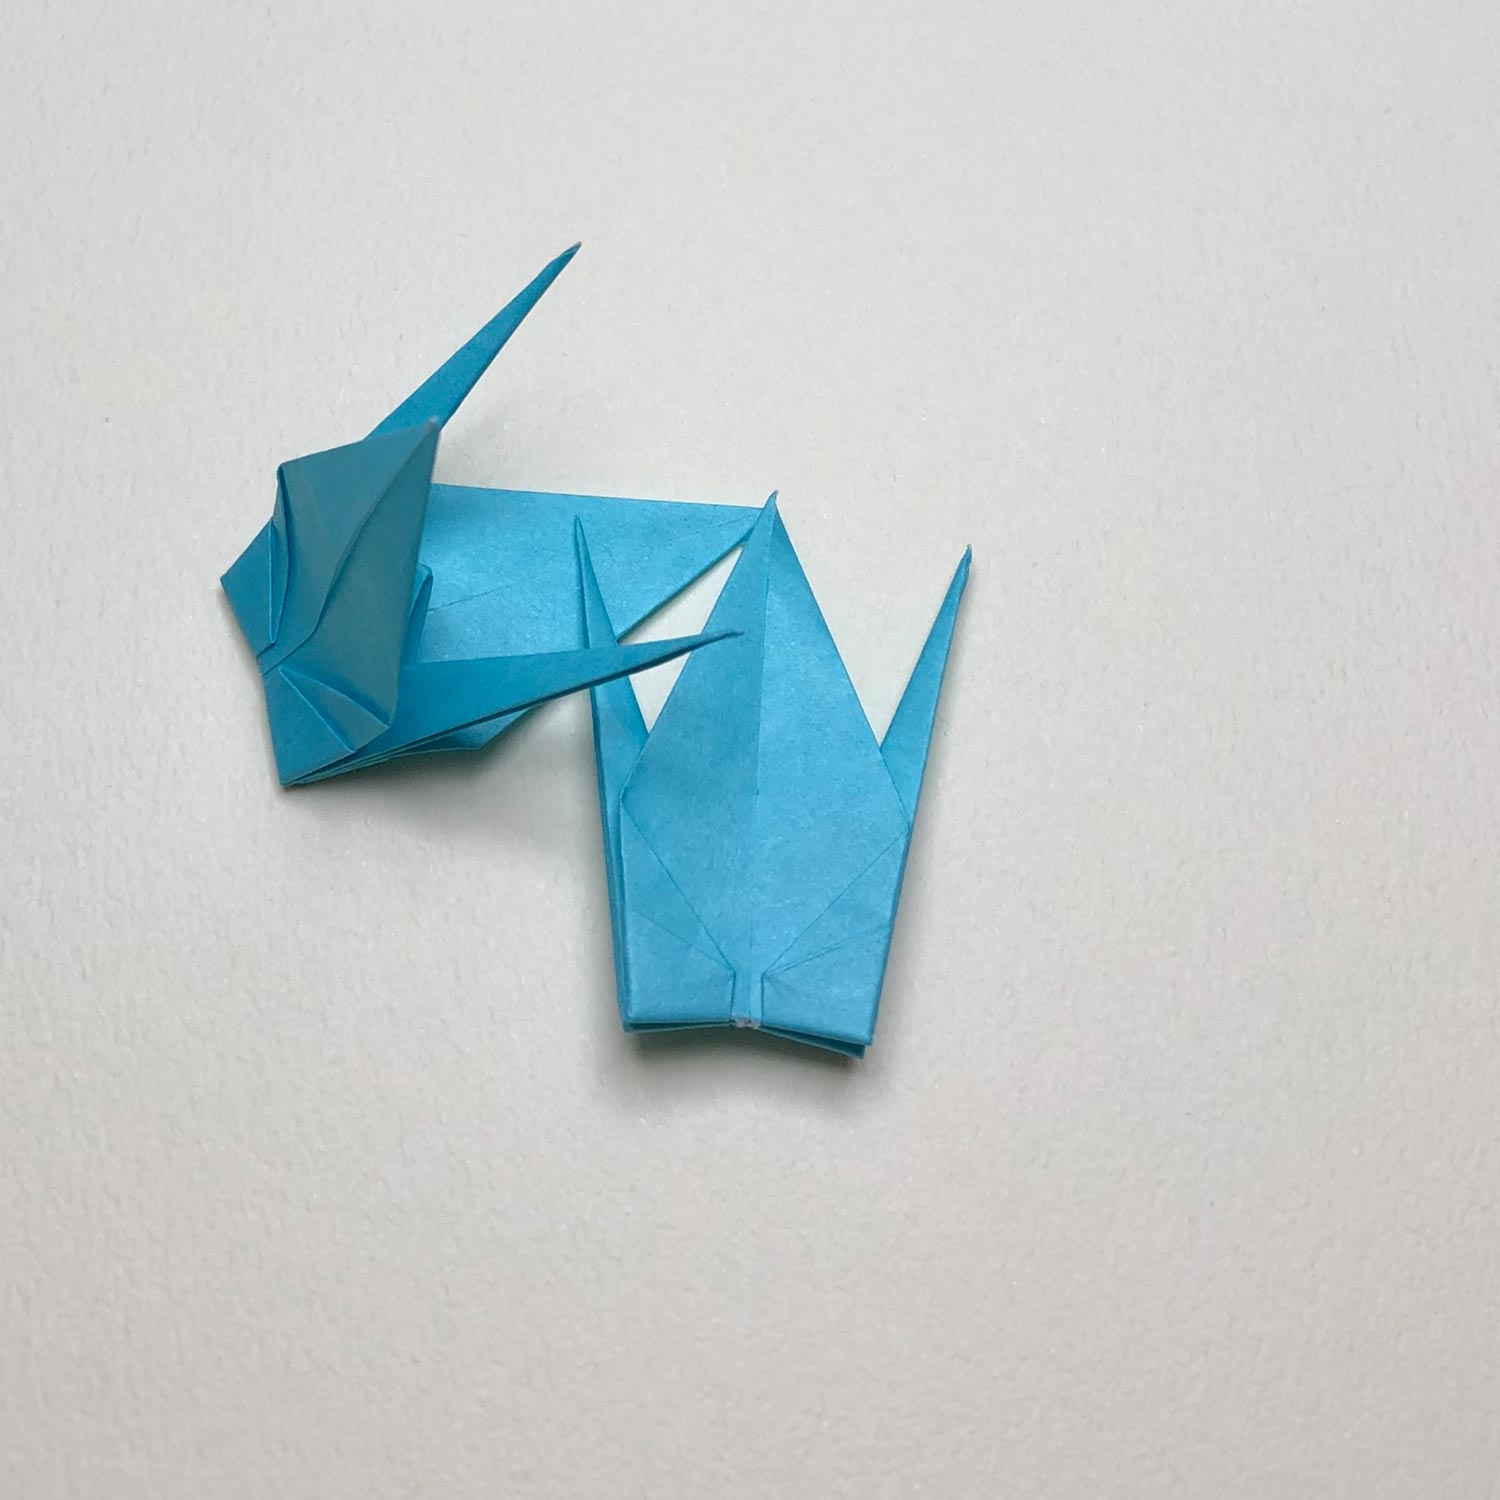
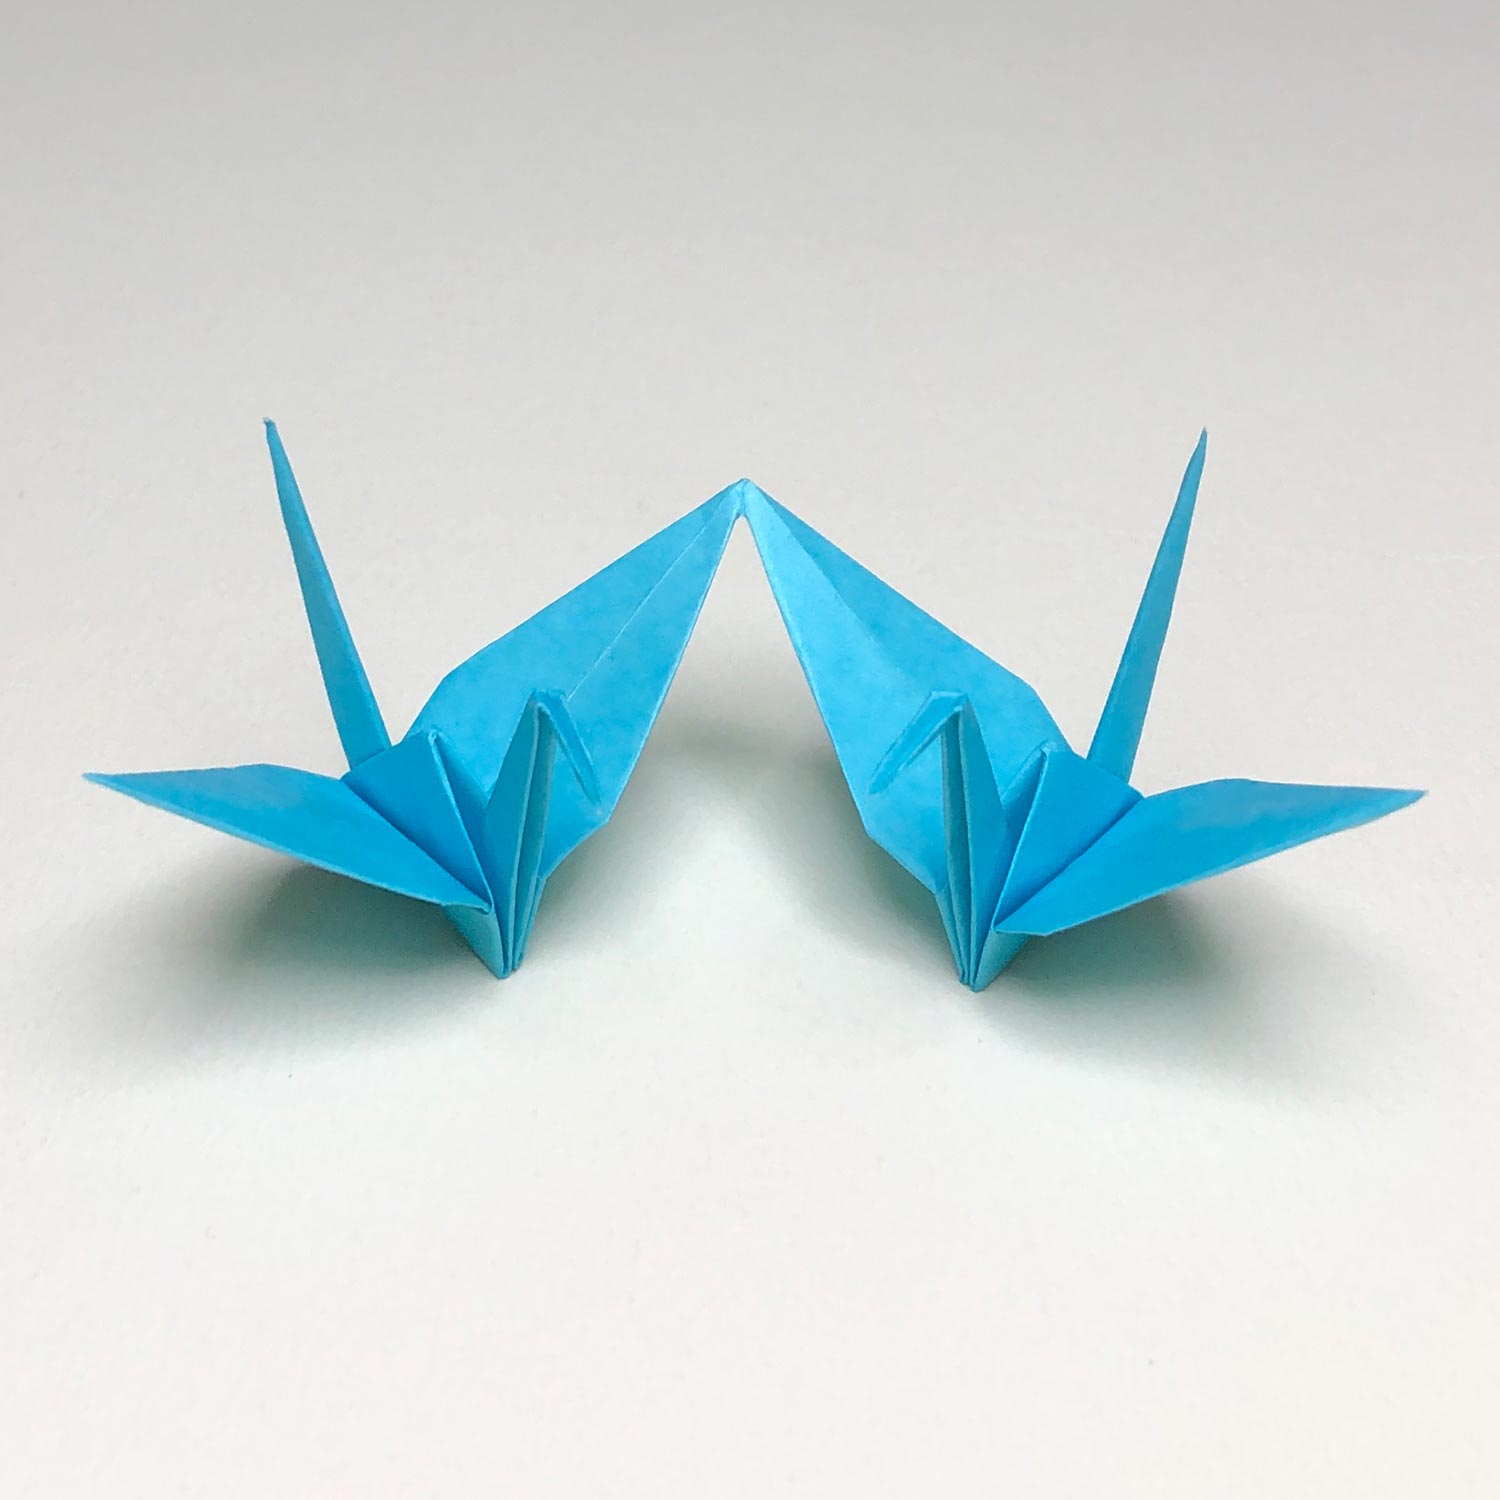
(Picture 3)
After making both cranes, it looks like this picture.
Then look at how to make a new crease!
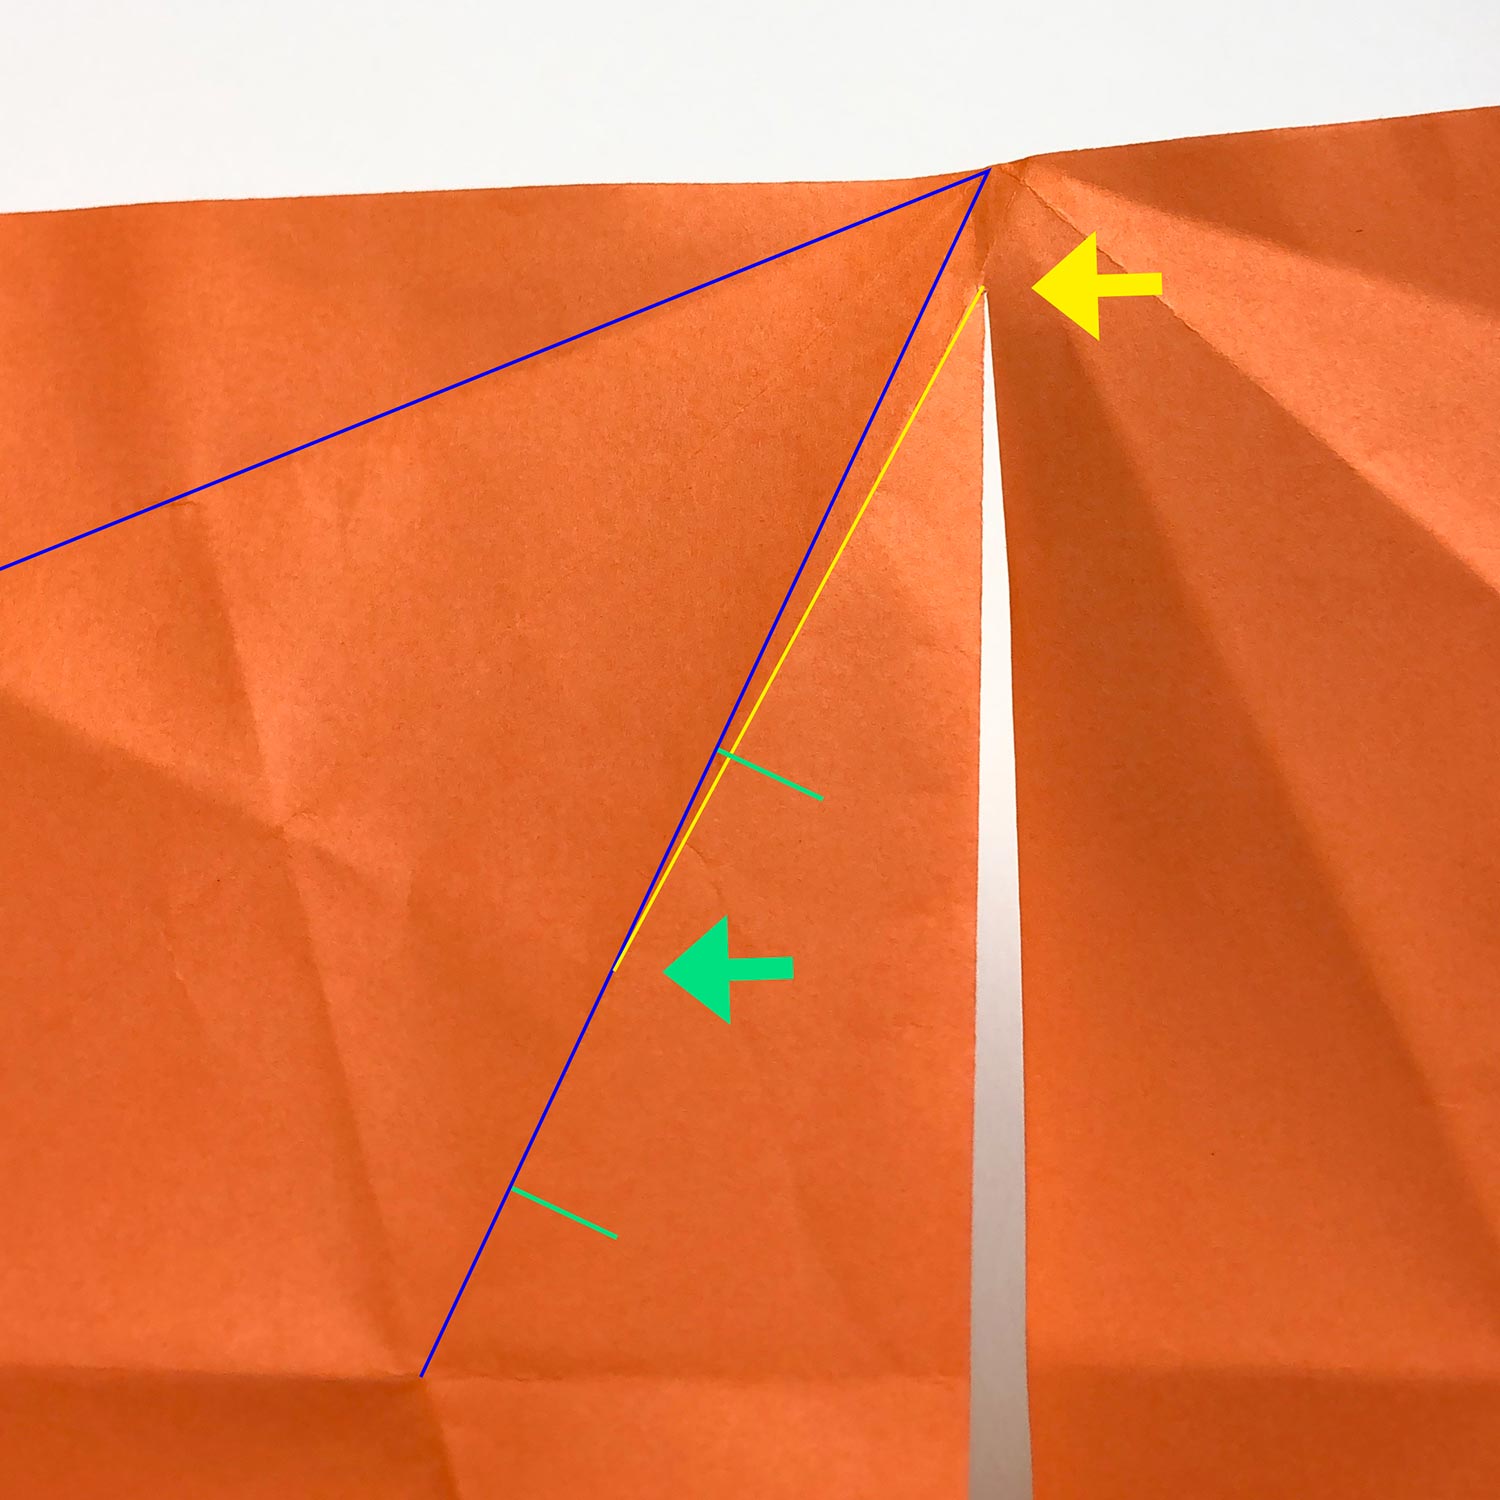
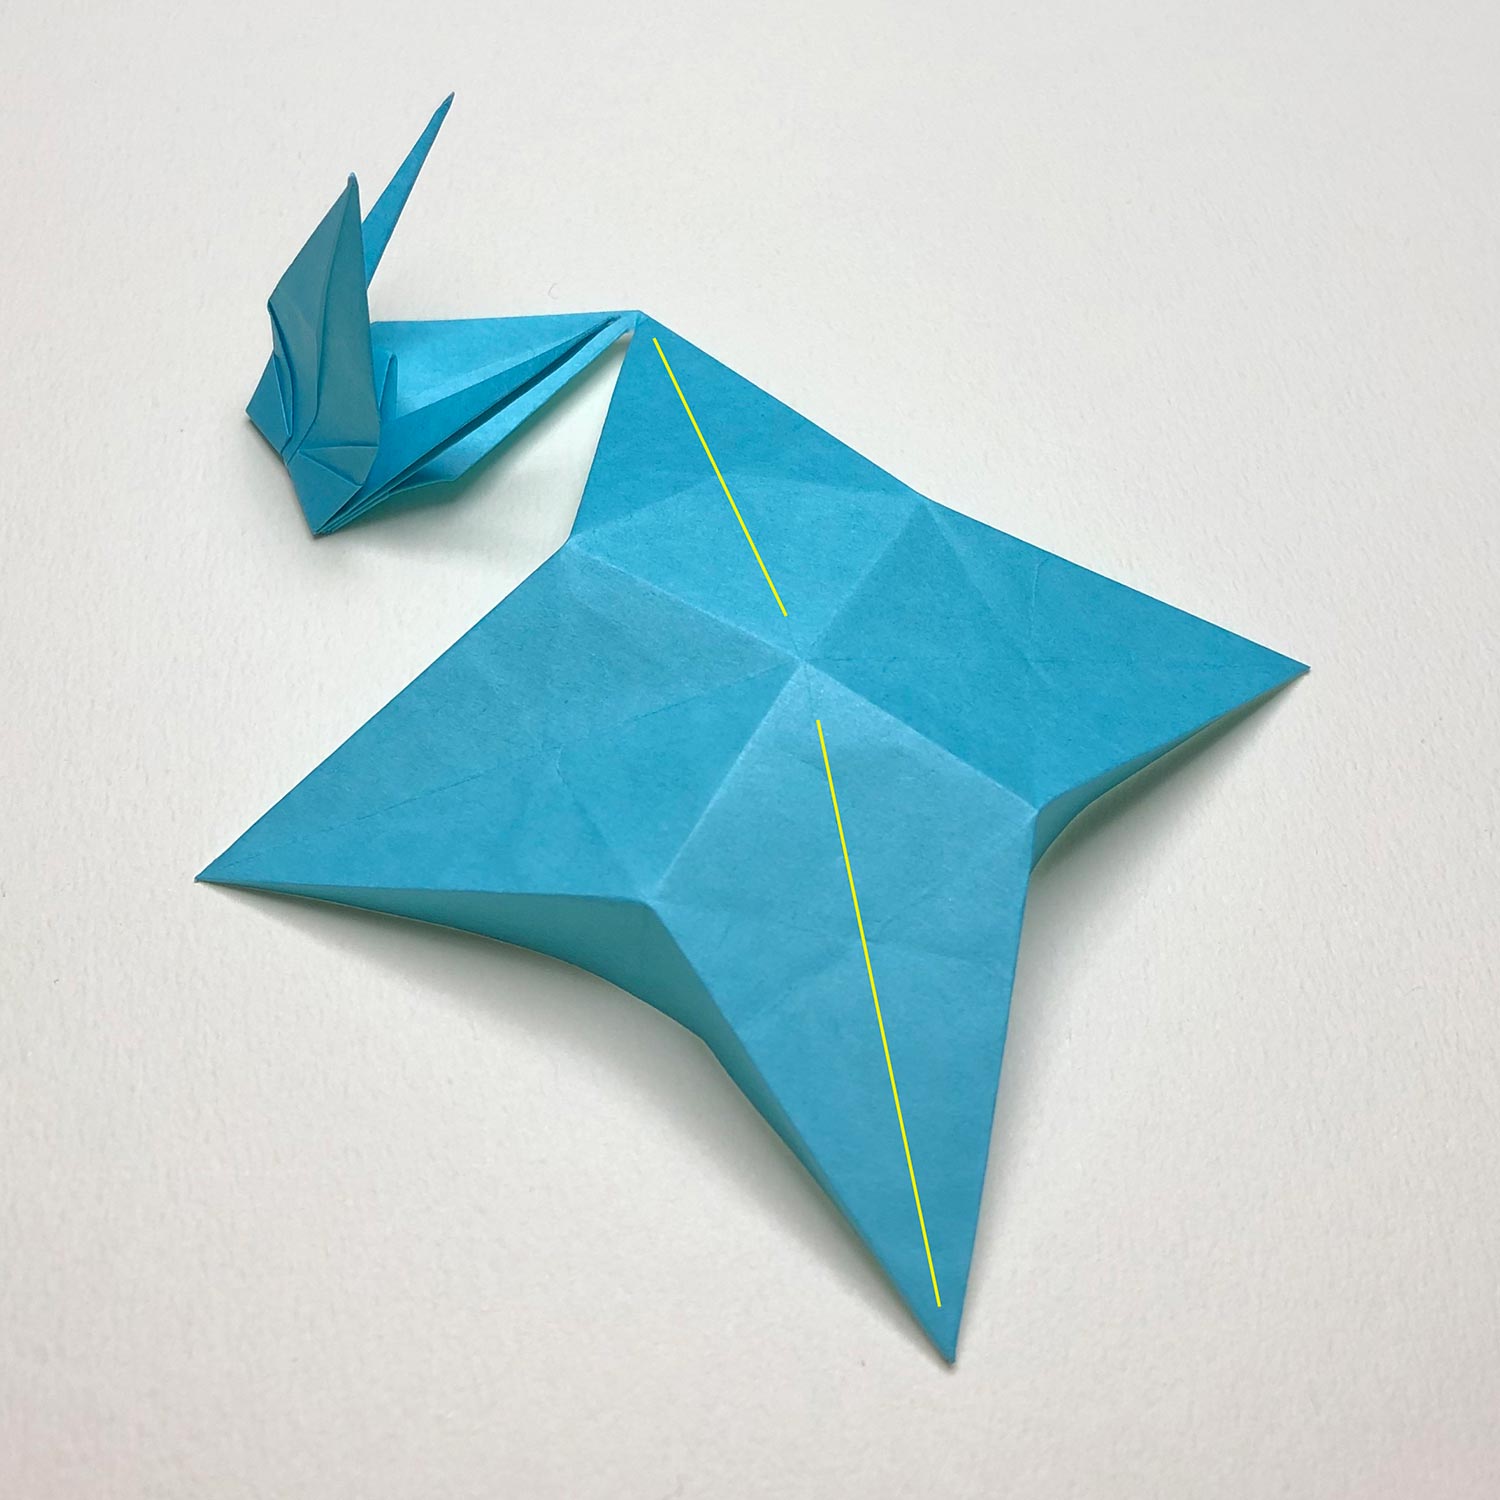
(Explanation 1)
The blue lines have made creases in the former steps.
The yellow arrow is at the bottom of the connecting part.
Put the green arrow anywhere between the green lines.
The yellow line is connected the yellow arrow and the green arrow.
Make a new crease on the yellow line.

(Explanation 2)
The dotted lines have made creases in the former step.
Make mountain-folds on the dotted lines.

(Explanation 3)
Make mountain-folds like this picture.
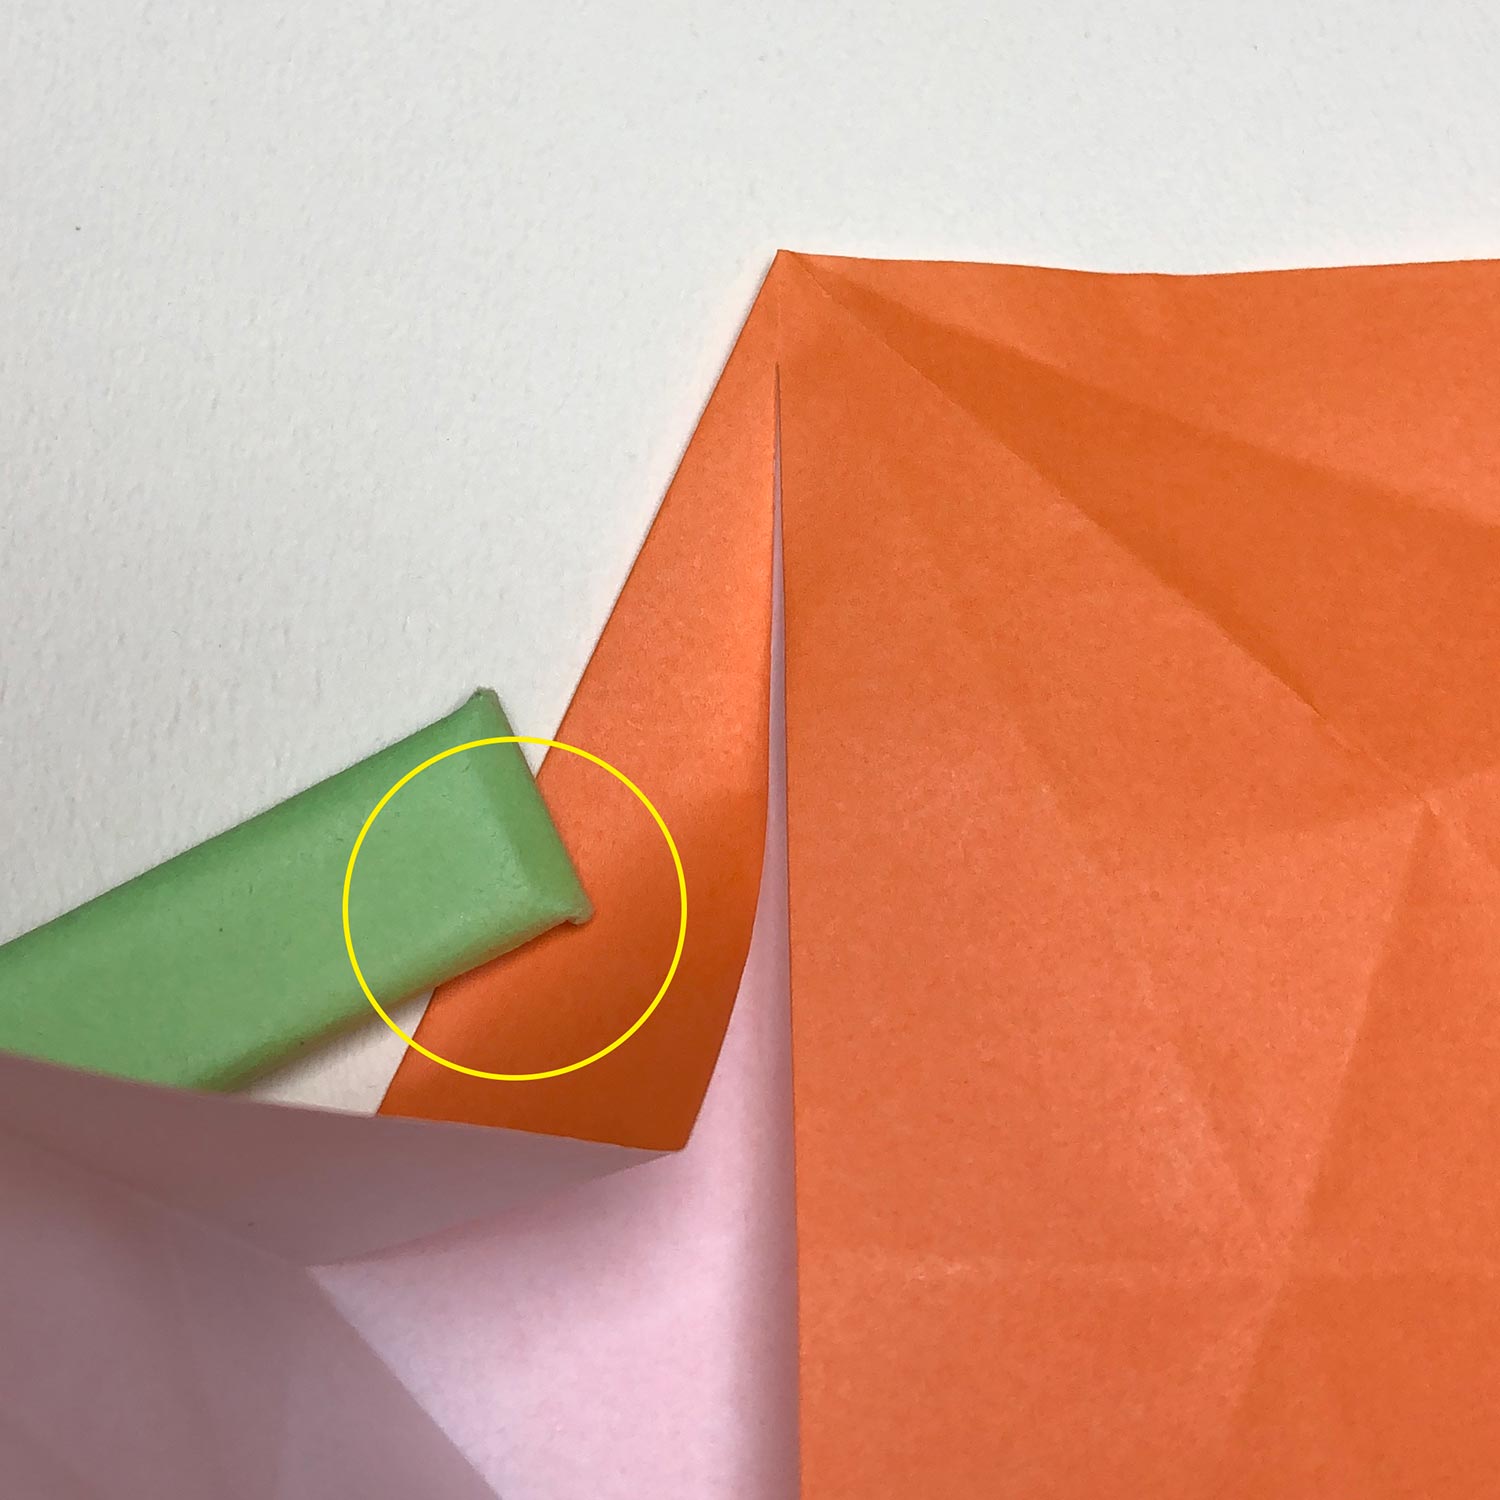
(Explanation 4)
Proceed with the next step while pinching both sides at the yellow circle.
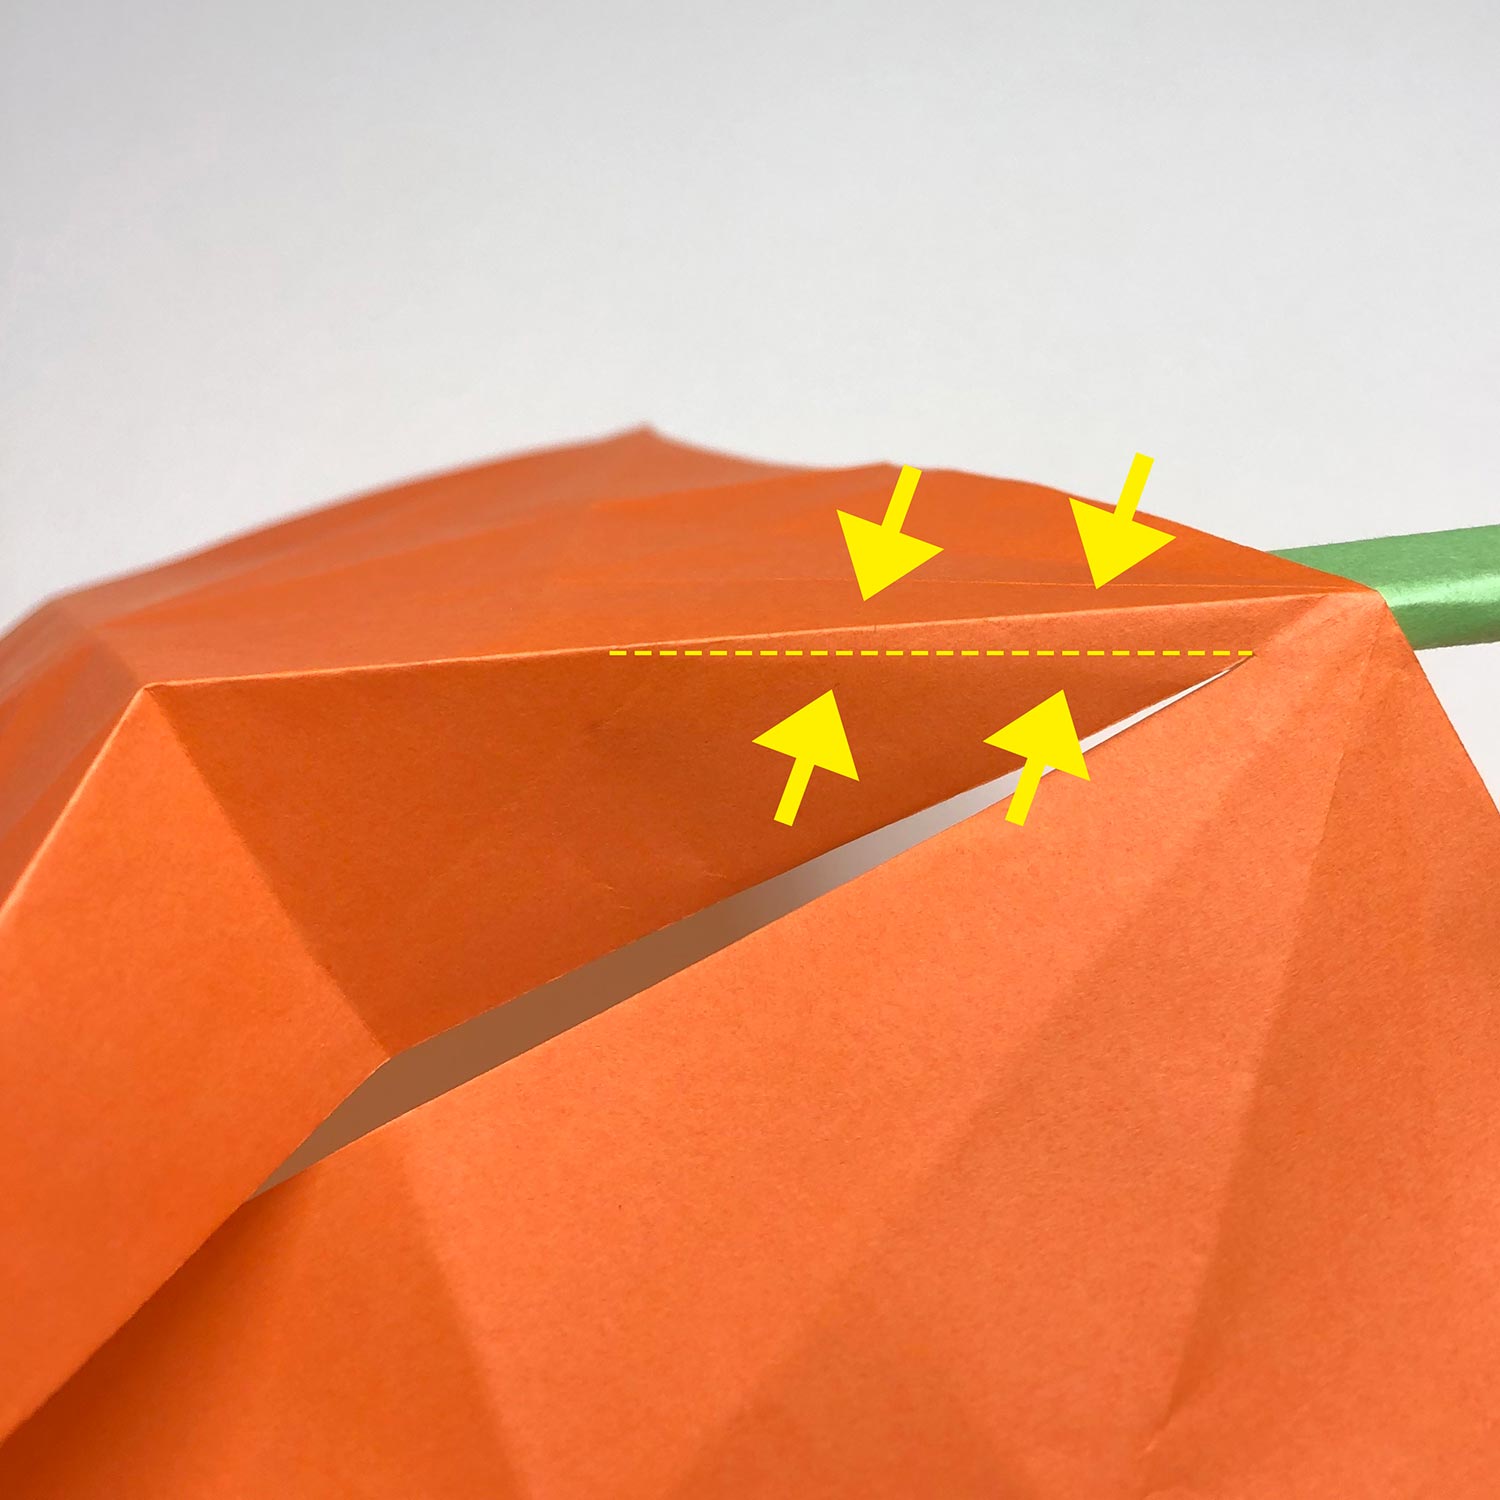
(Explanation 5)
Then pinch in the direction of the arrows and shift the paper in order to make a new crease like the dotted line.

(Explanation 6)
After making a new crease, it looks like this picture.
Make the new crease adjusting to the end of the connecting part.
Then make a star-shape using the other six creases that you have made as it is.
After that, make a bird-base.
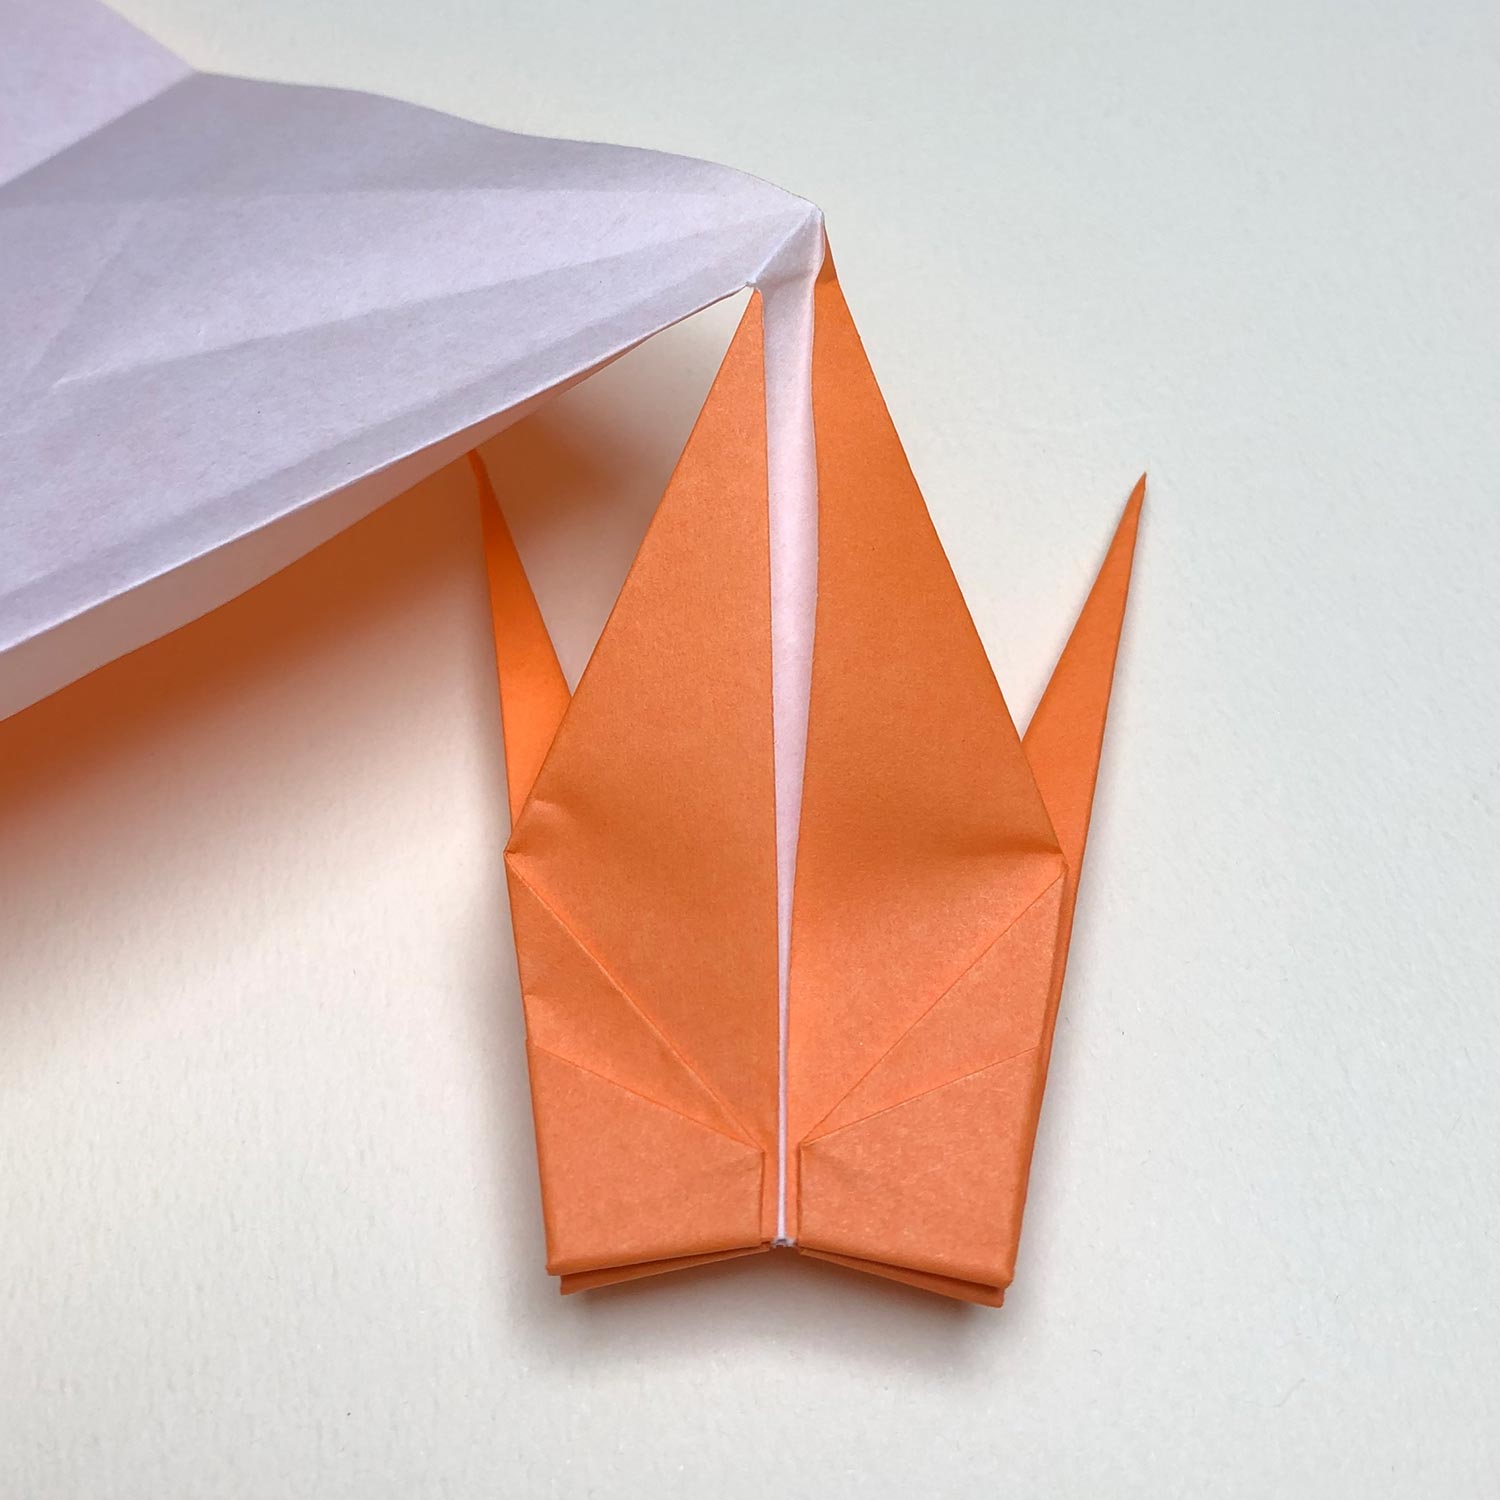
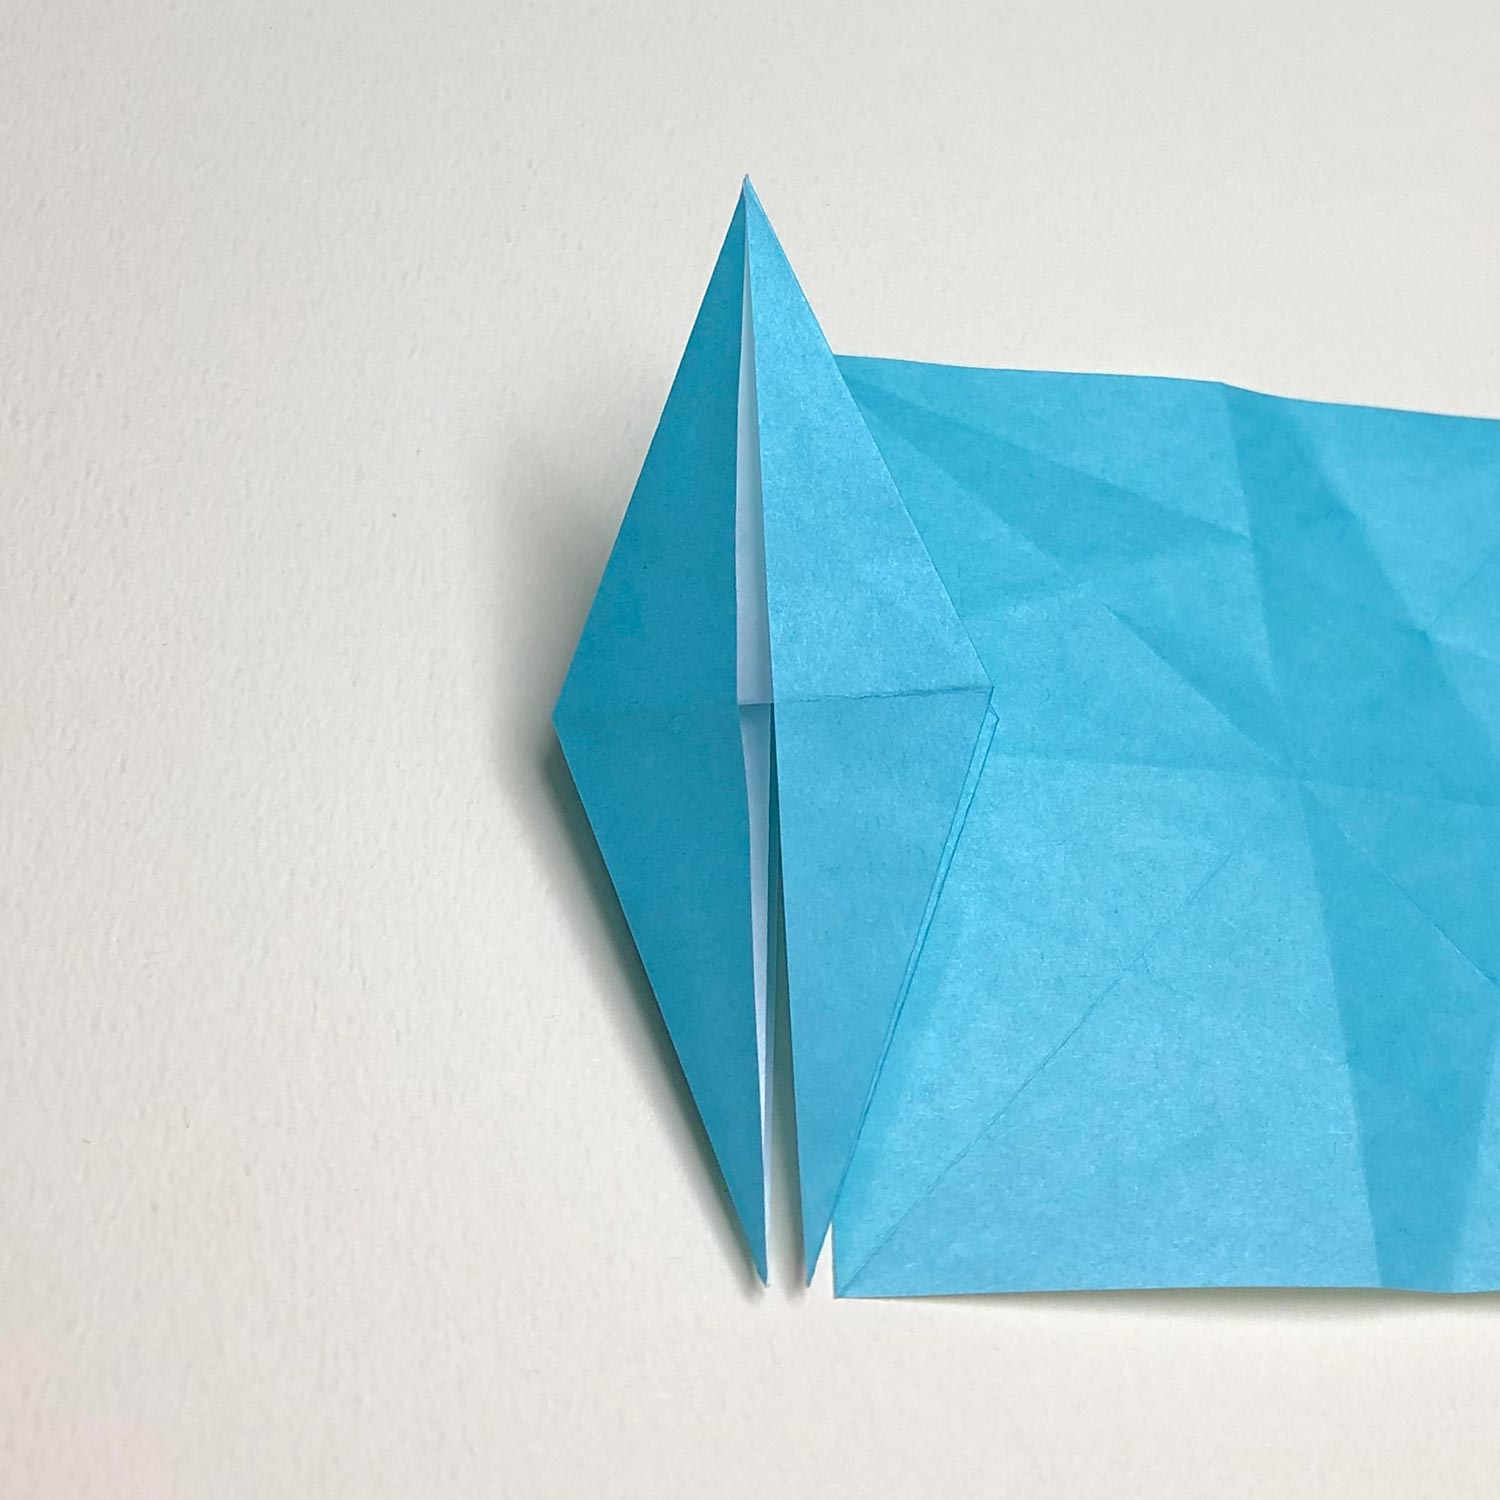
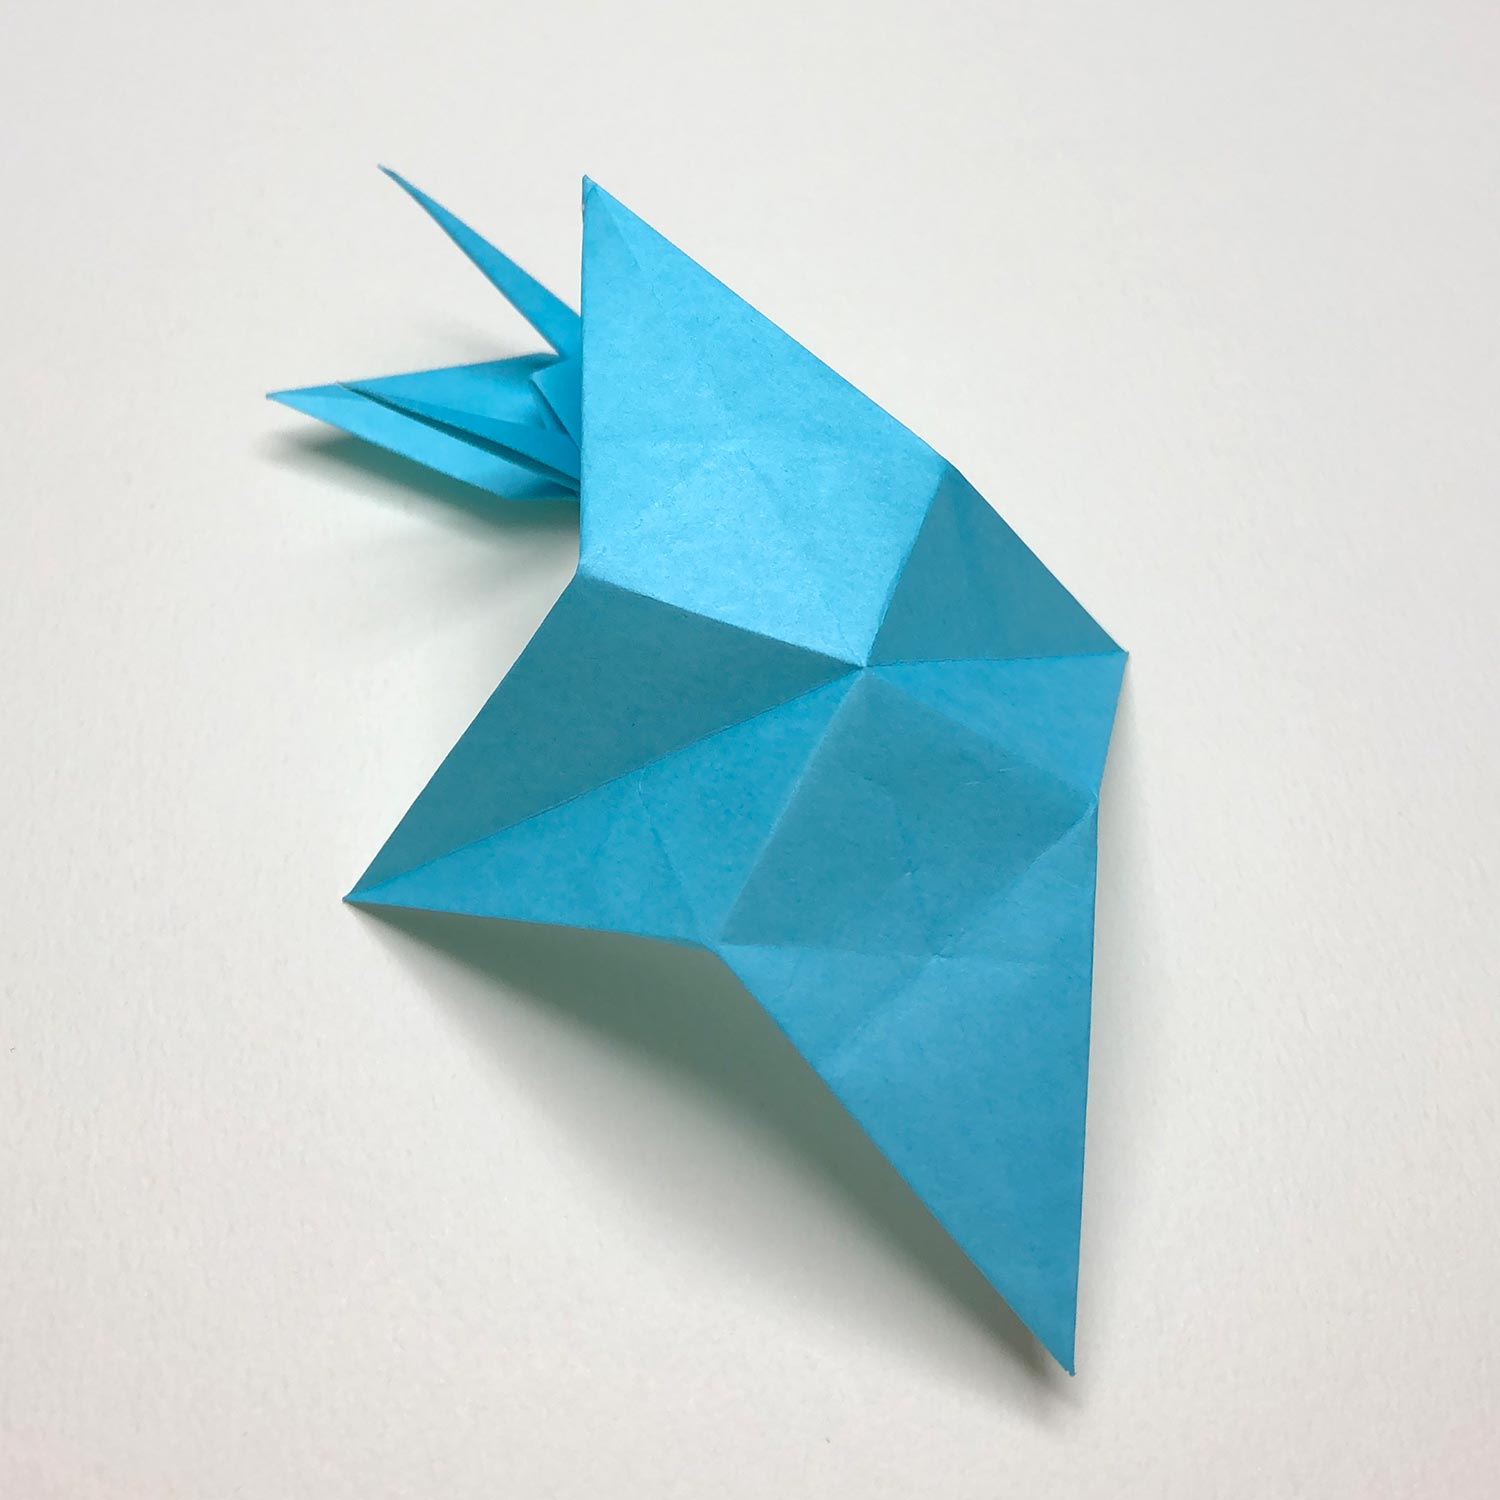
(Explanation 7)
After making a bird-base, it looks like this picture.
Then make a crane.
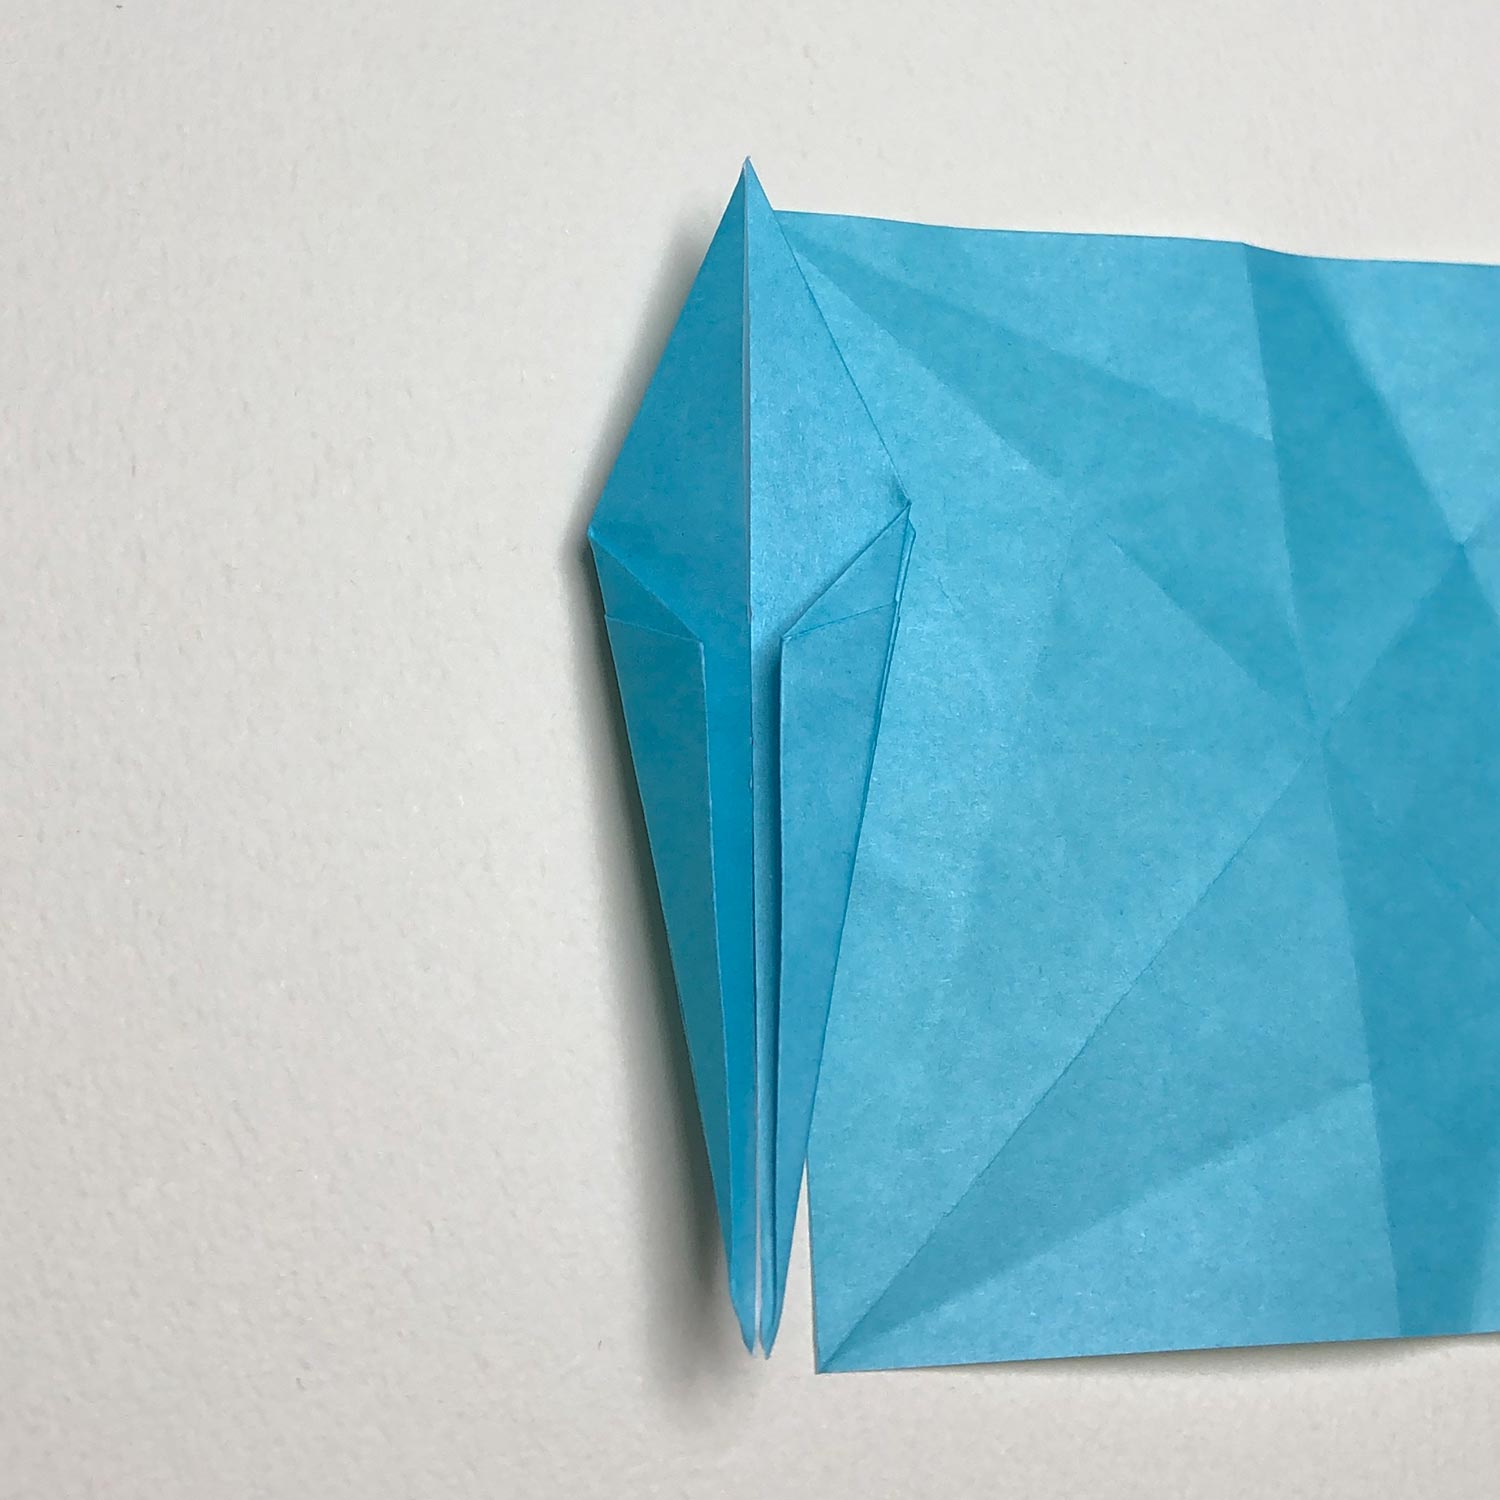
(Explanation 8)
After making a crane, it looks like this picture.
Then make Temusubi!
(1)
Make a star-shape like this picture.
Then make a bird-base so that the yellow lines are changed to wings.
(2)
Make a new crease like the dotted line.
(3)
After making a new crease, make a bird-base.
(4)
The bird-base is finished.
(5)
Fold each of the head/tail to the center.
(6)
Raise them like this picture.
The first crane is finished.
(7)
The crane is connected to the other square like this picture.

(8)
In order to get easier to fold the other crane, spread the wings of the completed crane.
(9)
Then fold the other square.
Make a star-shape like this picture and make a new crease near a connecting part as well.
Then make a bird-base so that the yellow lines are changed to wings.
(10)
This picture is halfway through.

(11)
The bird-base is finished.
(12)
Fold each of the head/tail to the center.
(13)
Raise them like this picture.
The two cranes are finished.
(14)
The cranes are connected to each other like this picture.
(15)
Spread wings and make each beak so that cranes face inwards.
Temusubi is complete!
When you post pictures of your completed Renzuru works on social media,
please write my website’s name – “Tsuru-no-Goshiki” or paste the link!
On Instagram, if you write “@ritsu_cranes”,
I will be able to see your works and glad!😀
If you liked this Renzuru model,
please click the button below and share this pages on Twitter!