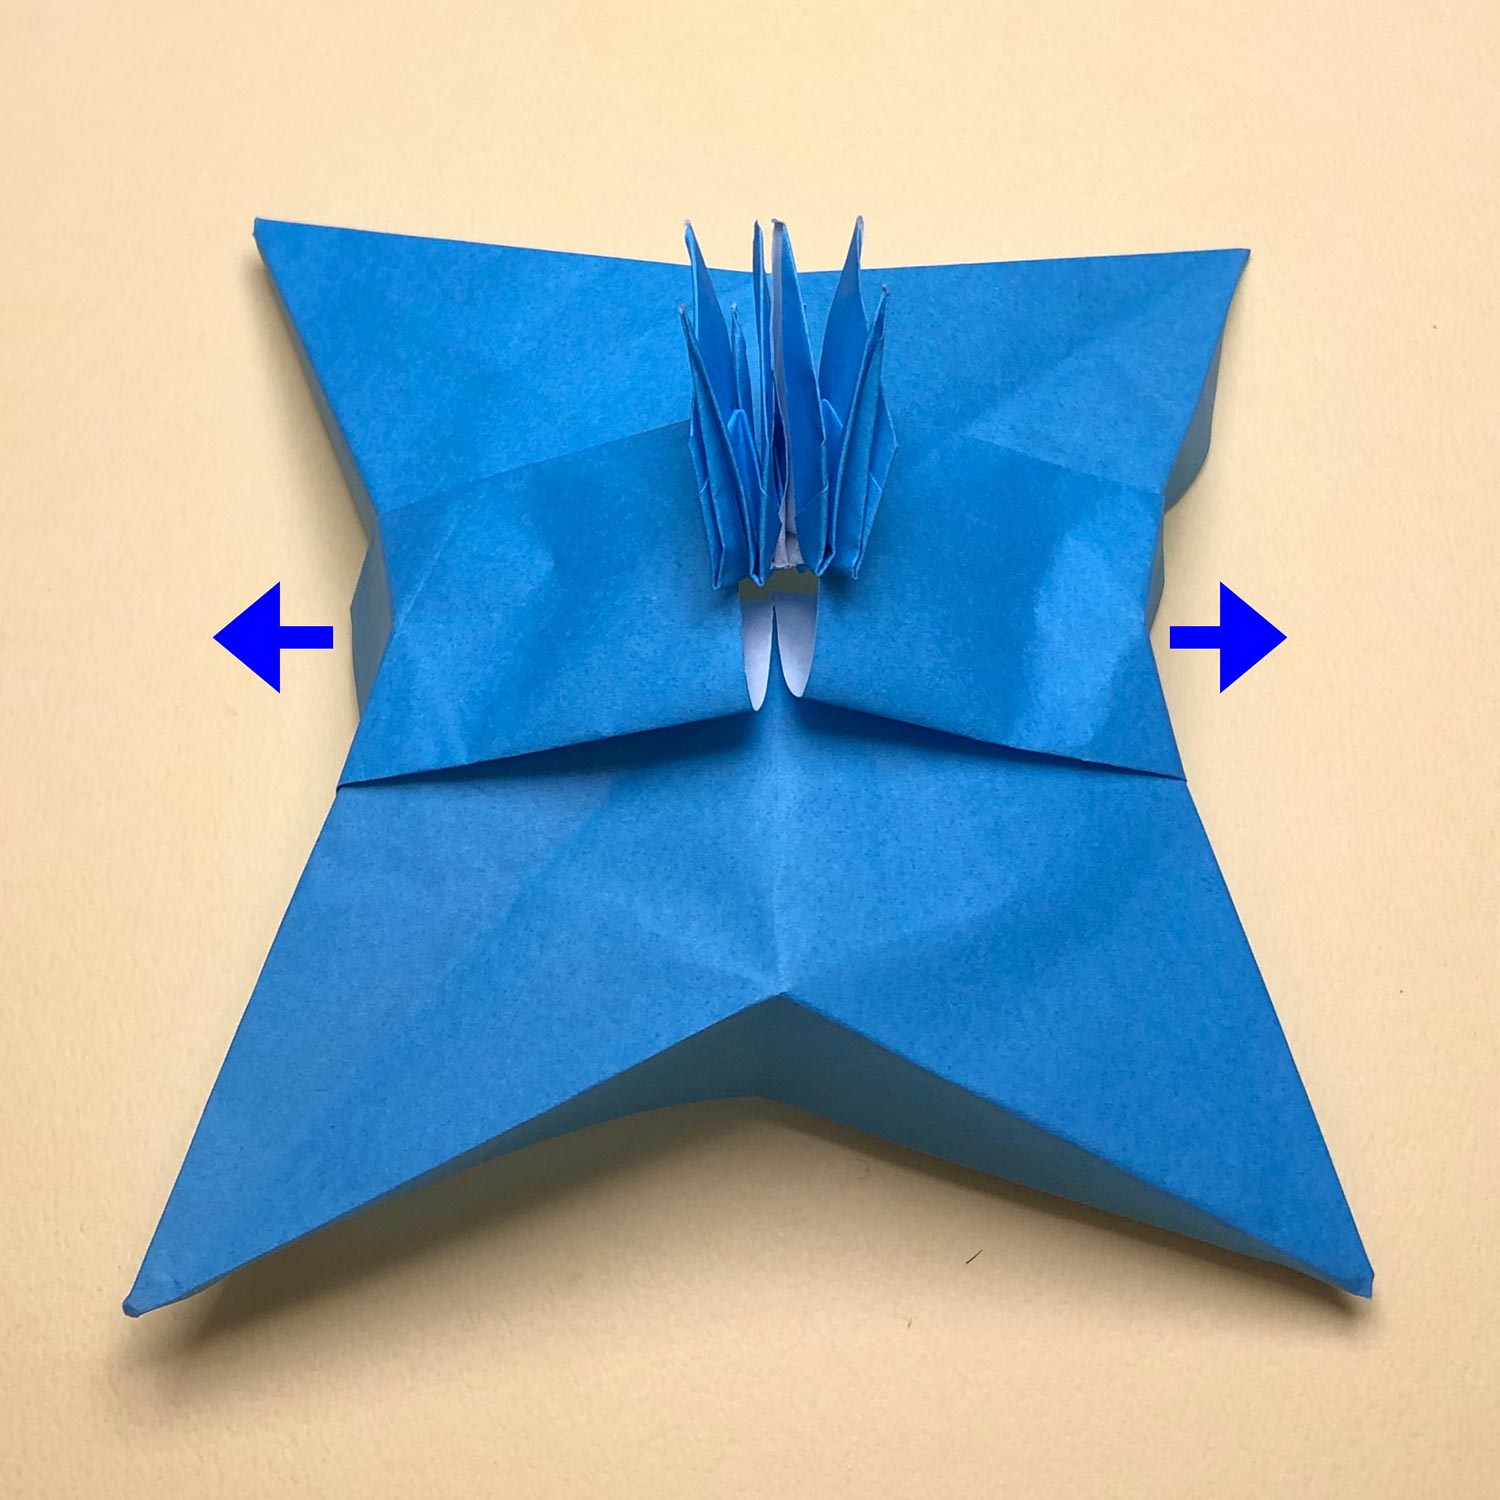
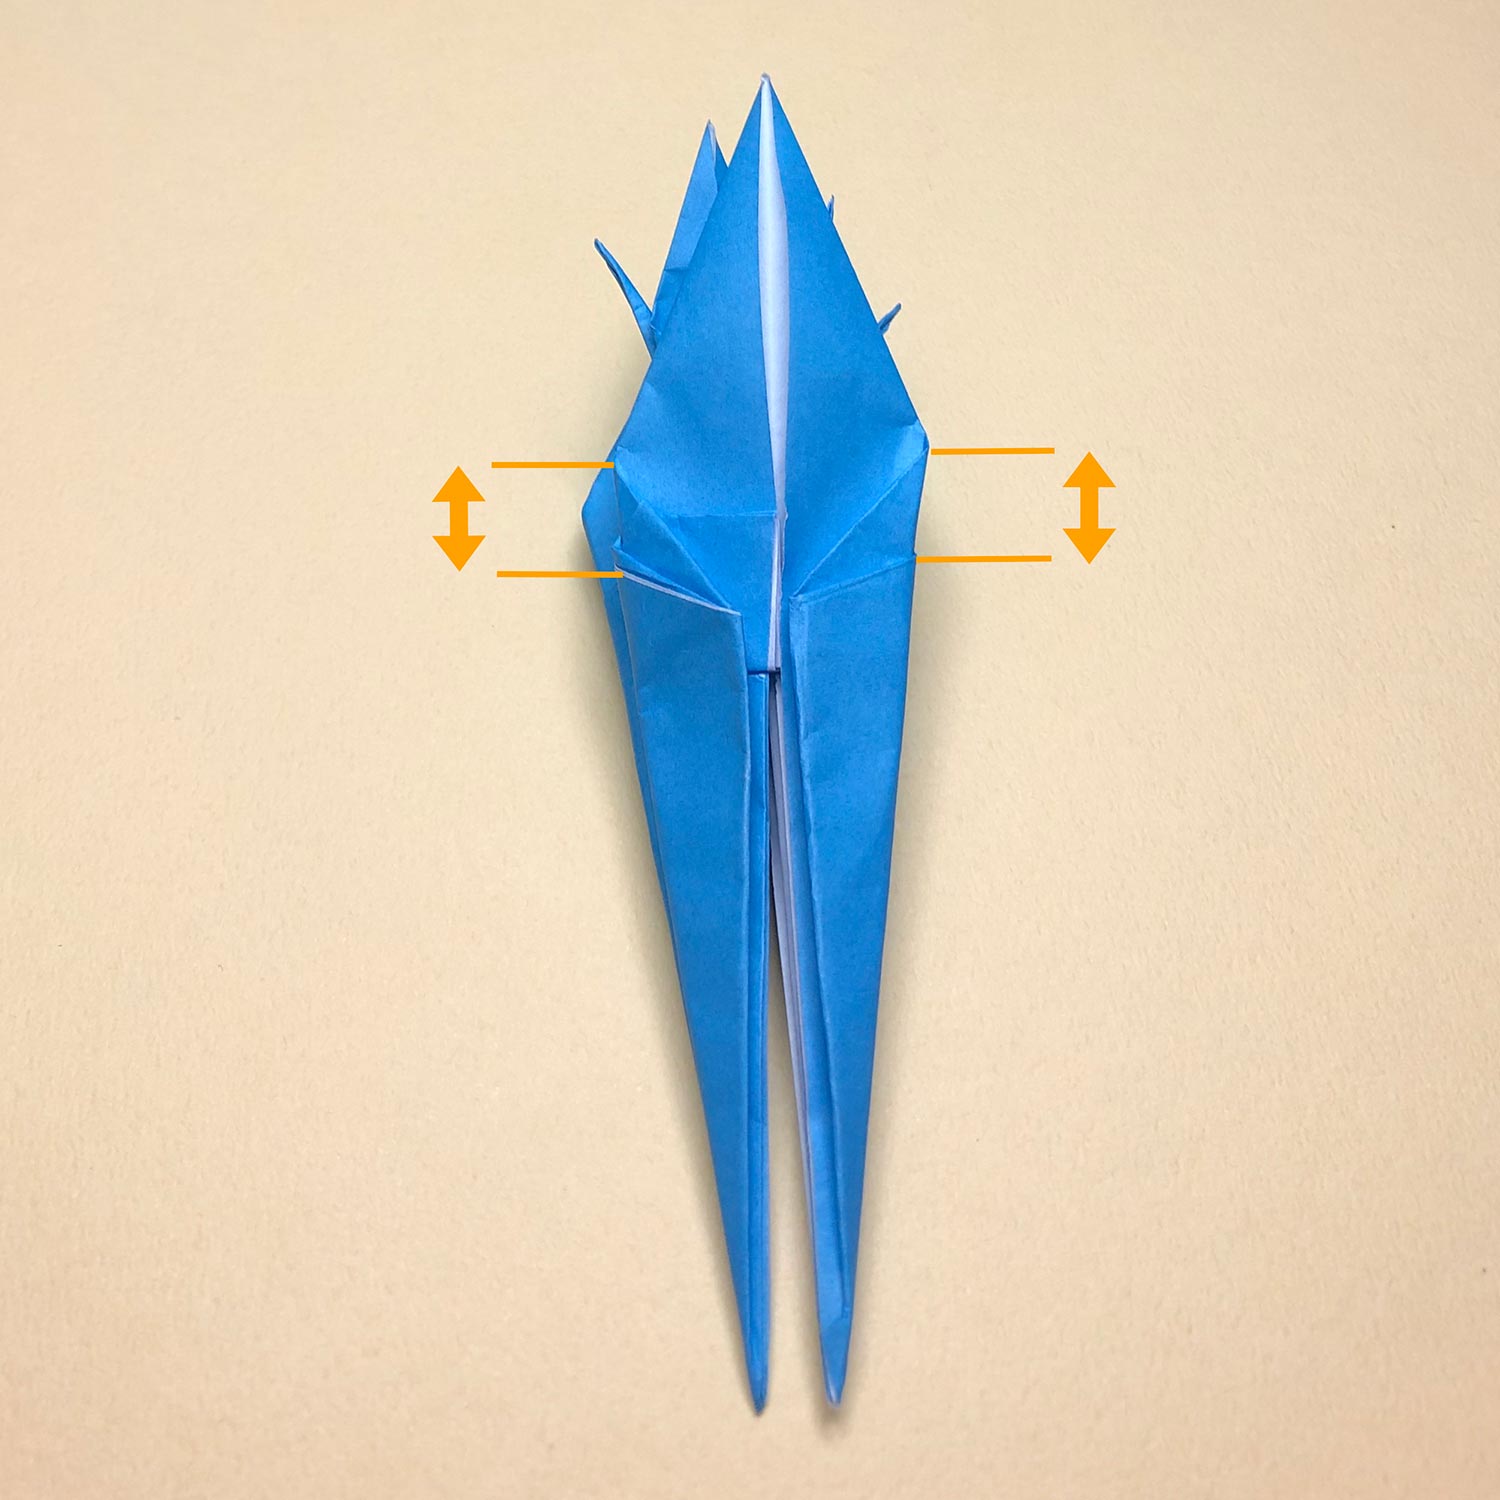
(26)
After rotating the paper, open both sides a little in the direction of the arrows.
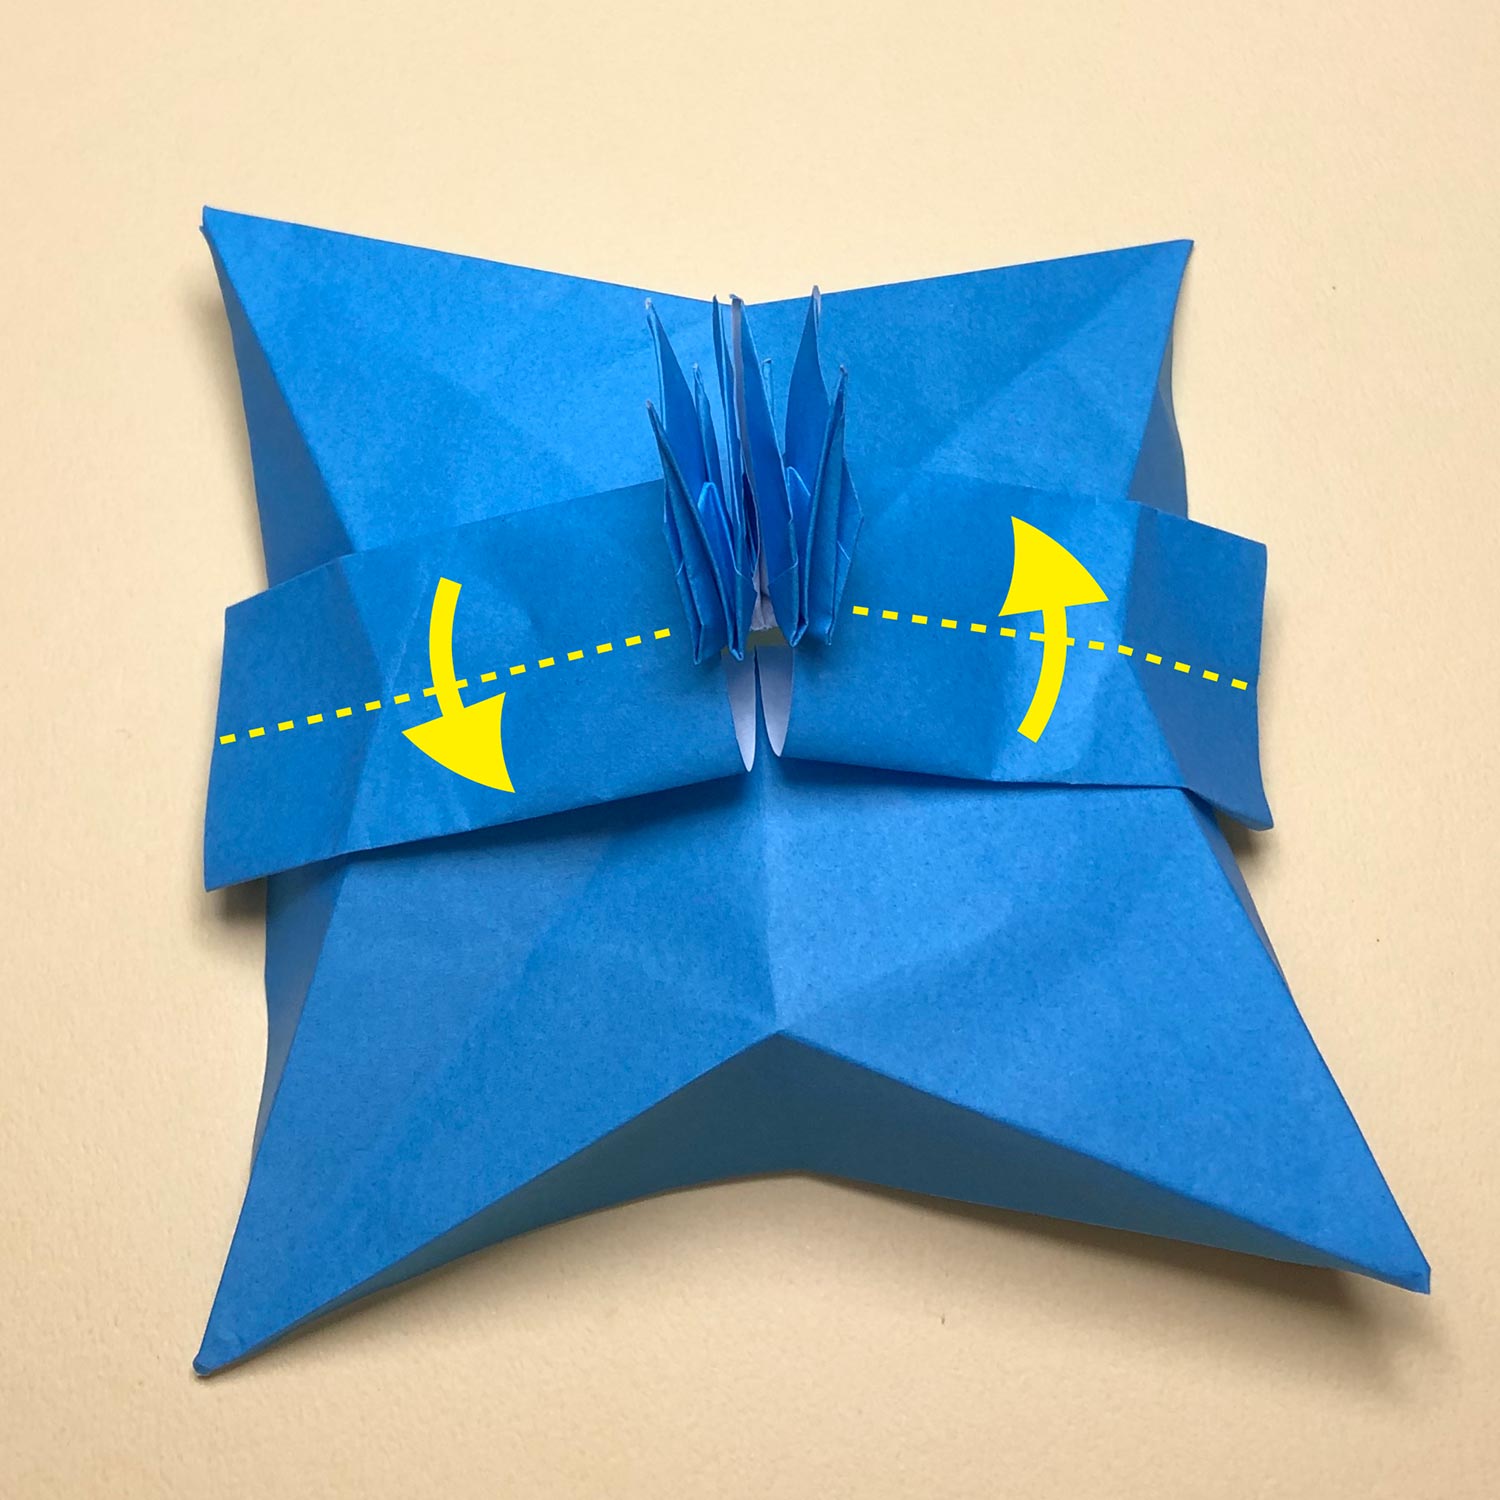
(27)
Open both sides like this picture.
Then fold the top left flap downwards on the dotted line.
Also, fold the bottom right flap upwards on the dotted line.

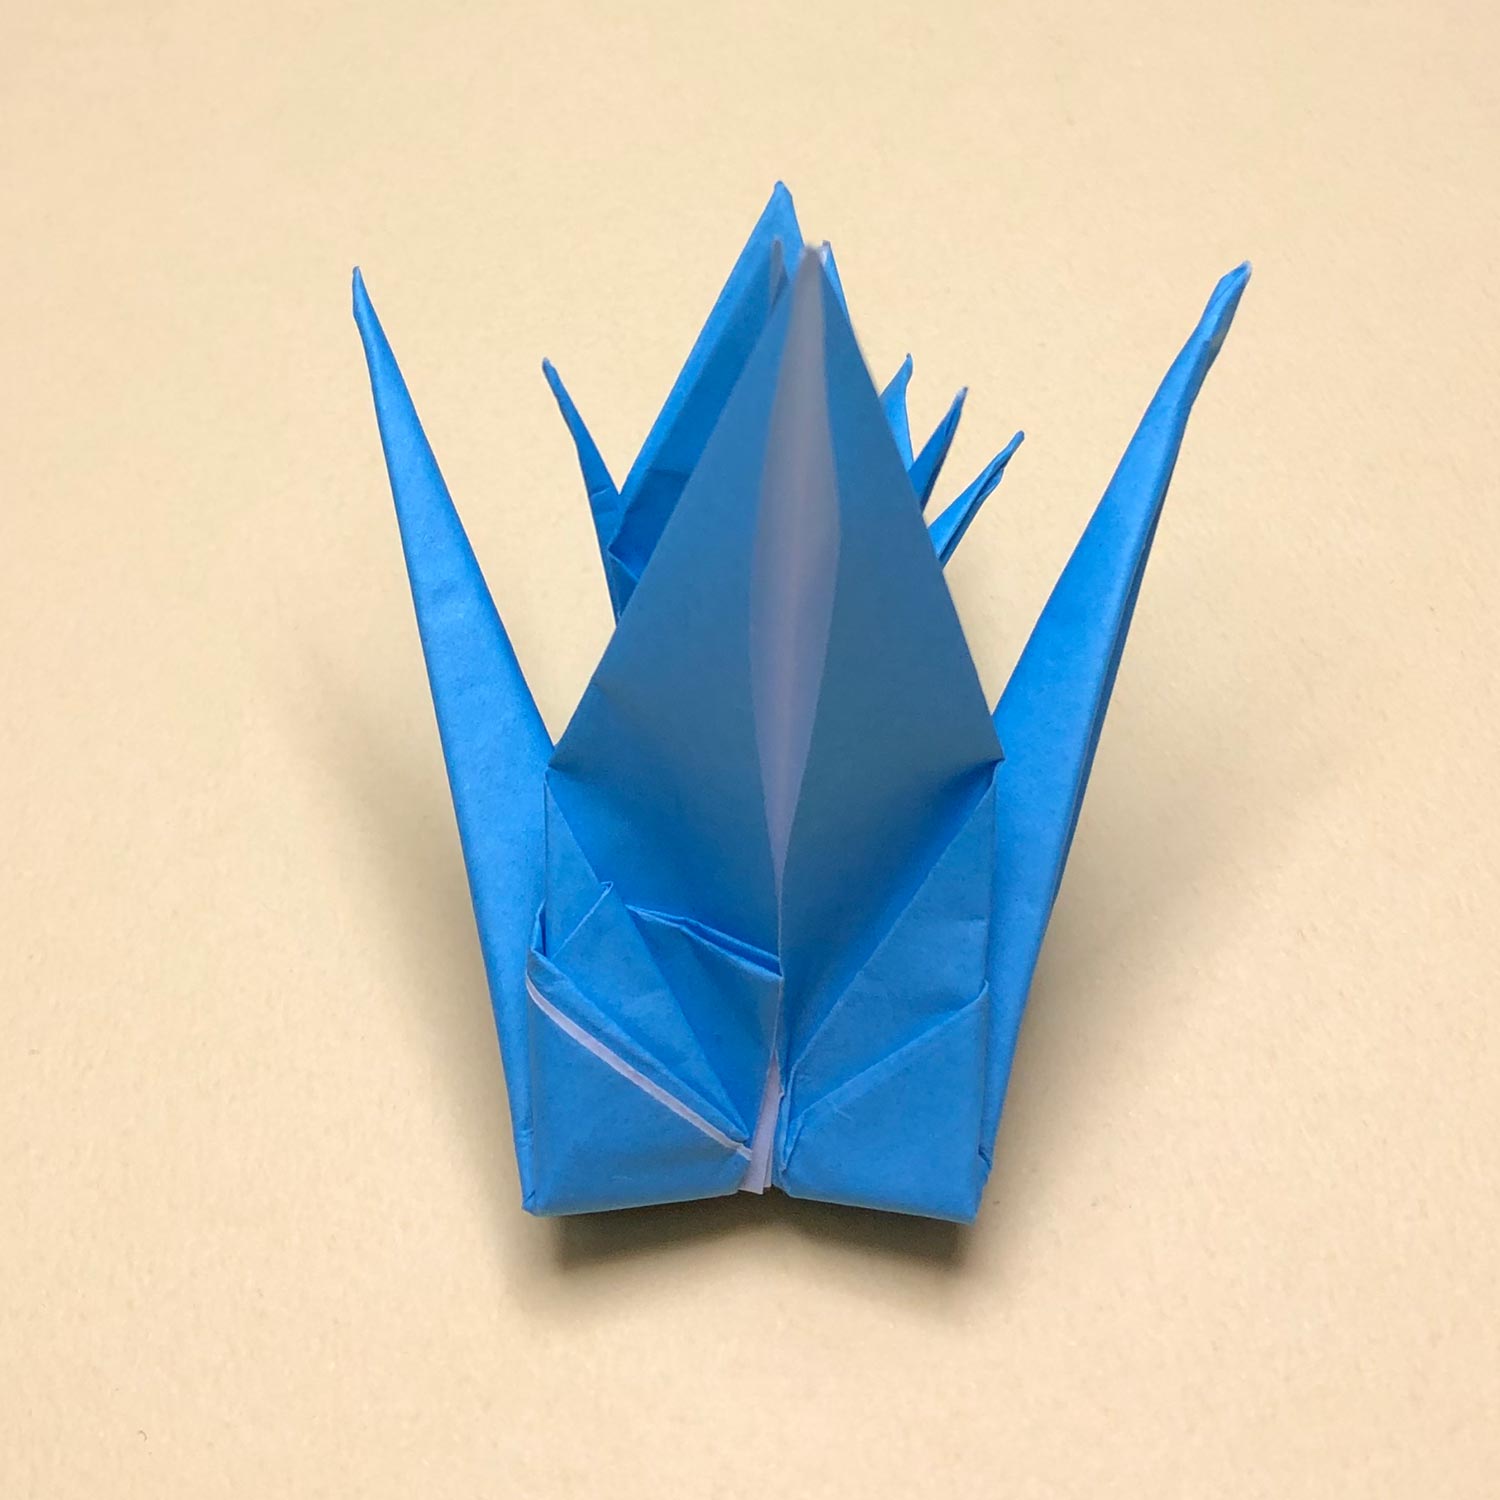
(28)
Fold the two flaps like this picture.
Then make a star-shape again.
At that time, try not to make creases near small cranes.

(29)
After making shape like this picture, make valley-folds on the dotted lines.
(30)
Make valley-folds like this picture.
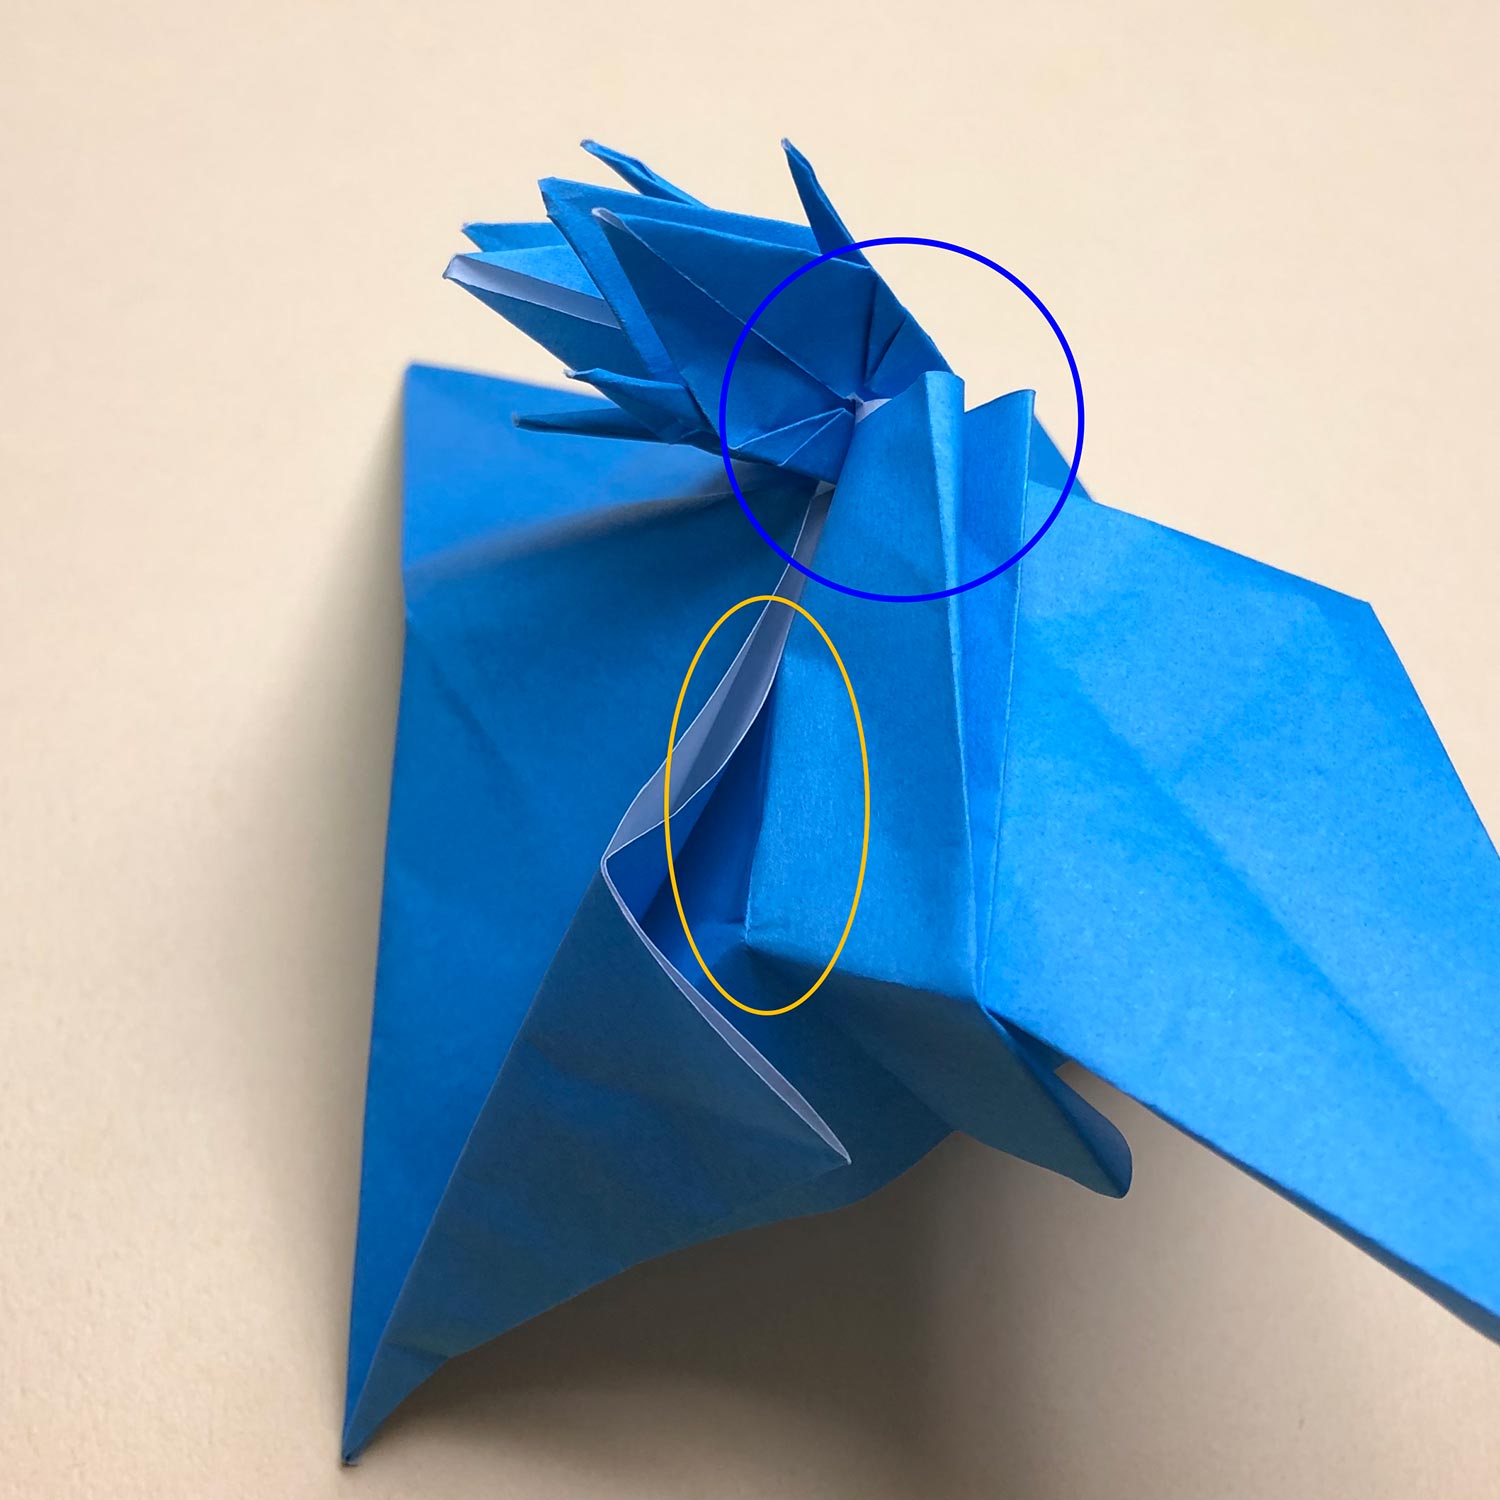
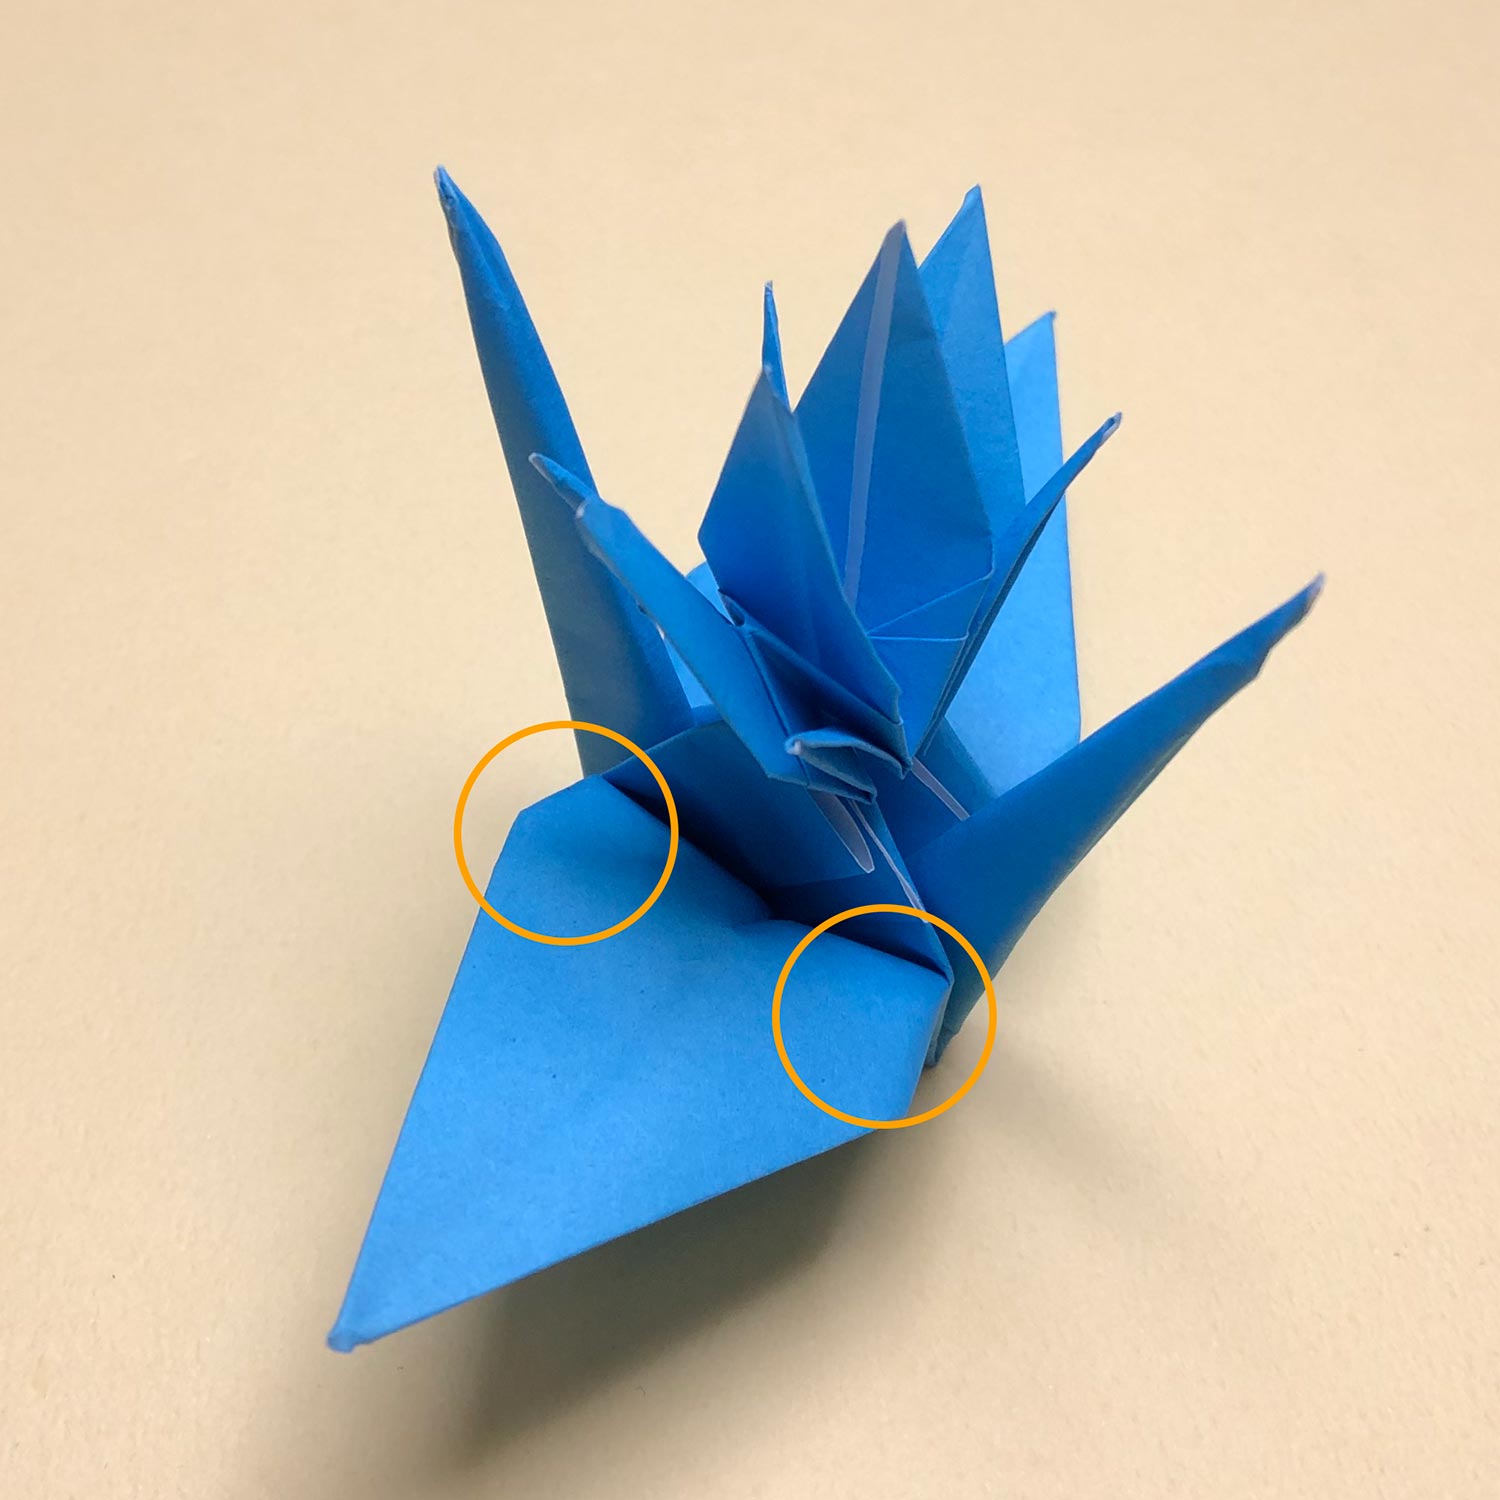
(31)
Then make creases only at the circled part in yellow.
Try not to make creases at the circled part in blue.
On the opposite side too, make creases in the same way.

(32)
After making creases, make a valley-fold on the dotted line.
On the opposite side too, make a valley-fold as well.

(33)
Make valley-folds like this picture.

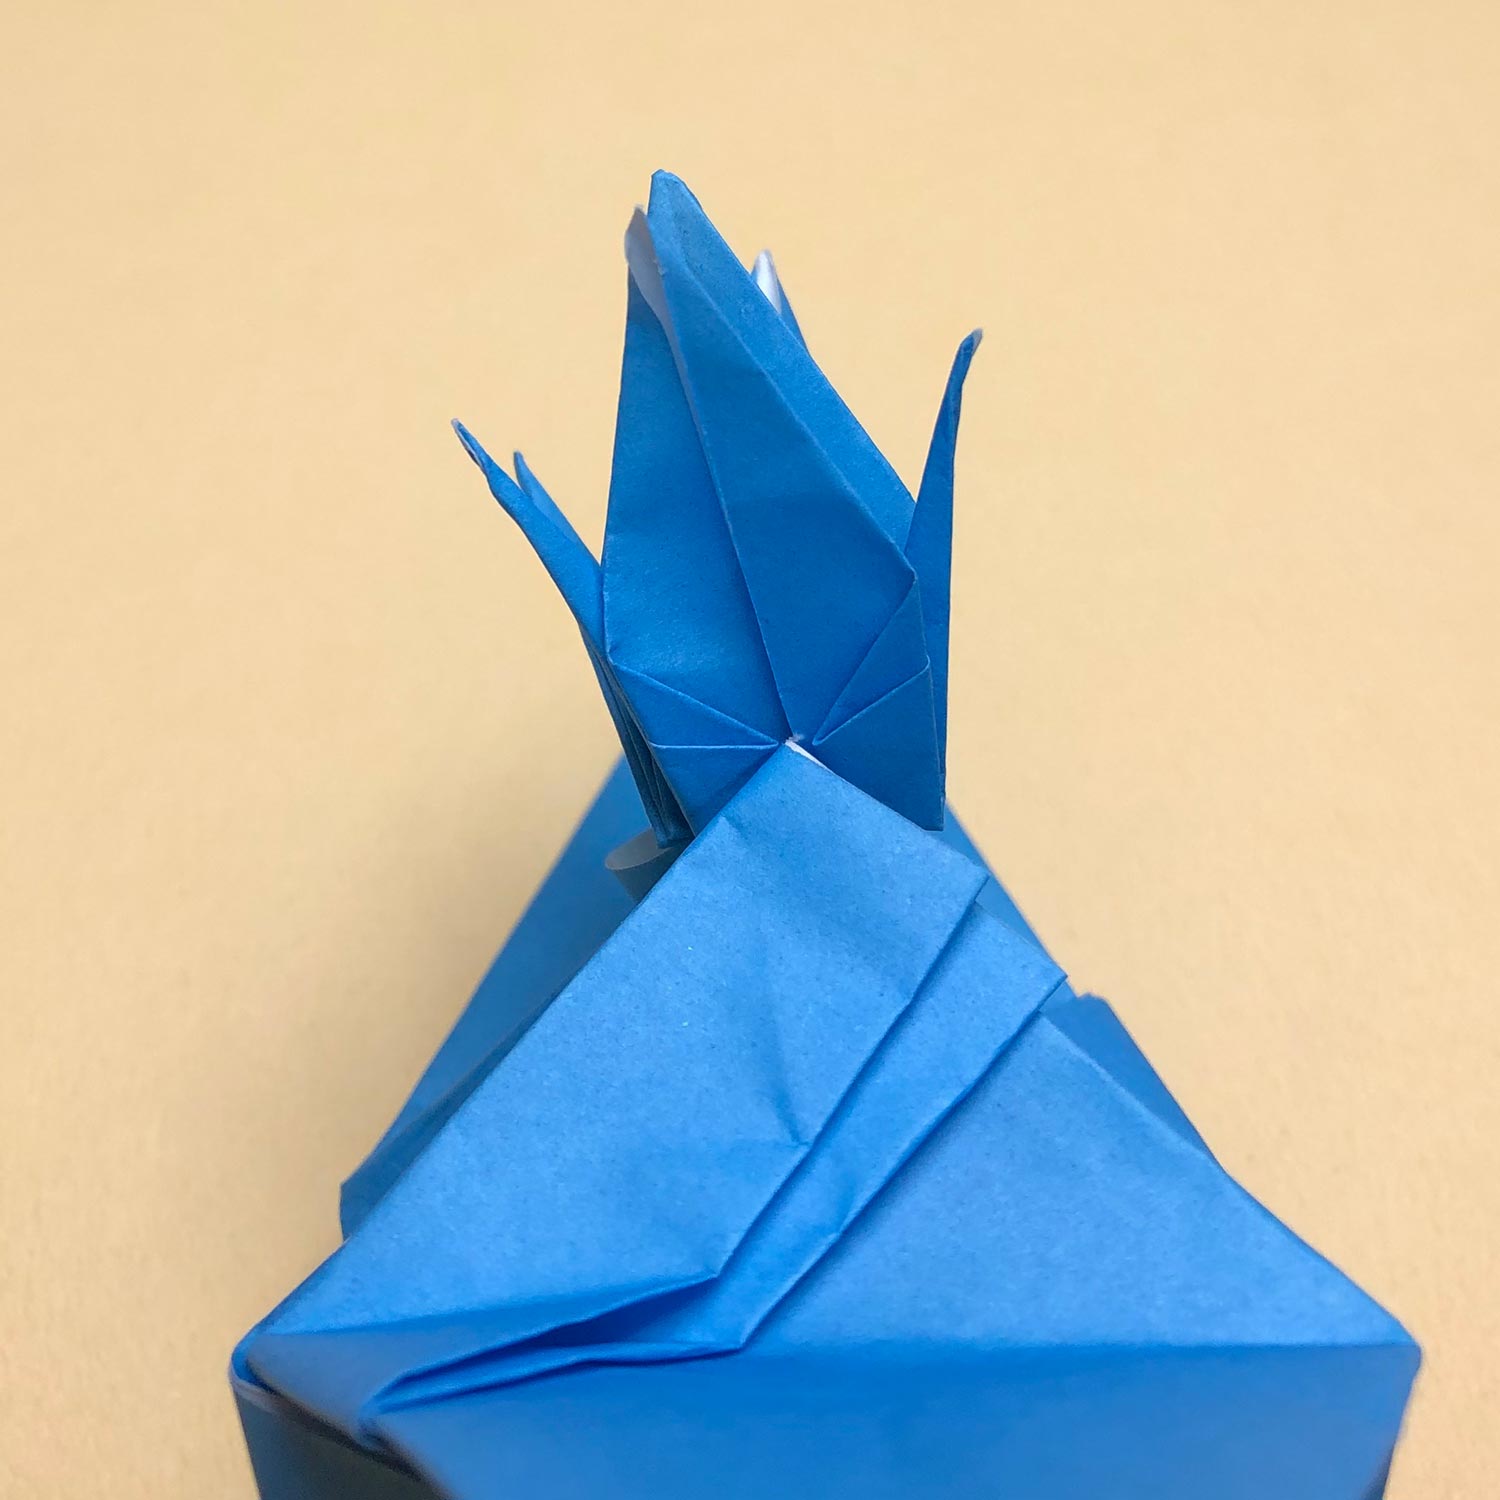
(34)
Then make creases at the circled part.

(35)
Rotate the paper so that you can see small cranes which are tilted to the left like this picture.
Take the flap in the front and move it in the direction of the yellow arrow.
Then adjust the tip of the flap to connecting parts and make a crease at the circled part.
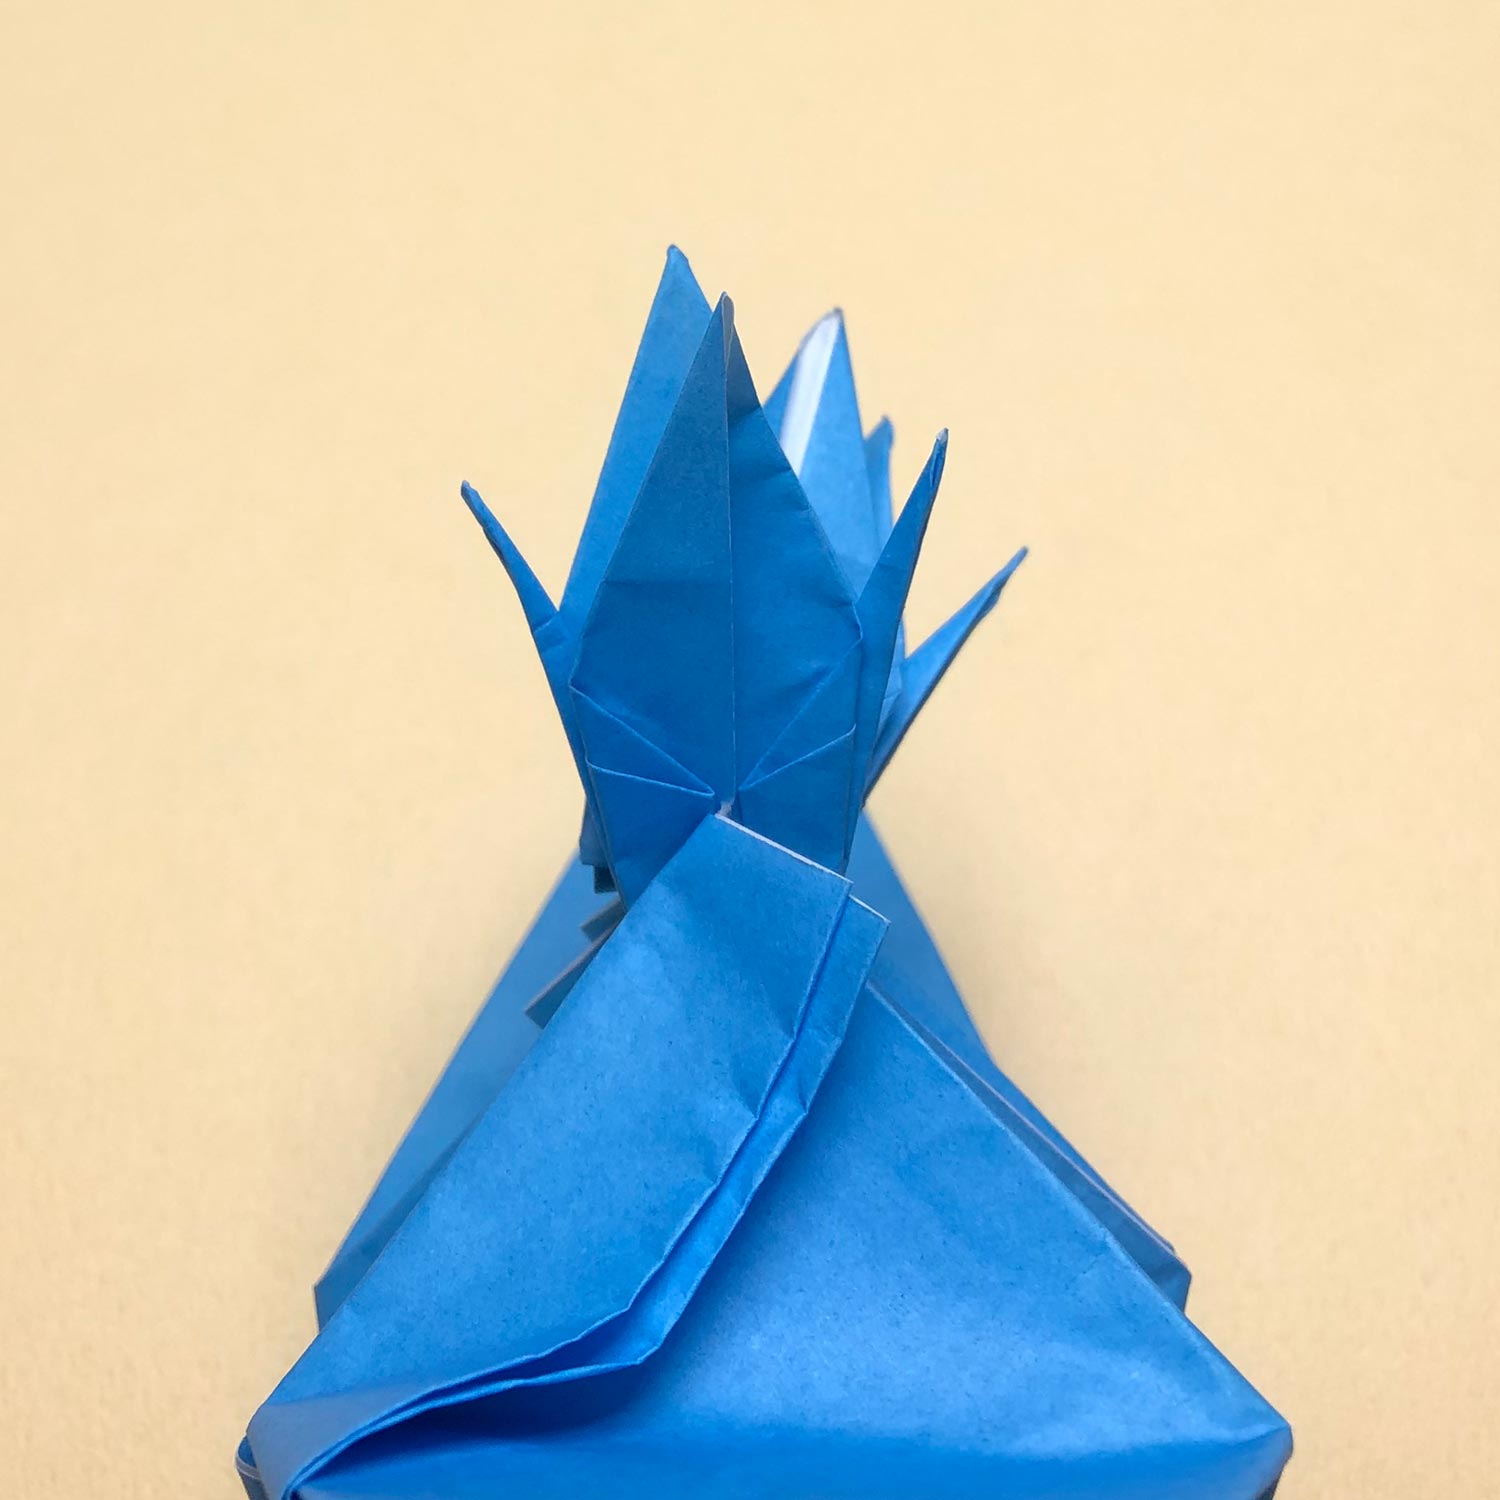
(36)
Make a crease like this picture.

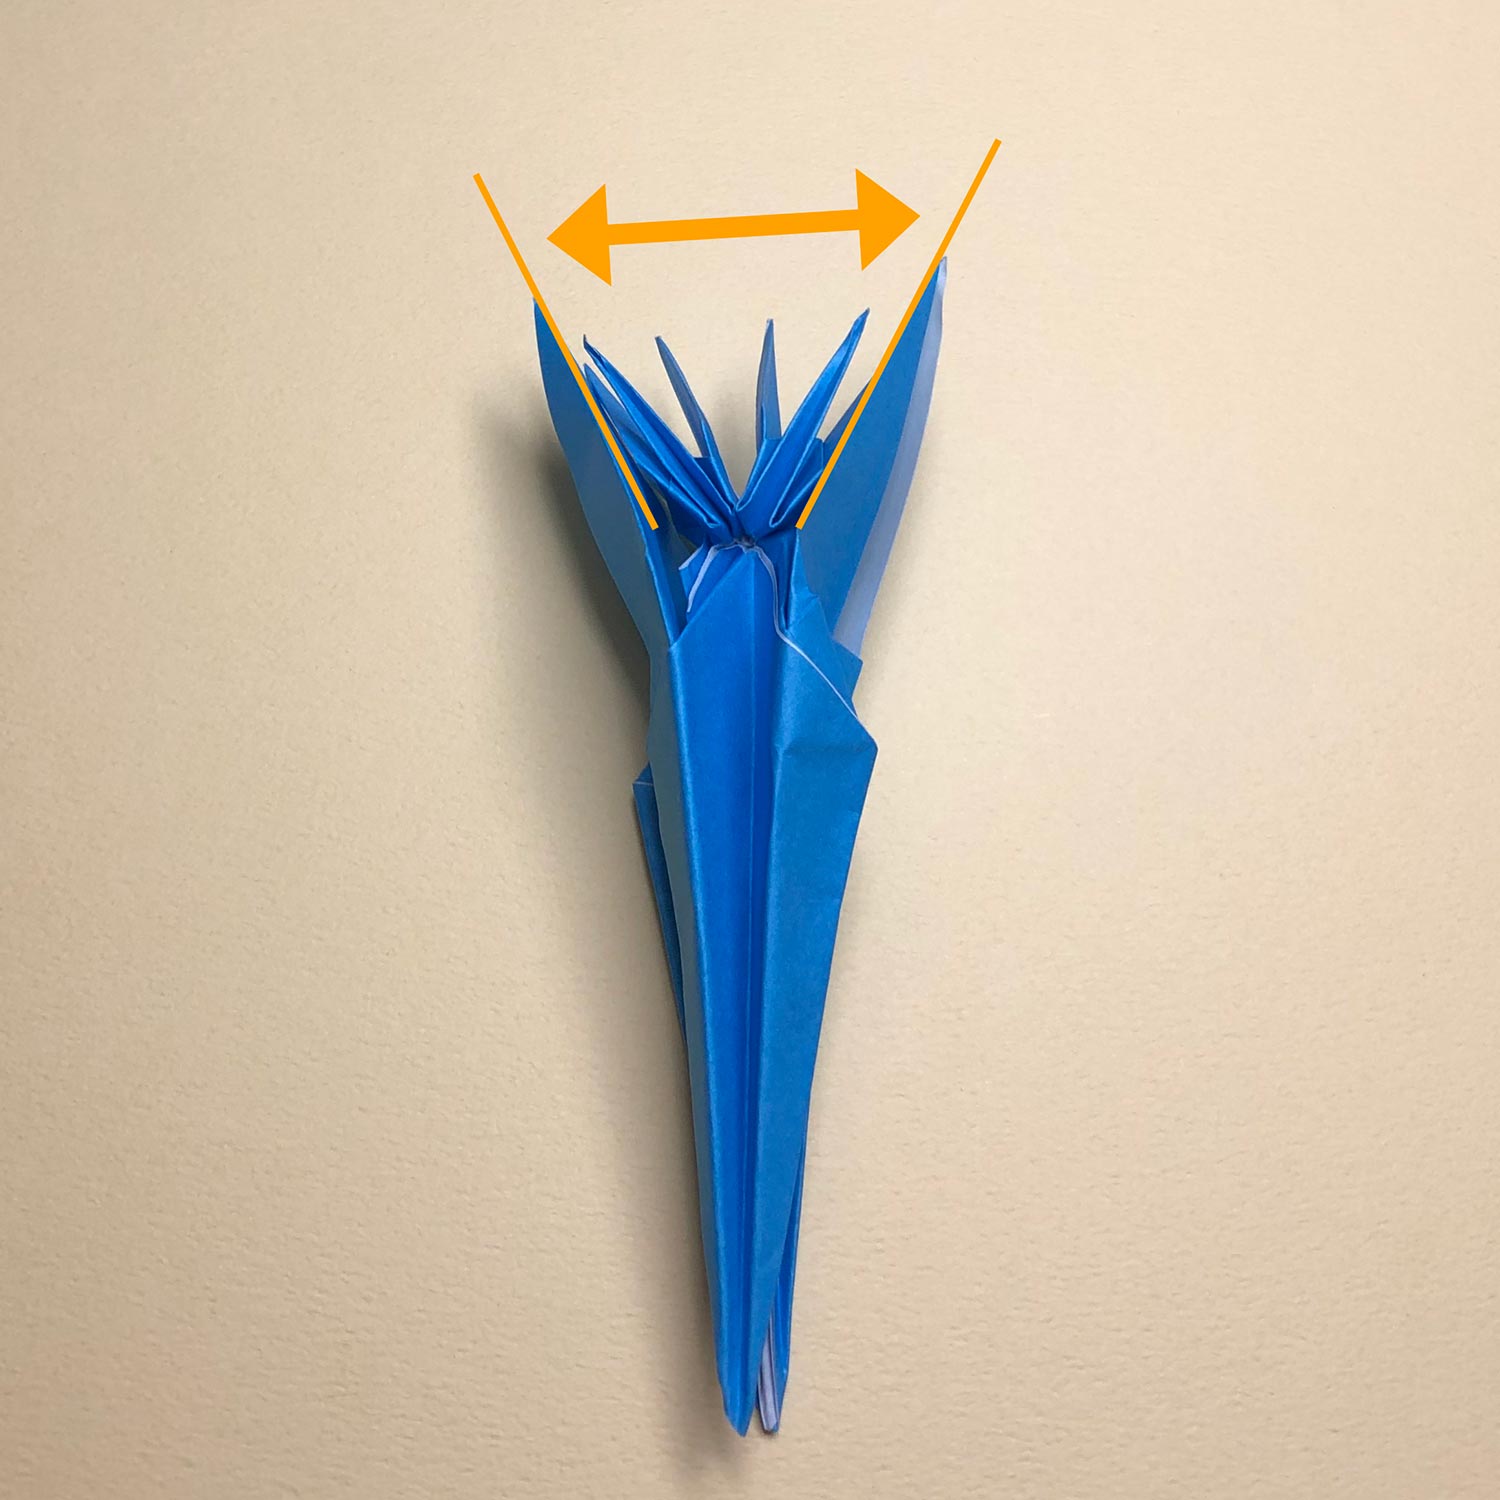
(37)
On the opposite side, take the two flaps and move them in the direction of the yellow arrow.
Then adjust the two flaps so that the two small cranes are not tilted as much as possible.
Finally, make creases at the circled part.
(38)
Make creases like this picture.
Then raise wings to make a bird-base.

(39)
The bird-base is finished.
Then fold each of the head/tail to the center.
(40)
In order to get harder to put pressure on connecting parts,
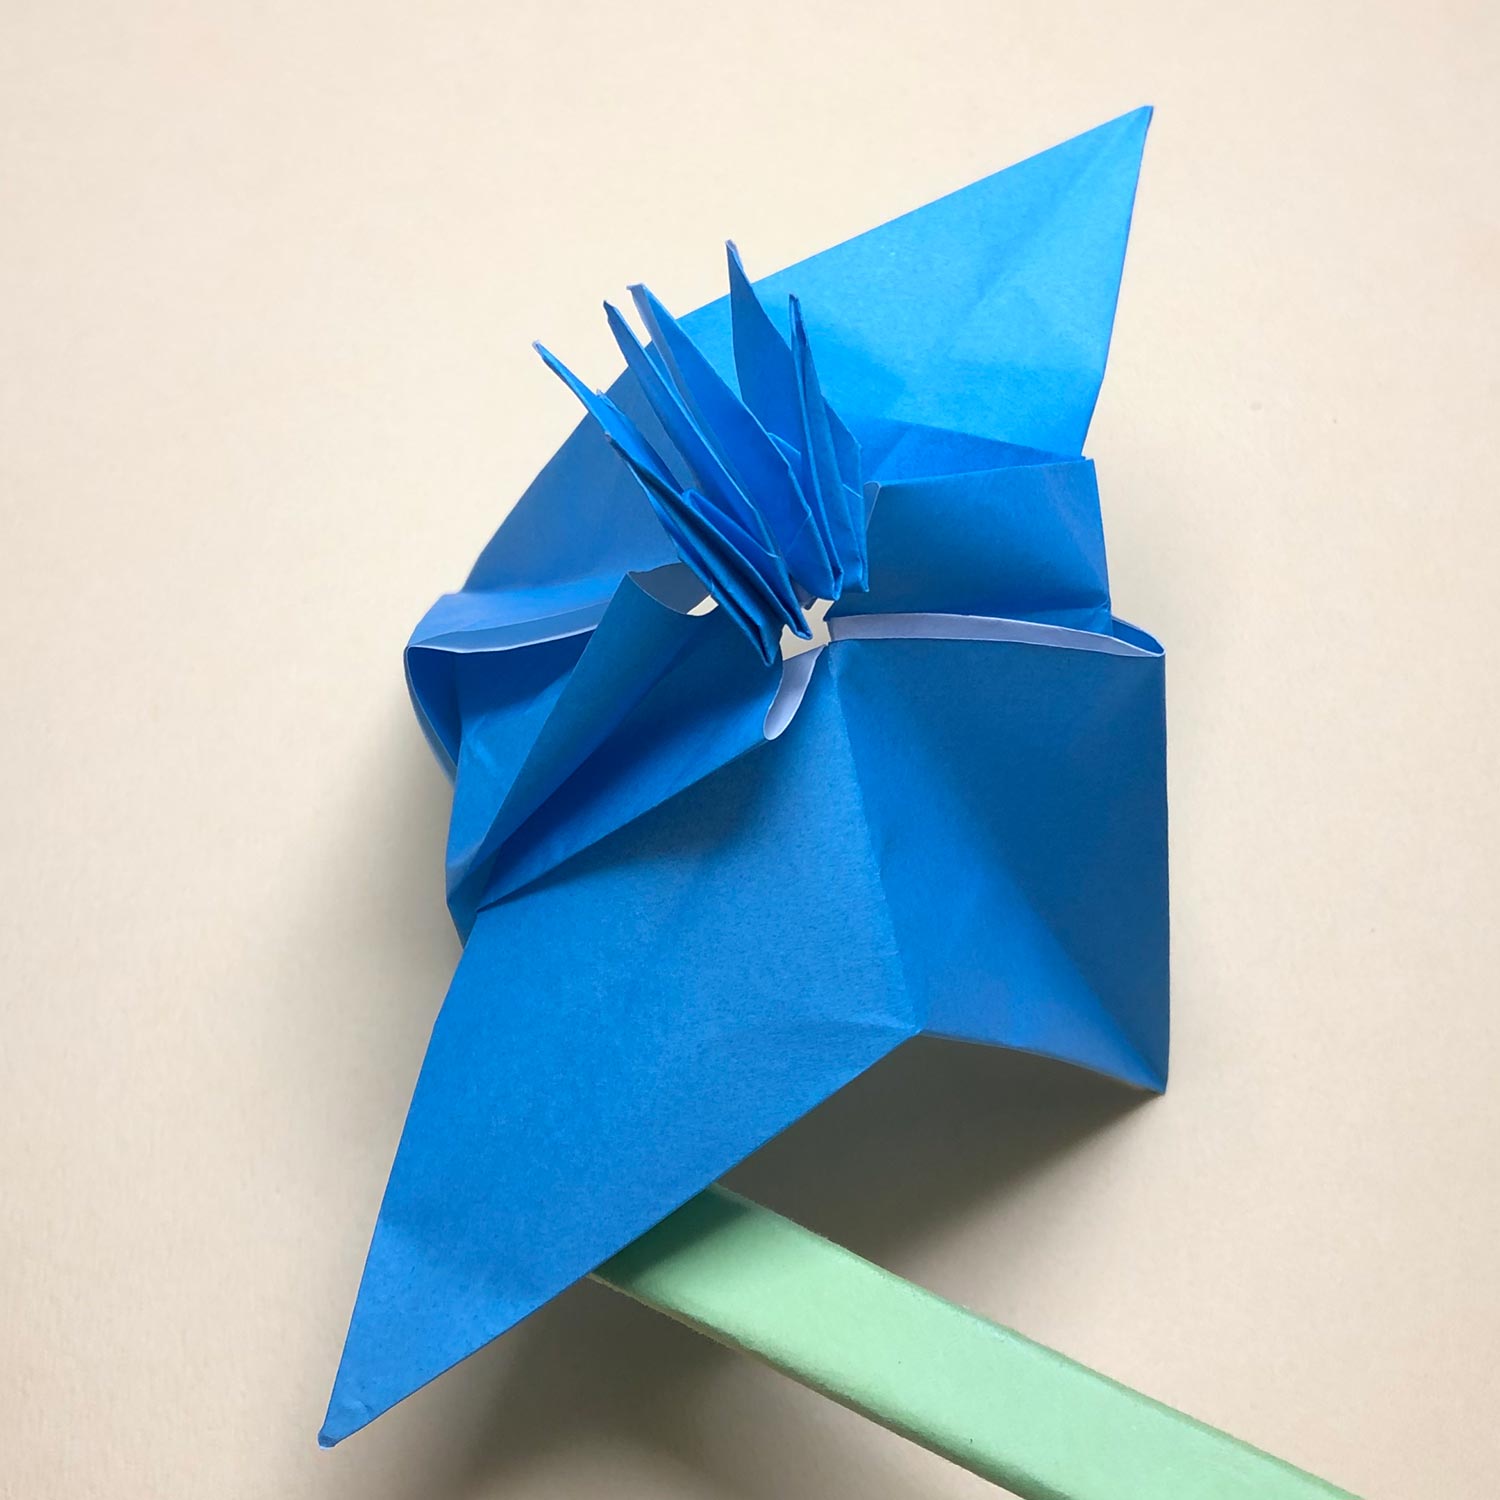
fold a head/tail to the center in the state of that wings of a bird-base are open a little like this picture.
(41)
Also, although it is very hard to fold a head/tail in this model, fold the two head/tail to the center so that the parts which are shown by the arrows are the same length.
If the length of the parts is different, wings of a big crane will not be beautiful.
After folding the two head/tail, raise them.
(42)
Raise them like this picture.
The big crane is finished.
(43)
Then spread wings of a big crane.
When spreading wings of a big crane, flip wing-roots which have been circled.
Finally, make beaks so that cranes face in the same direction and spread wings of small cranes.
(44)
This picture is taken from the side.
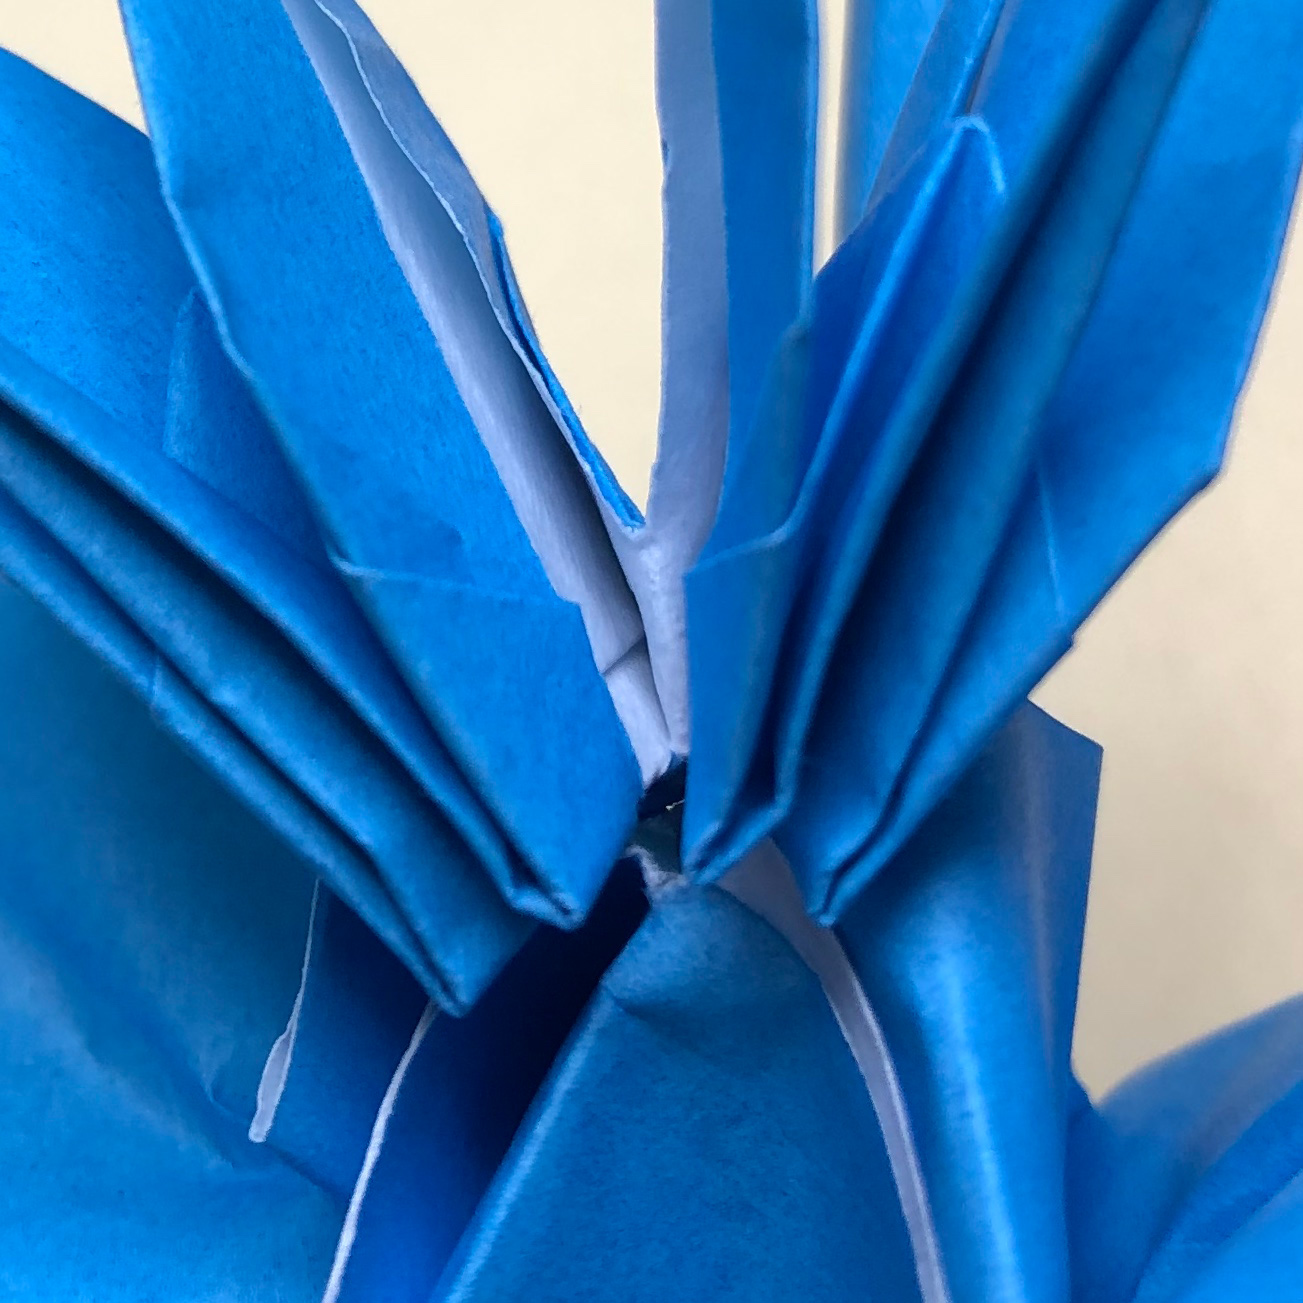
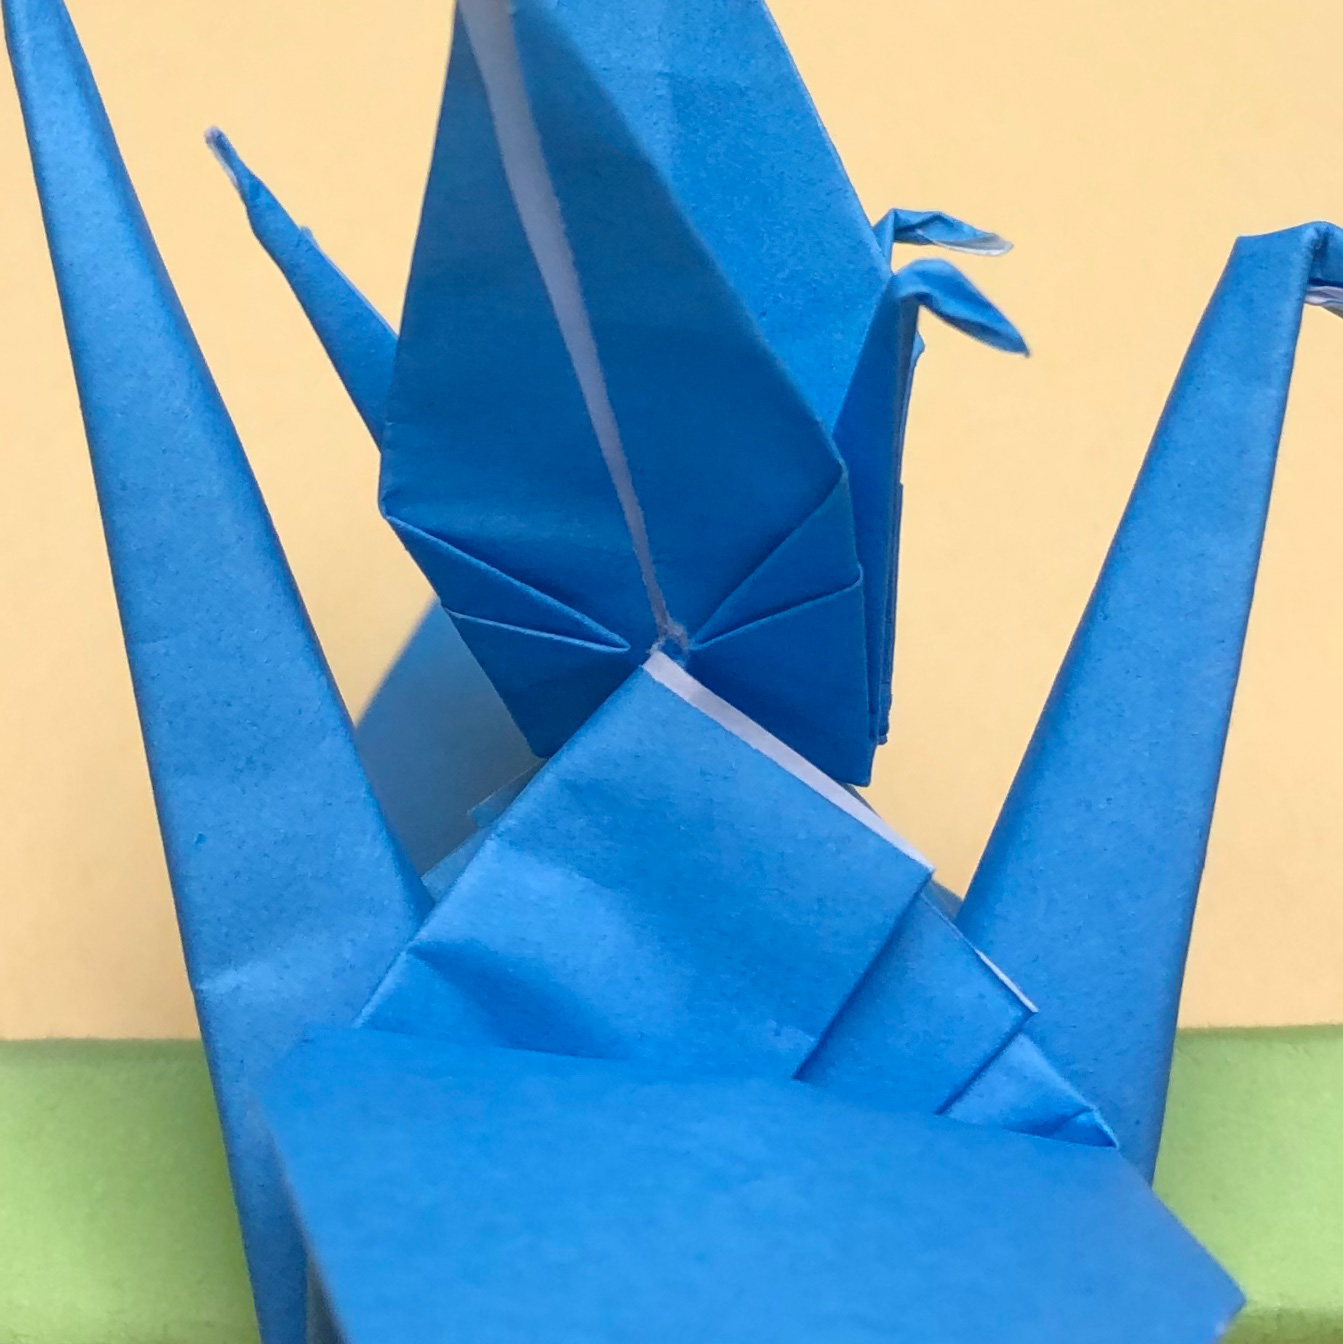
(45)
This is an enlarged picture of connecting parts in the center.
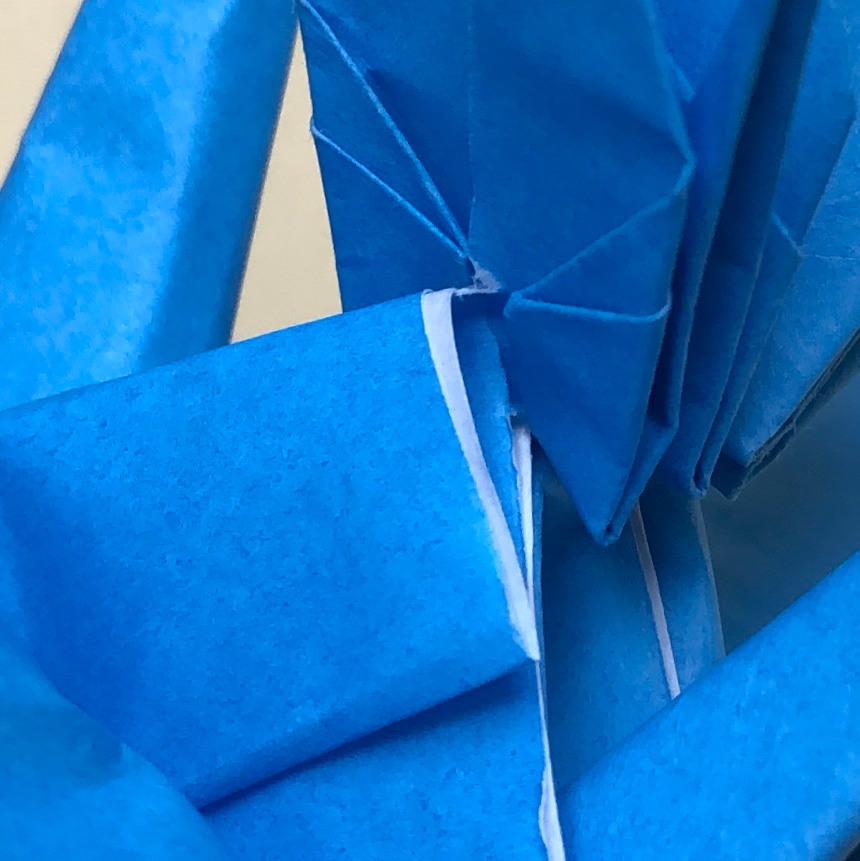
(46)
This is an enlarged picture of connecting parts in the outside.
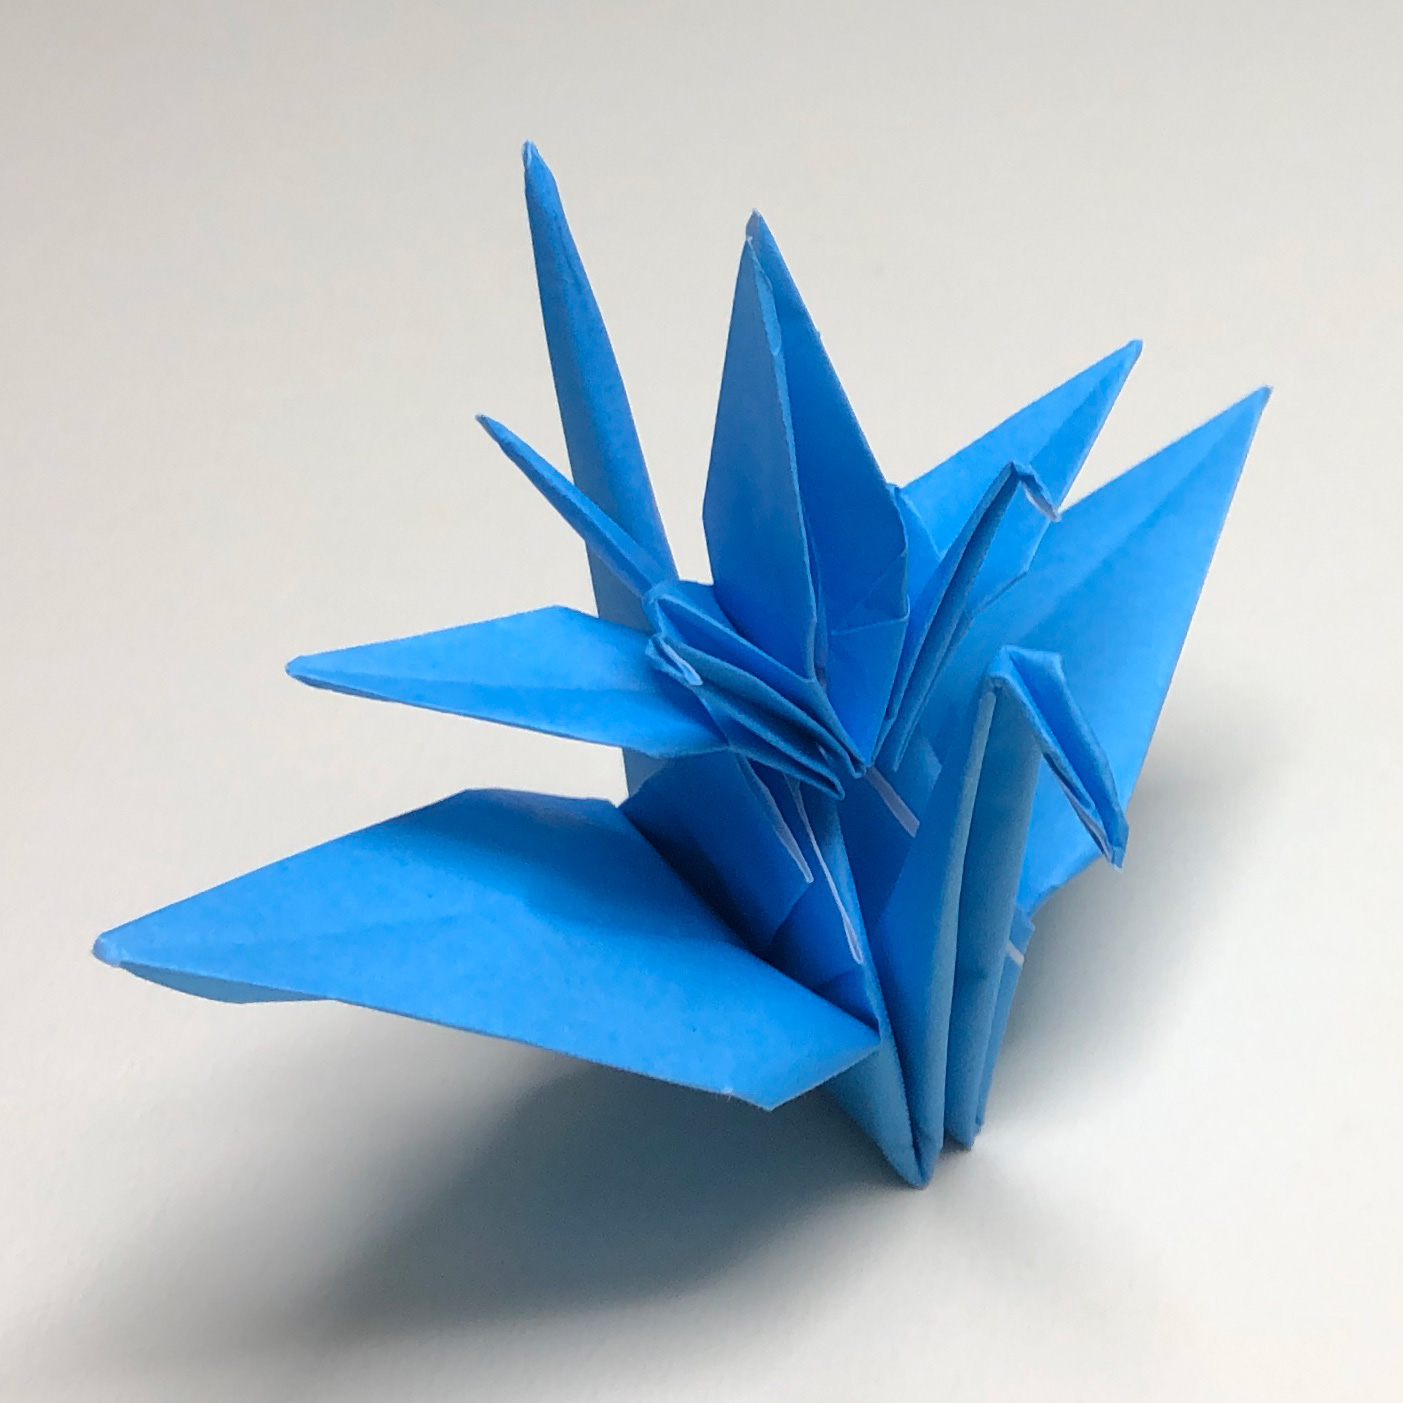
Tsukubane is complete!
When you post pictures of your completed Renzuru works on social media,
please write my website’s name – “Tsuru-no-Goshiki” or paste the link!
On Instagram, if you write “@ritsu_cranes”,
I will be able to see your works and glad!😀
If you liked this Renzuru model,
please click the button below and share this pages on Twitter!