花菱/Hanabishi
“花菱/Hanabishi” is one model of 49 kinds of “連鶴/Renzuru”.
Renzuru means connected-cranes which are made of only one paper without glue and tape.
49 kinds of Renzuru was in the book which is “秘伝千羽鶴折形/Hiden-Senbazuru-Orikata”.
The book was published in 1797.
— Total difficulty level —
☆7:☆☆☆☆☆☆☆・・・
— By item —
Tear easily :☆☆☆・・
Complexity :☆☆☆☆・
Hard to fold:☆☆☆☆・
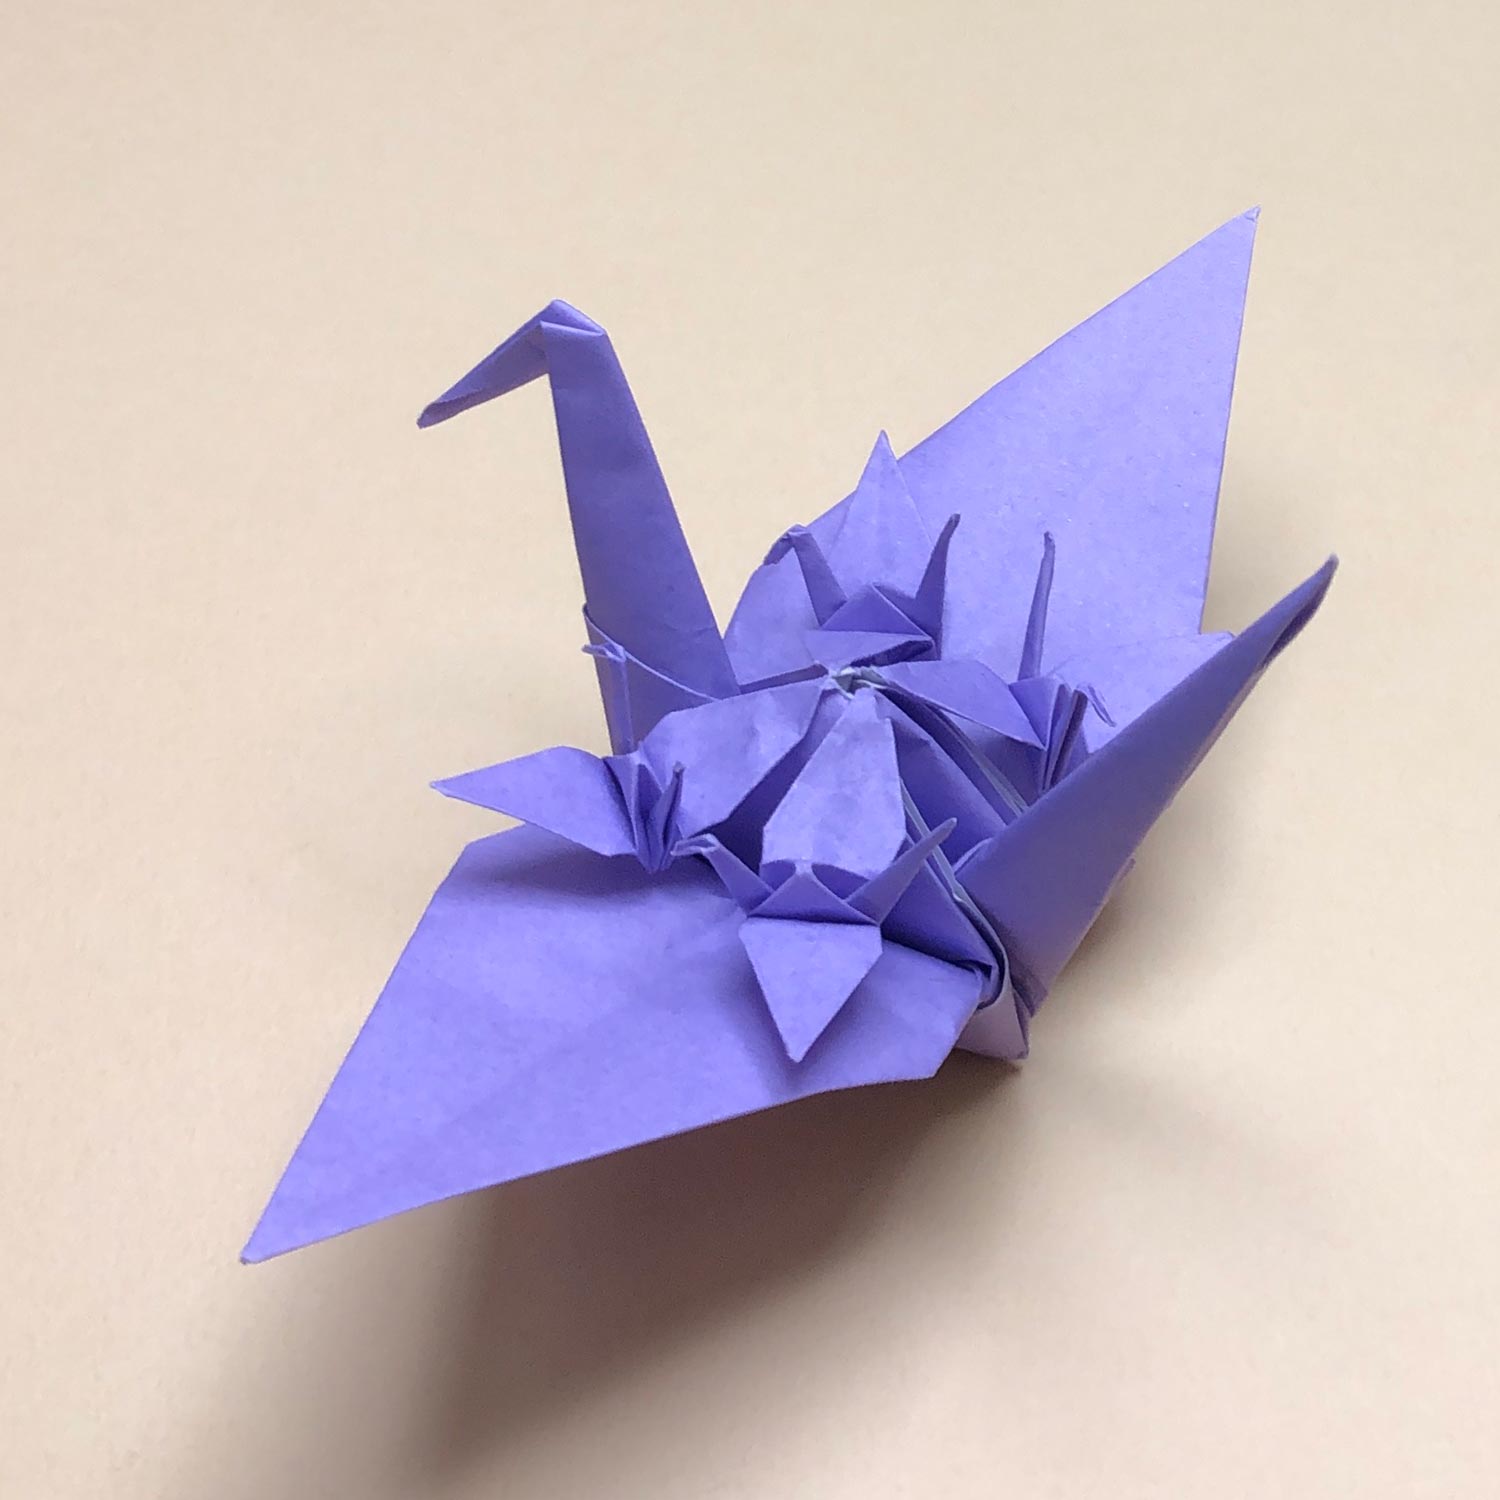
Hanabishi is the model that a back of a big crane is connected to four small cranes.
Make creases neatly and this model carefully!
Completed Hanabishi
The diagram of Hanabishi
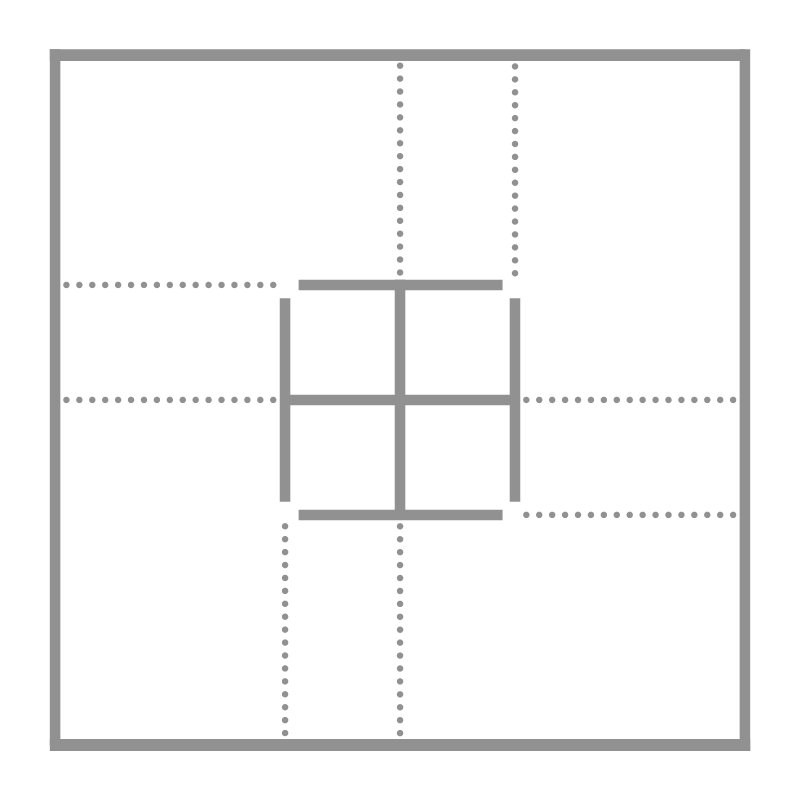
<reference>『Hiden-Senbazuru-Orikata』- was published in 1797
This is a diagram that I drew new dotted lines.
Preparation of an origami paper
【Size】
a 26x26cm paper or it is bigger than 26cm.
【Kinds】
・Basic origami paper
・Double sided origami paper
・Washi paper
I made this model with a 26x26cm basic origami paper.
If you use a big paper, it will get easier to make this model.
In order to draw lines, prepare a pencil and a ruler as well!
Change to a divisible length by six
When making this model, there is a need to divide a paper in six.
Therefore, change to a divisible length by six first.
By changing first, it will get easier to draw lines.
If you use a 26x26cm paper, there are the two ways to change size.
The first way is to cut a paper at 2cm from each edge so that the paper is changed to 24x24cm.
If that’s the case, it will get easier to draw lines.
The second way is to cut a paper at 0.2cm from each edge so that the paper is changed to 25.8×25.8cm.
If that’s the case, it will get easier to fold this model.

I drew lines at 0.2cm from each edge so that the paper is changed to 25.8×25.8cm.
After drawing lines, cut the paper along lines that you have drawn.
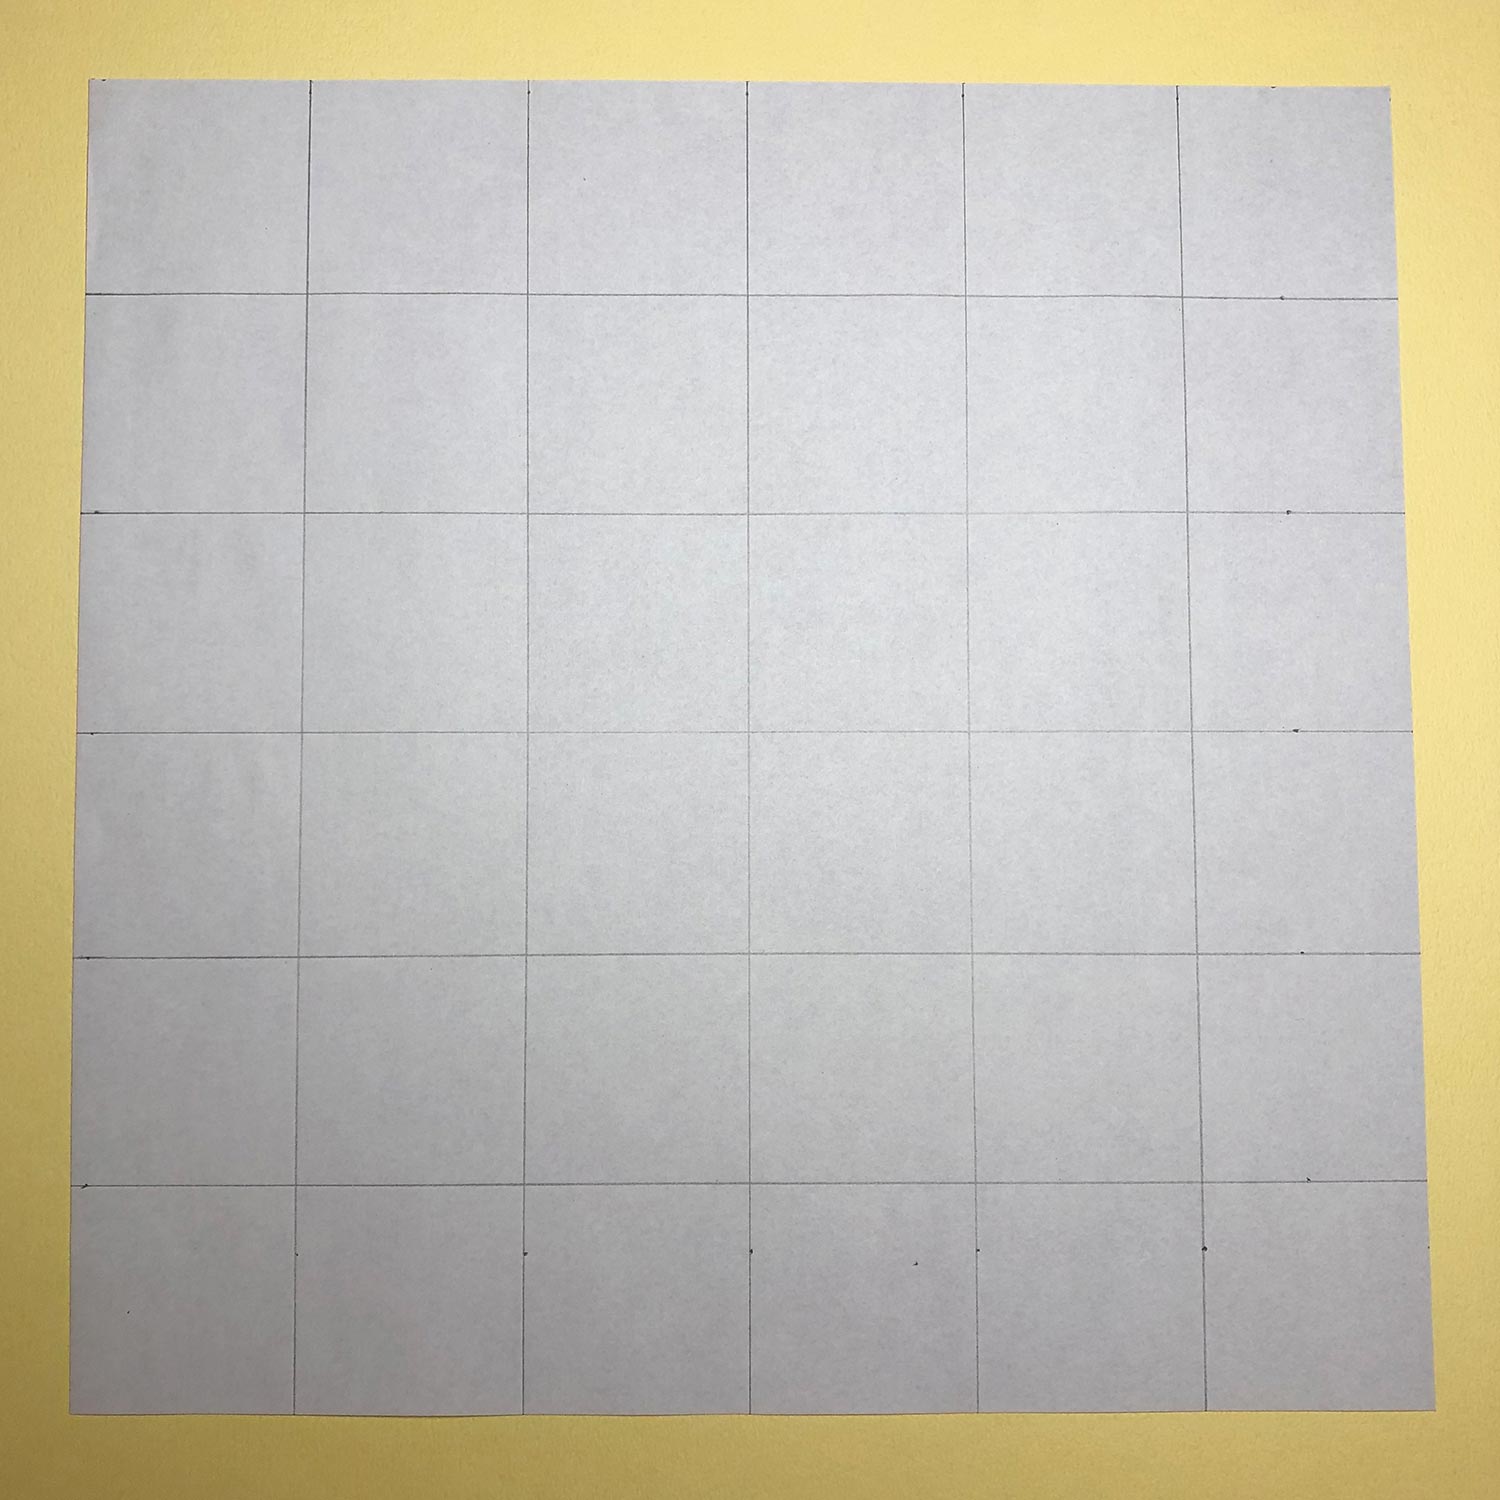
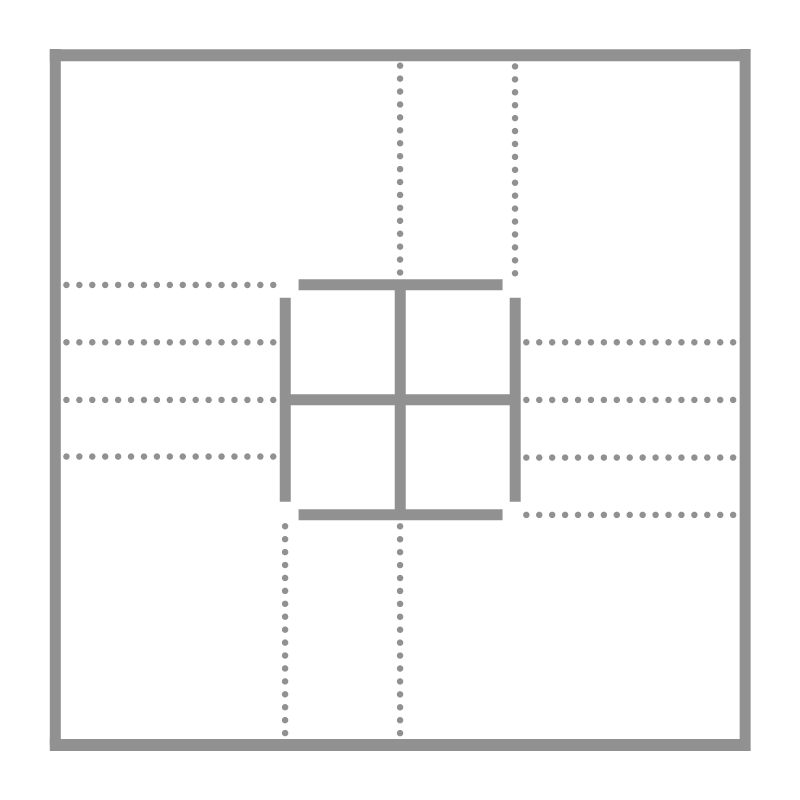
After cutting the paper, draw lines while referencing this picture.
Divide the paper in six horizontally and vertically.
If your paper is 25.8×25.8cm, the side of each square is 4.3cm.
If your paper is 24x24cm, the side of each square is 4cm.
Make creases
To make creases on a paper
To make creases on a paper before cutting the paper is very important.
If you cut a paper first before making creases, it will get harder to make creases on the paper.
Also, there’s a possibility that the paper is cut halfway when making creases.
This step is making creases.
When making this model,
fold small cranes in the way to make a basic-crane for connected-cranes.
fold a big crane in a specific way.
Make creases for making a big crane while referencing this pages.
On the other page, there is how to make a basic-crane for connected-cranes.

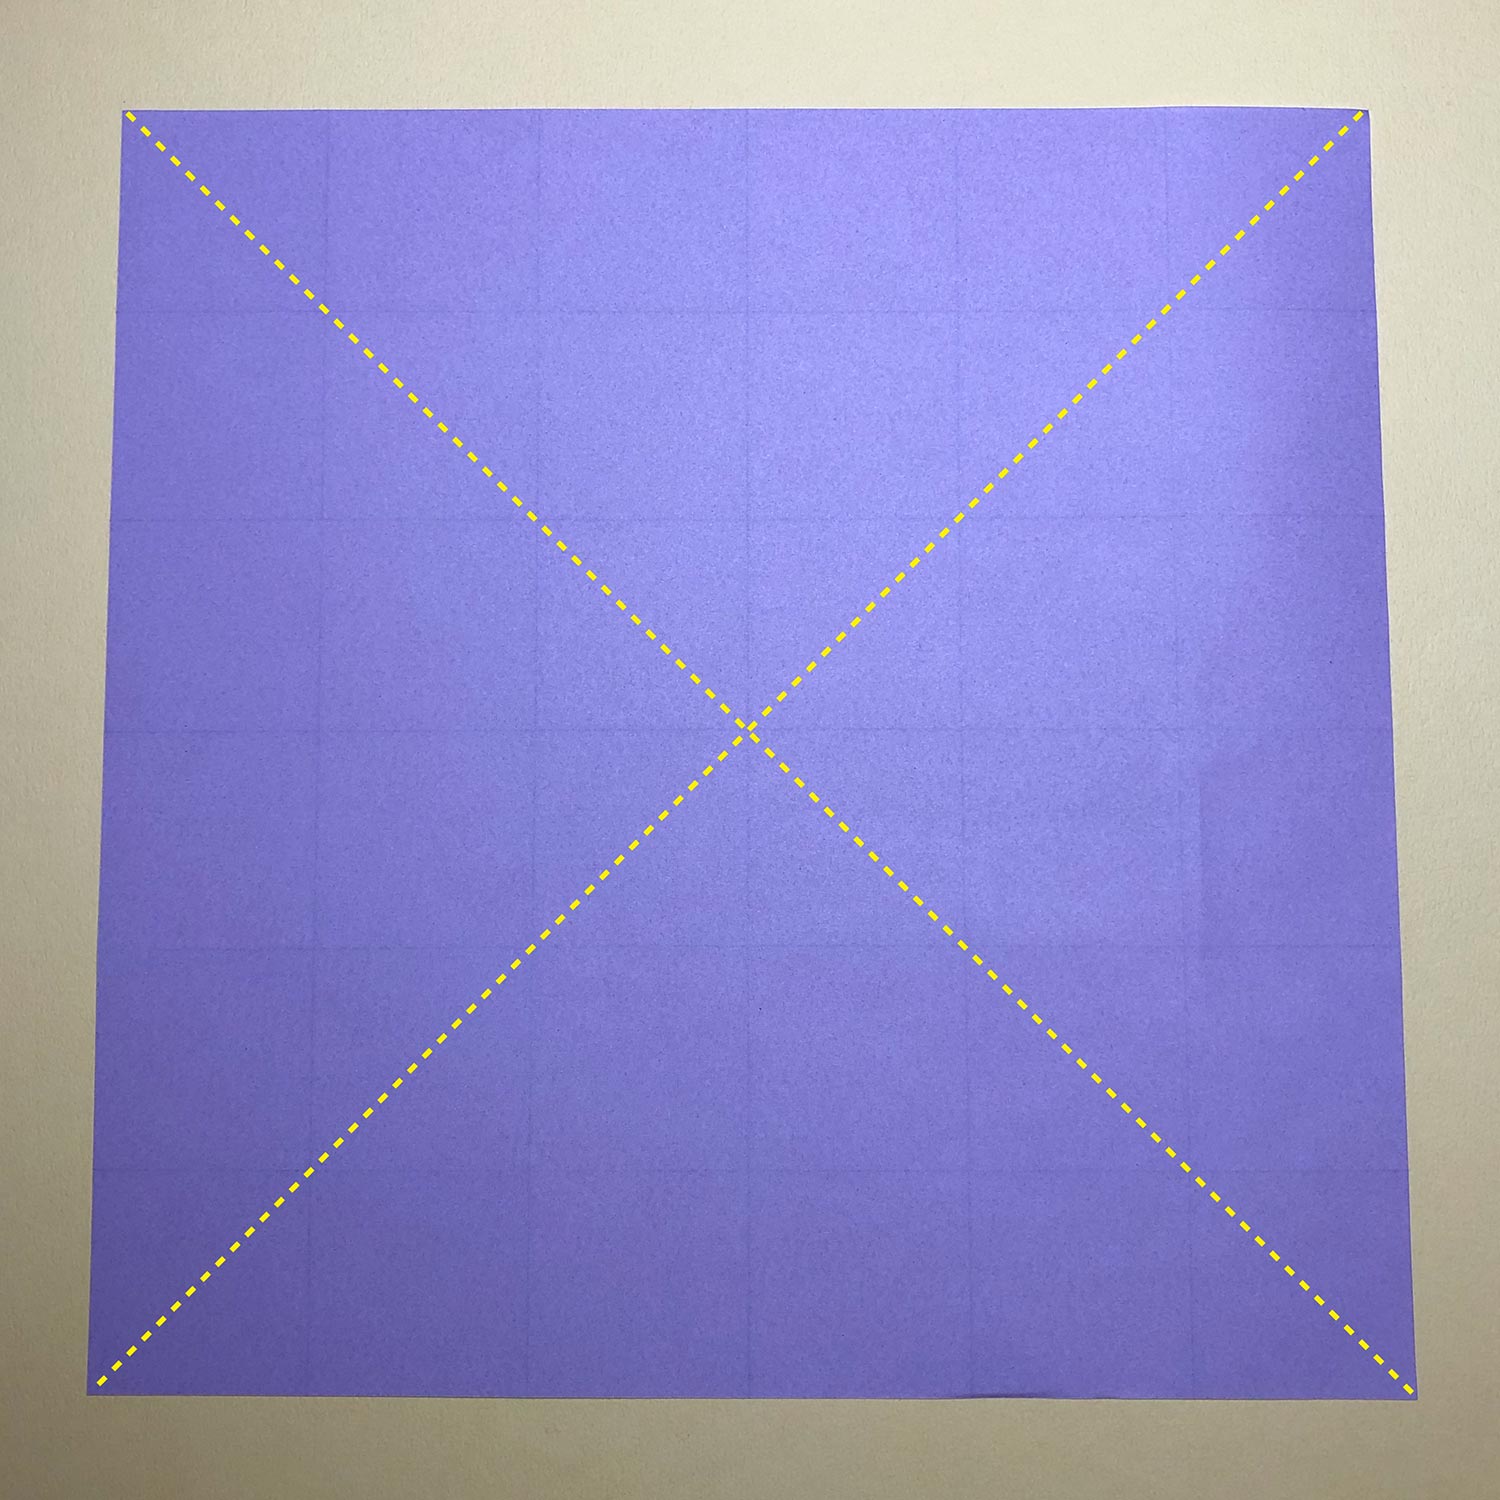
(1)
Start with making creases for making a big crane.
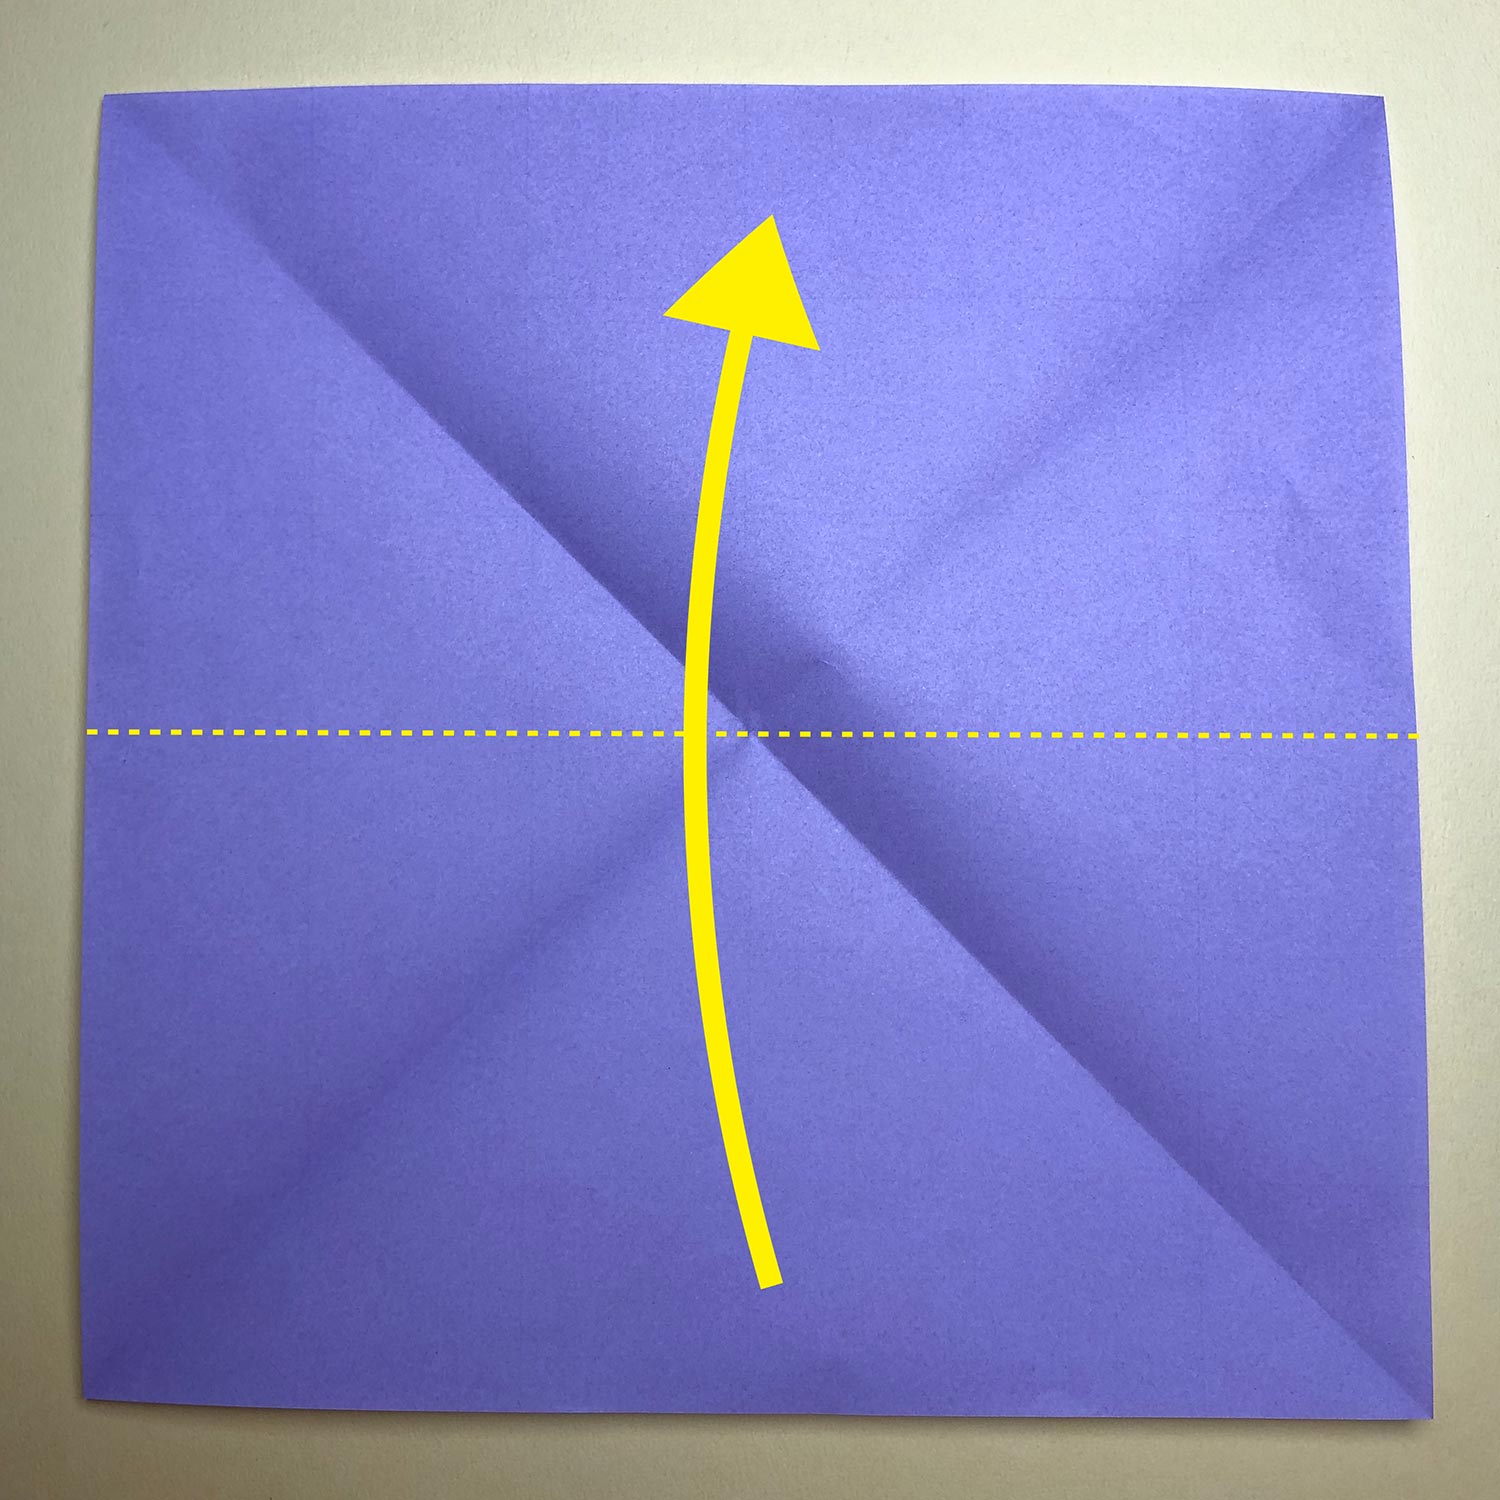
Put the paper colored side up.
Fold the paper in half diagonally in each direction.
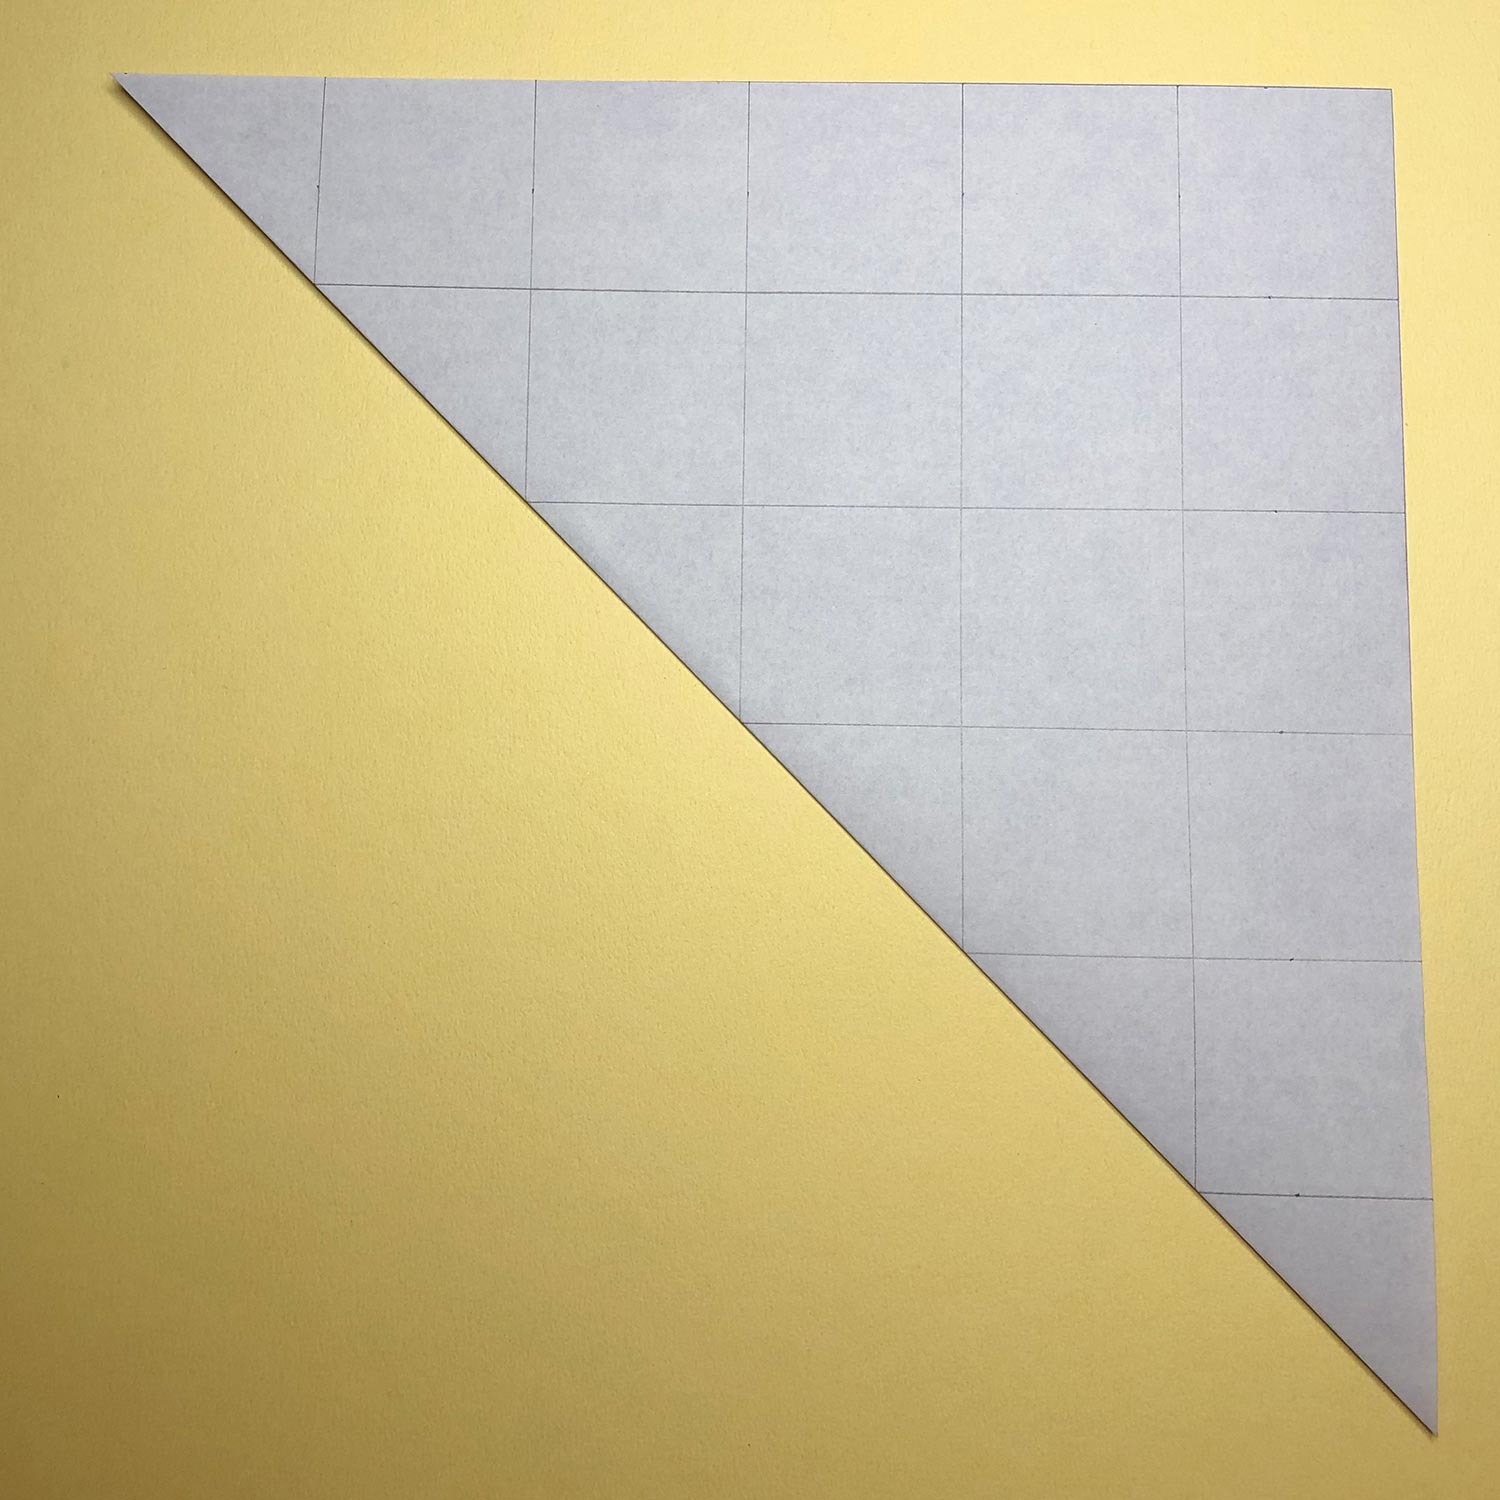
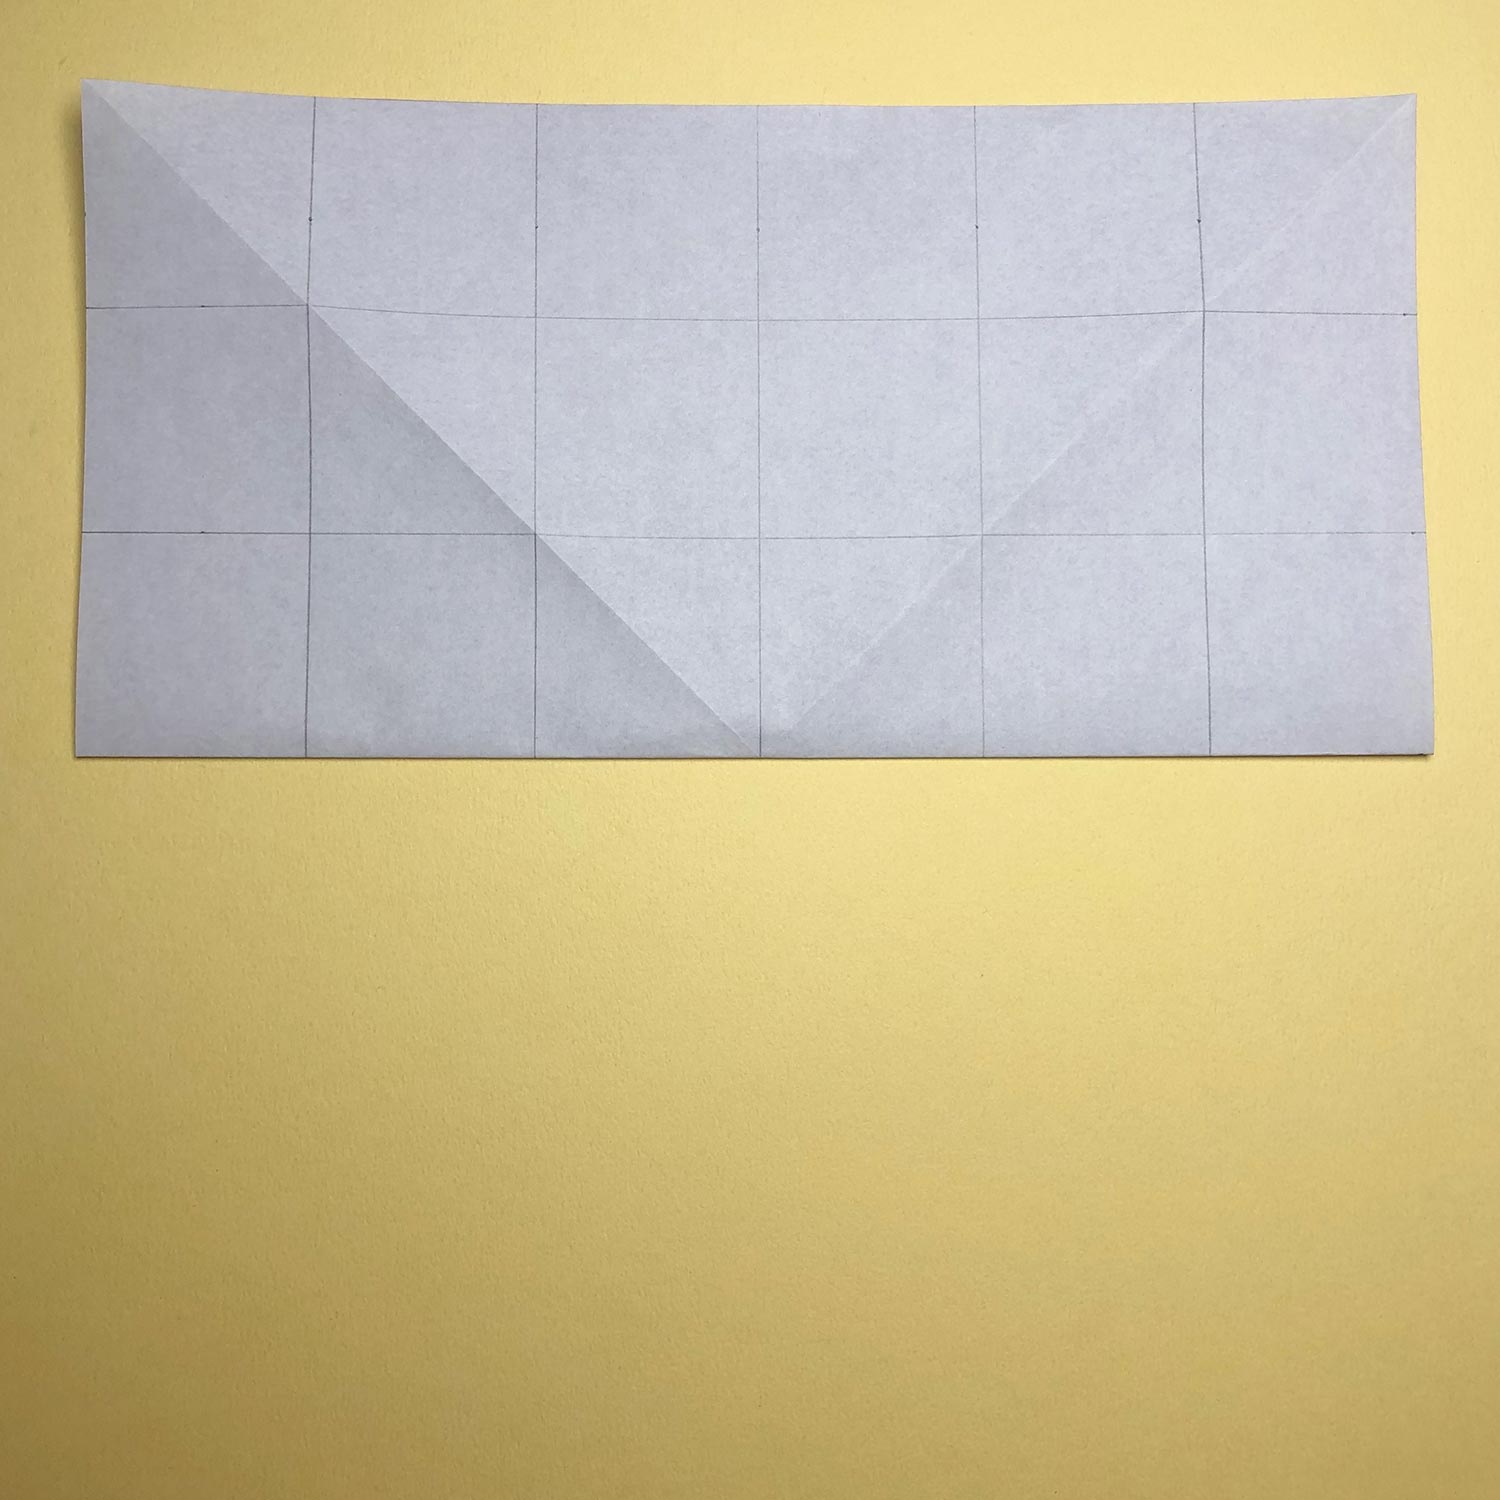
(2)
Fold the paper like this picture.
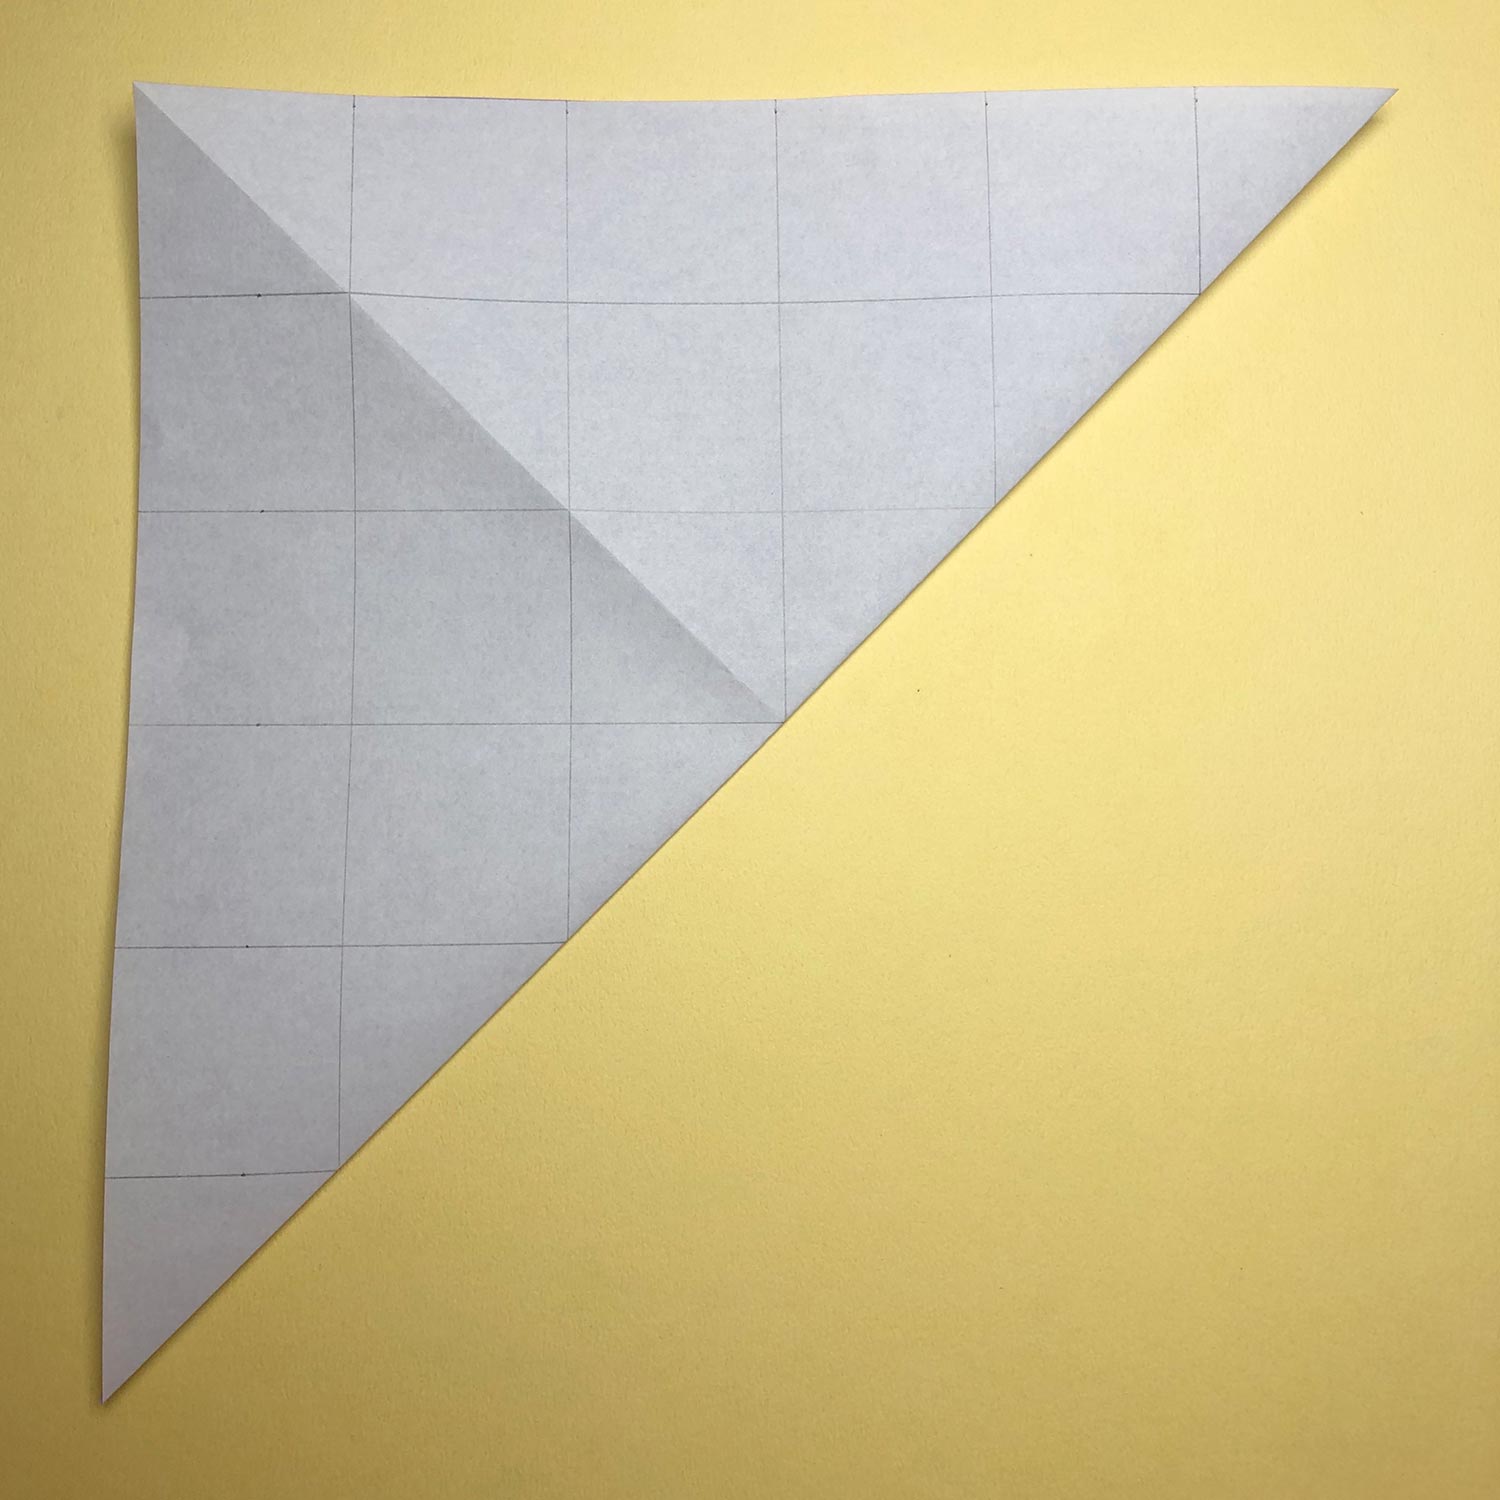
(3)
In the other direction, fold the paper like this picture.
(4)
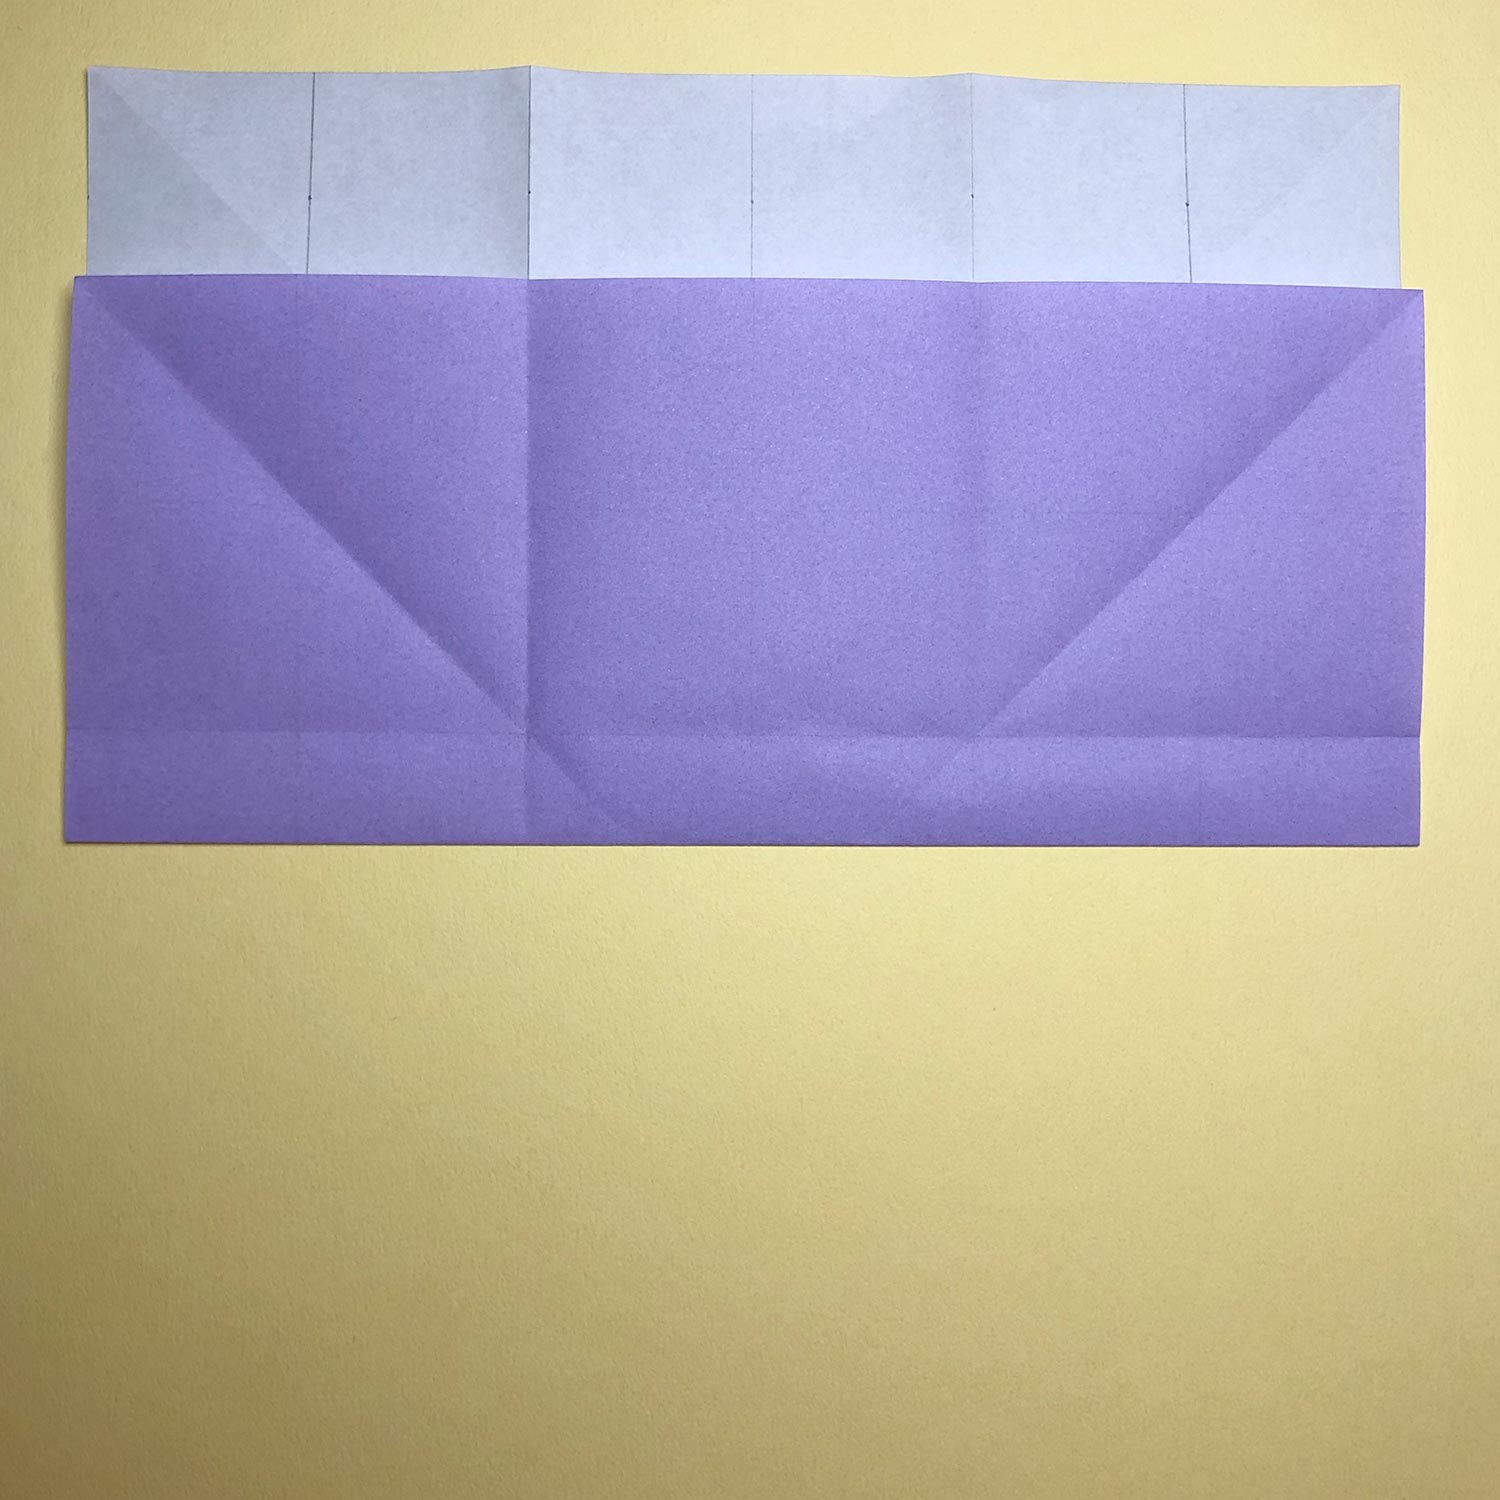
Then fold the paper in half.
(5)
Fold the paper like this picture.
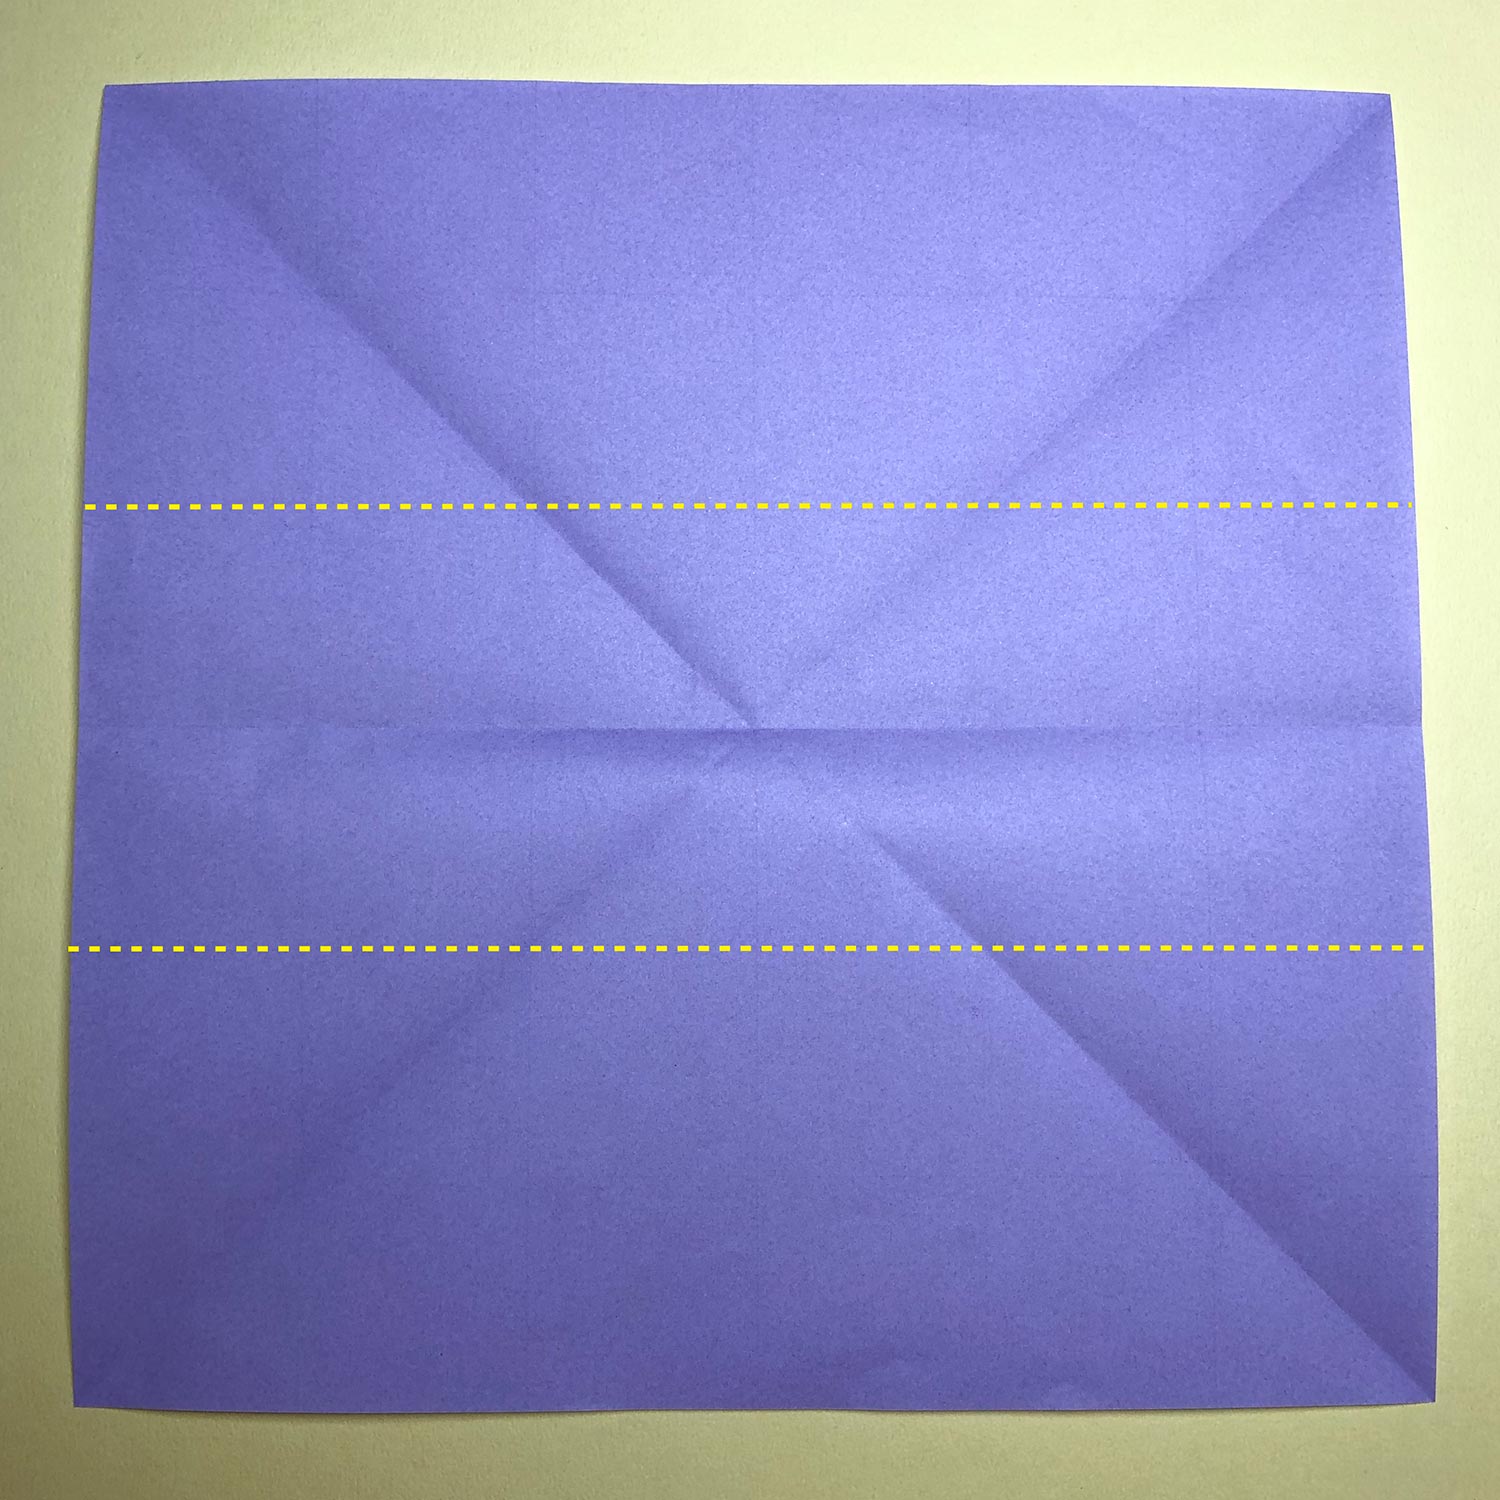
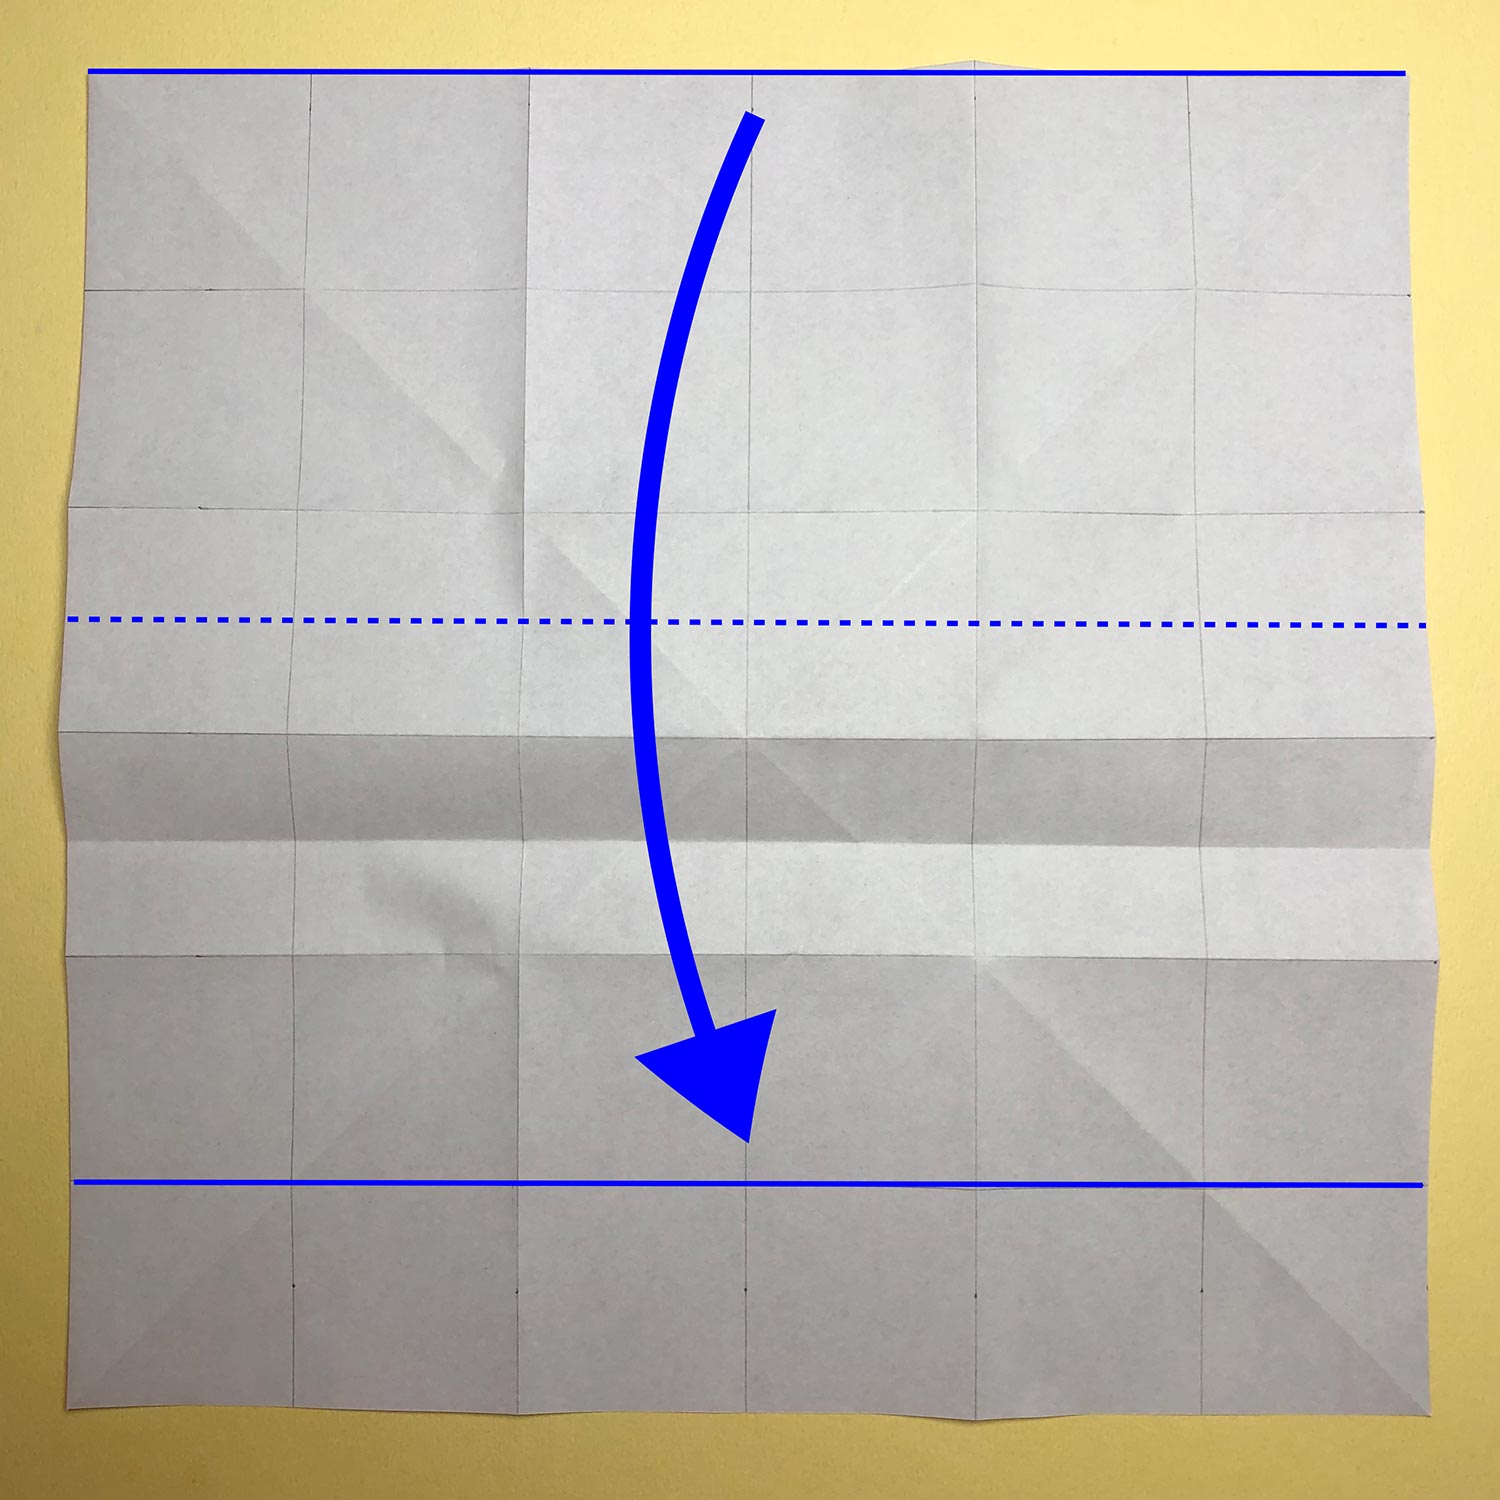
(6)
Then make creases along the dotted lines that you have drawn.
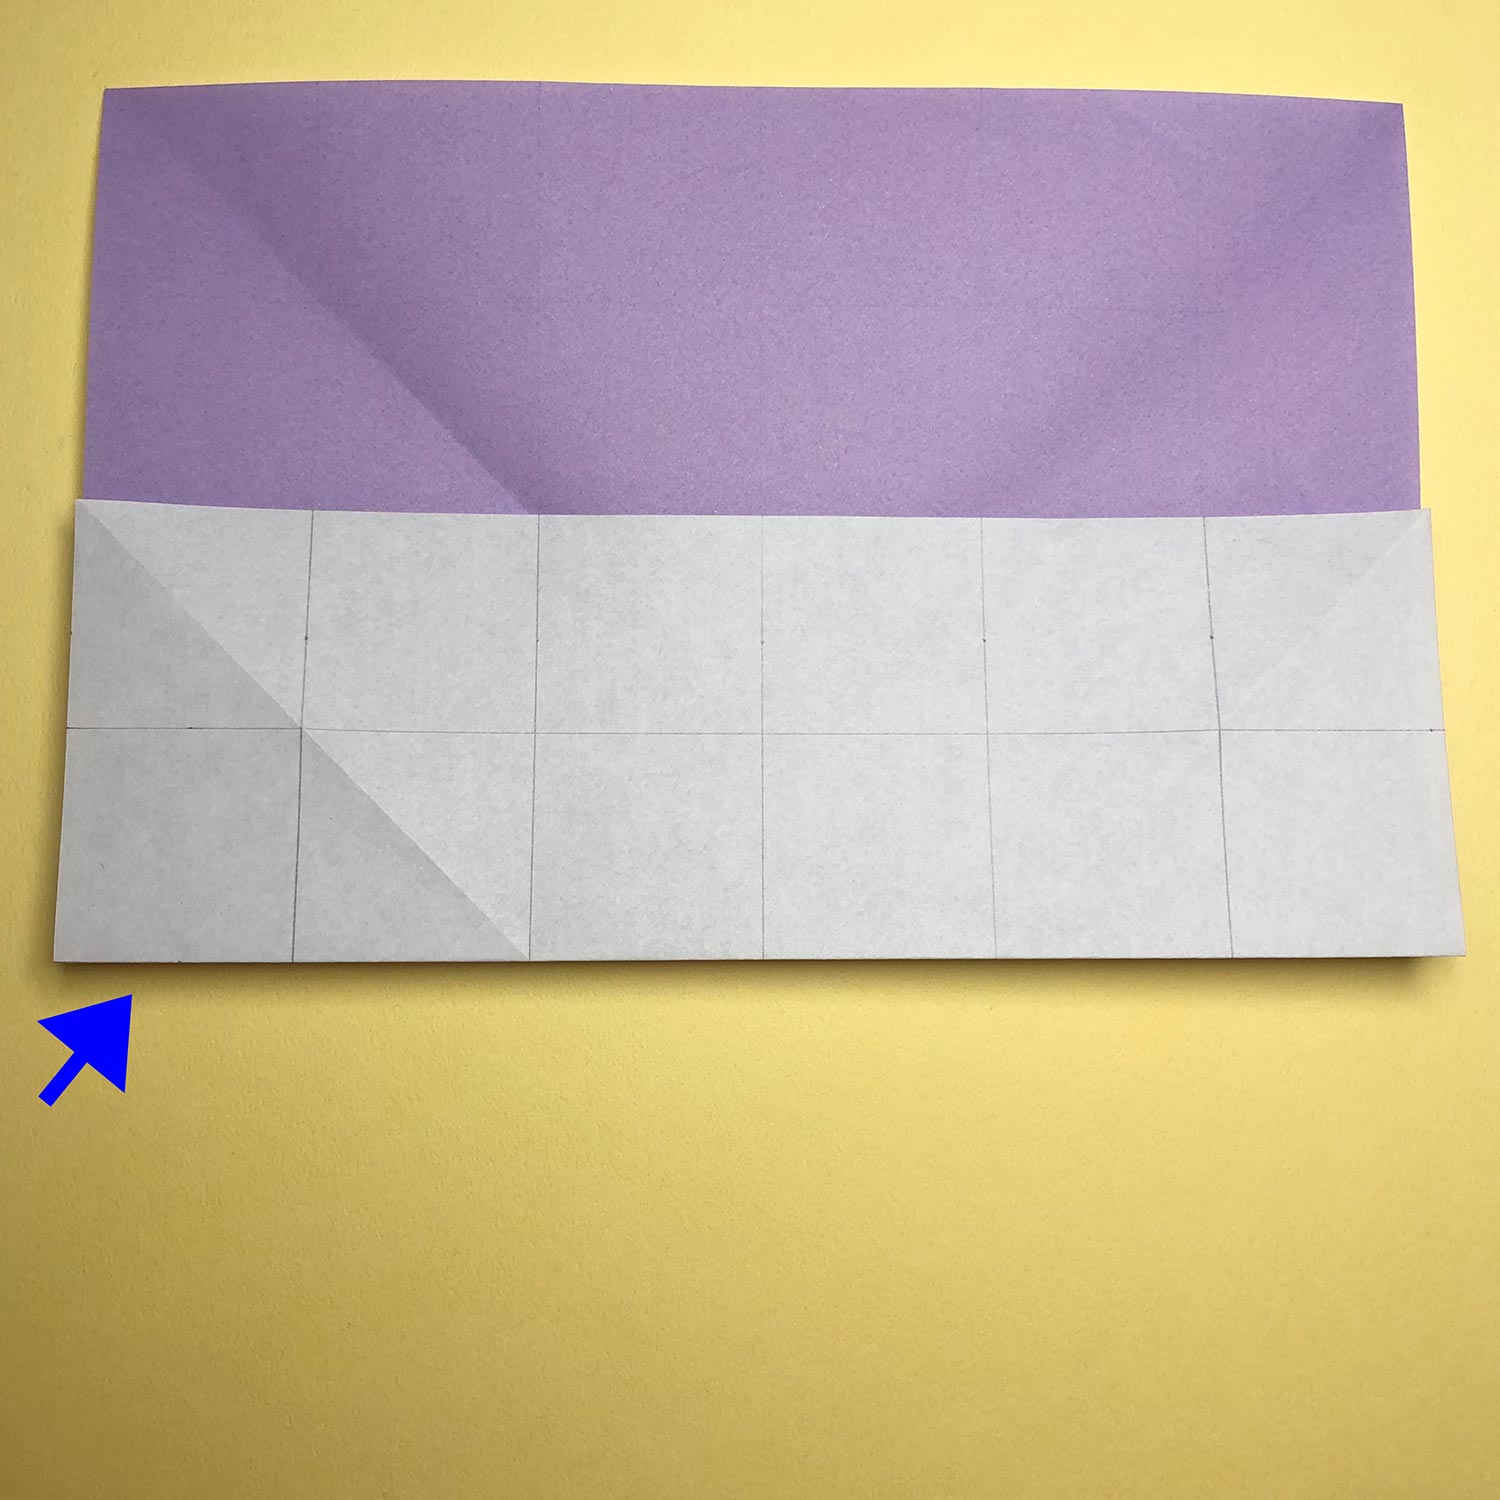
(7)
Make a crease along the second line, which you have drawn, from the edge like this picture.
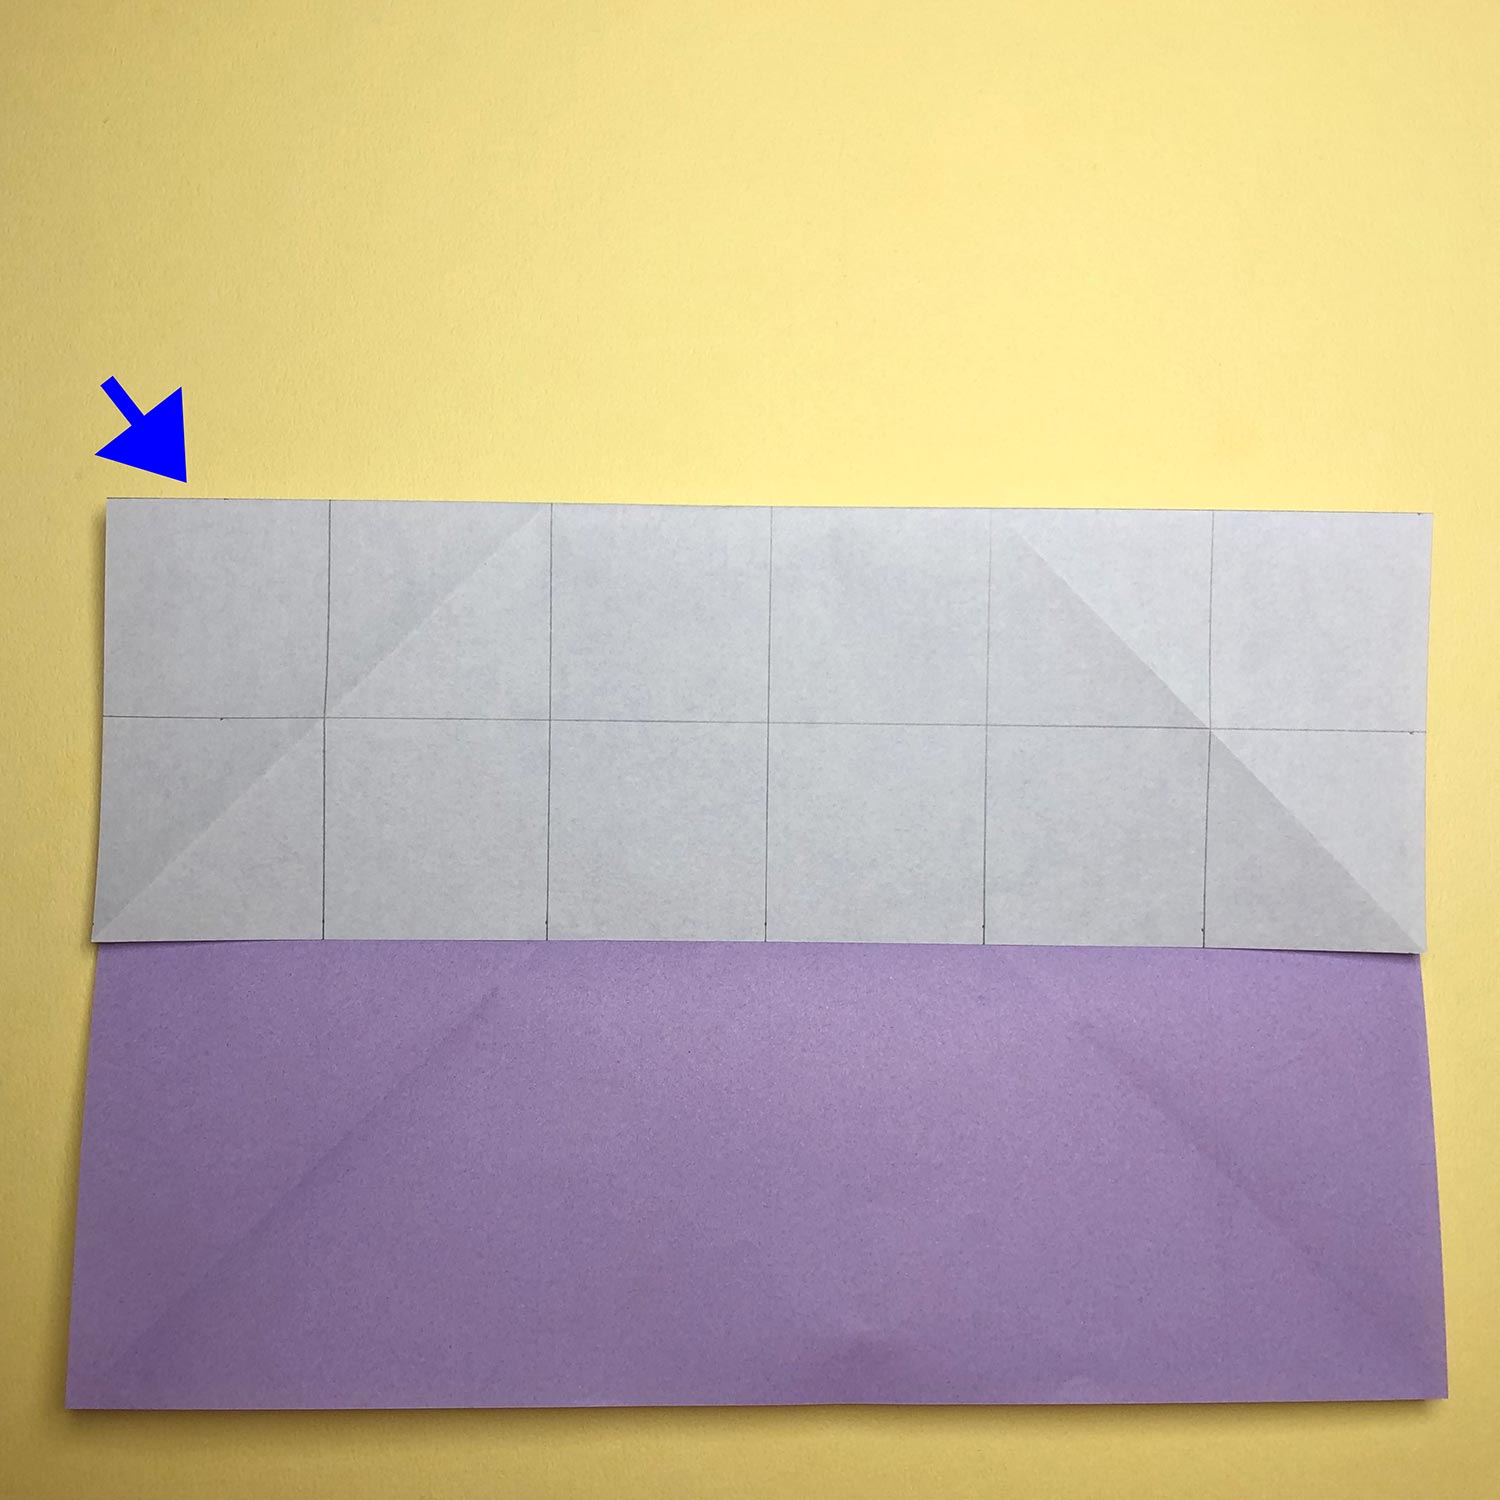
(8)
On the opposite side, make a crease along the second line, which you have drawn, from the edge as well.
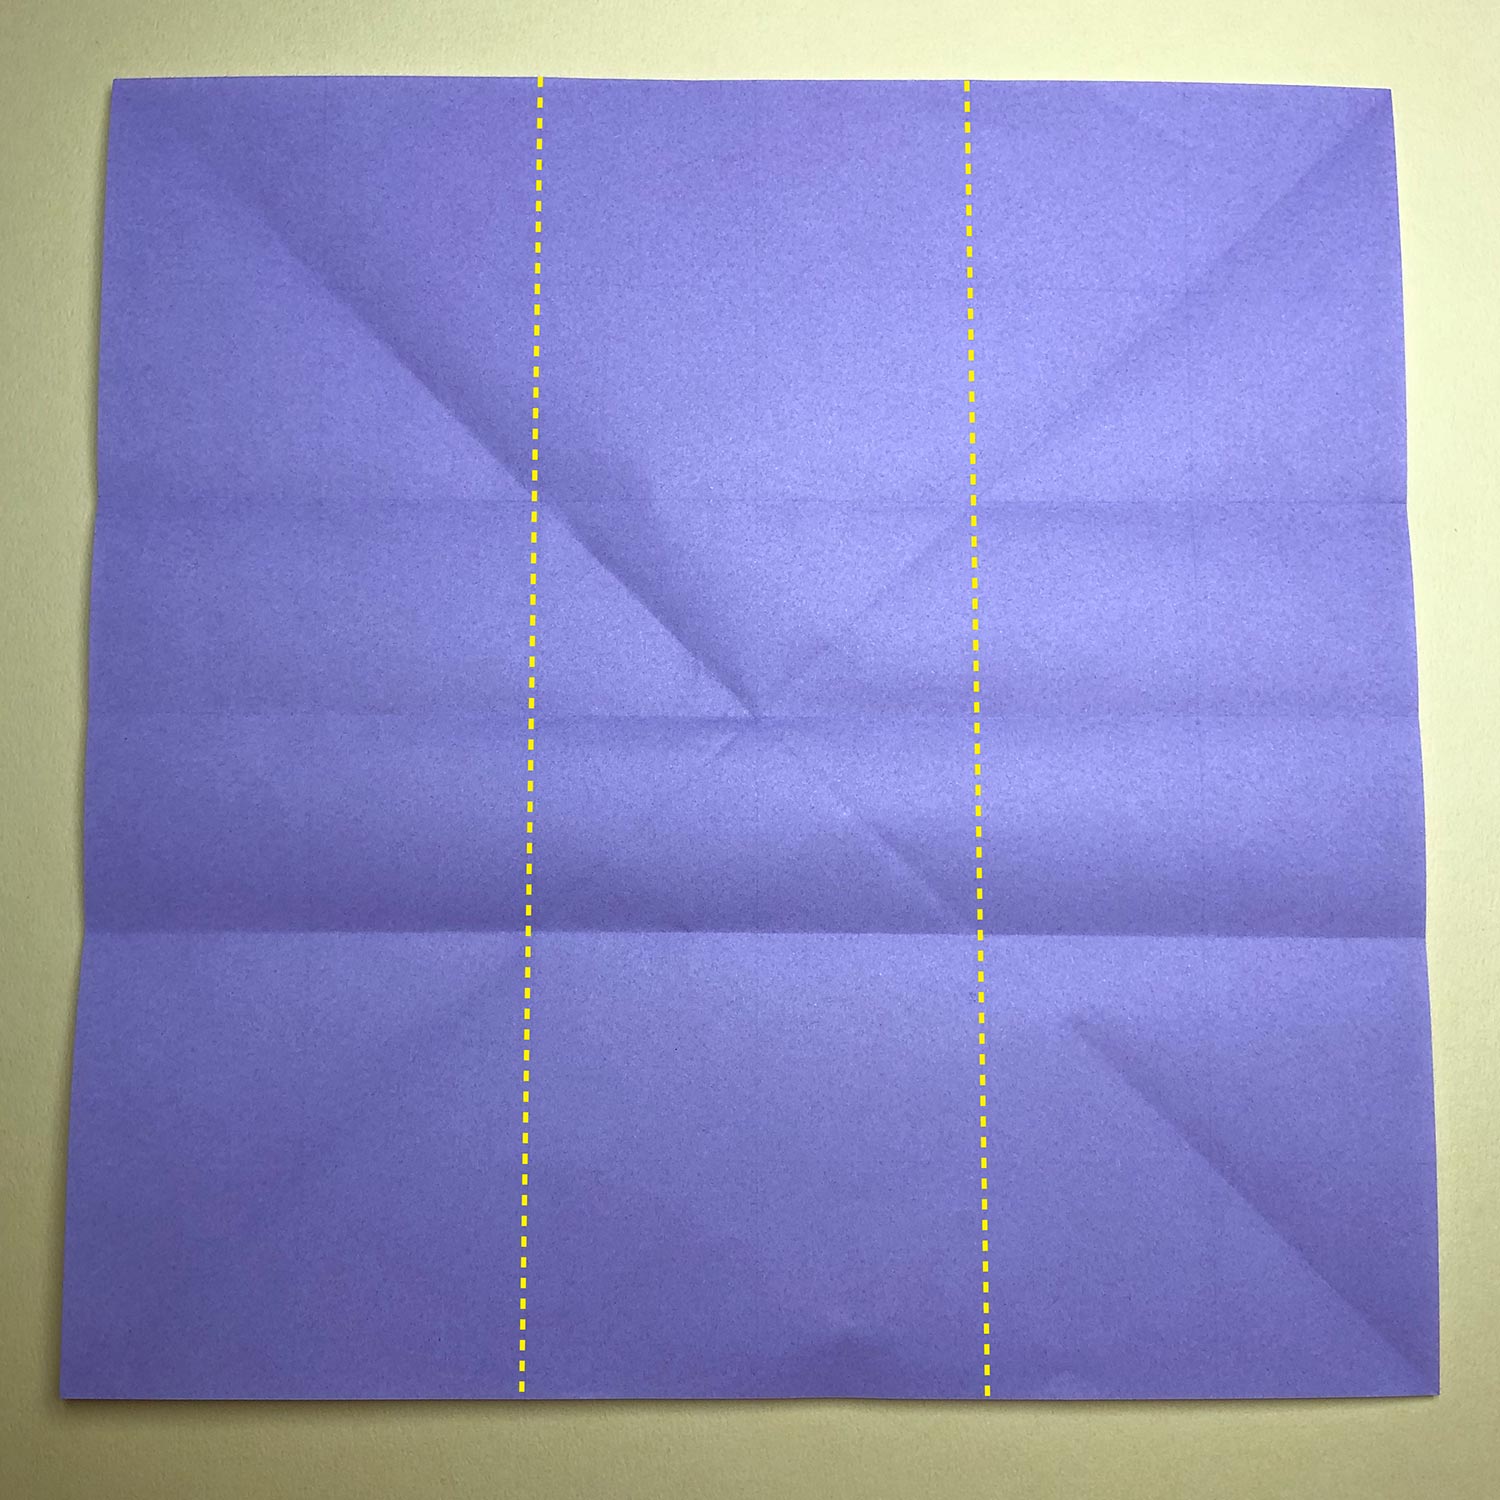
(9)
Then make creases along the dotted lines that you have drawn.
(10)
Make a crease along the second line from the edge.

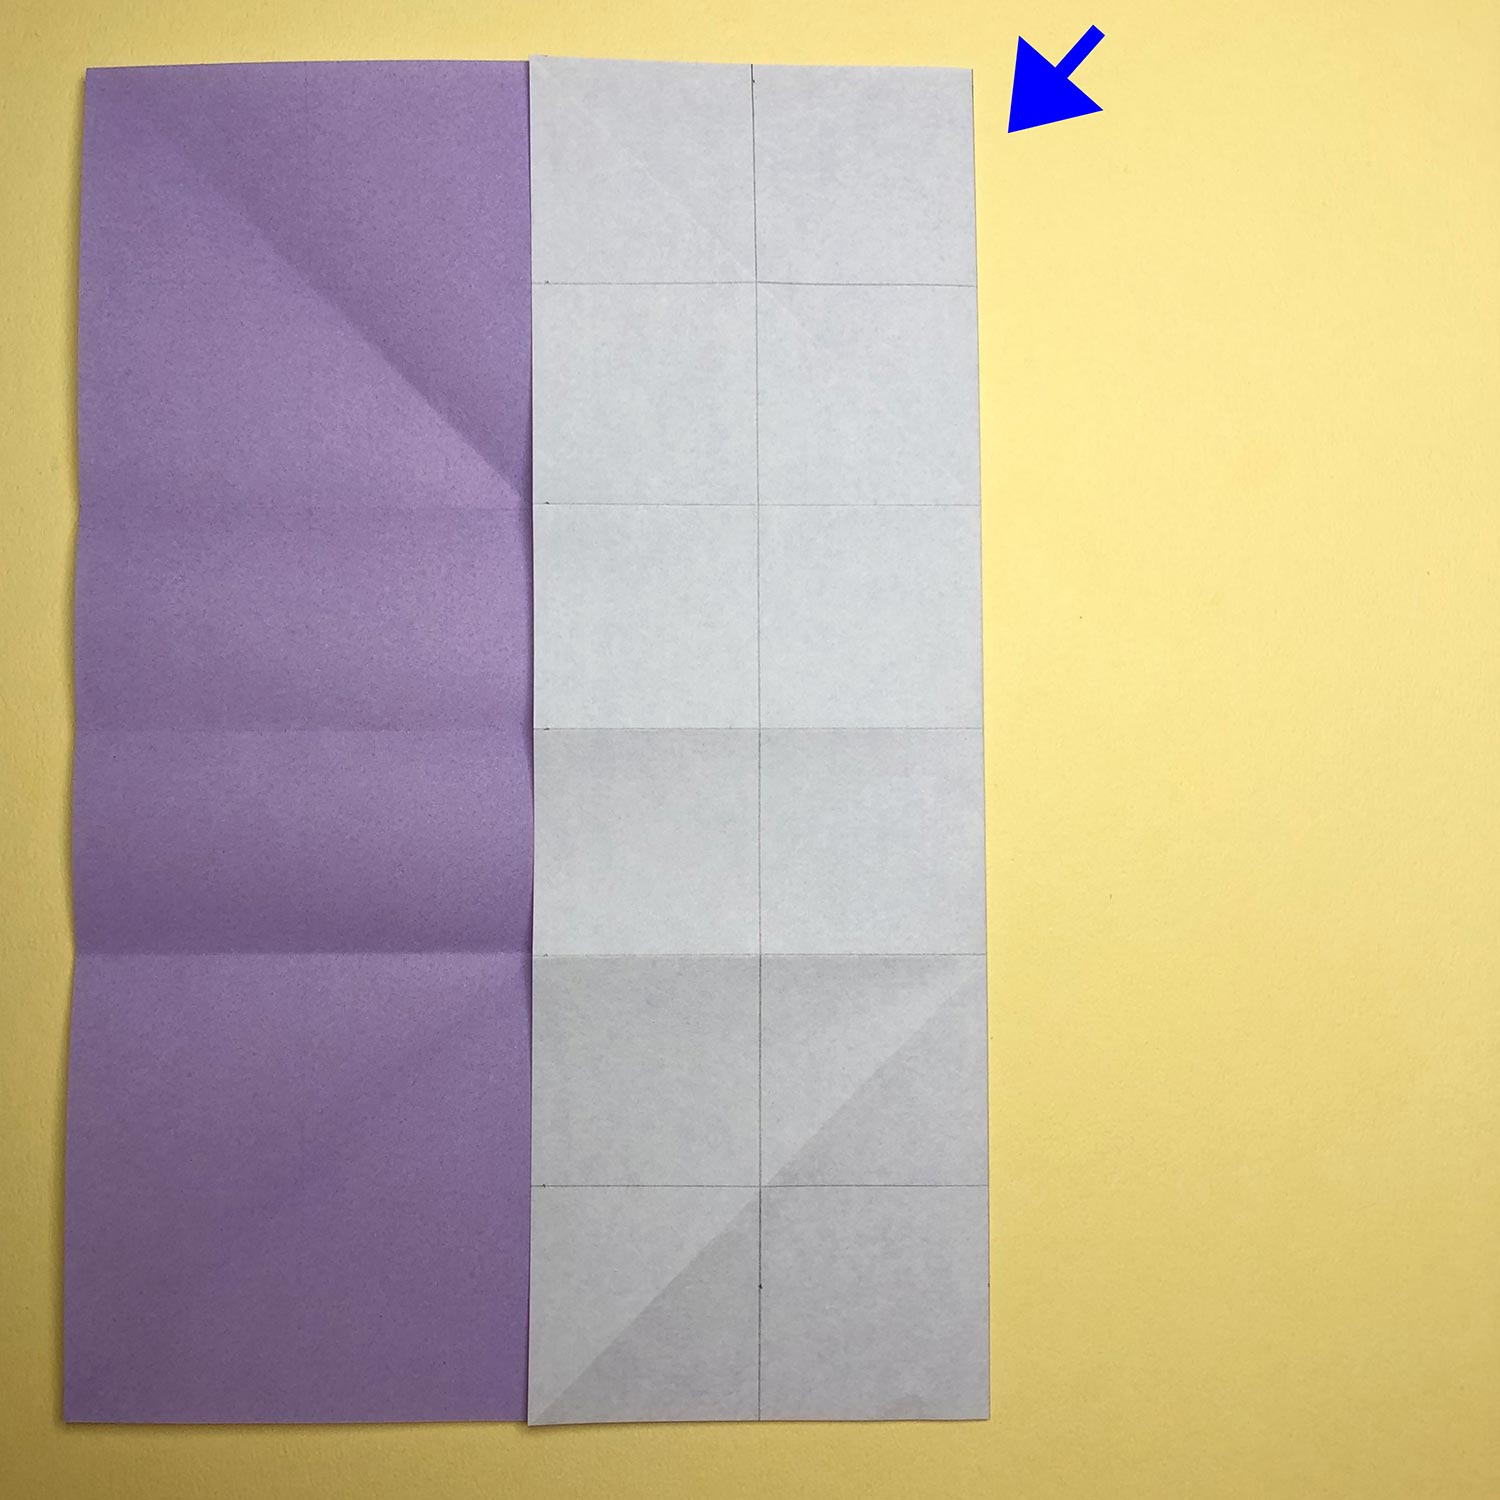
(11)
On the opposite side, make a crease along the second line from the edge.
After making creases, spread and turn the paper over.
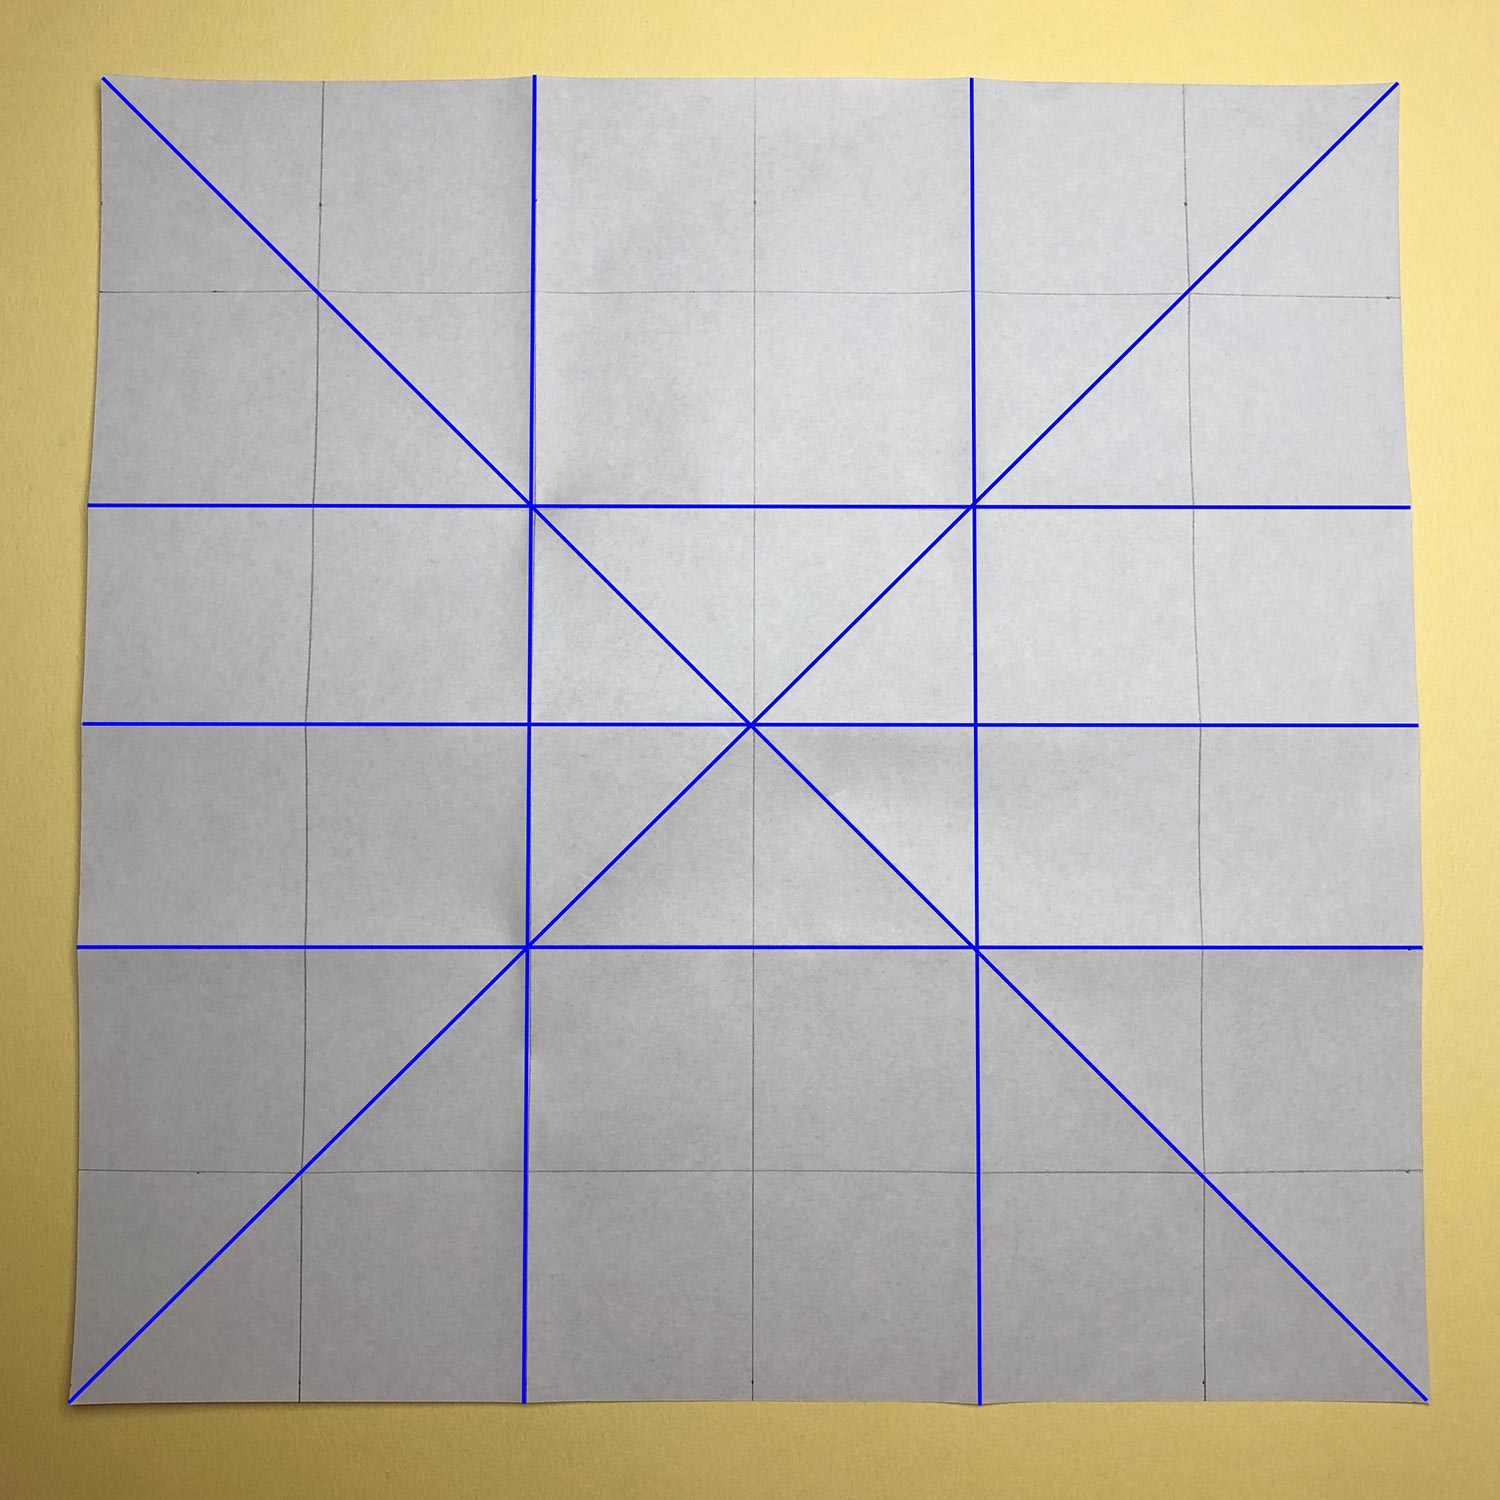
(12)
The blue lines are creases which you have made.
Put the paper like this picture.

(13)
Fold the bottom to the first line from the top to make a crease at the dotted line.
(14)
Fold the paper like this picture.
(15)
Then fold the top to the first line from the bottom to make a crease at the dotted line.

(16)
Fold the paper like this picture.
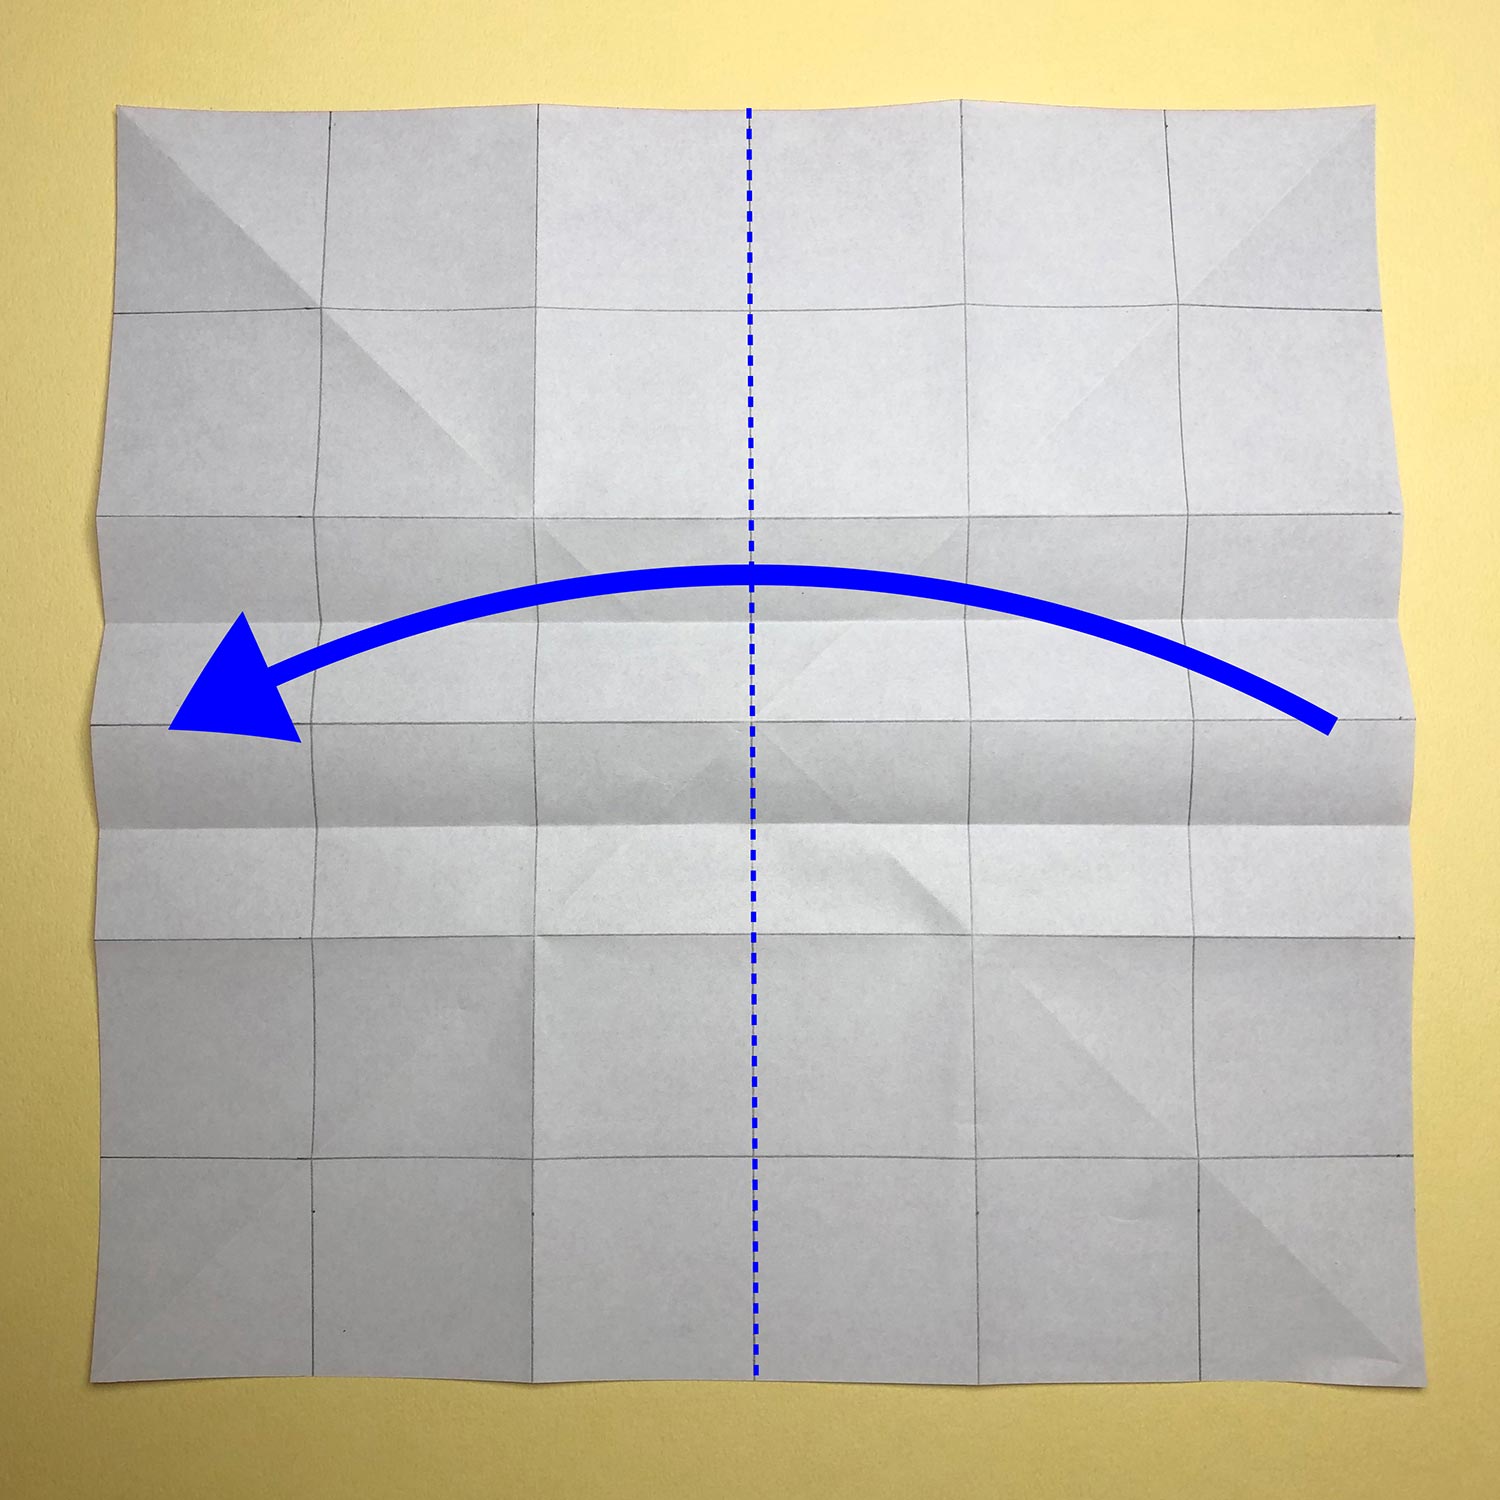
(17)
Then fold the paper in half.
(Fold the right to the left.)

(18)
Fold the paper like this picture.