
(41)
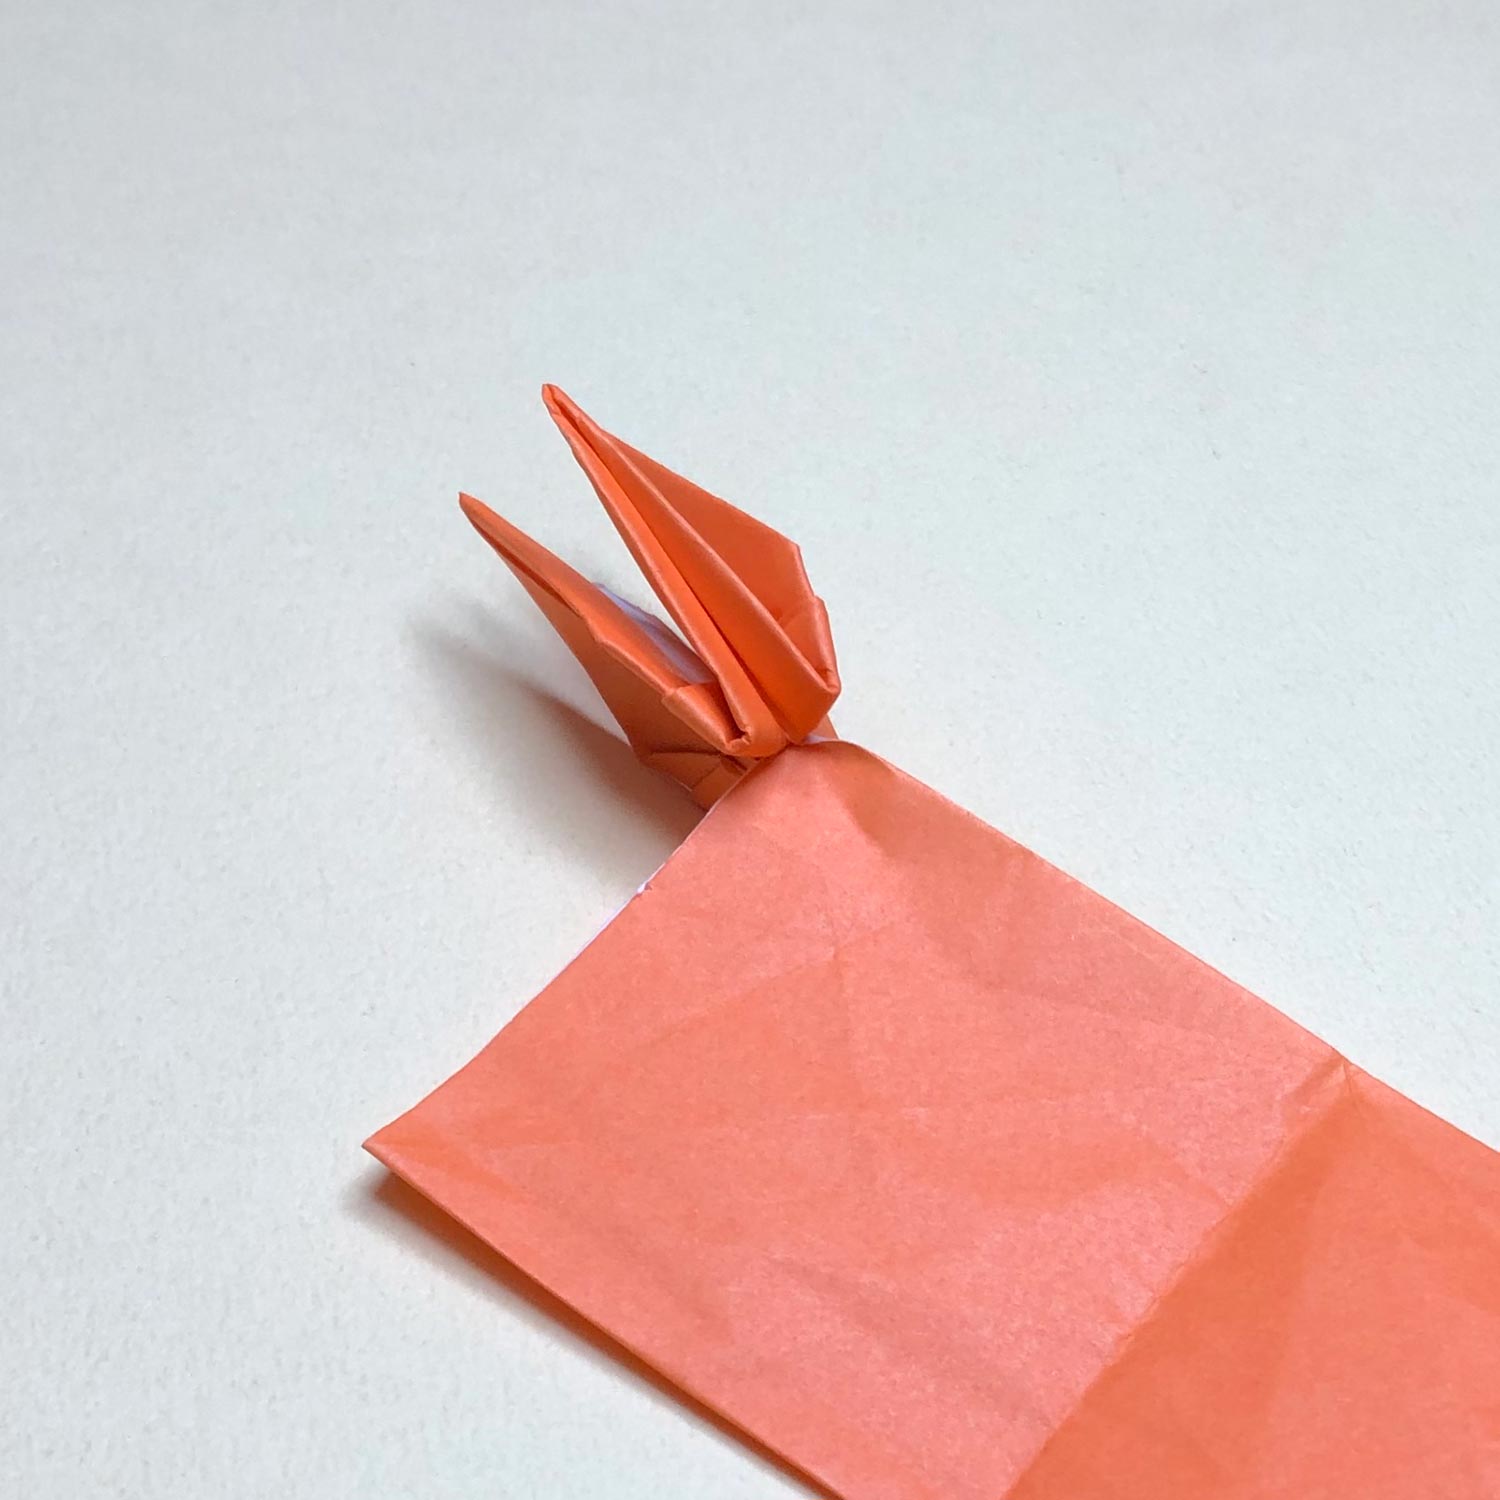
Then fold the head/tail to the center and raise it.

(42)
Raise it like this picture.
(43)
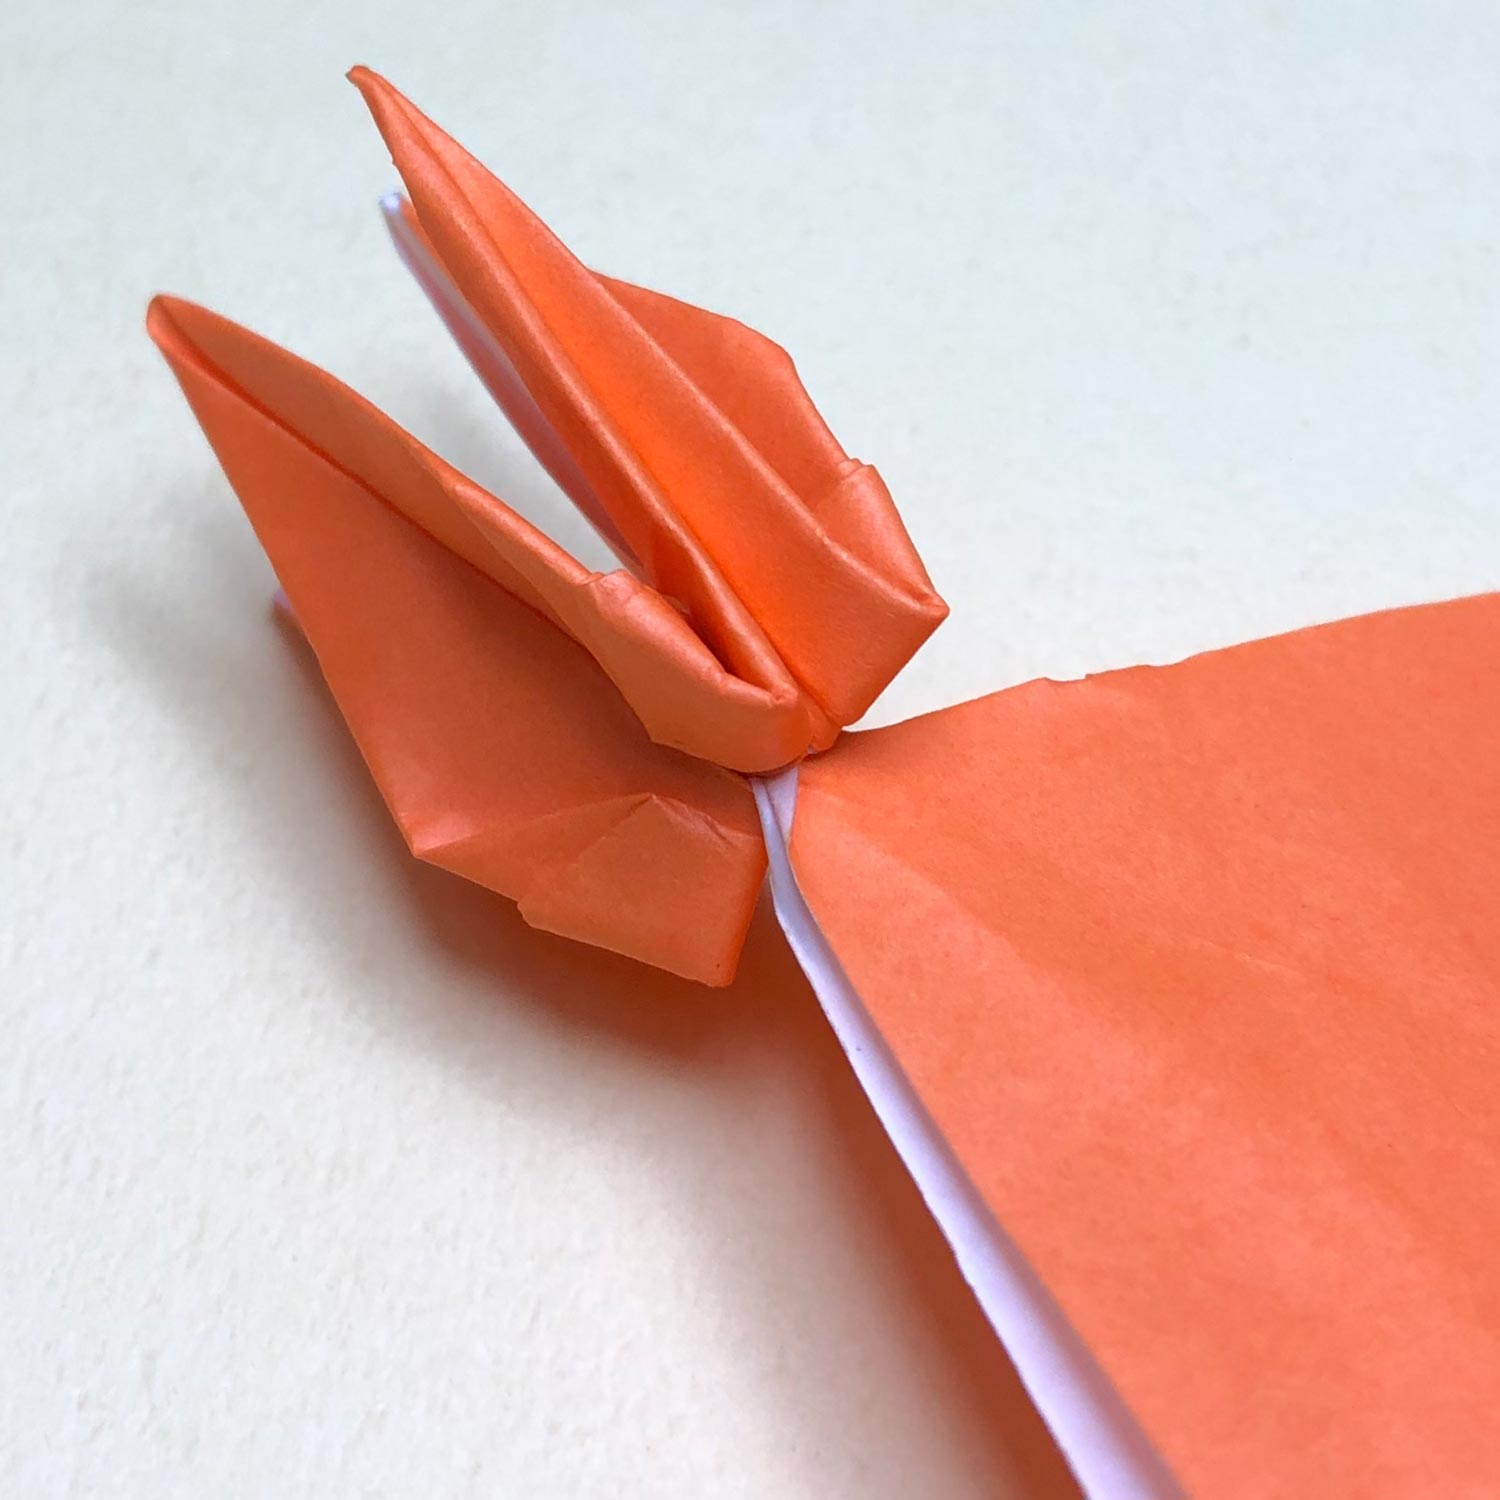
Then fold the other head/tail to the center and raise it.
(44)
Raise it like this picture.
The crane is finished.
(45)
This is an enlarged picture of connecting parts.
If you raise two head/tail well, connecting parts will be under a belly of a completed crane like this picture.
(46)
Then fold the other square.
Fold four corners to the center point like this picture.
Then turn the paper over as it is.
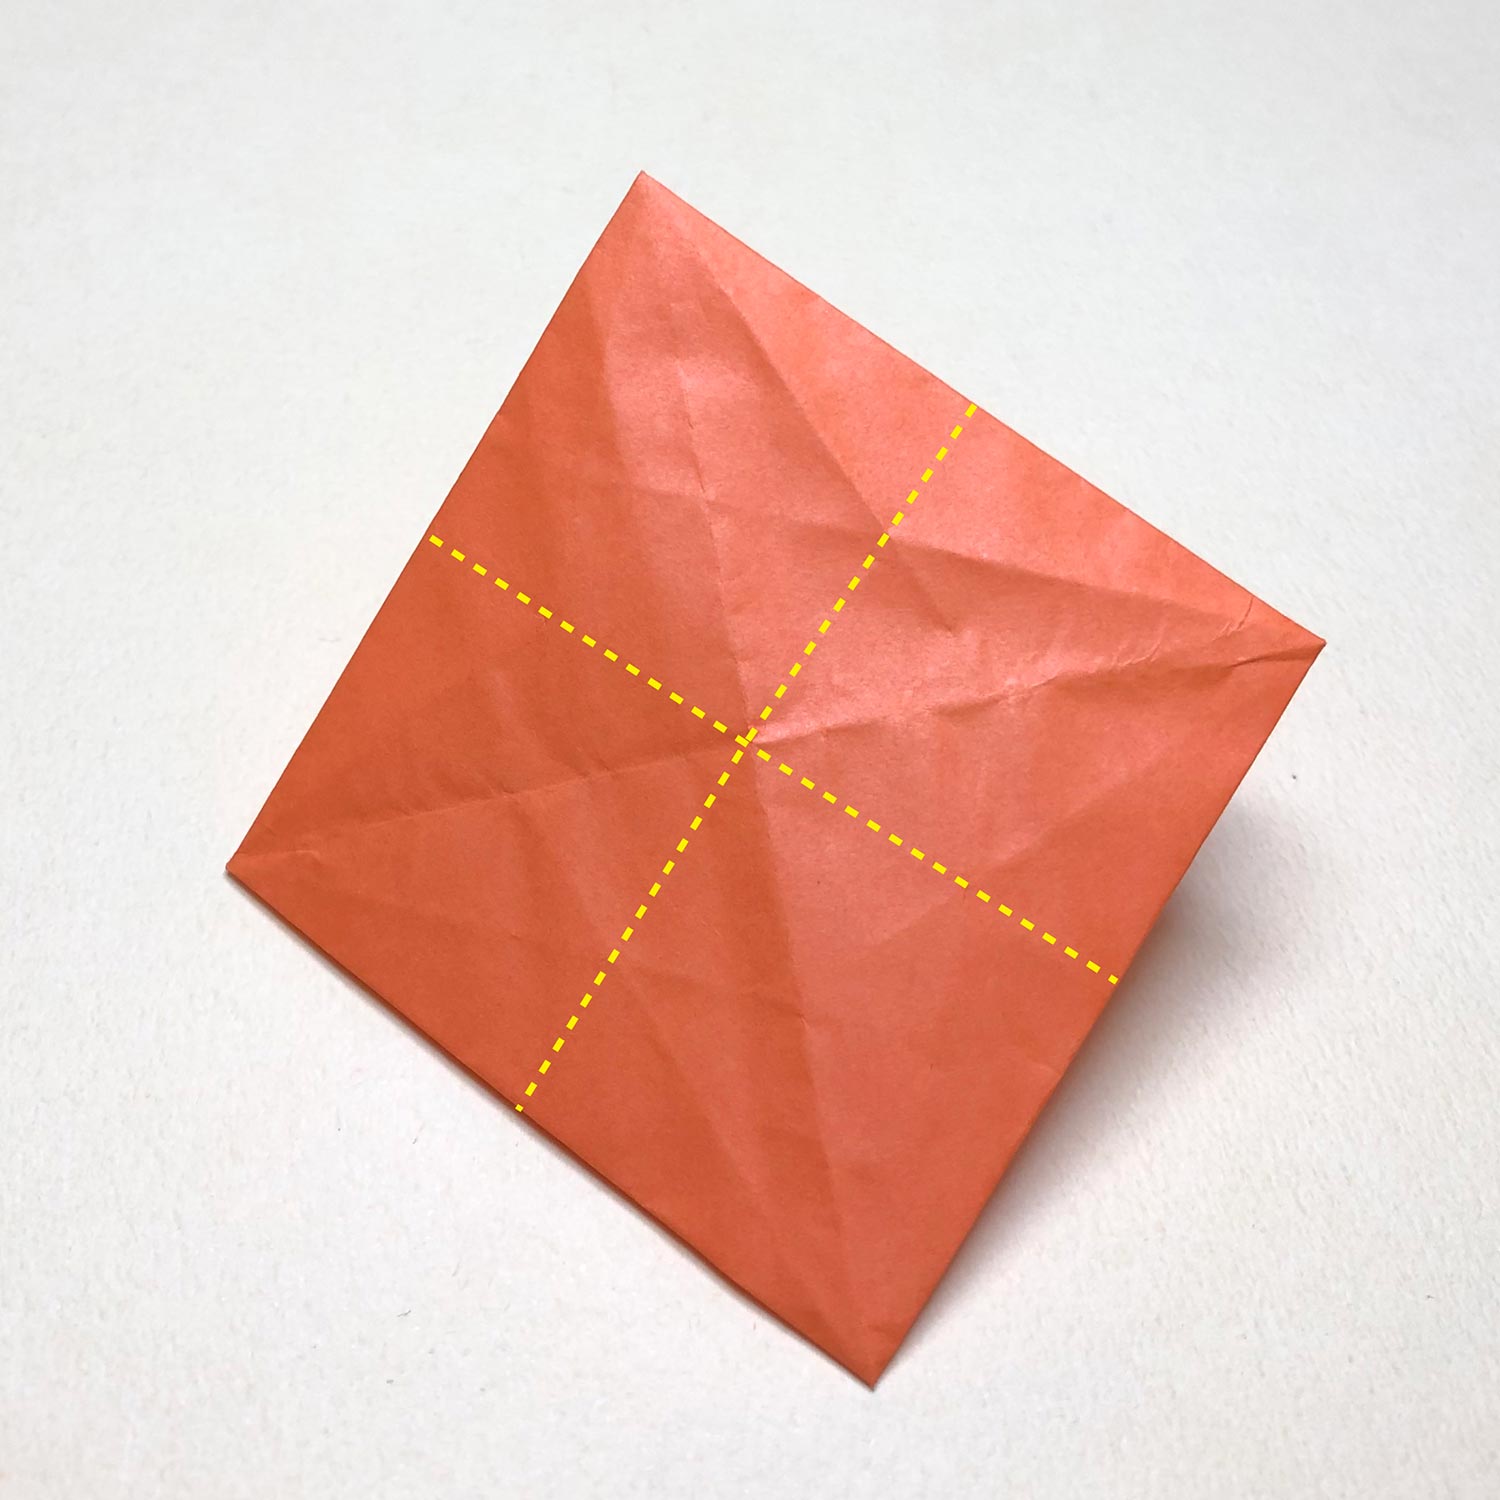
(47)
After tuning the paper over, make mountain-folds again on the dotted lines.

(48)
Make mountain-folds like this picture.
Then turn the paper over.
(49)
After turning the paper over, fold the paper on the eight creases around in order to make a star-shape. (Make valley-folds on the eight creases around.)

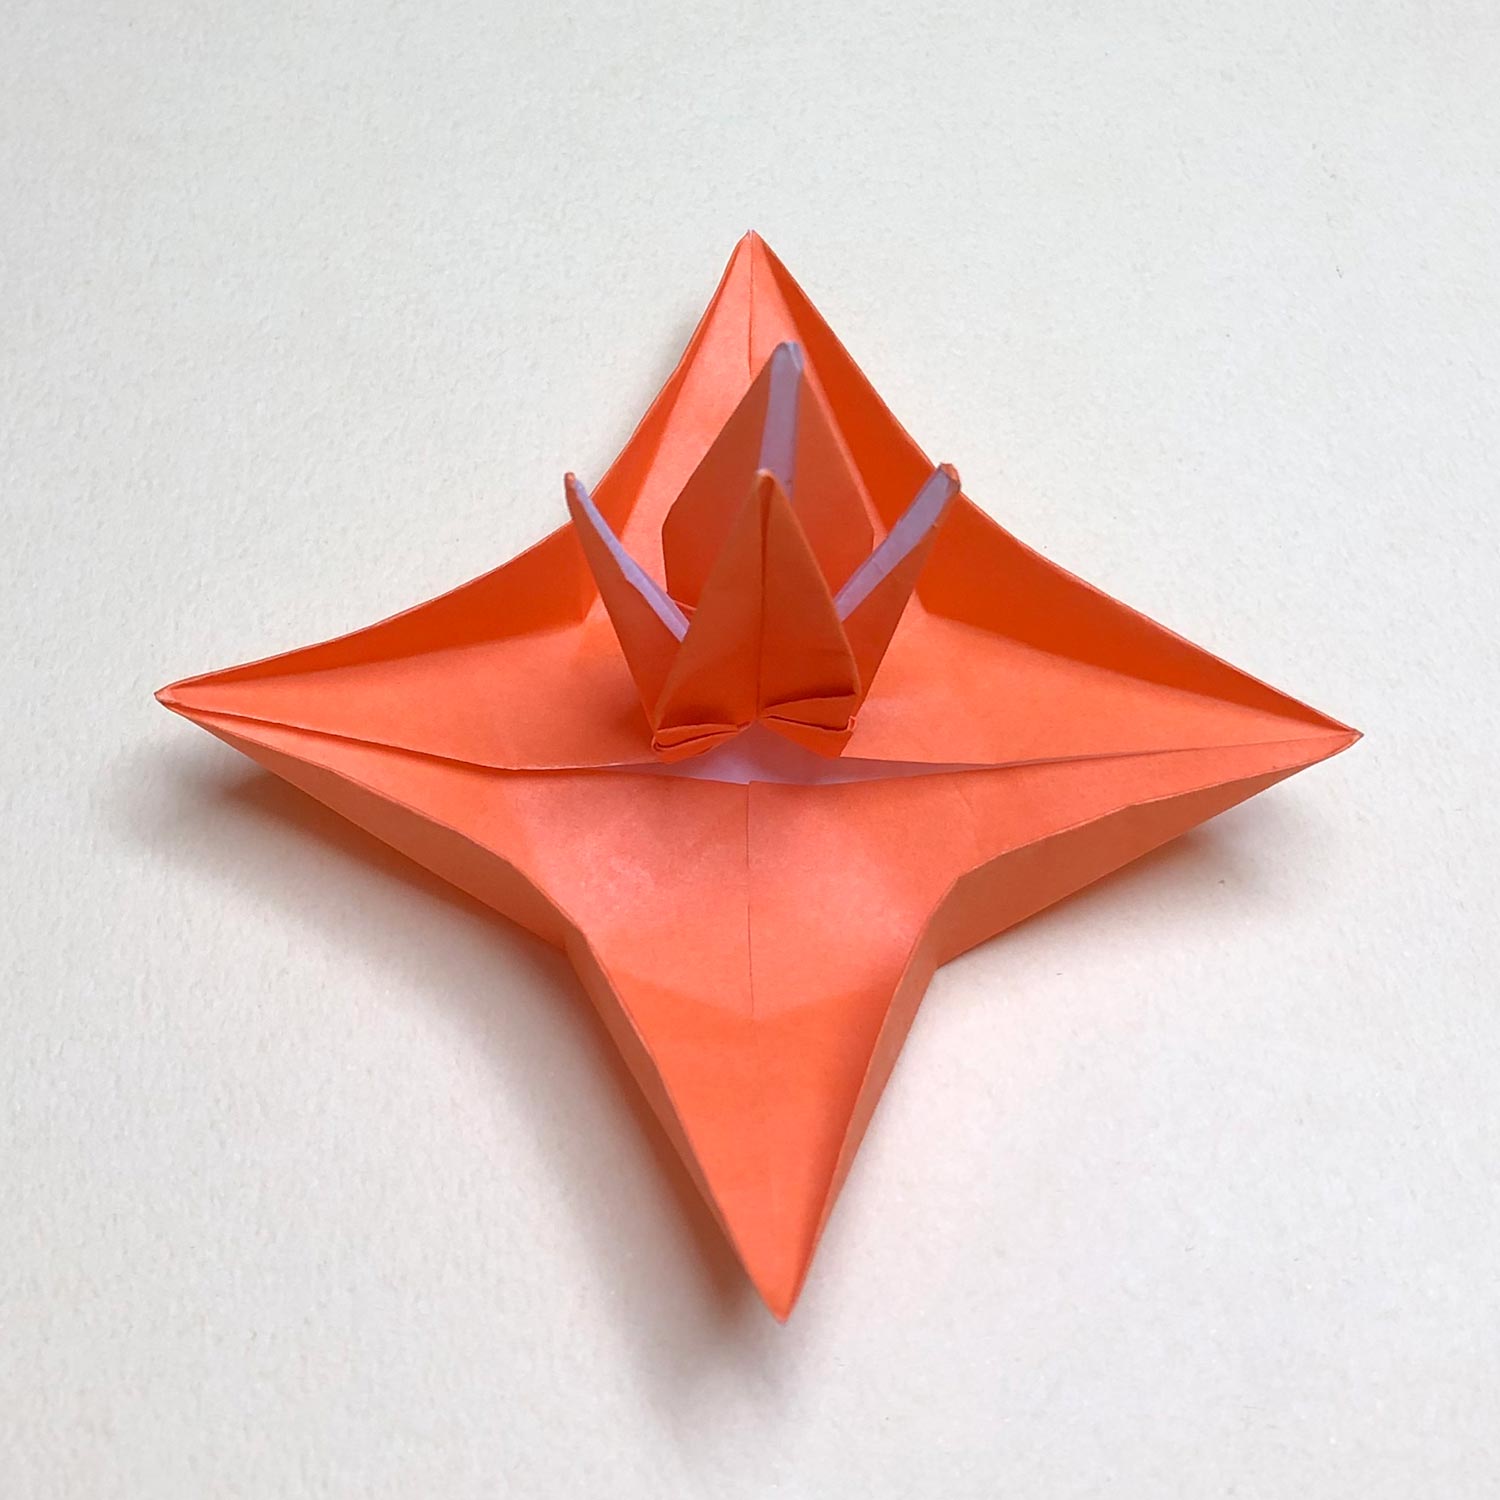
(50)
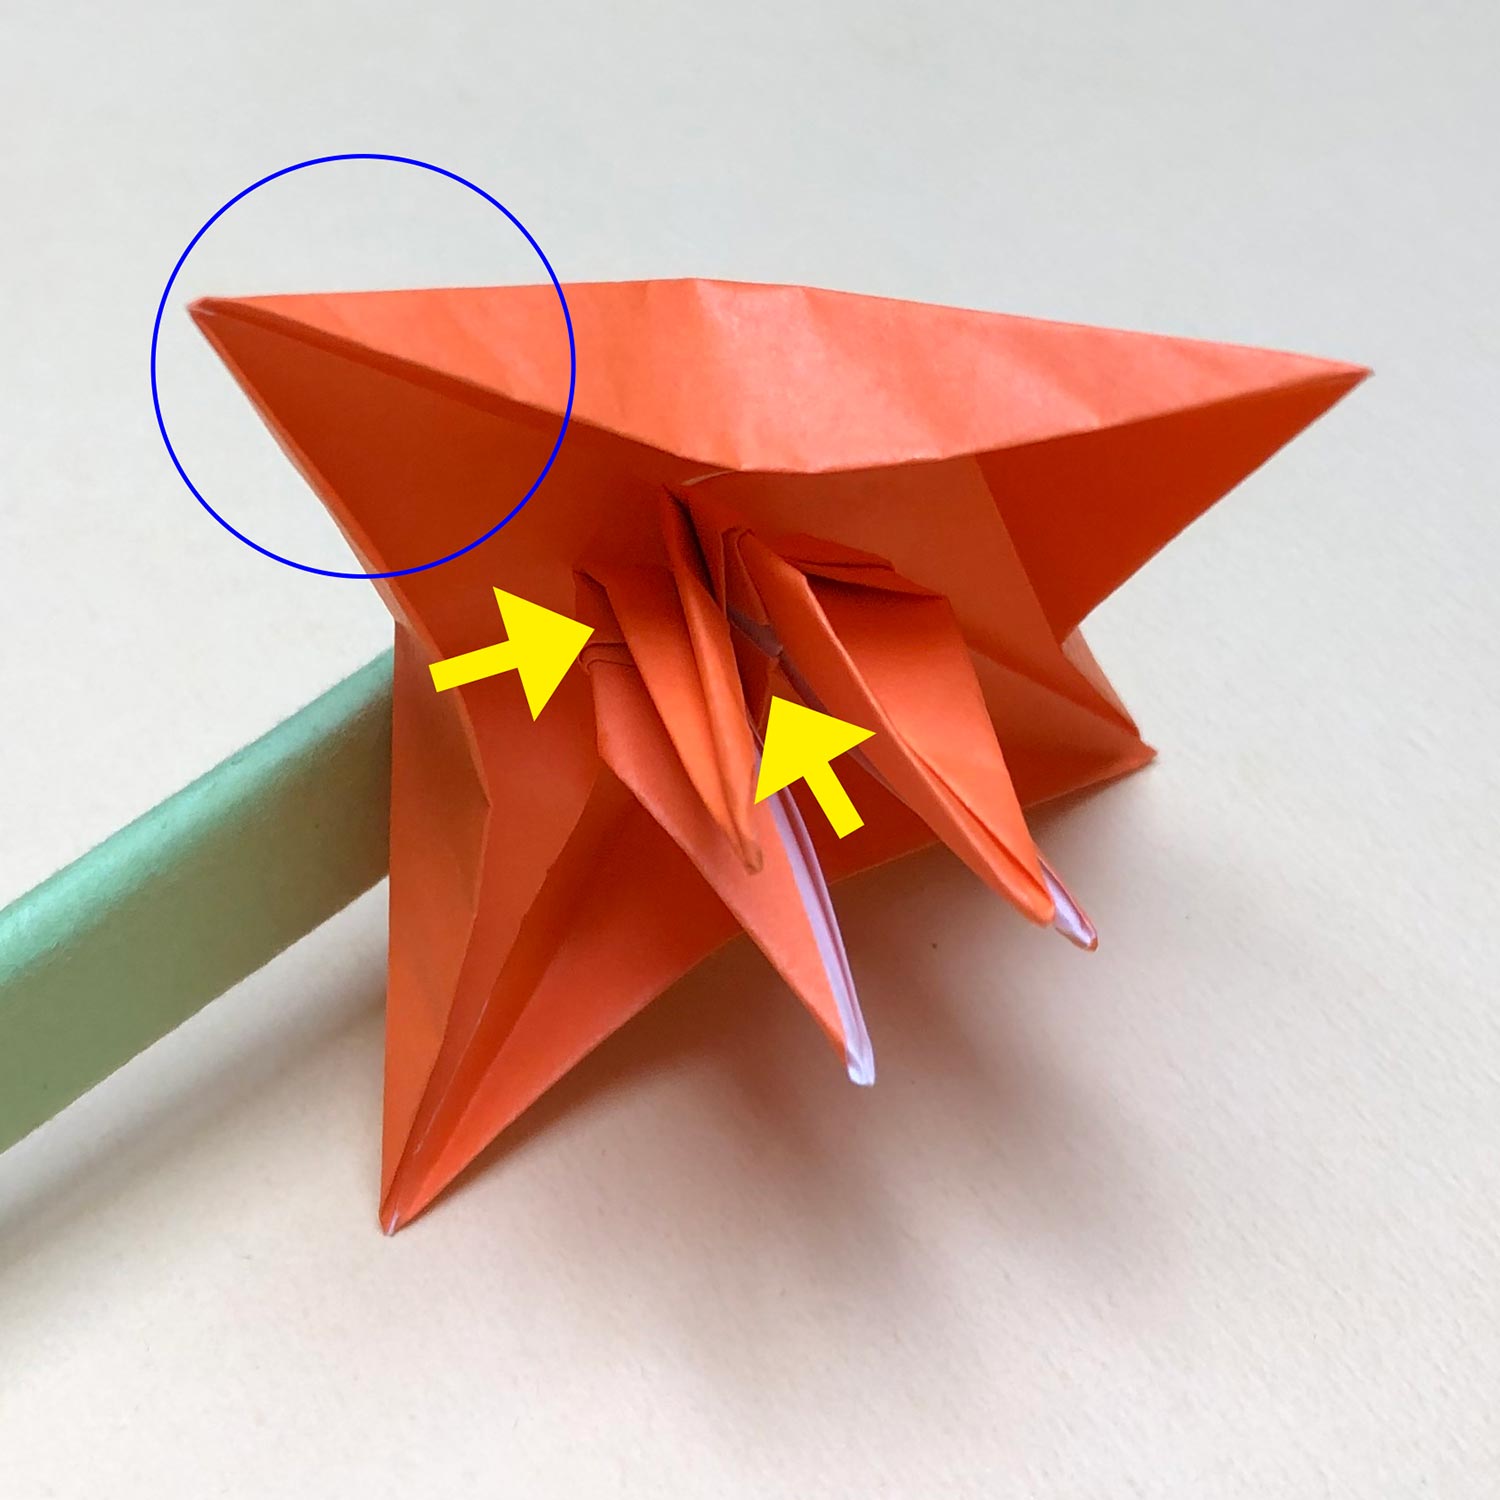
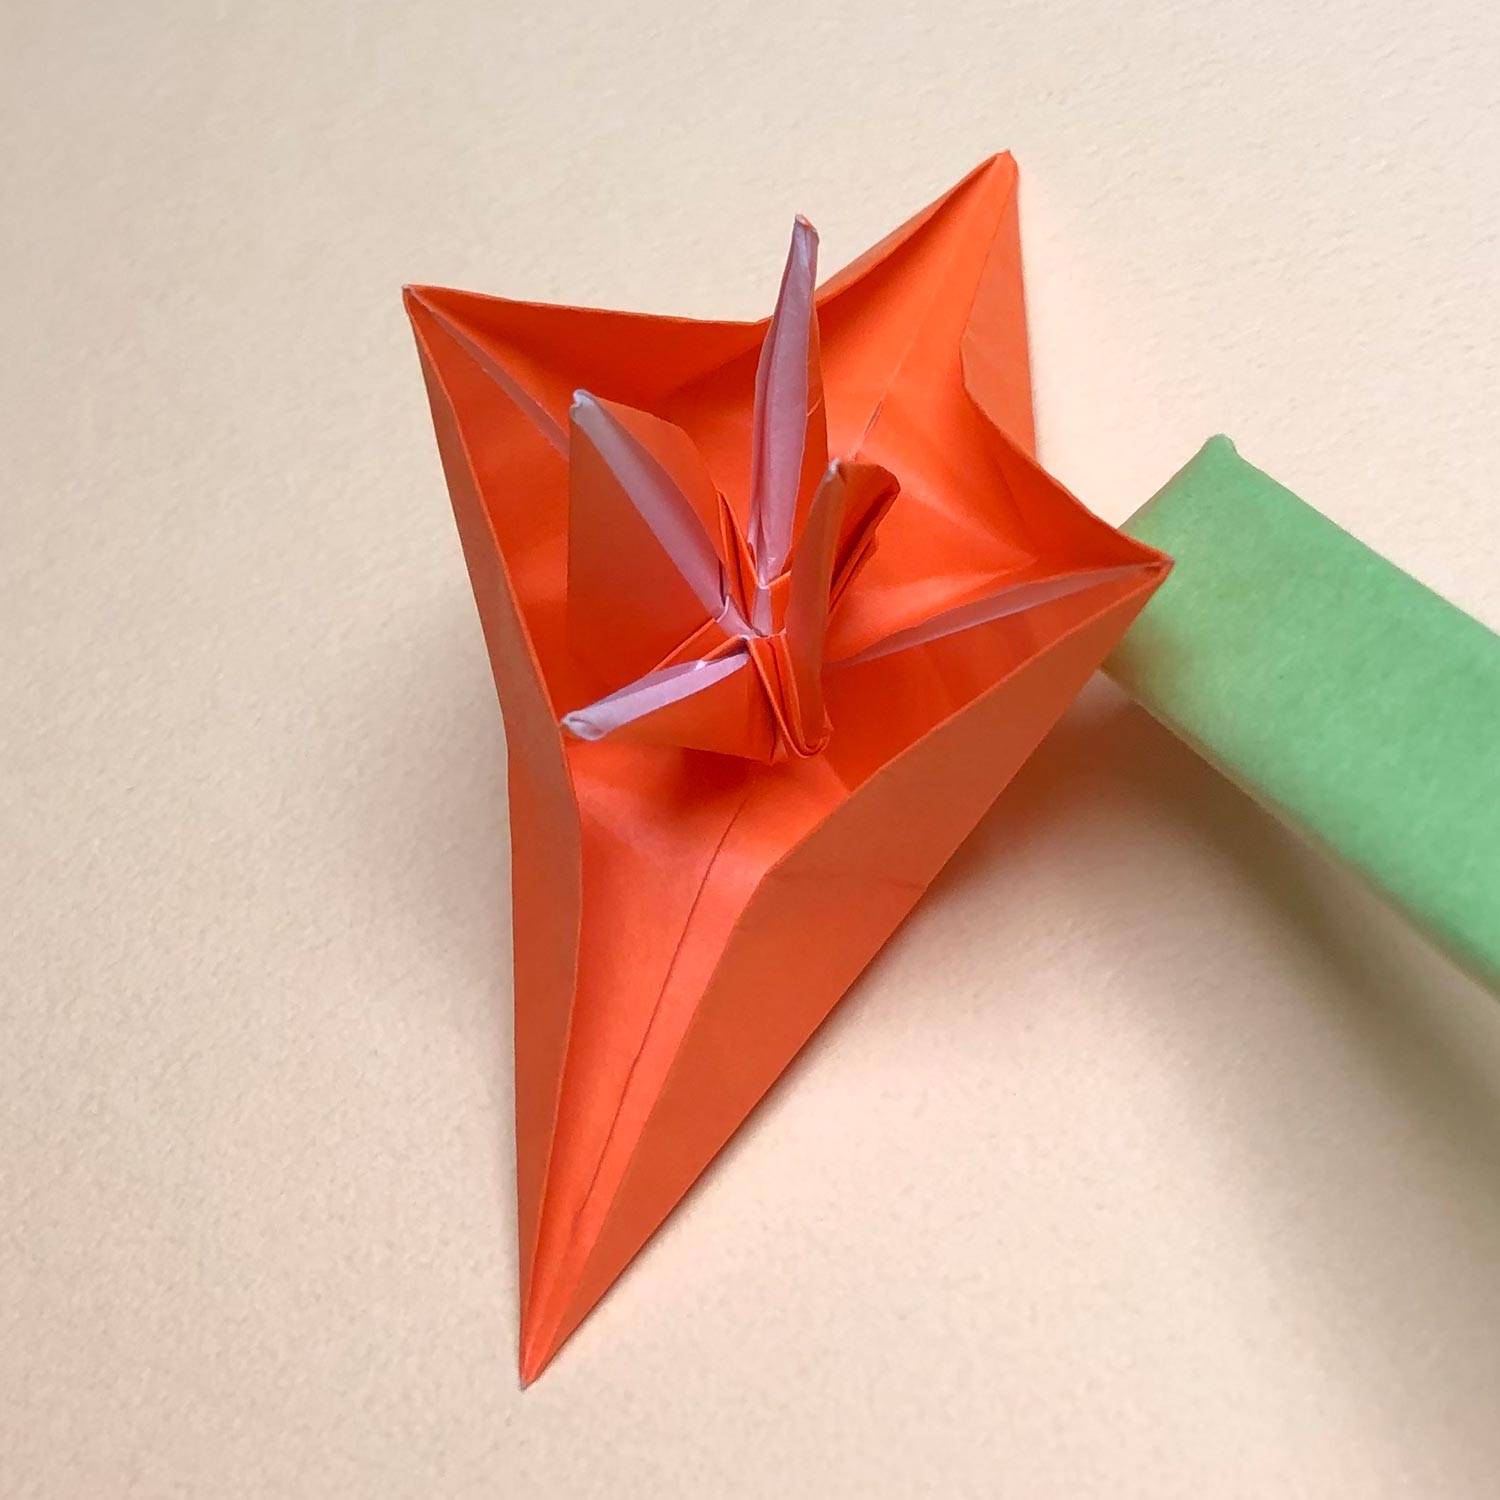
Then check parts which will be changed to wings.
Make a crane so that the circled parts are changed to wings.
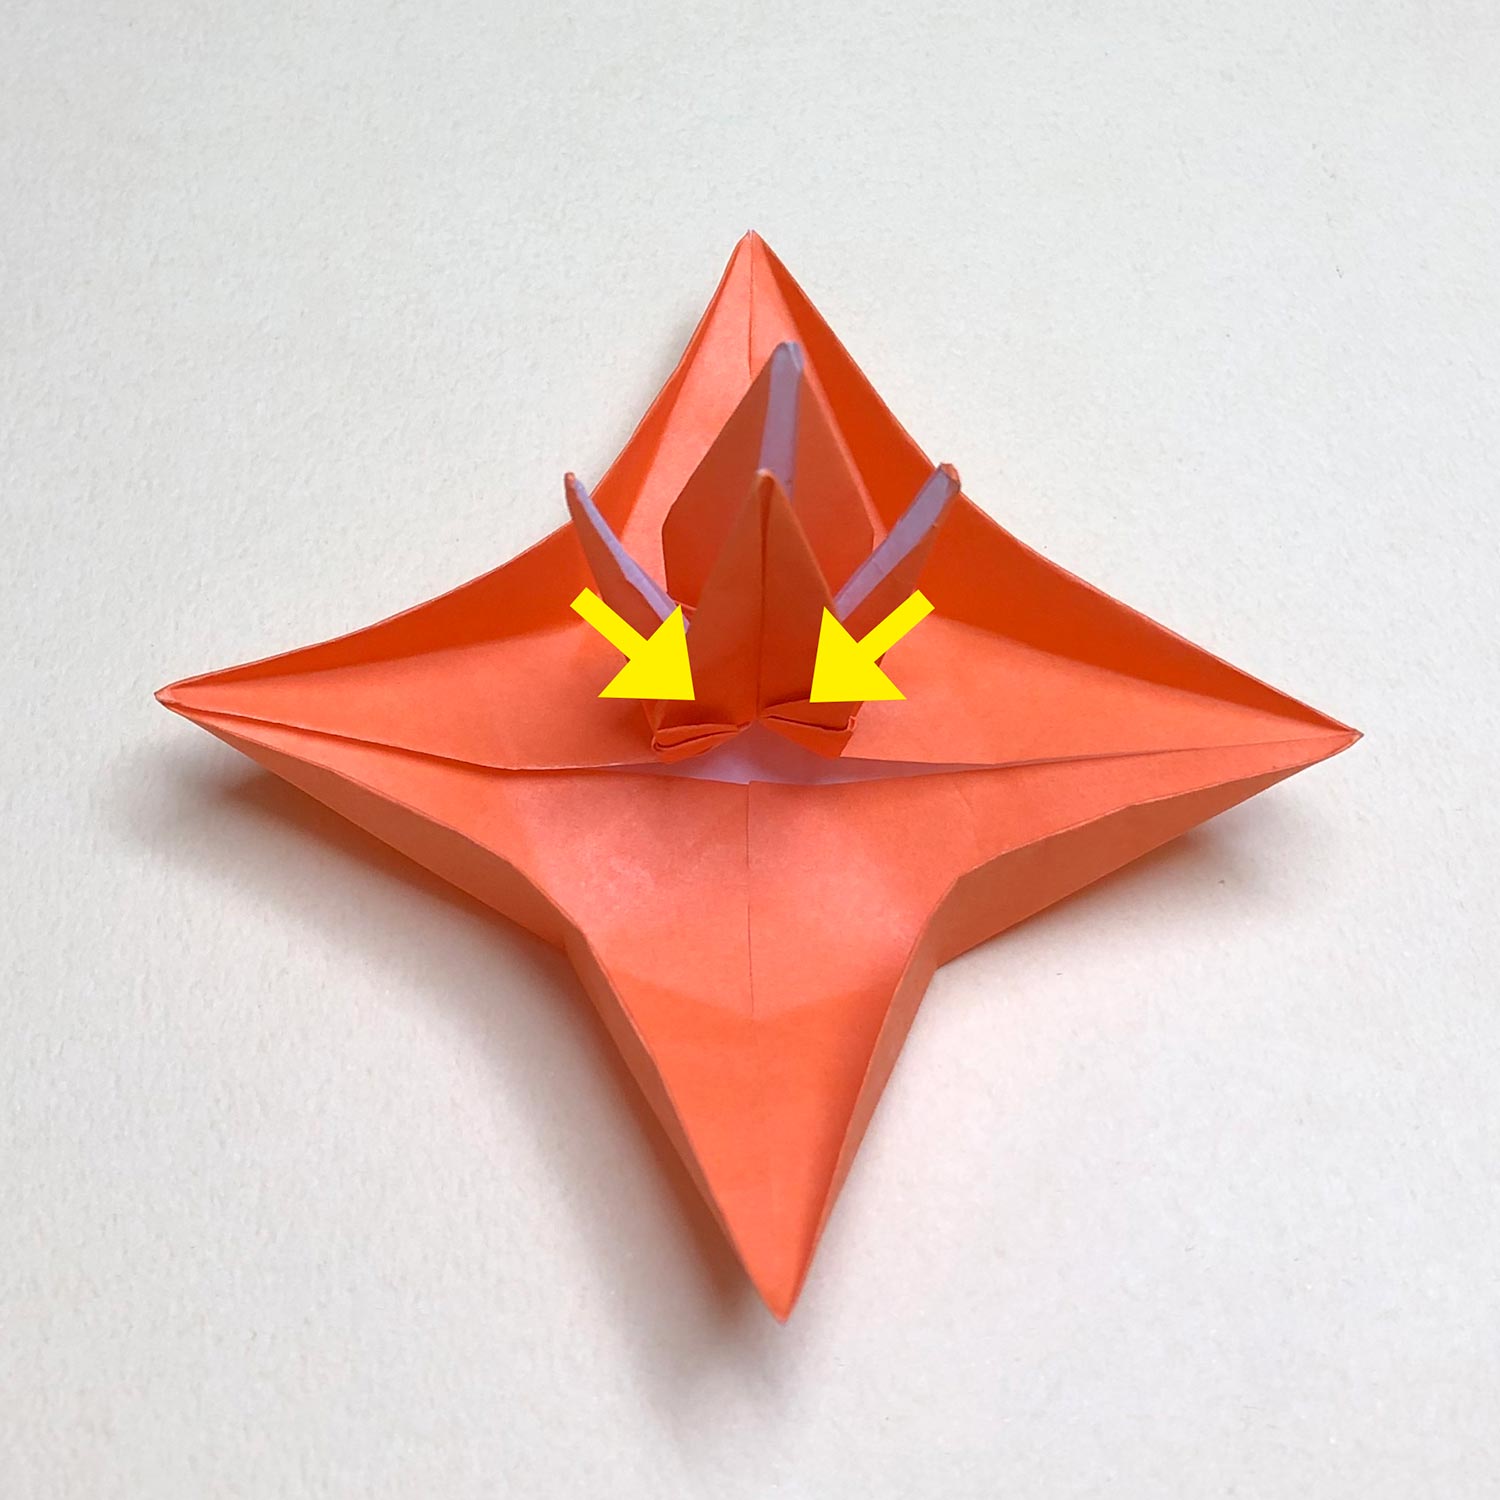
(51)
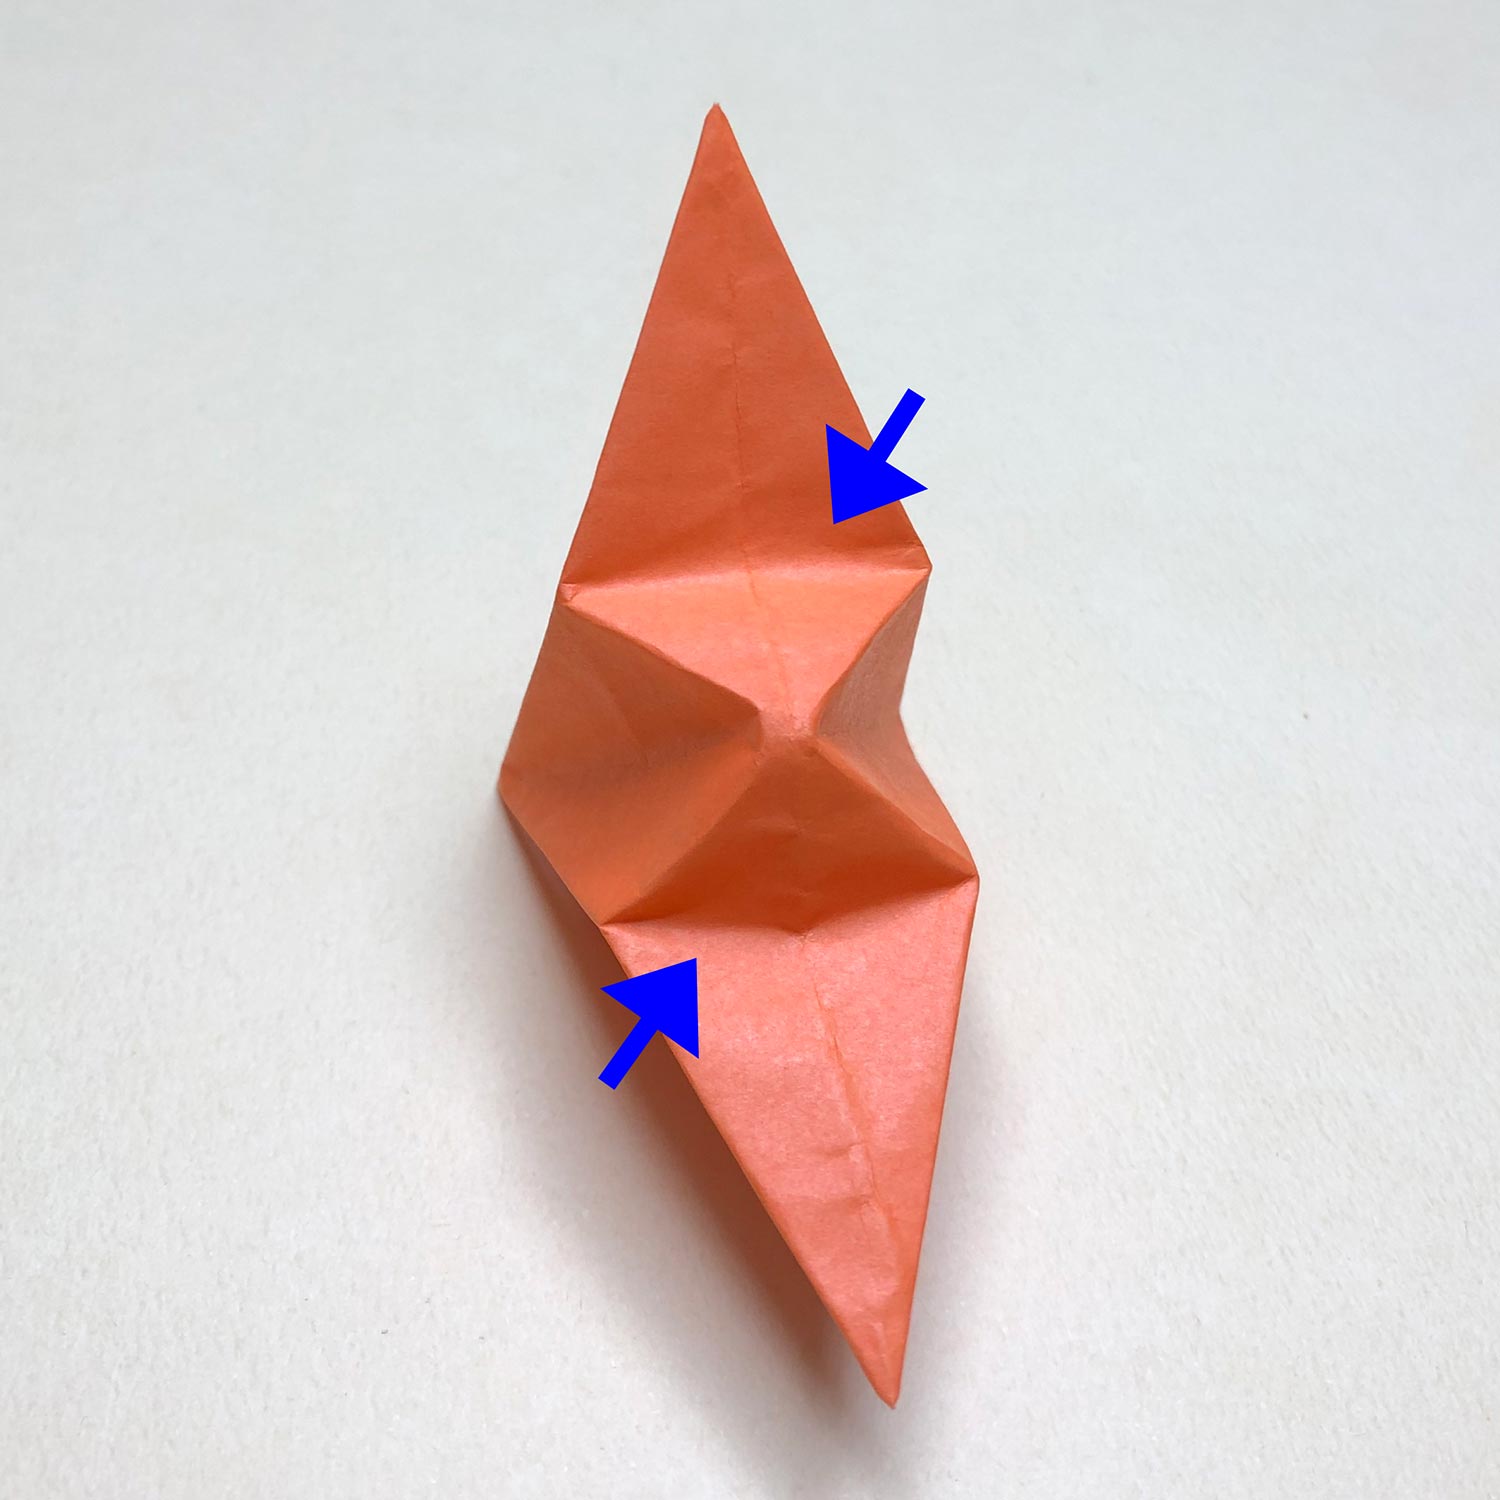
Also, check the position of connecting parts.
There are connecting parts at the parts which are shown by the arrows.
(52)
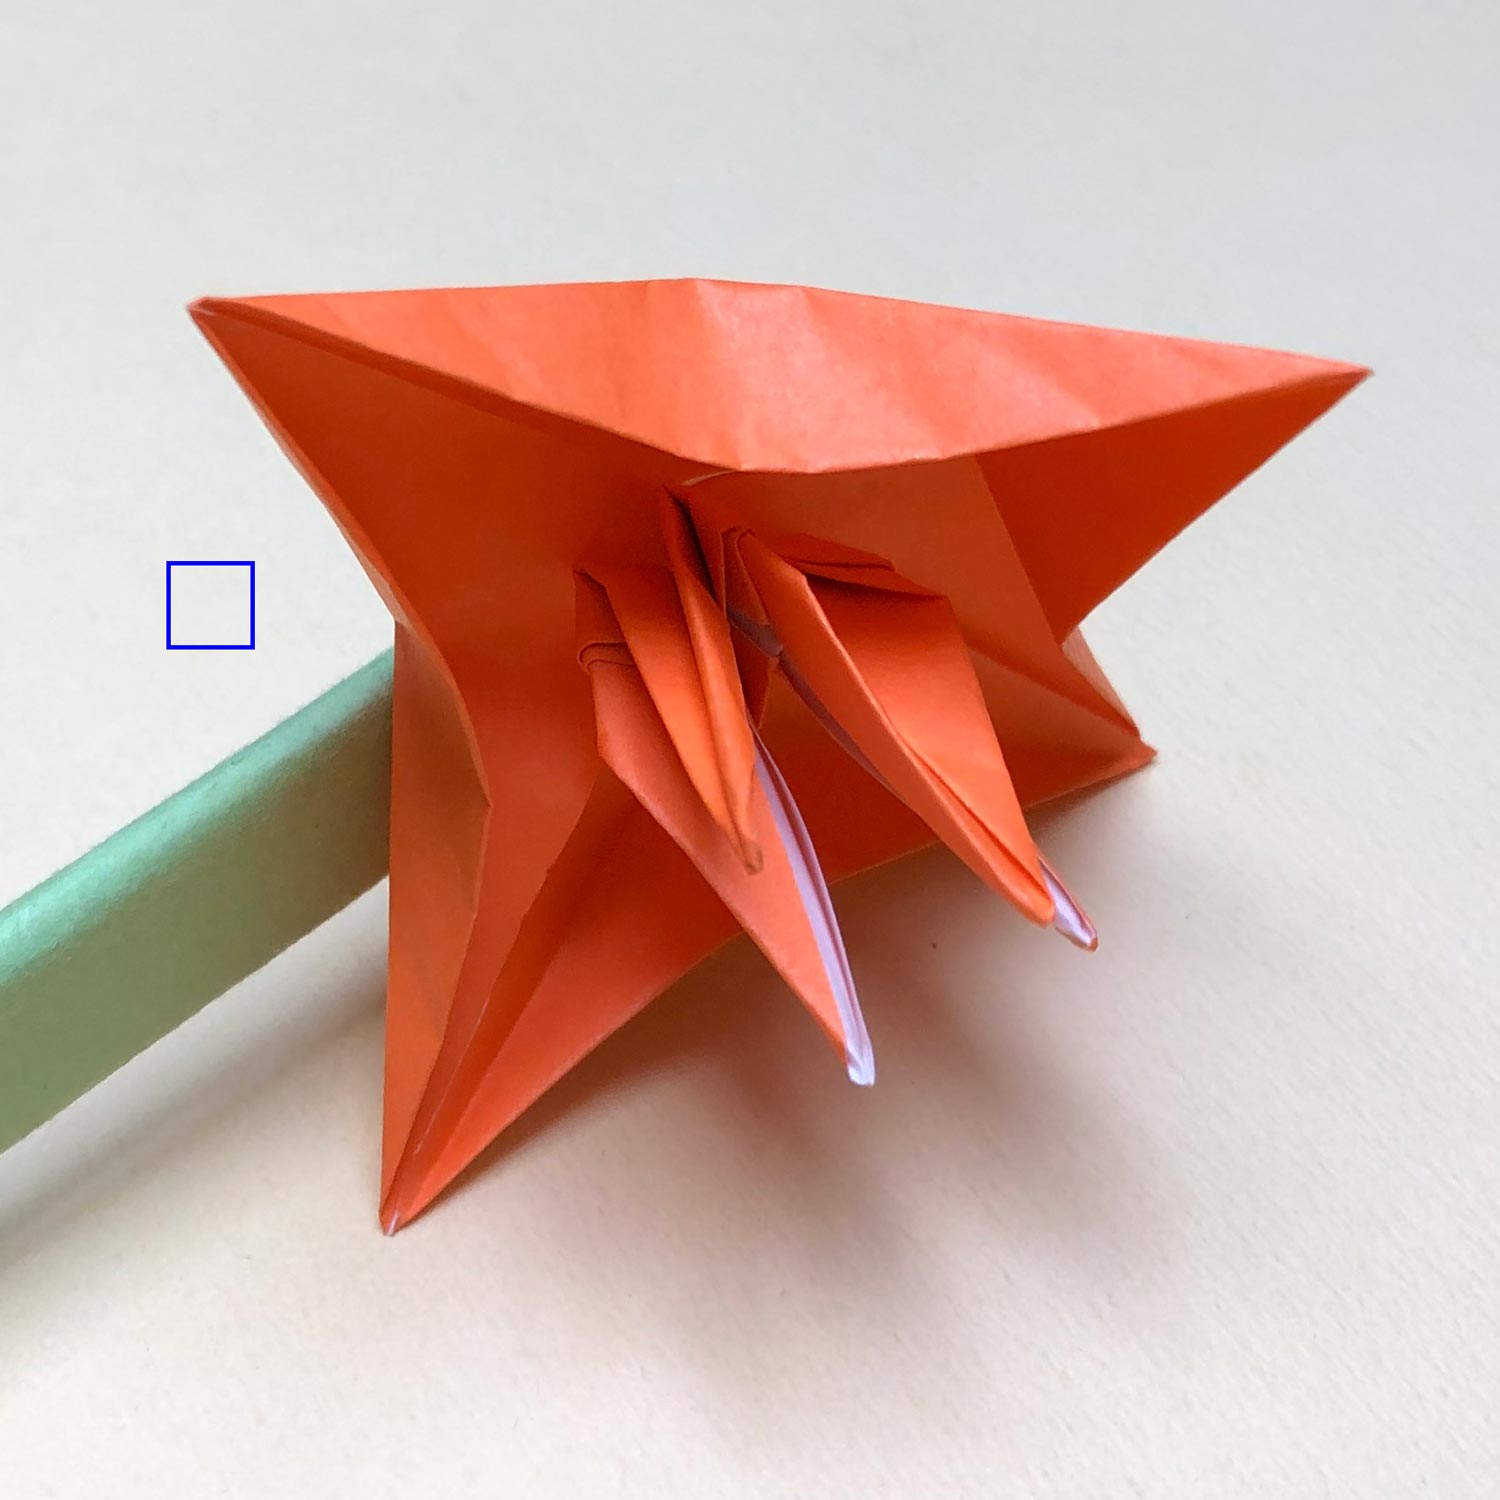
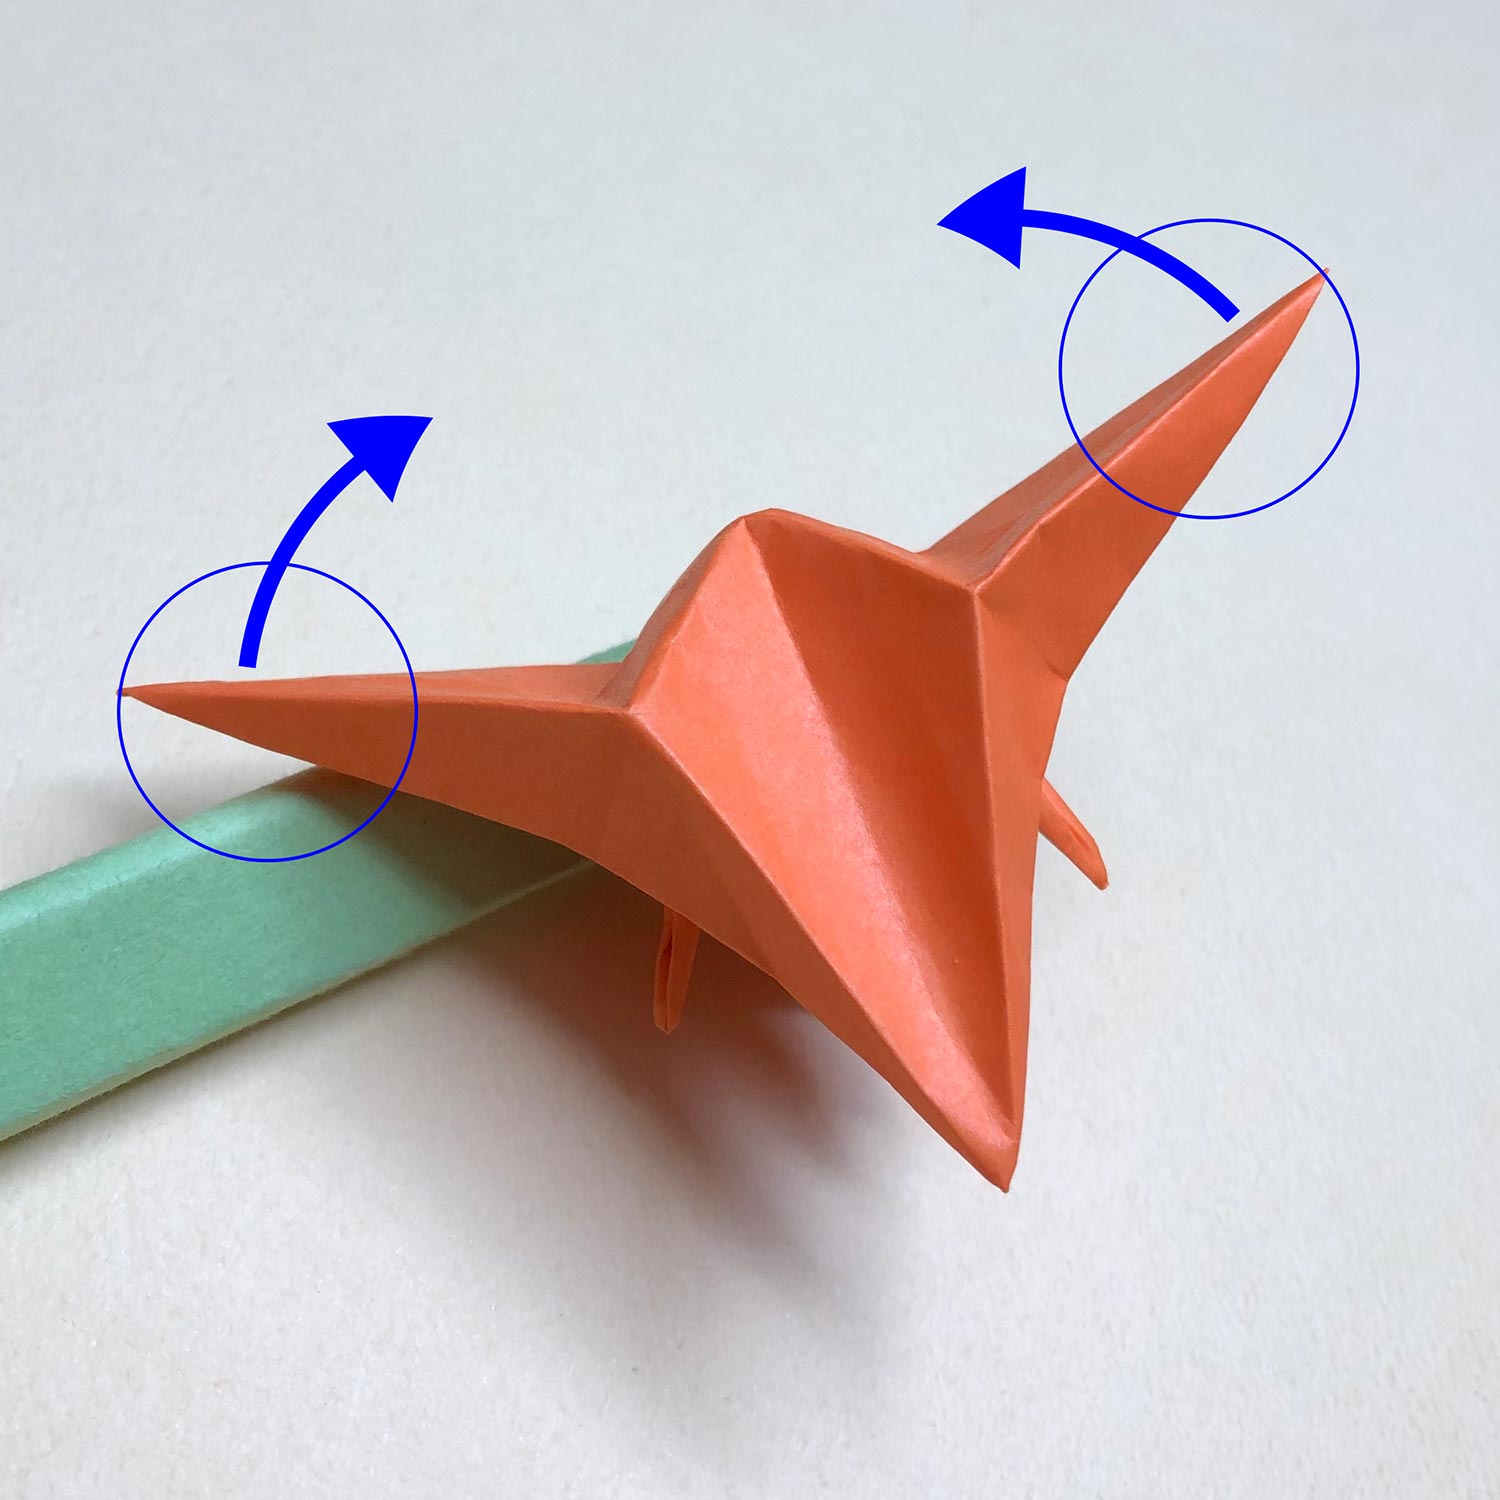
This picture is taken from the other side.
The circled part will be changed to a wing.
There are connecting parts at the parts which are shown by the arrows.
In other words, there are connecting parts in the left in this picture.
If you make a mistake about the direction of the paper, you will not be able to make this model well.
Therefore, I will draw a square in the side, which there are connecting parts, in pictures.
(53)
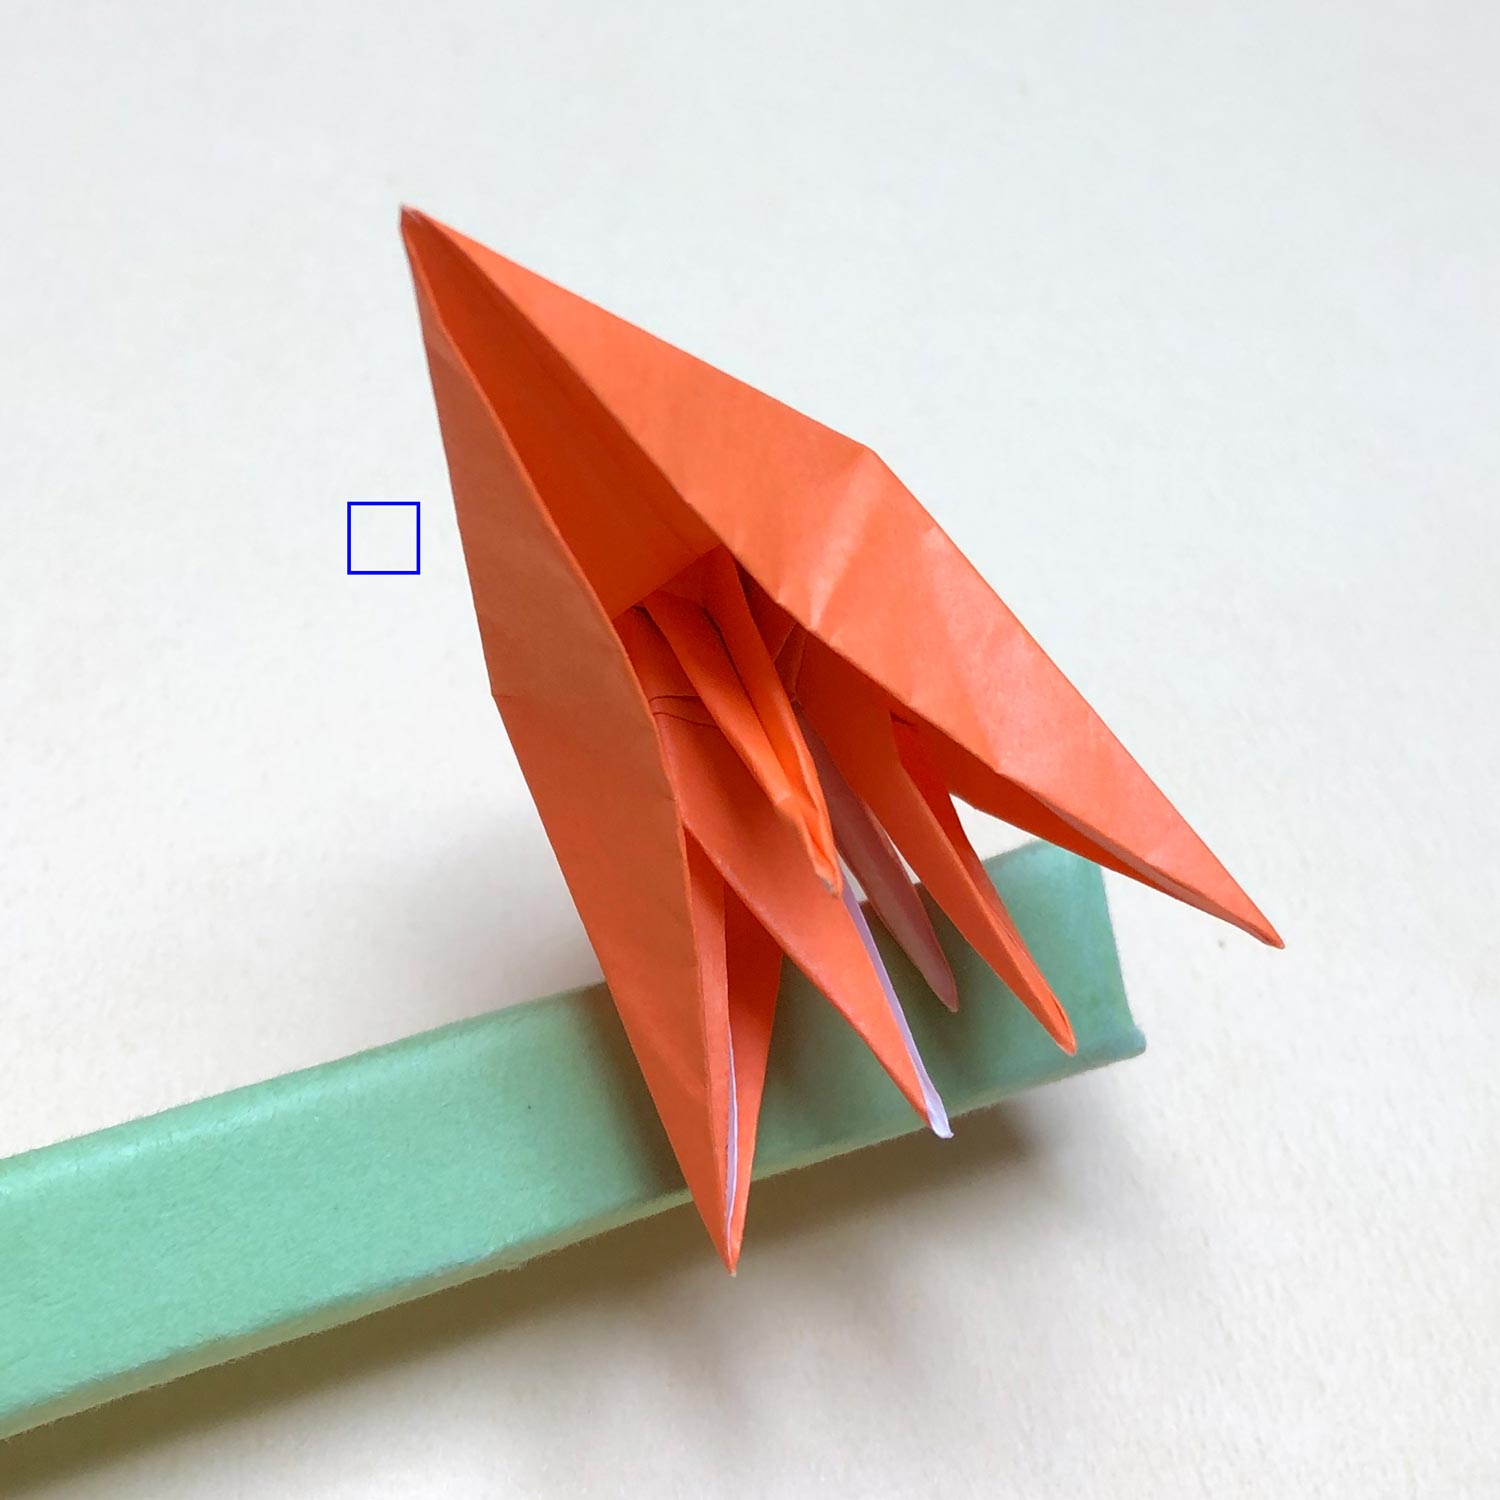
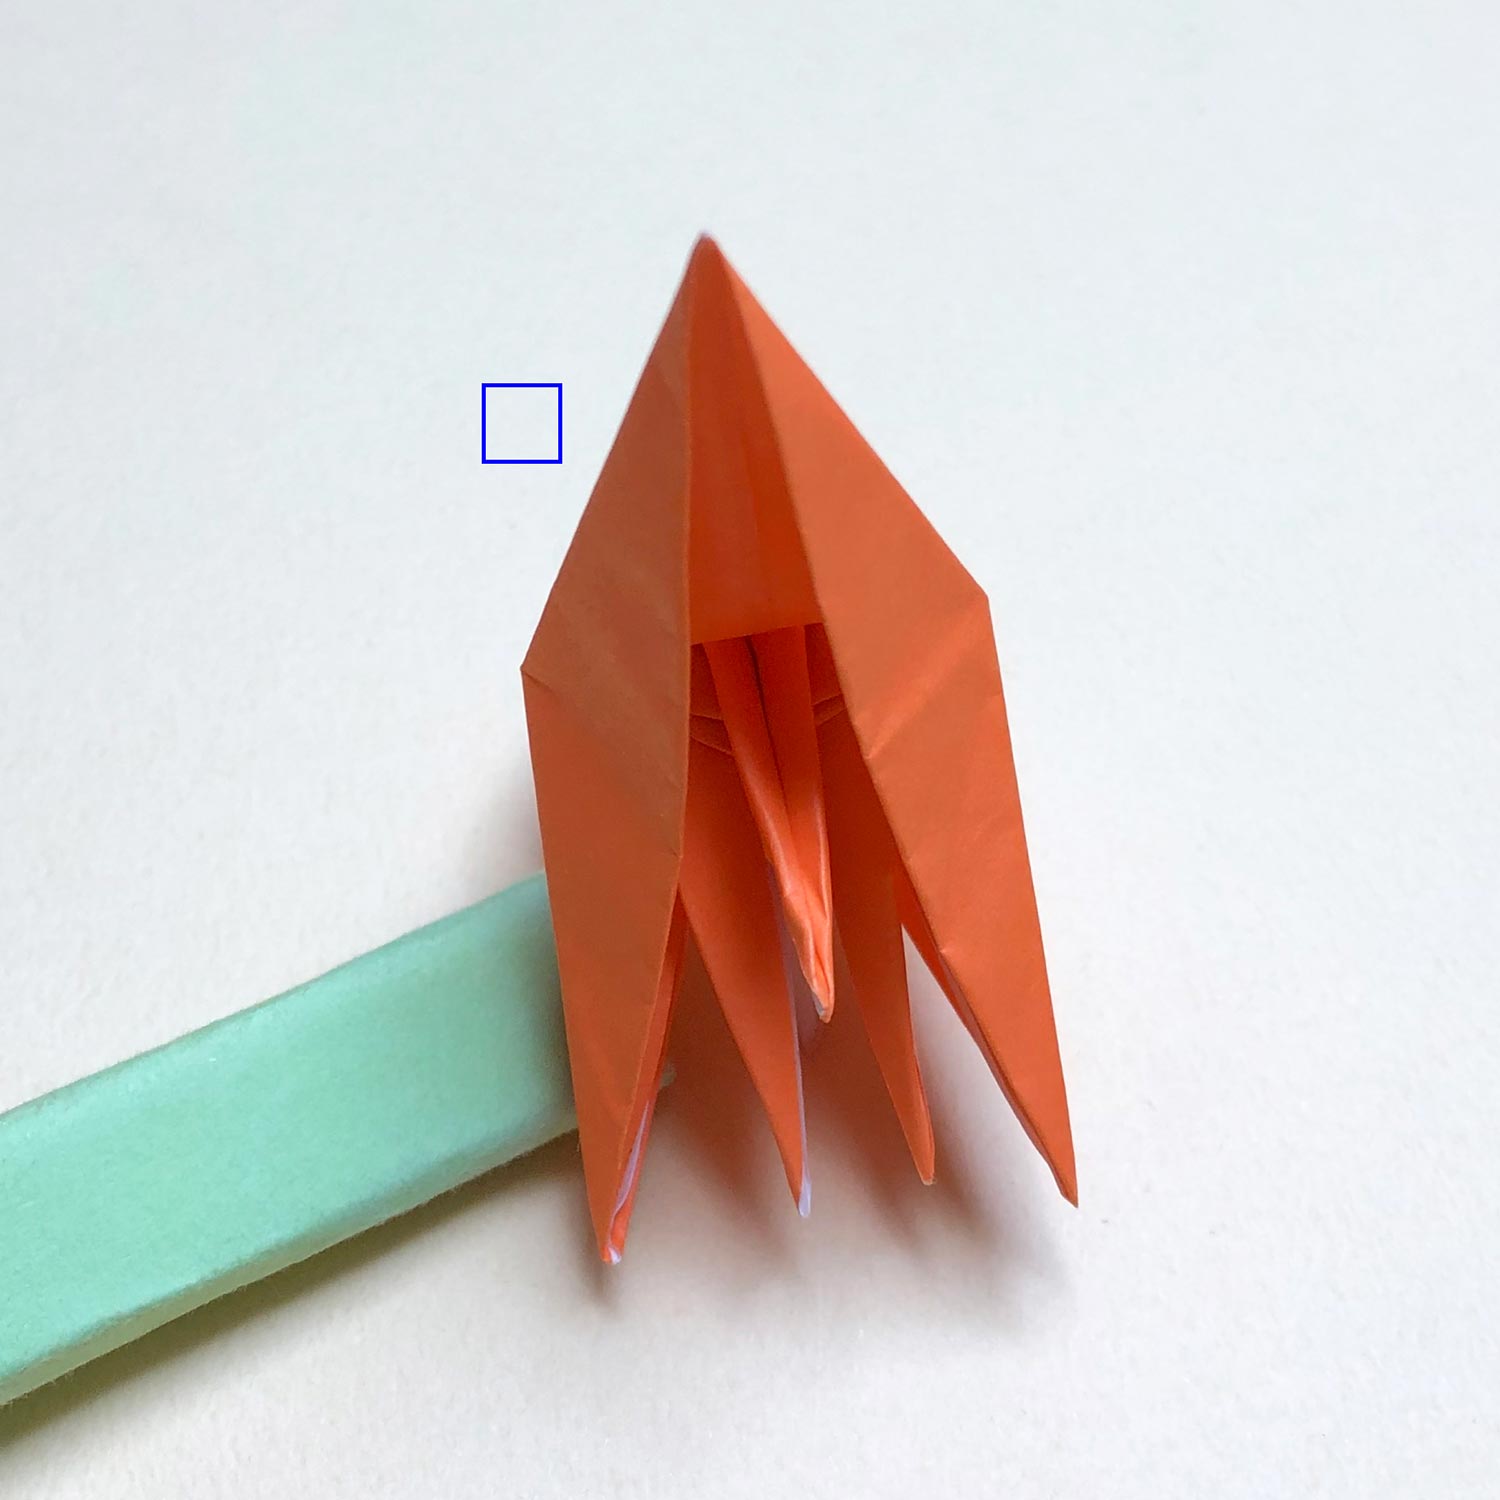
I will draw a square in the side, which there are connecting parts, in pictures like this picture.
Make a crane while checking the direction of the paper.
(54)
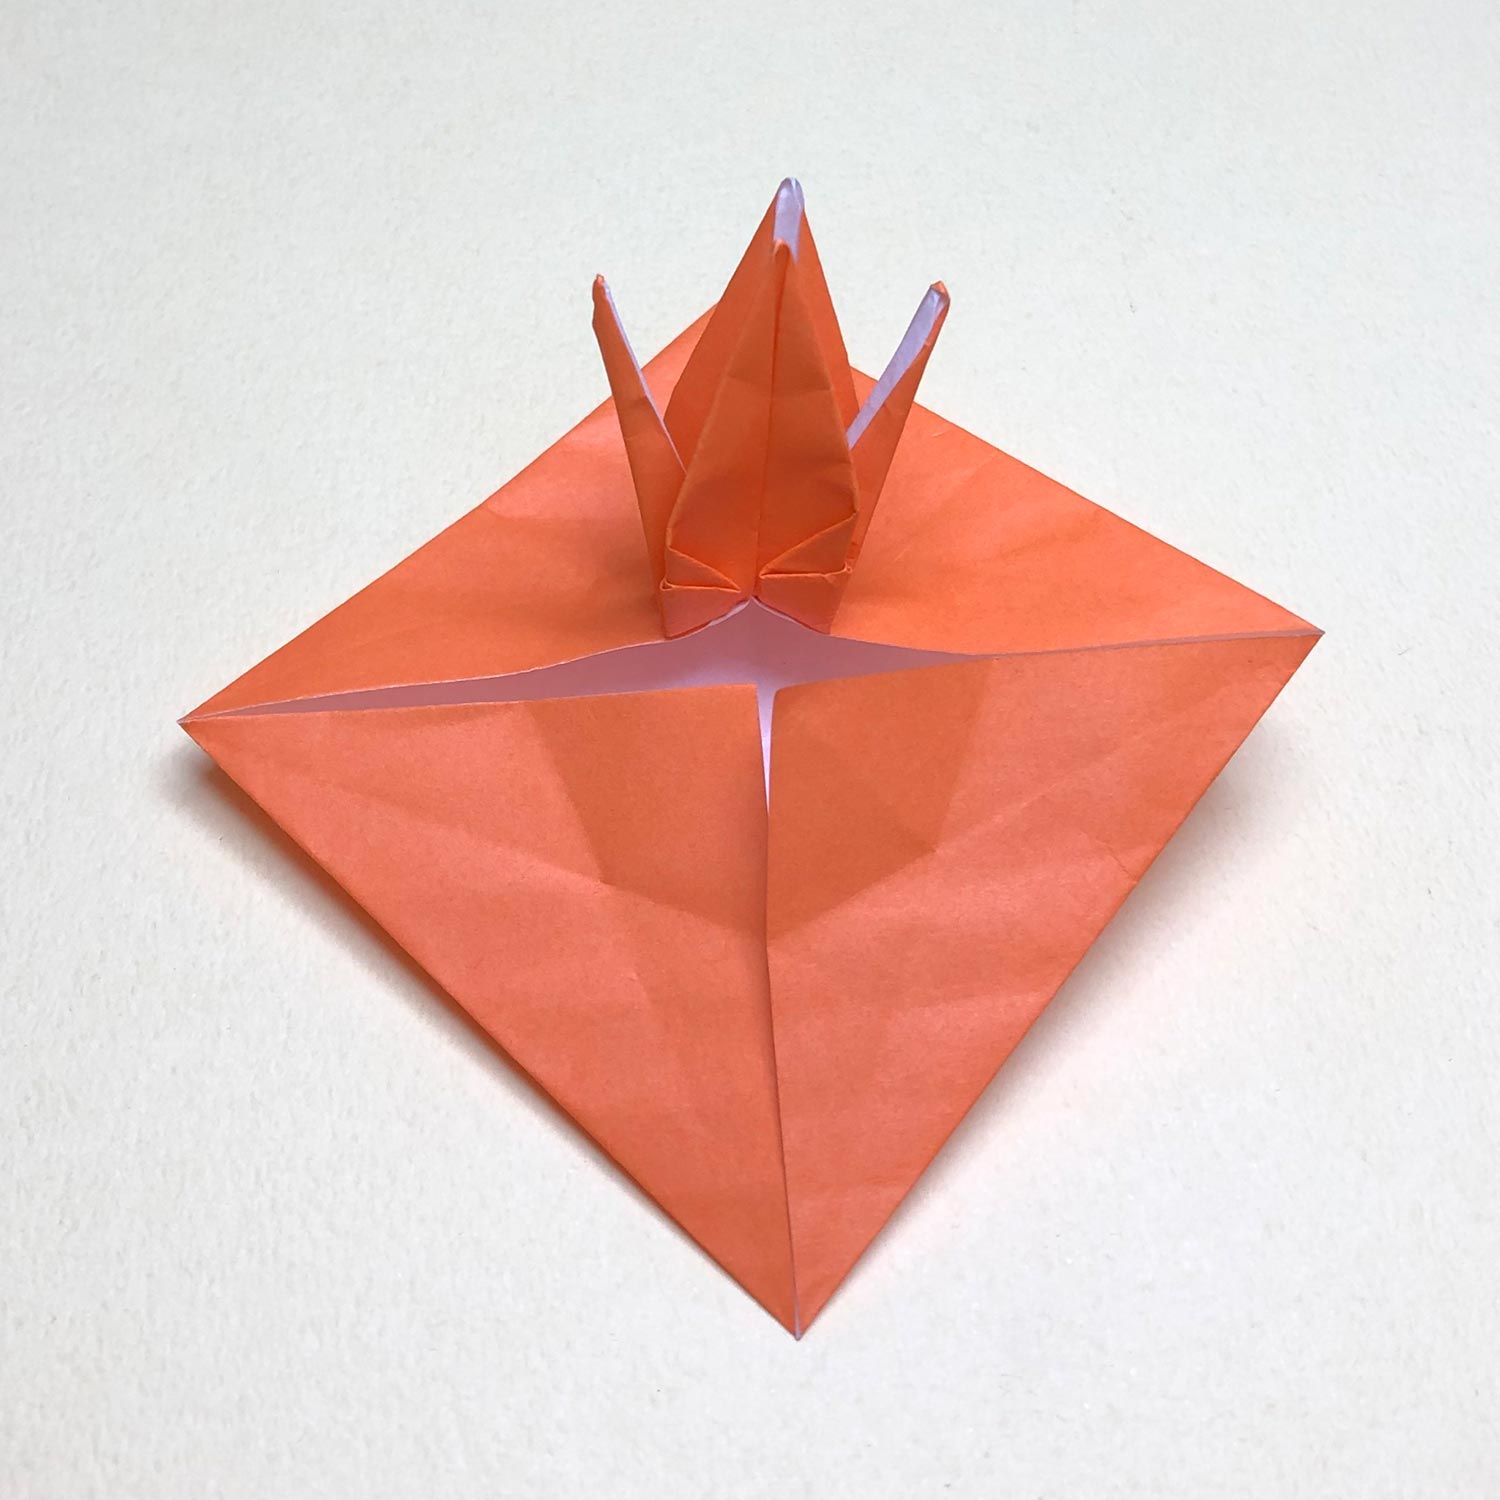
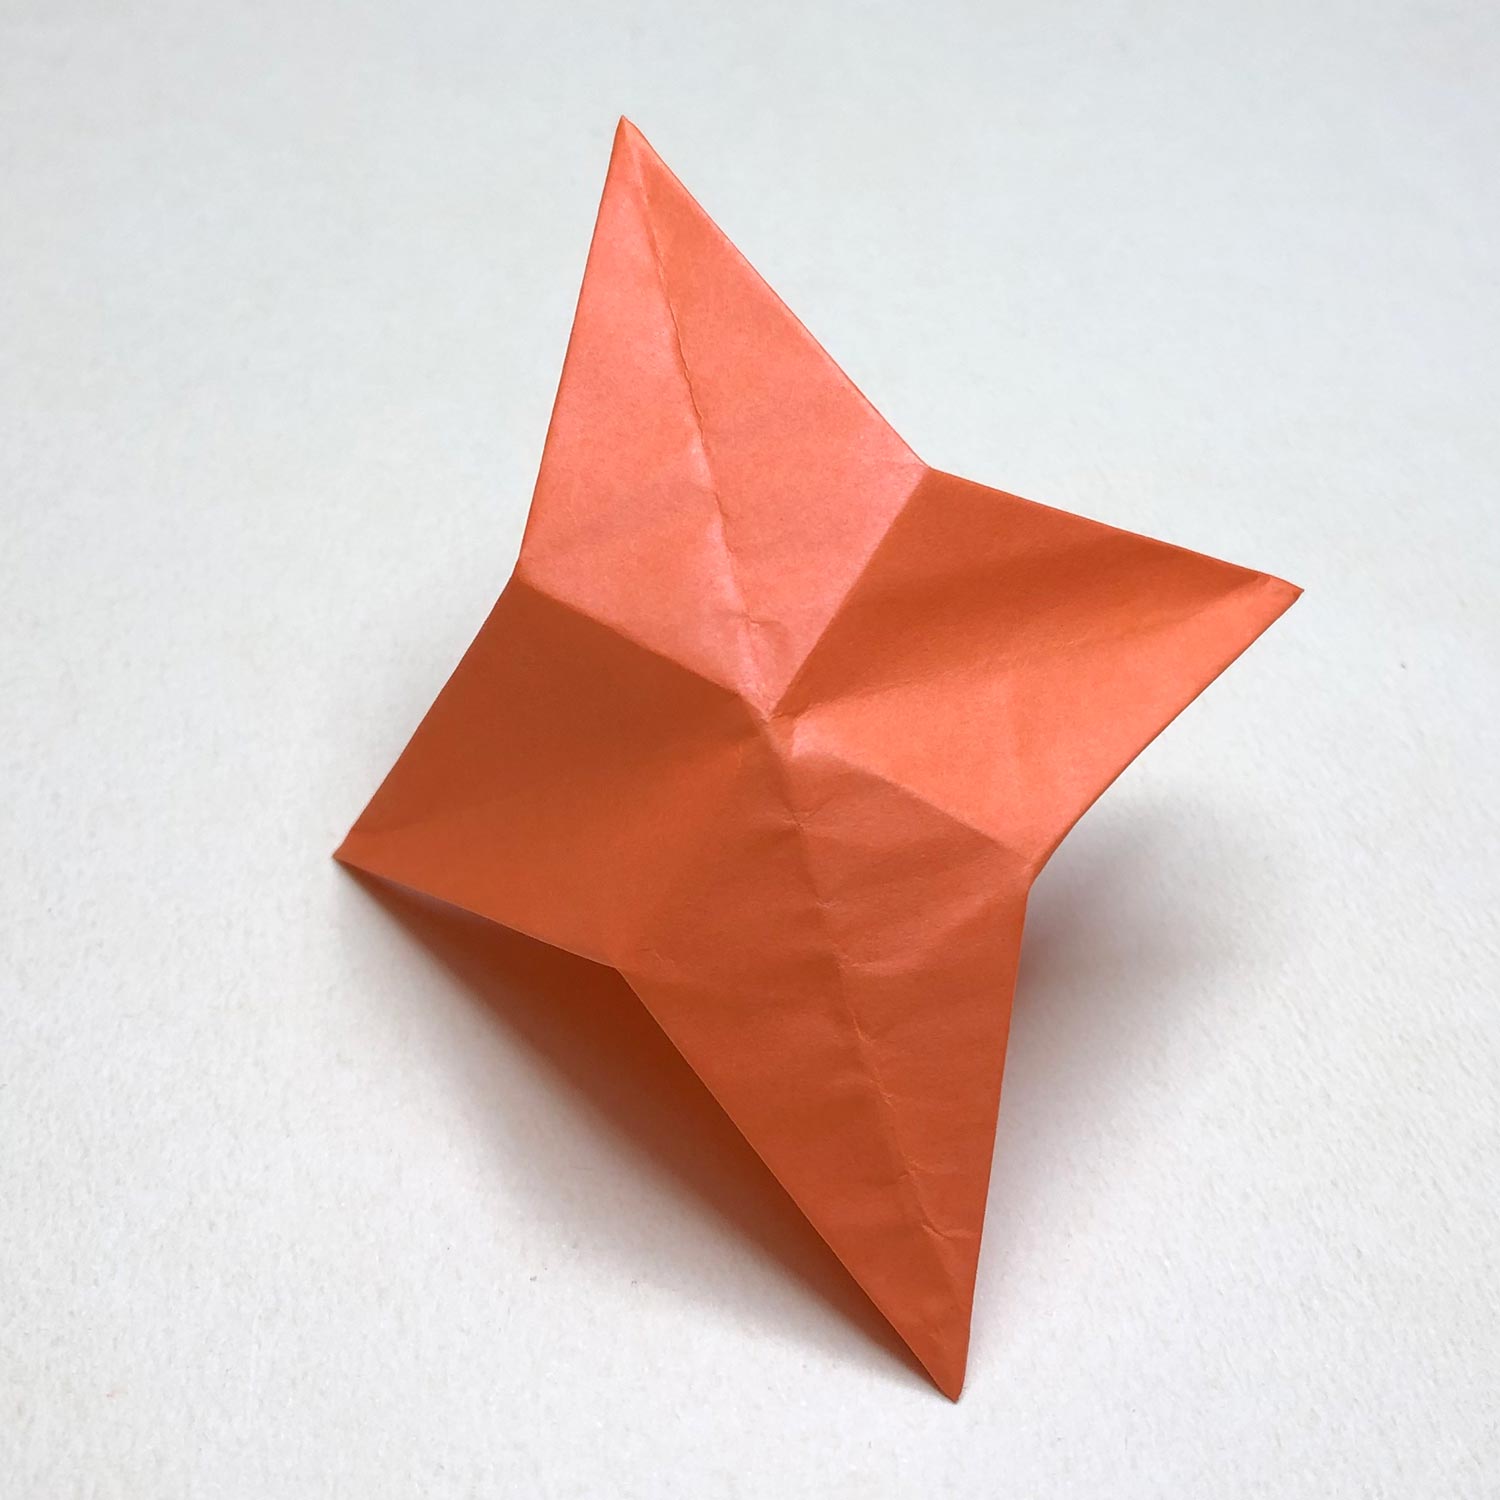
Then make shape closer to a bird-base like this picture in the state of that the completed crane is in the bird-base.
(55)
This picture is taken form the other side.
(56)
Raise wings a little to make valley-folds at the parts which are shown by the arrows.
(Raise wings a little because the completed crane is in the bird-base.)
(57)
This picture is taken from the other side.
(58)
Then move wings in the direction of the arrows.
(59)
This picture is taken before moving wings.
(60)
After moving wings, two head/tail get close to each other like this picture.
Hold wings to keep the state of that two head/tail are close to each other.
(61)
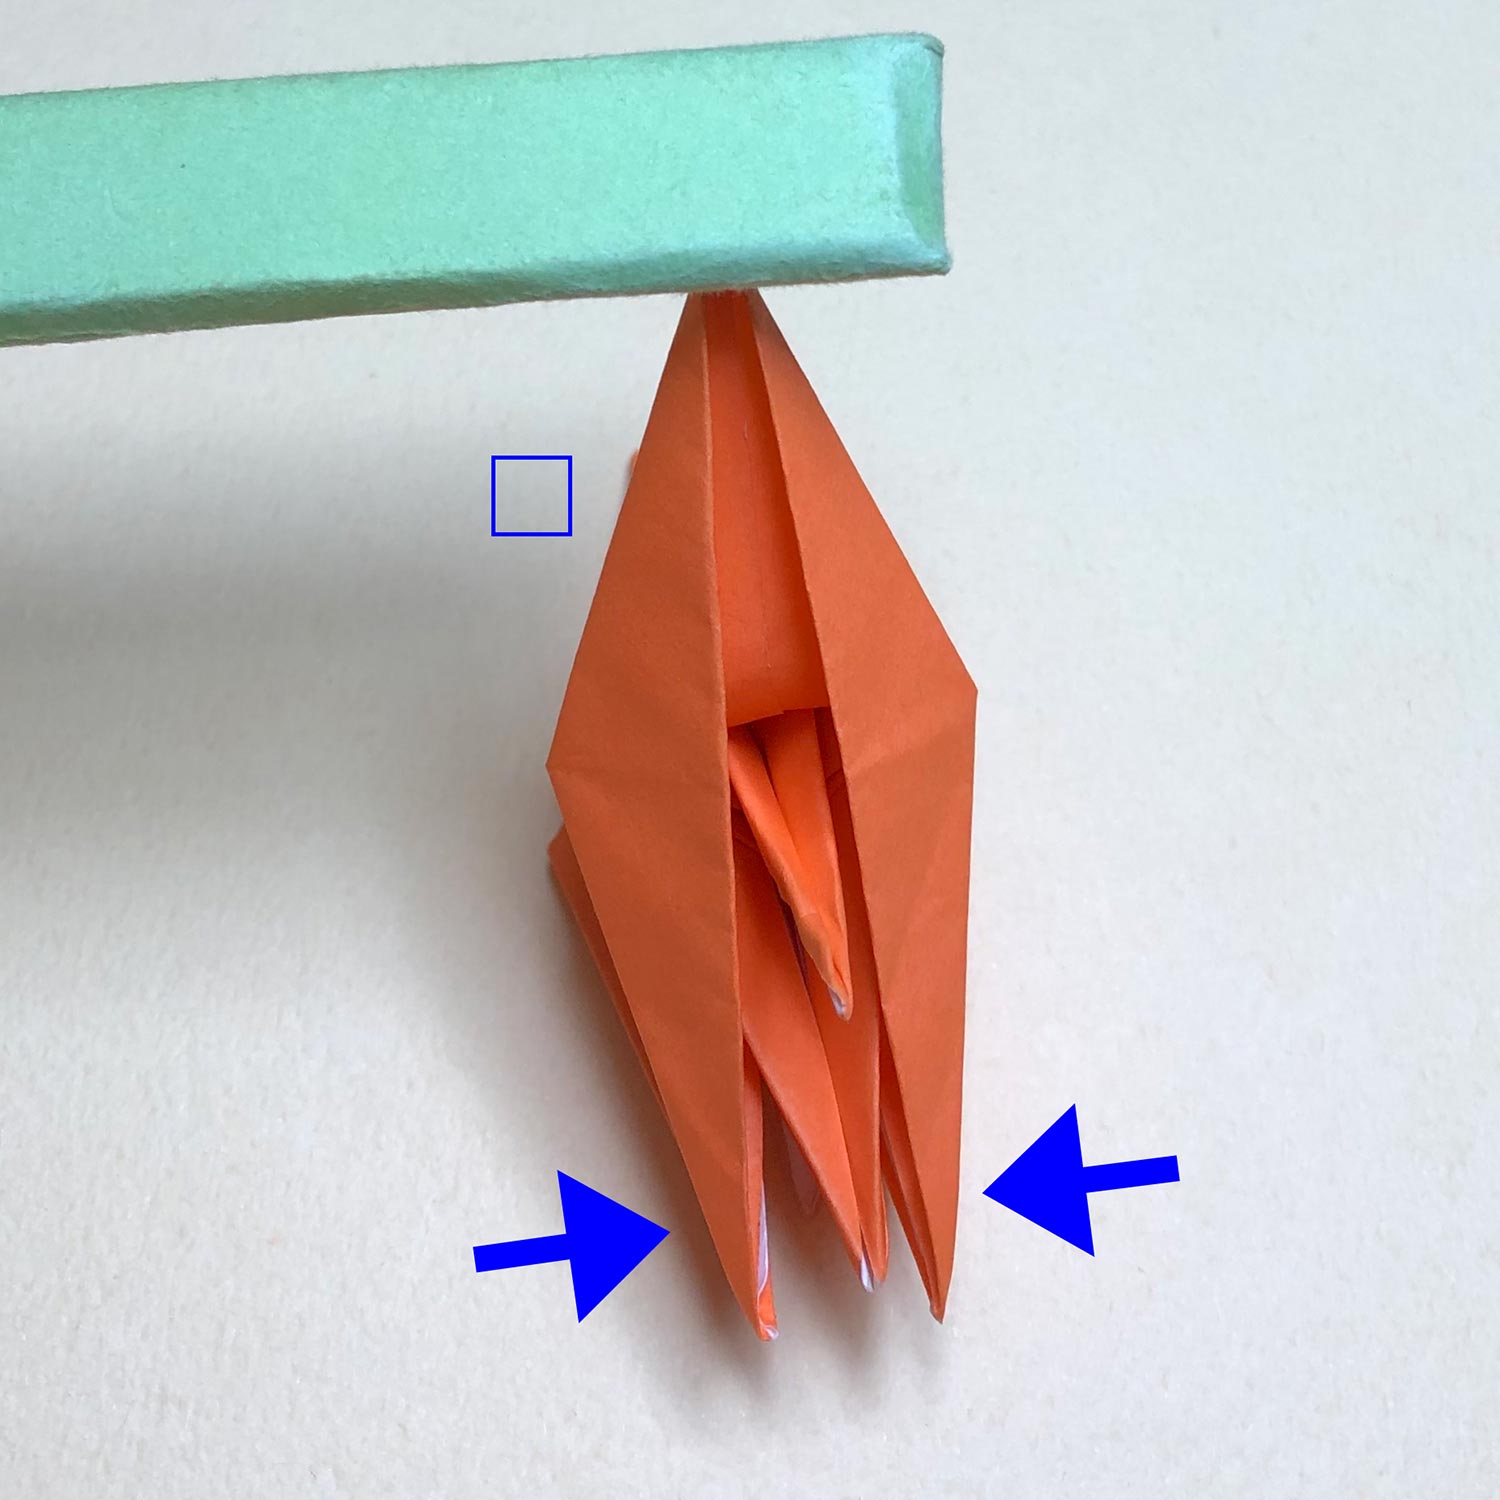
Move the completed crane in the direction of the arrow while holing wings.
Connecting parts tear easily.
Therefore, move it carefully.

(62)
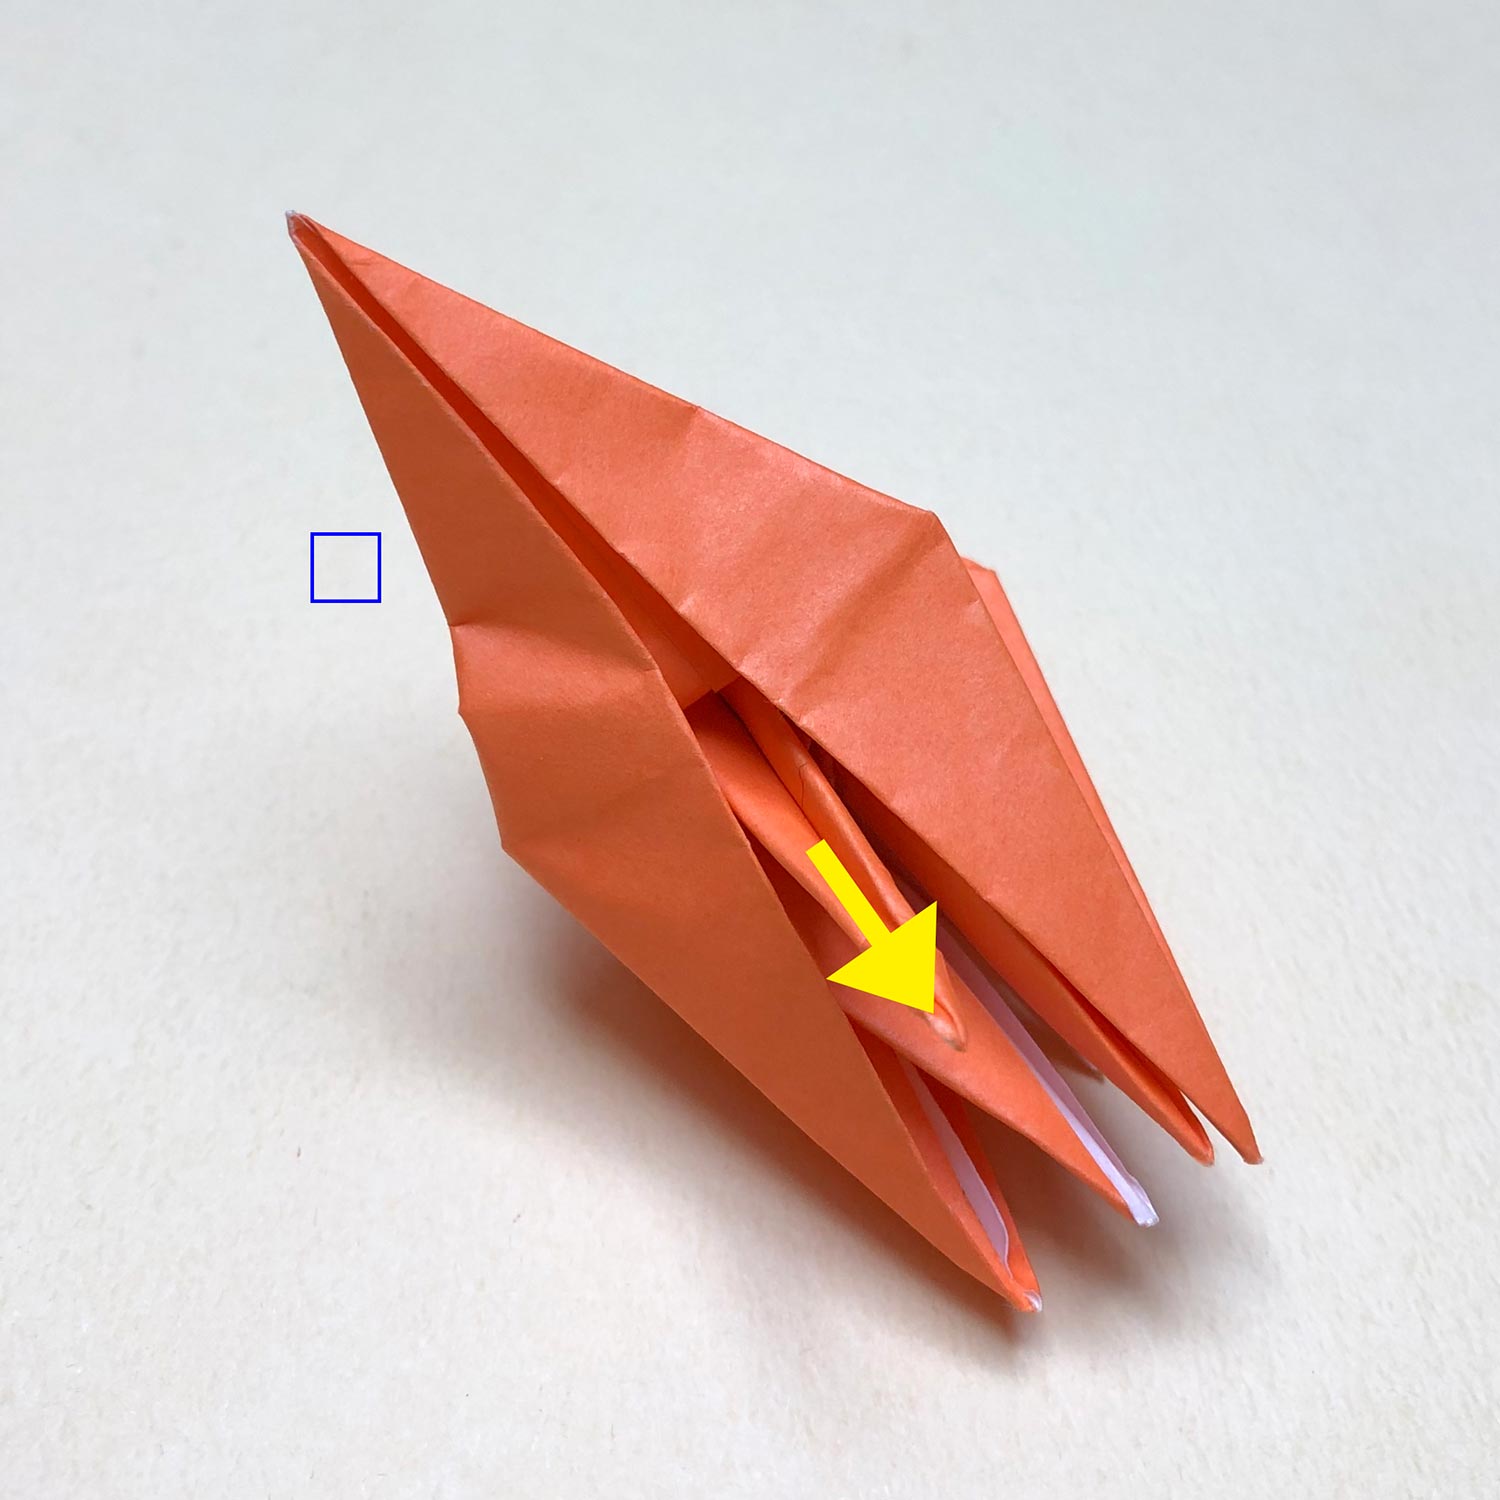
Then put the completed crane out of the bird-base a little like this picture.
If you put the completed crane out of the bird-base too much, connecting parts will be long when this model is completed.
Therefore, put the completed crane out of the bird-base a little like the completed crane is caught on the bird-base.
On the opposite side too, put the completed crane out of the bird-base a little.
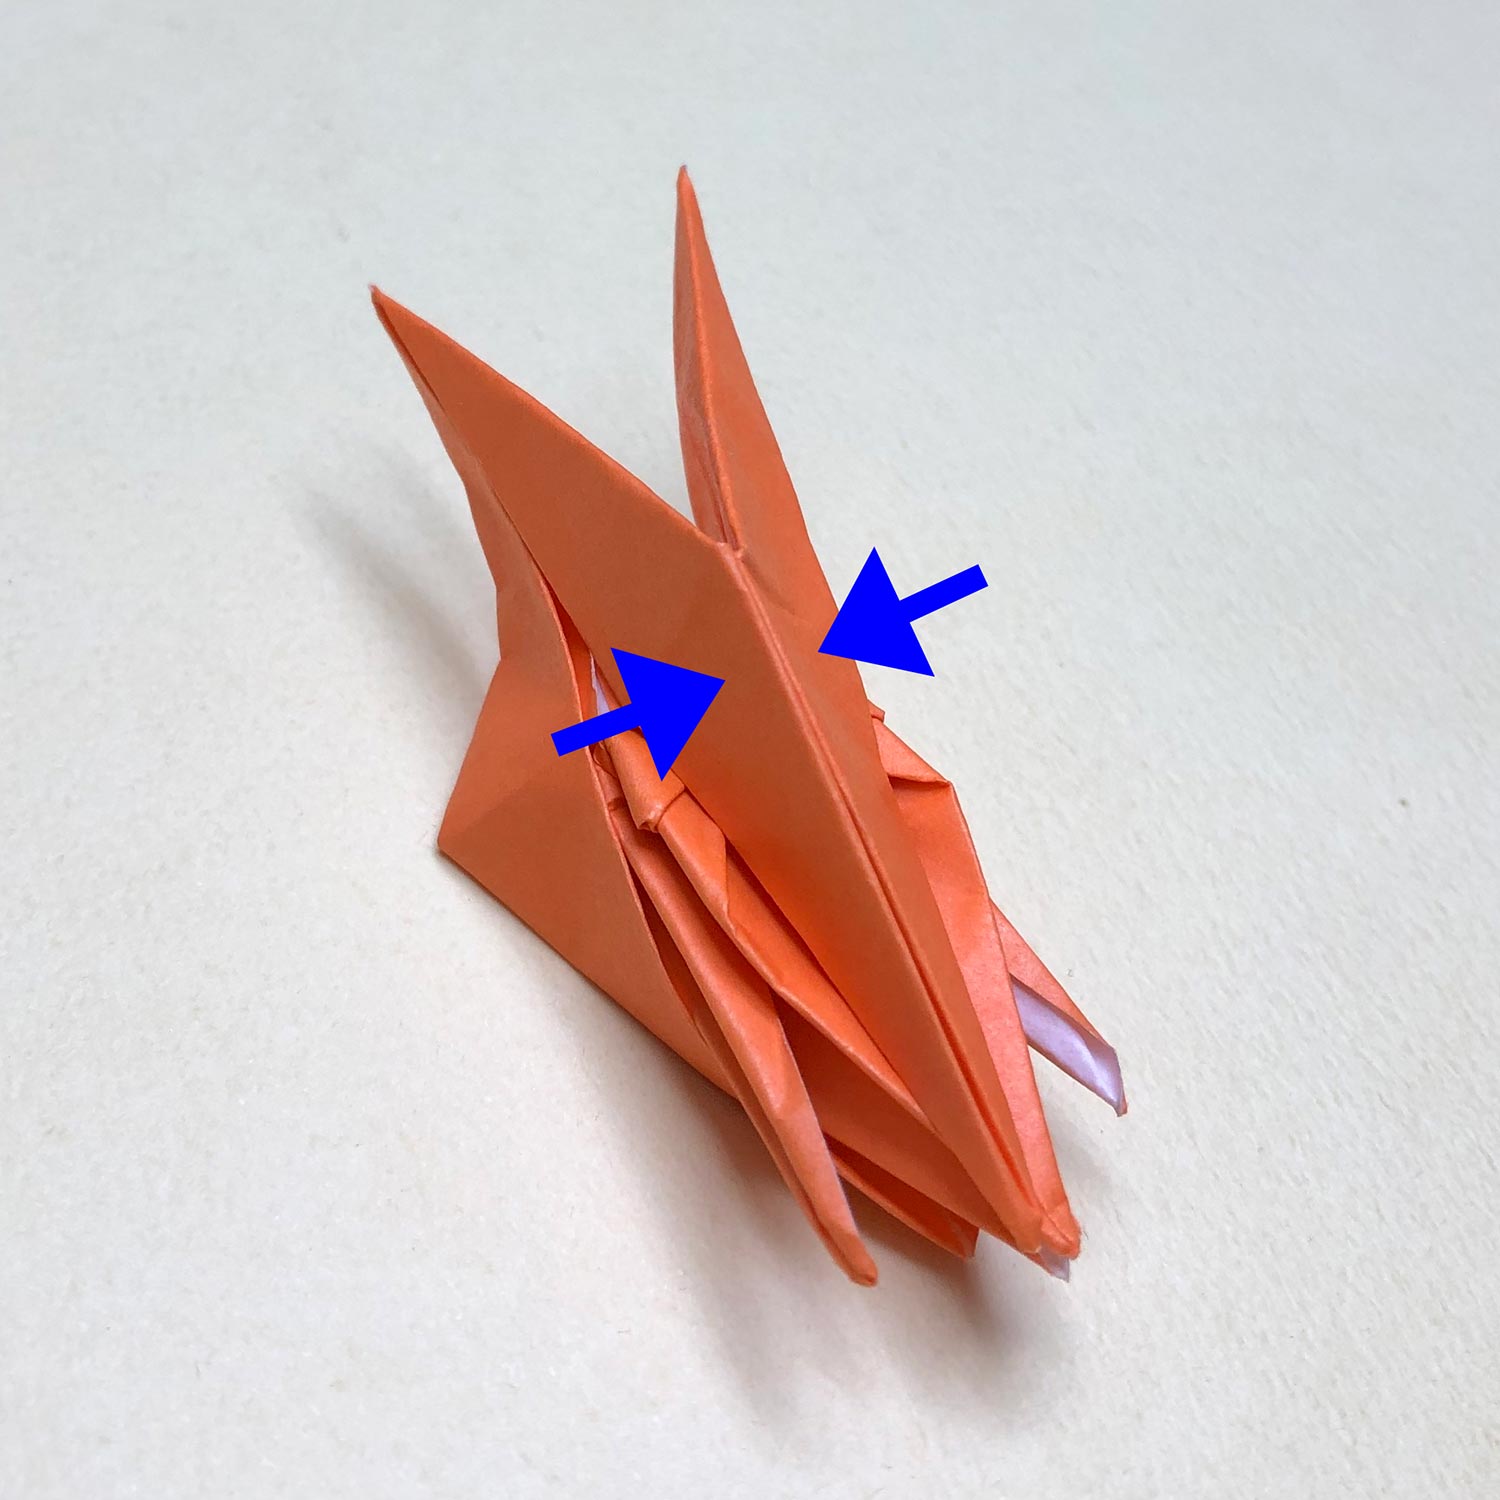
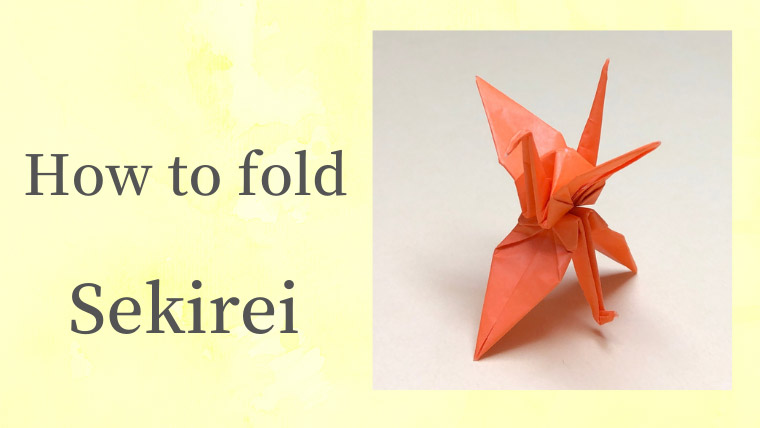
(63)
After putting the completed crane out of the bird-base on the opposite side too, you would be able to make creases at the head/tail.
Pinch the head/tail in the direction of the arrows to make creases.
After making creases, raise the head/tail as it is without folding it to the center.
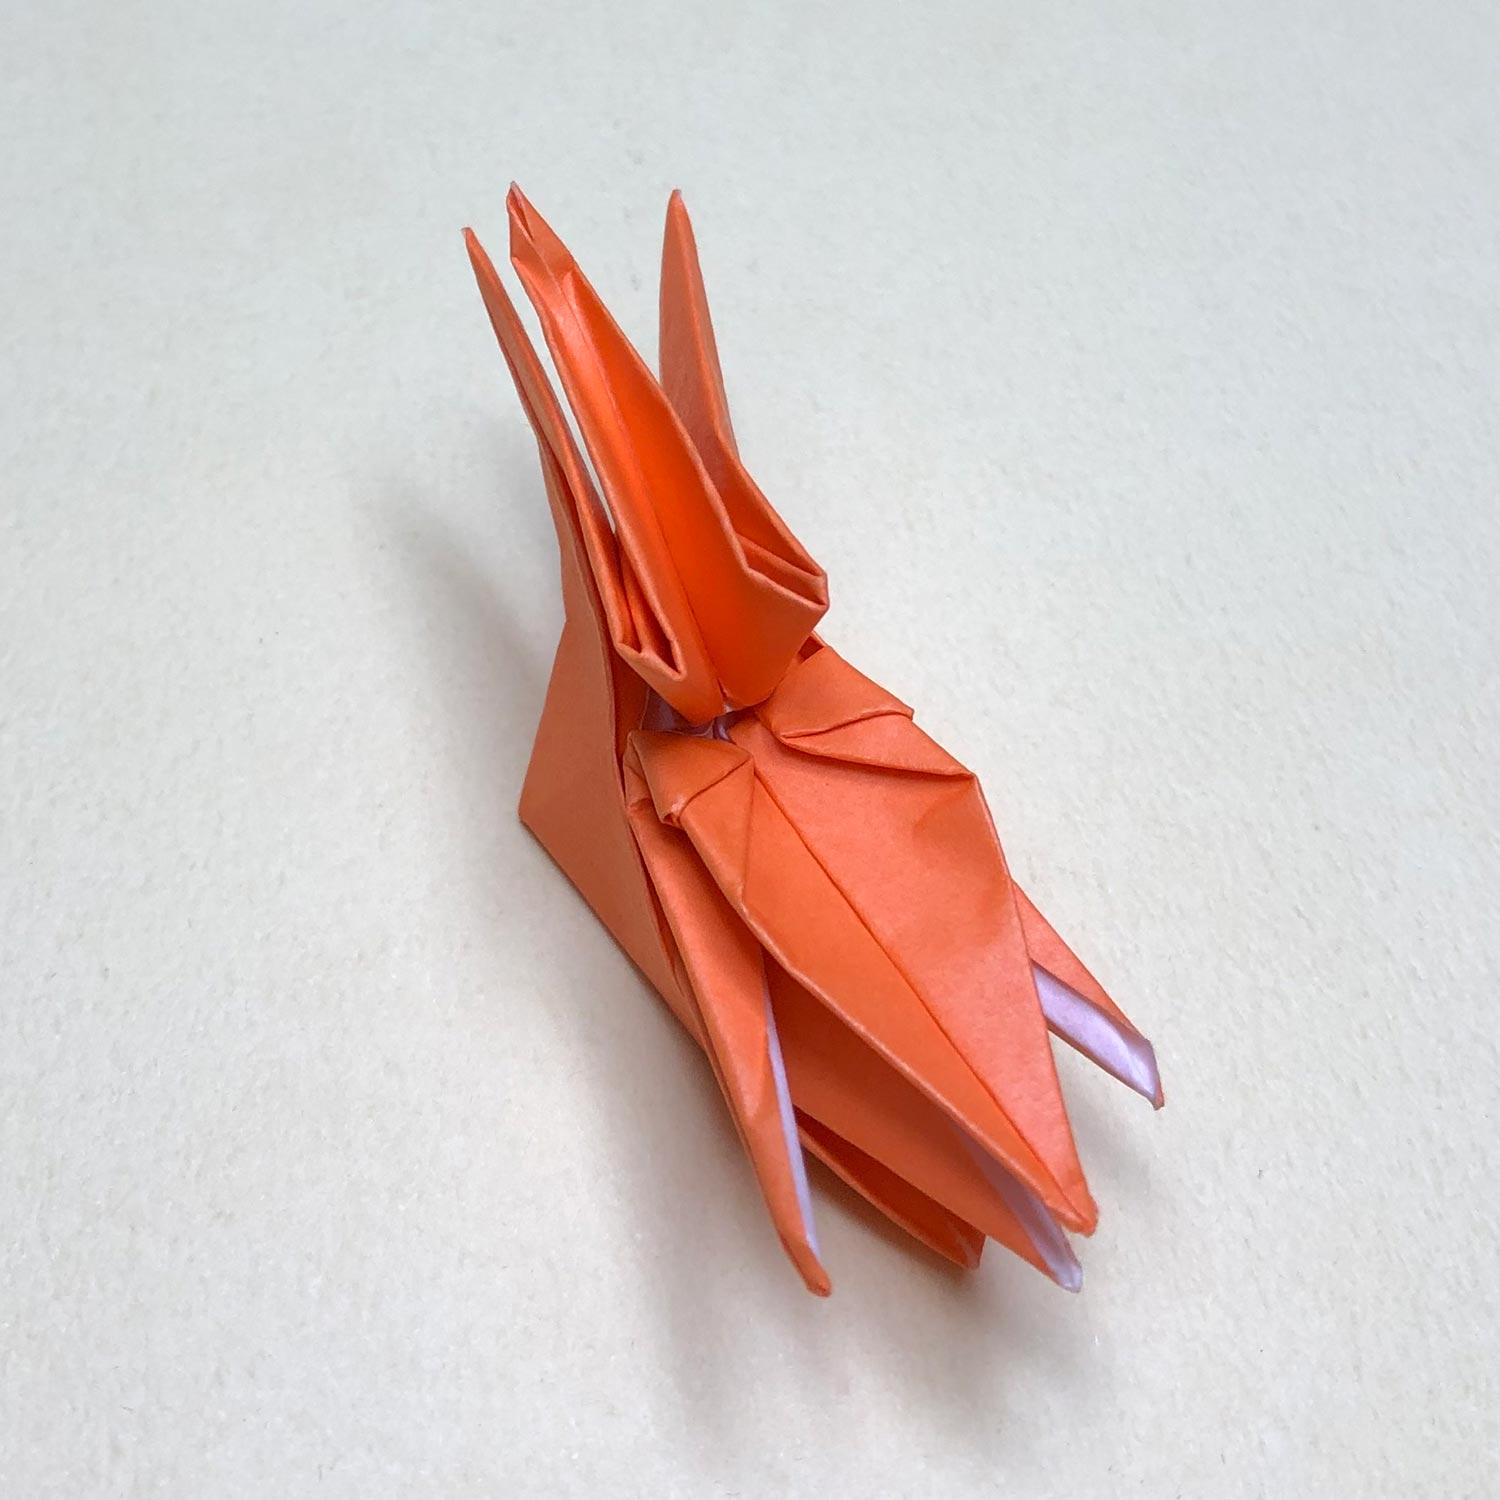
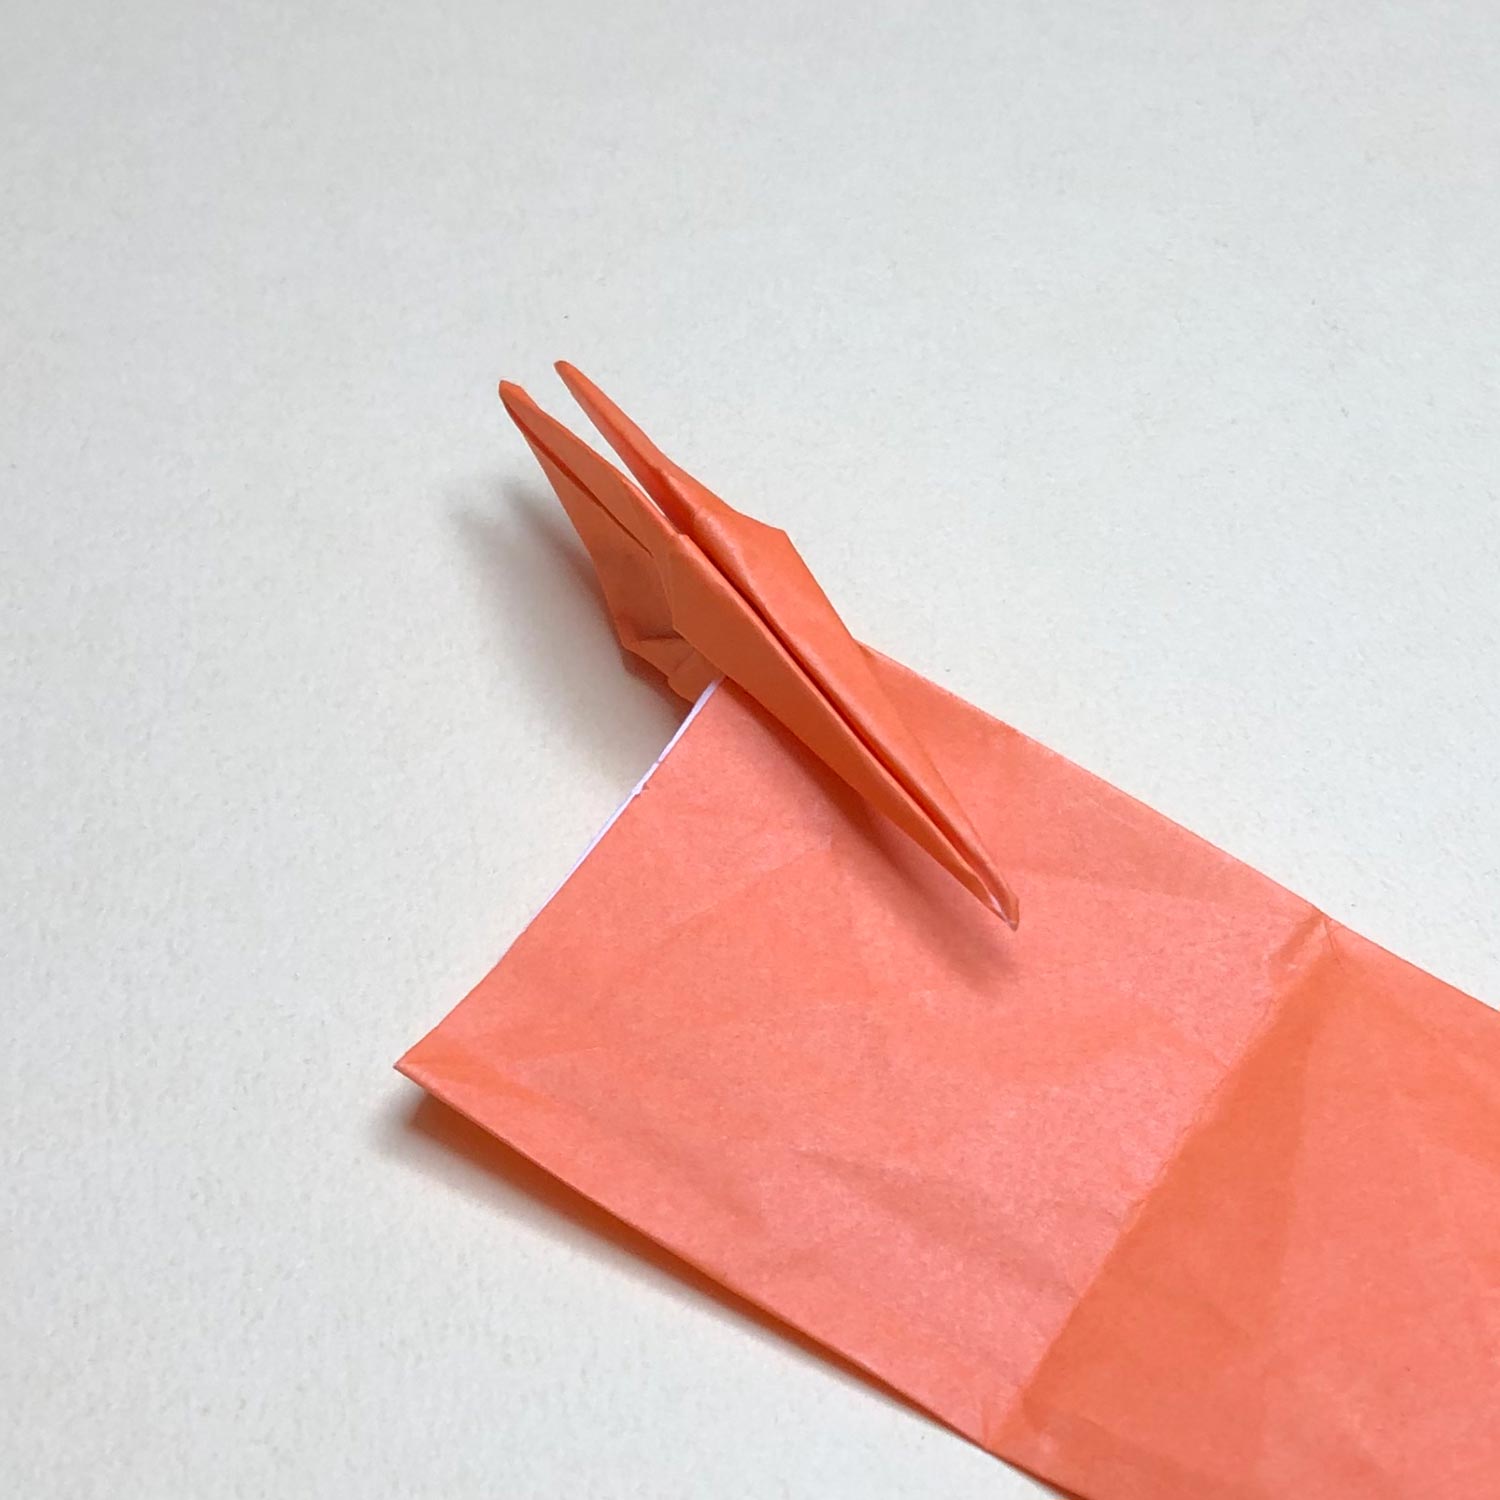
(64)
Raise the head/tail as it is like this picture.