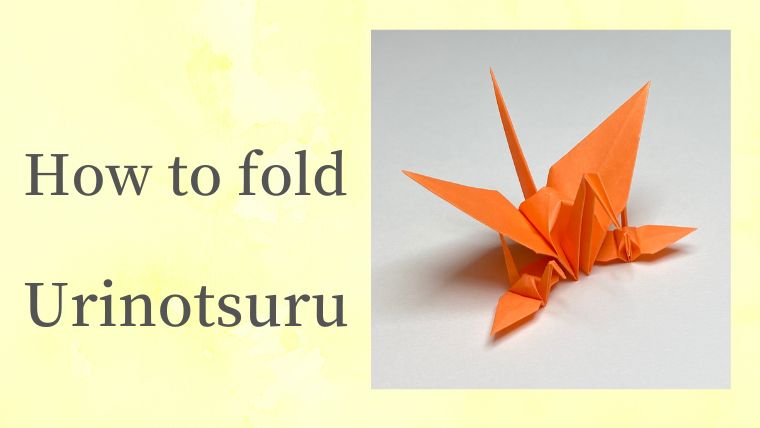
瓜の蔓/Urinotsuru
“瓜の蔓/Urinotsuru” is one model of 49 kinds of “連鶴/Renzuru”.
Renzuru means connected-cranes which are made of only one paper without glue and tape.
49 kinds of Renzuru was in the book which is “秘伝千羽鶴折形/Hiden-Senbazuru-Orikata”.
The book was published in 1797.
— Total difficulty level —
☆5:☆☆☆☆☆・・・・・
— By item —
Tear easily :☆☆・・・
Complexity :☆☆☆・・
Hard to fold:☆☆☆・・
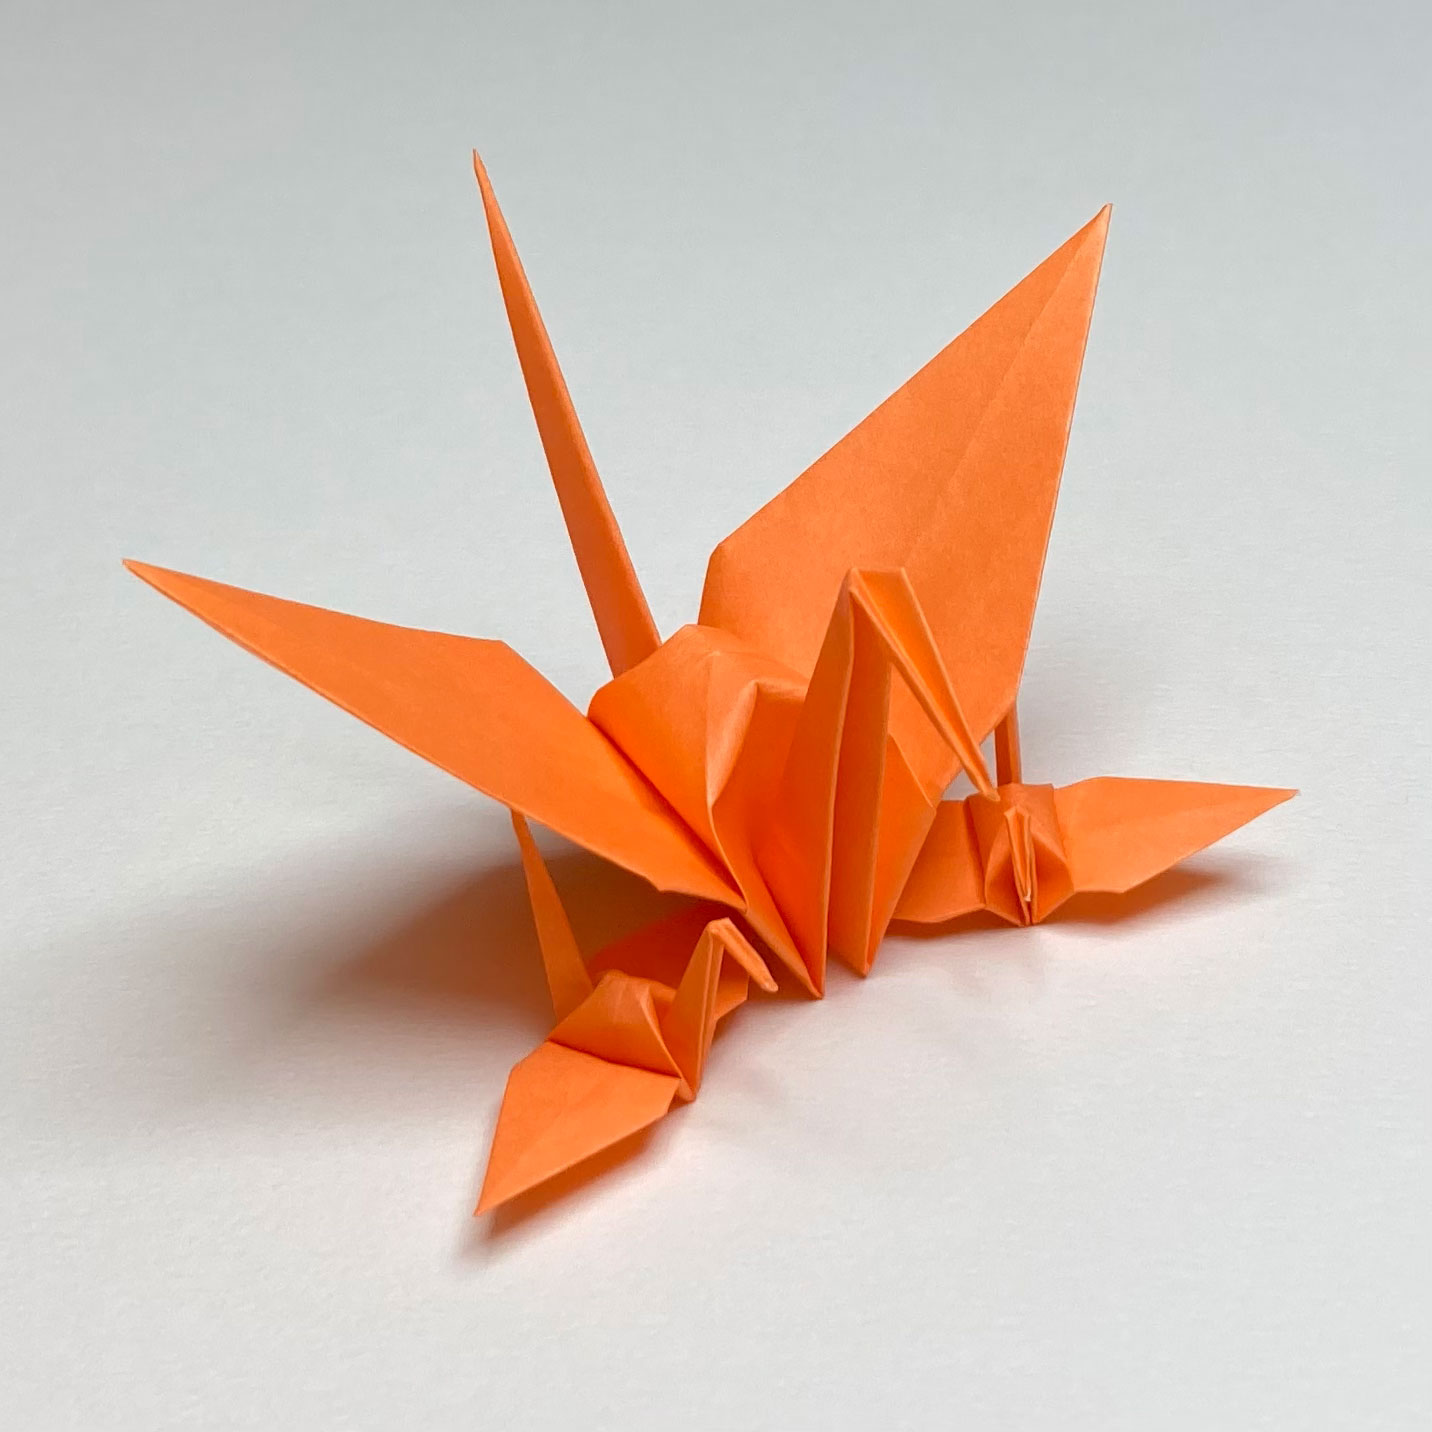
Urinotsuru is the model that two small cranes are connected to a big crane.
Connecting parts tear easily and it is hard to fold this model beautifully.
Therefore, make this model carefully!
Completed Urinotsuru
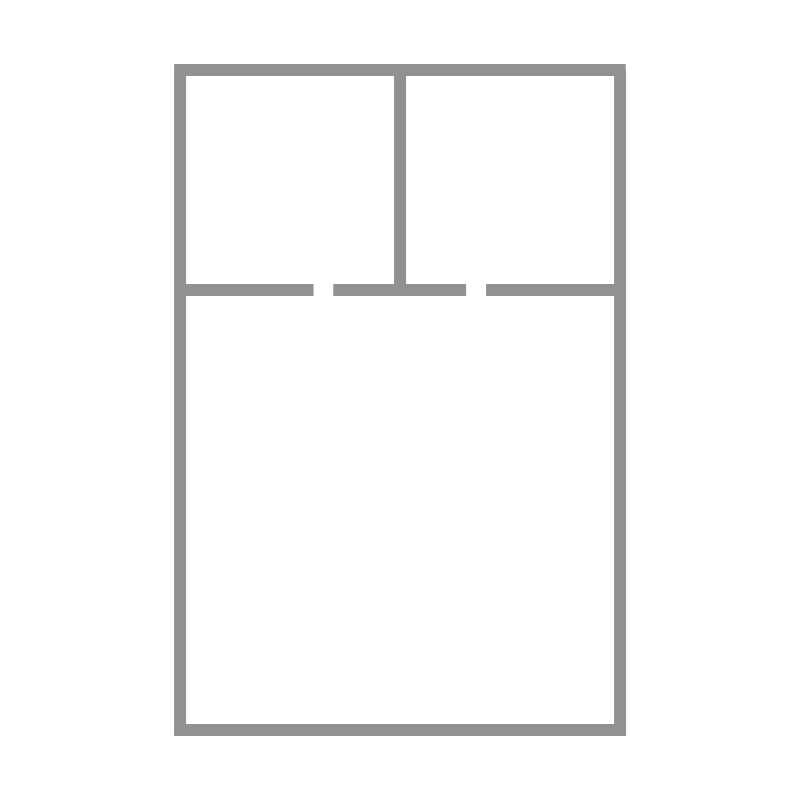
The diagram of Urinotsuru
<reference>『Hiden-Senbazuru-Orikata』- was published in 1797
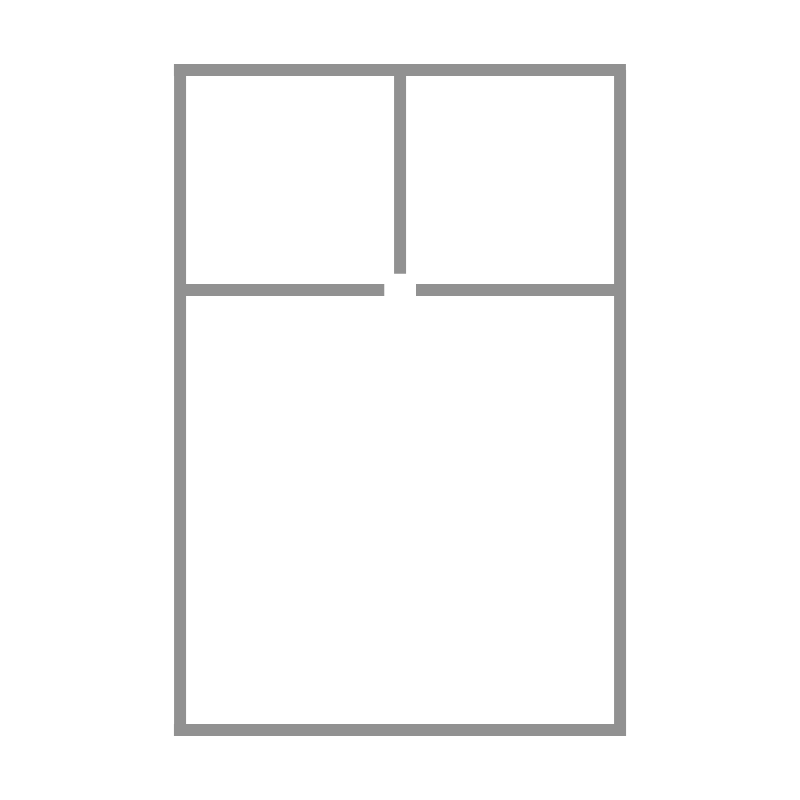
This is a diagram that I changed lines.
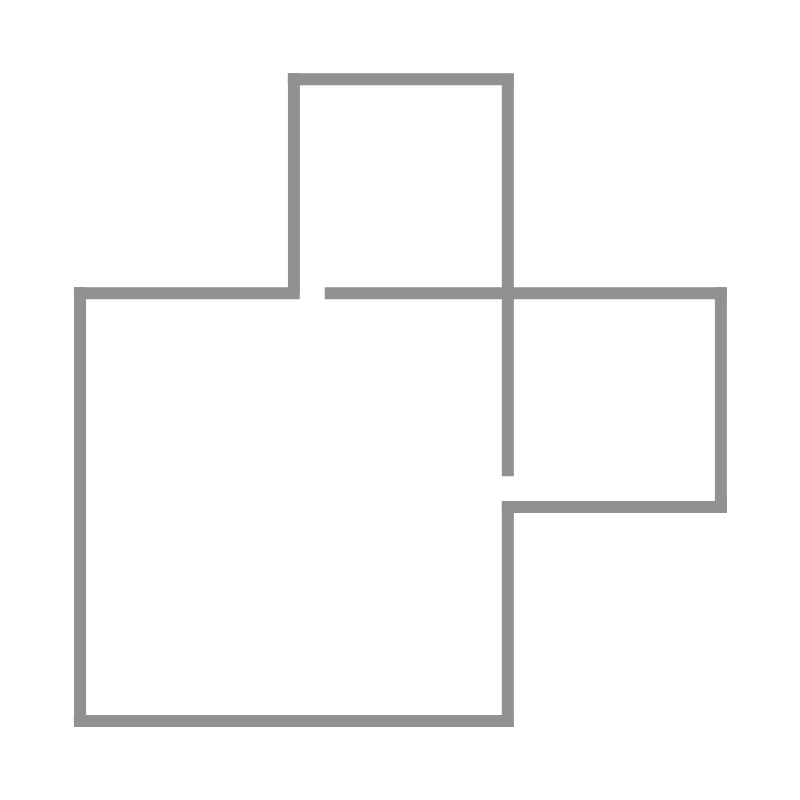
This is a diagram that I changed.
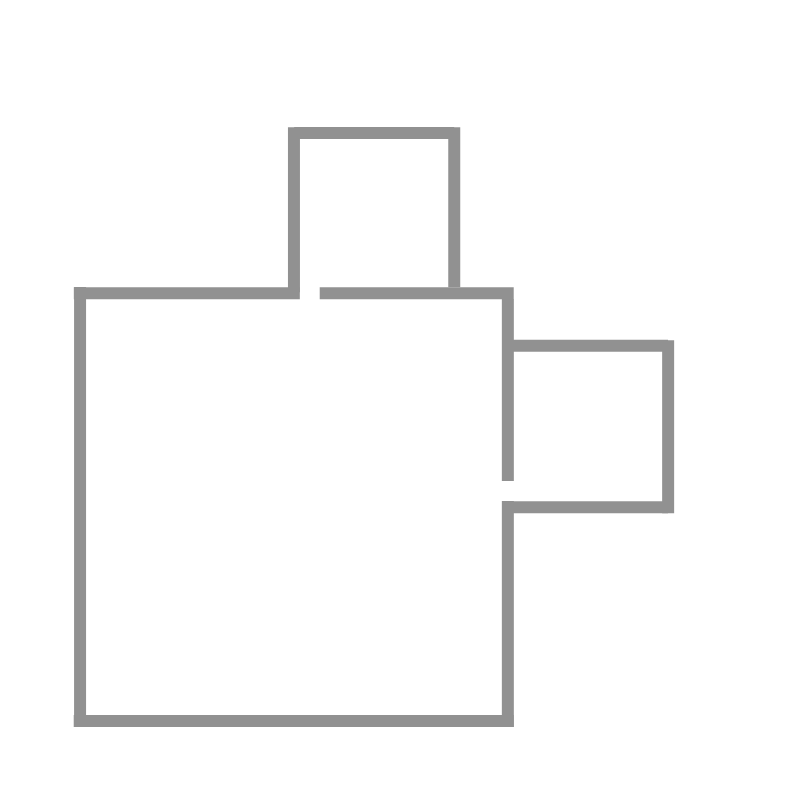
This is a diagram that I changed lines.
Preparation of an origami paper
【Size】
a 17.5×17.5cm paper or it is bigger than 17.5cm.
【Kinds】
・Basic origami paper
・Double sided origami paper
・Washi paper
I made this model with a 17.5×17.5cm basic origami paper.
If you use a big paper, it will get easier to make this model.
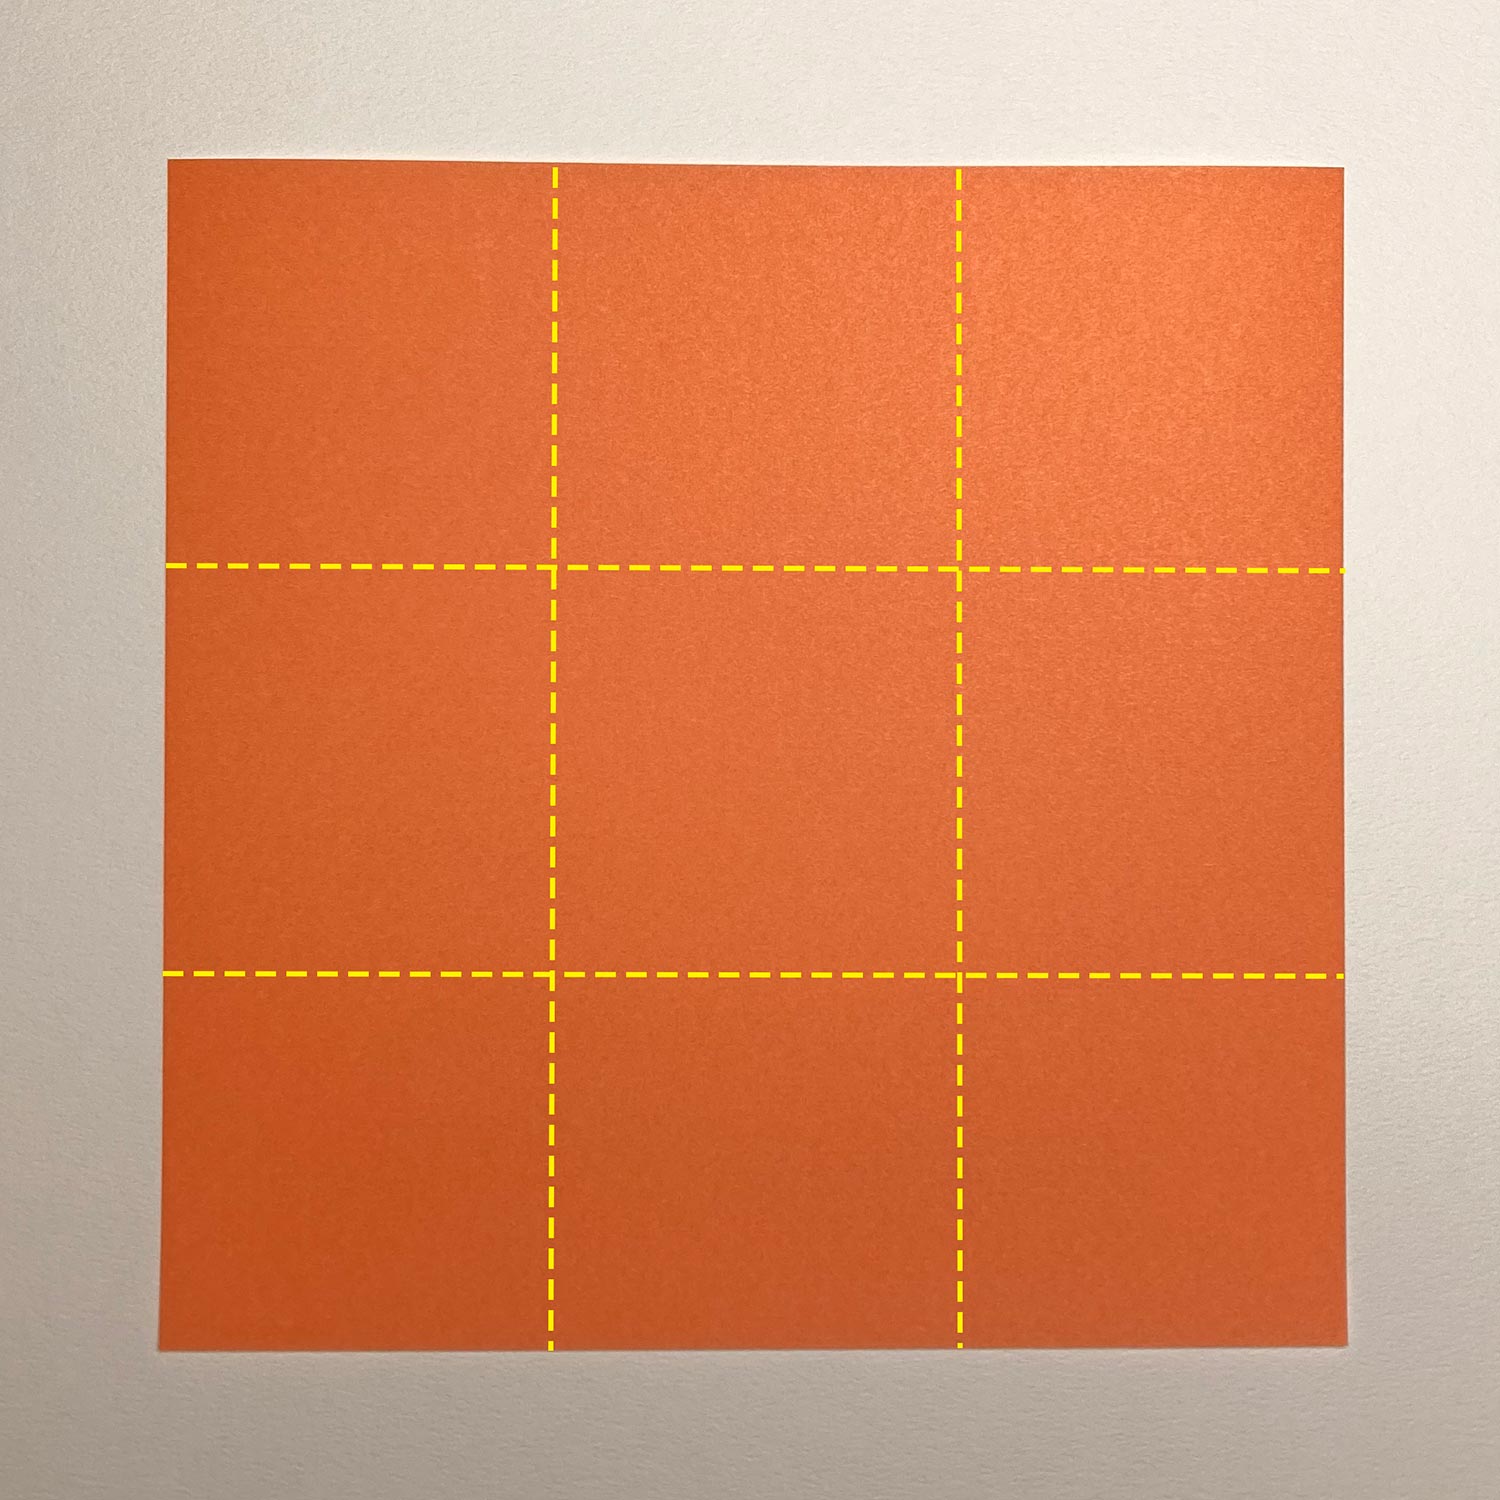
(1)
Fold the paper in three in each direction.
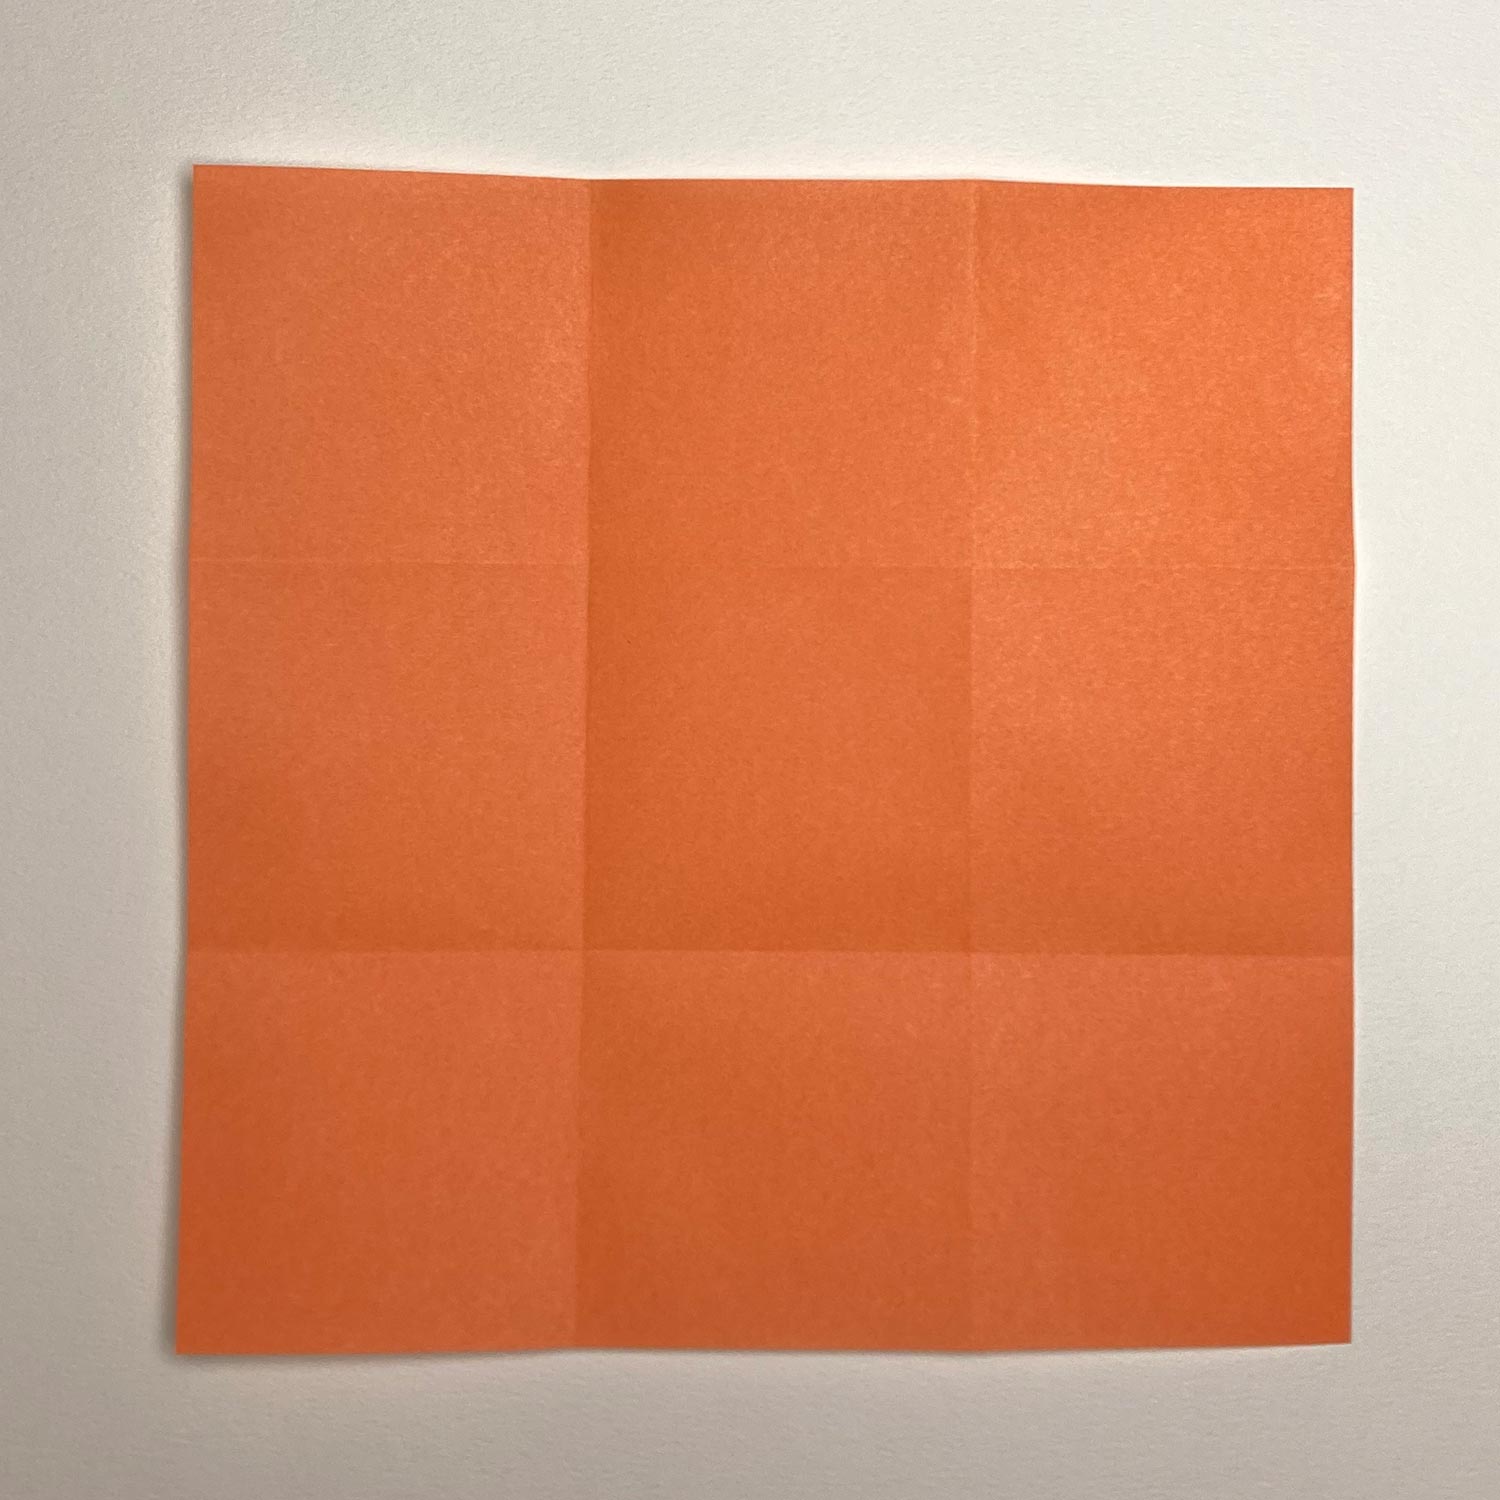
(2)
After making creases, it looks like this picture.
Then turn the paper over.
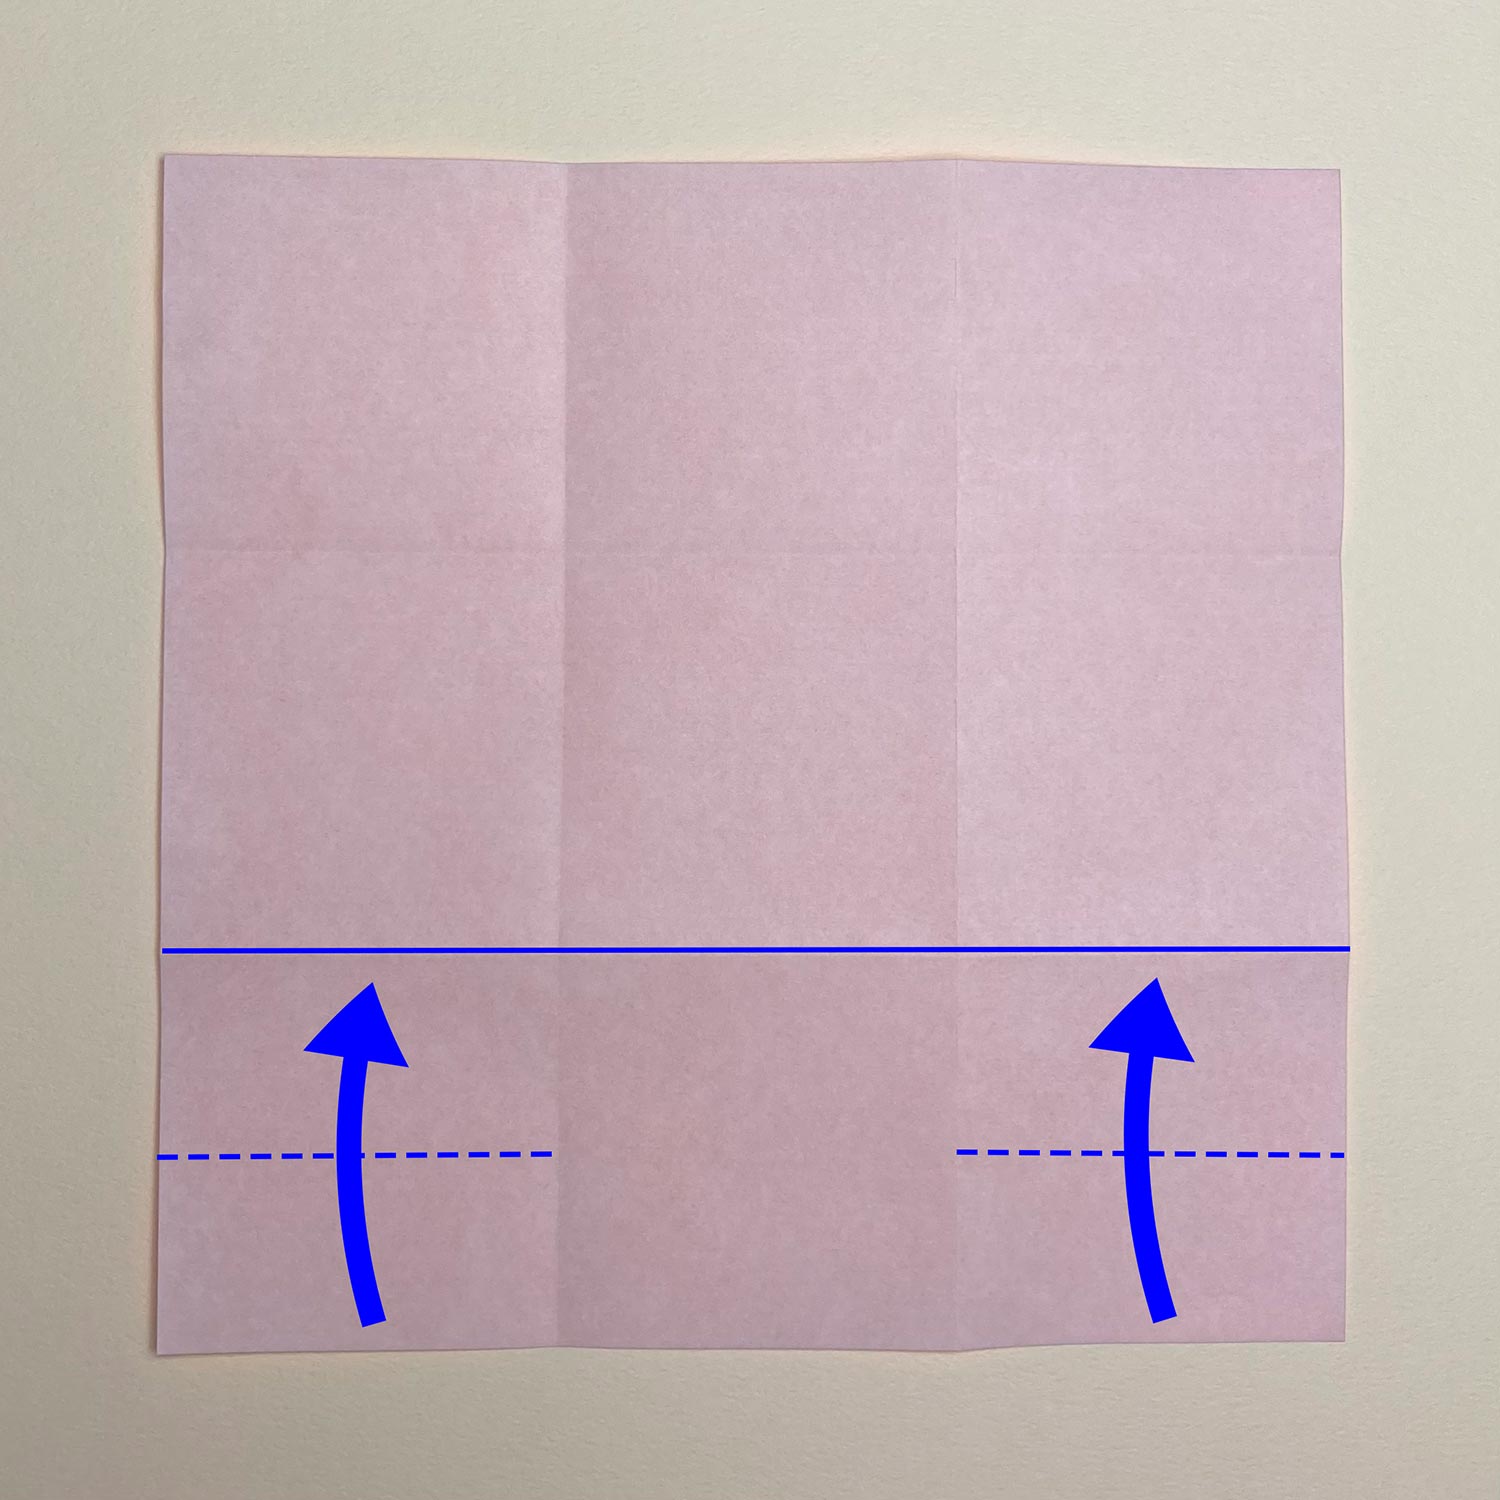
(3)
After turning the paper over, fold the bottom to the blue line, which you have made, to make creases at the dotted lines.

(4)
Fold the paper like this picture.
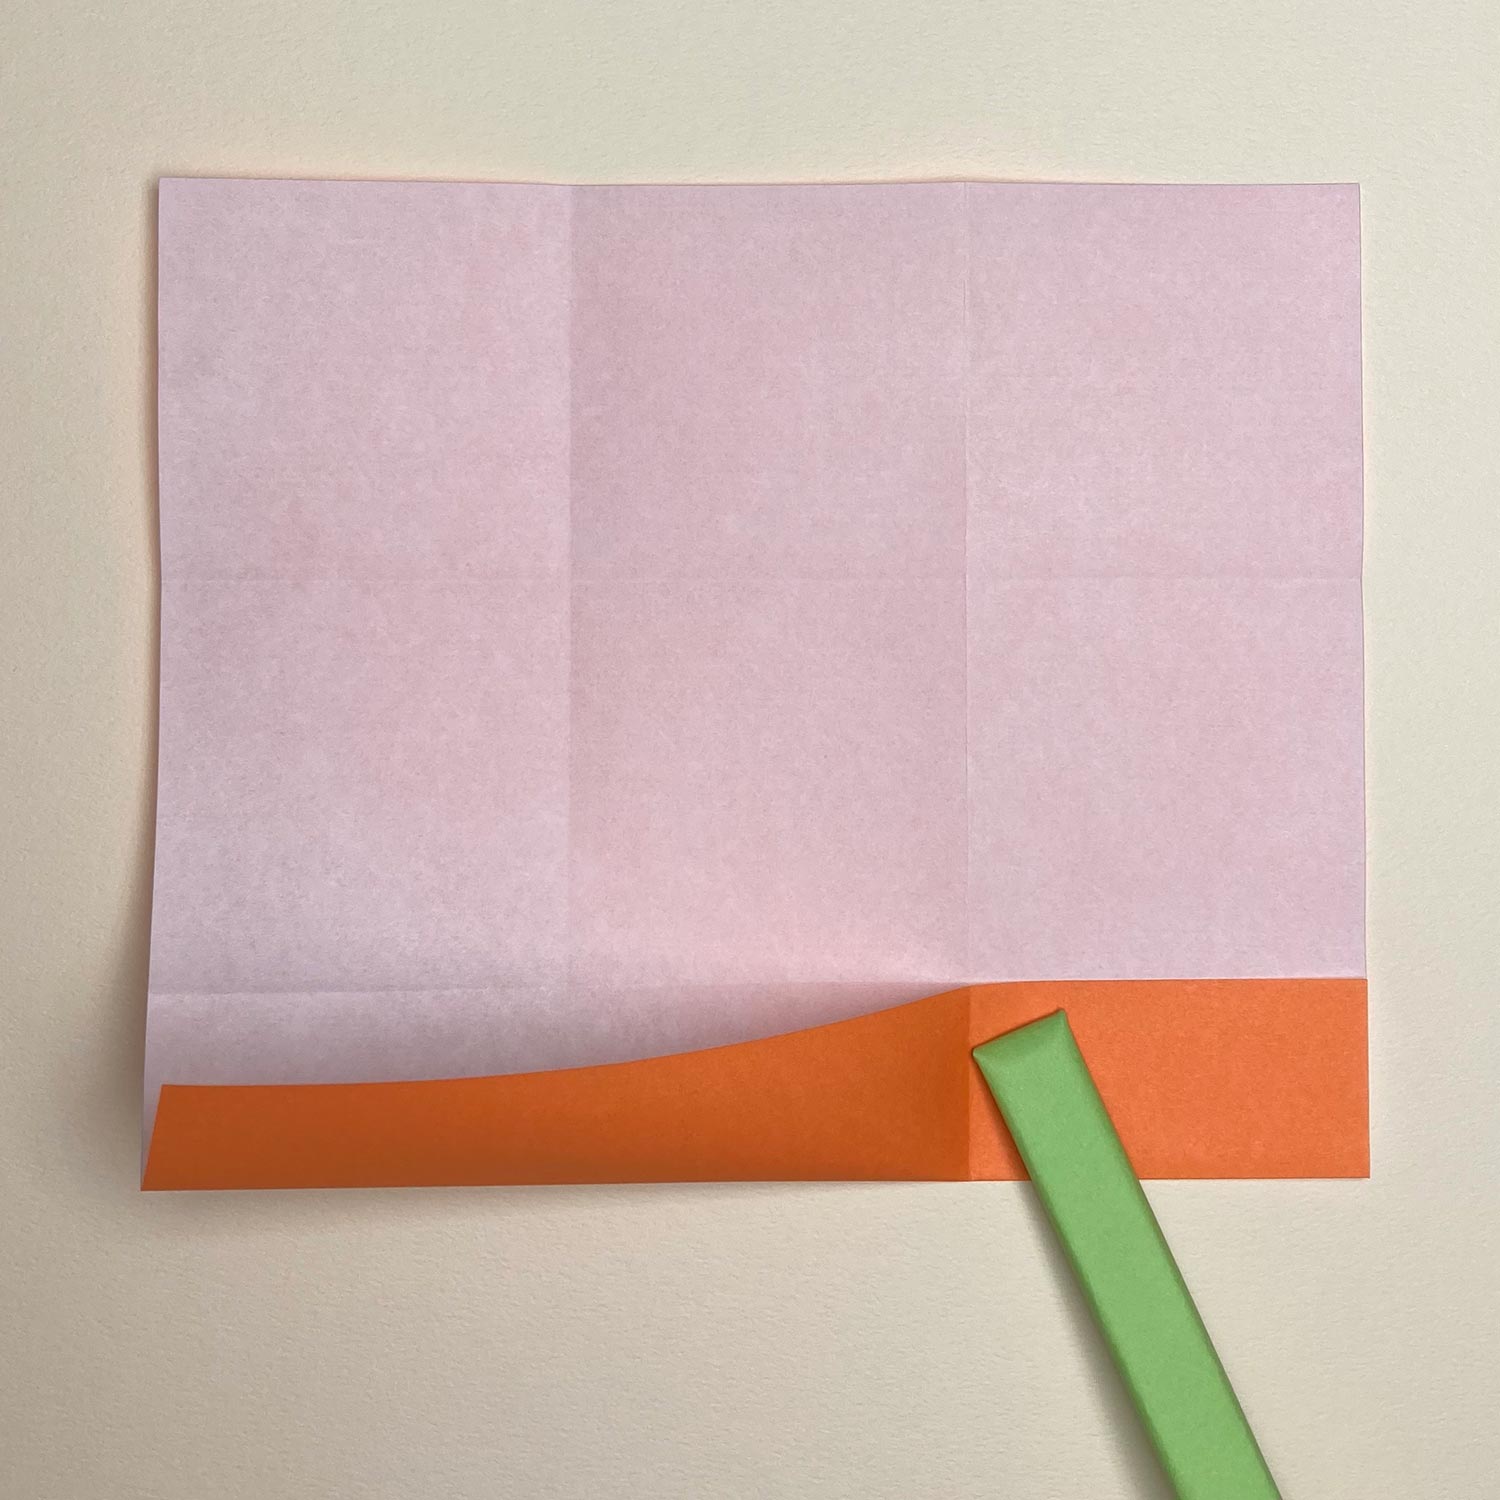
(5)
On the other side, fold the paper like this picture.
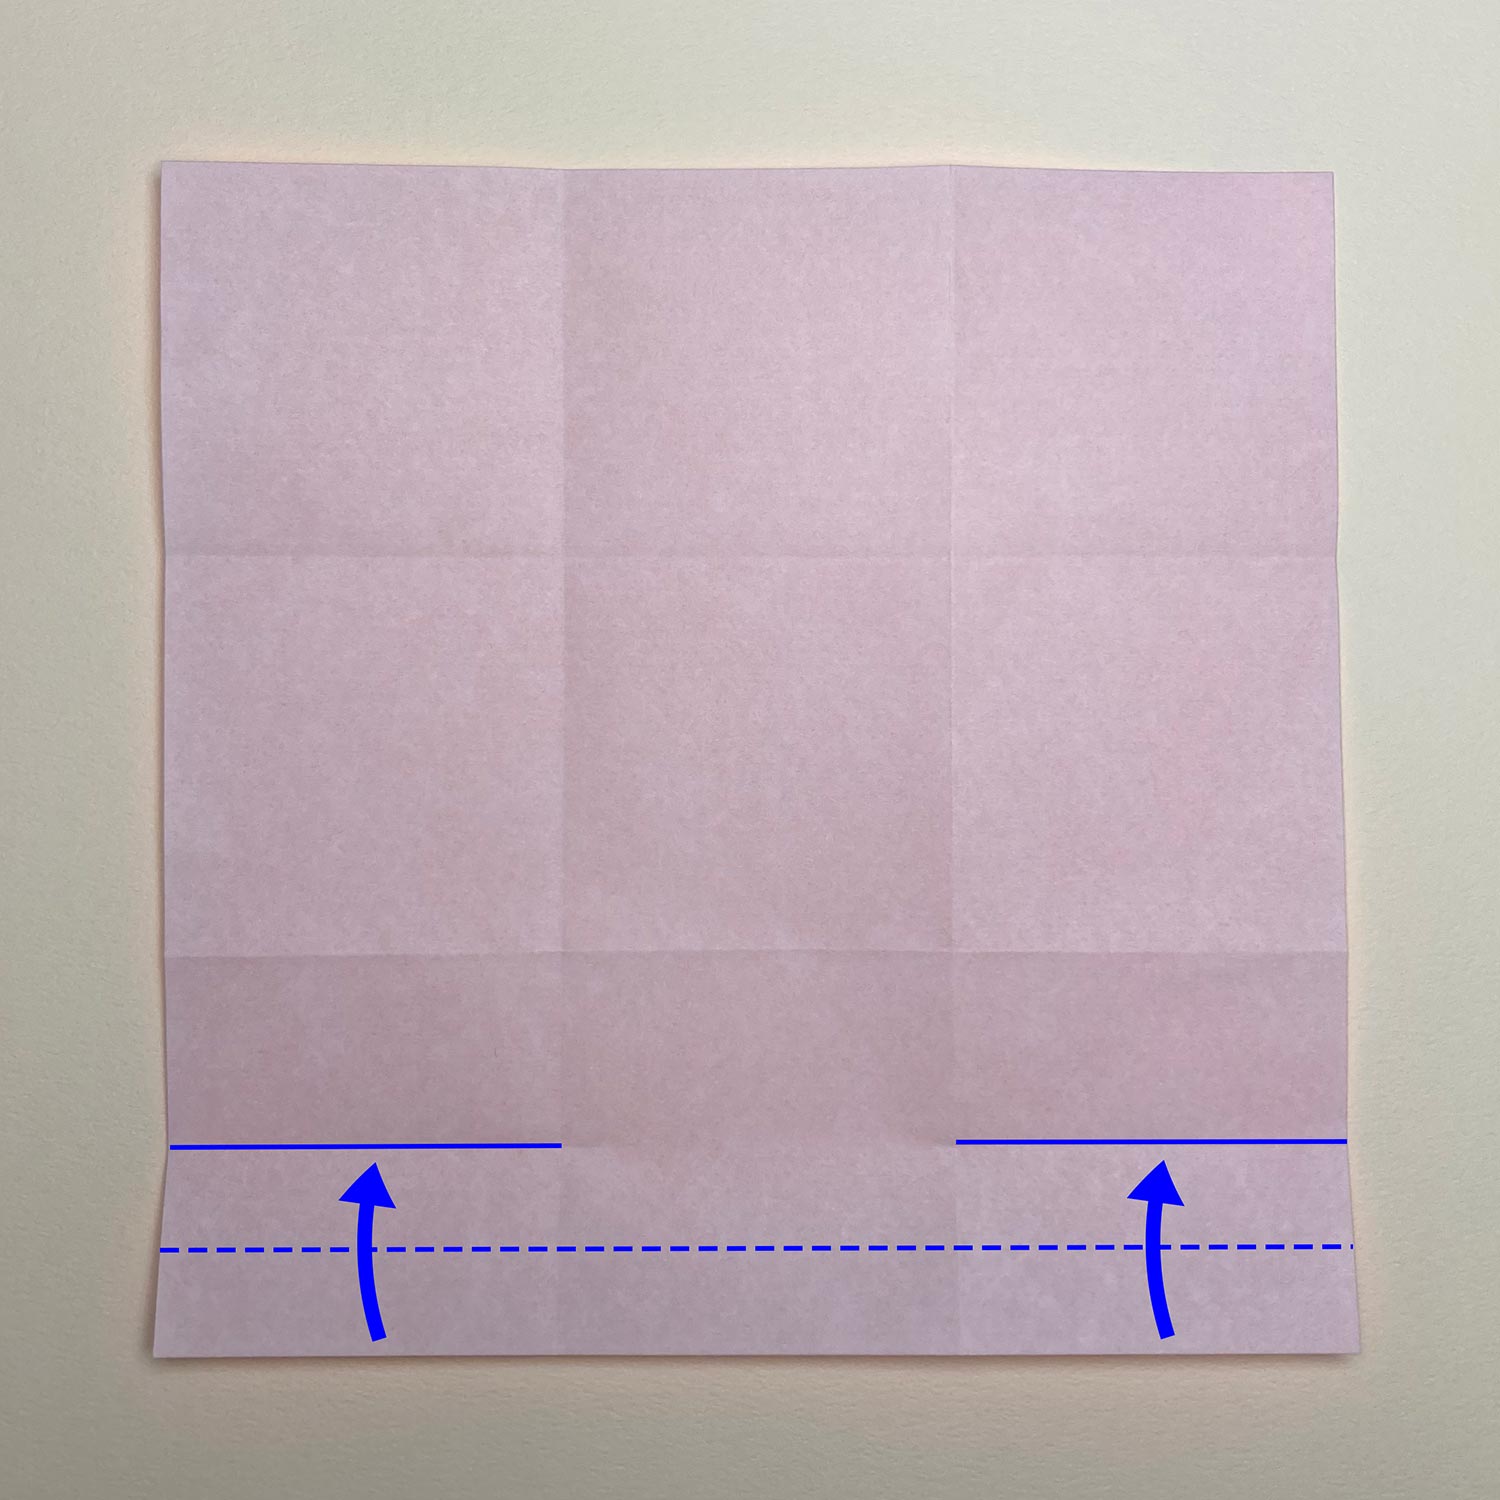
(6)
Then fold the bottom to the blue lines, which you have made in the previous step, to make a crease at the dotted line.
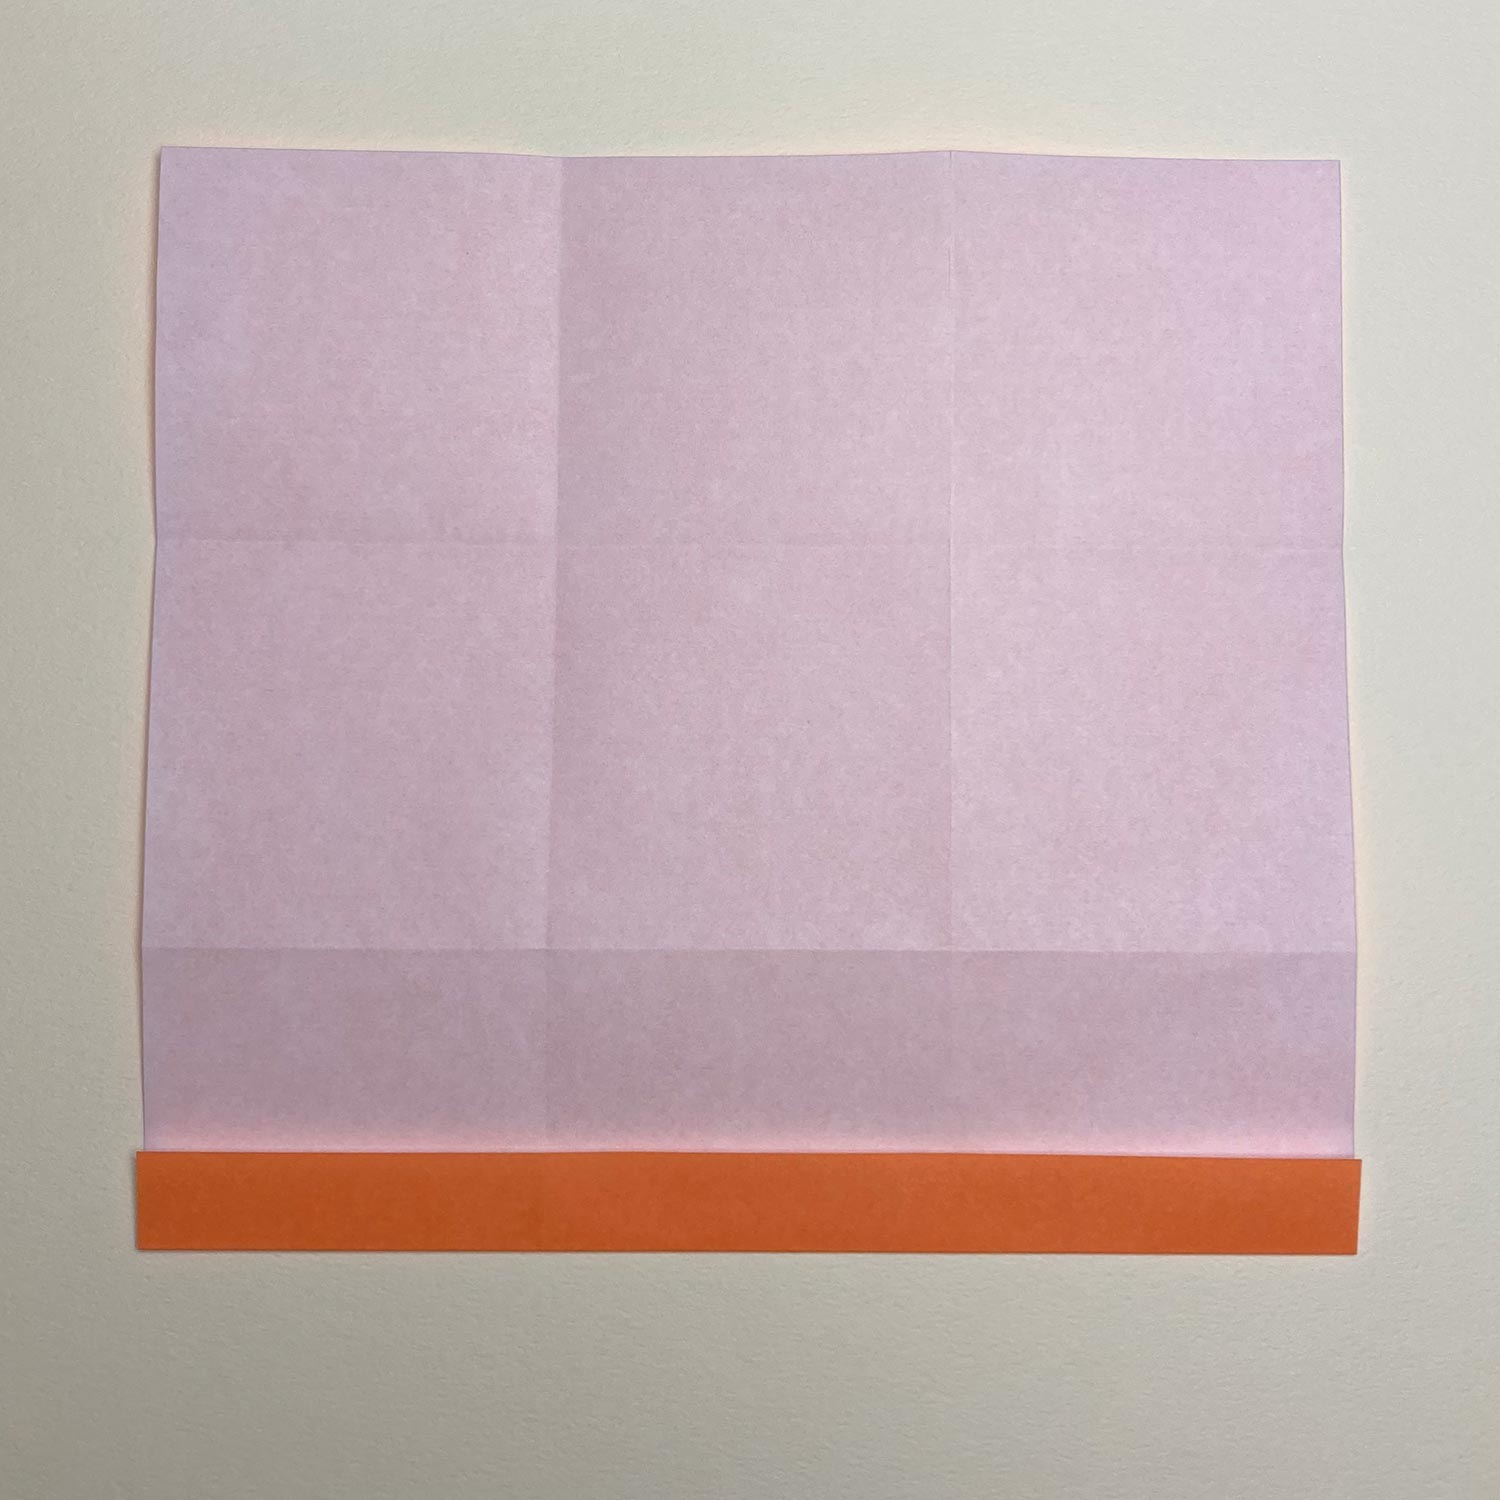
(7)
Fold the paper like this picture.
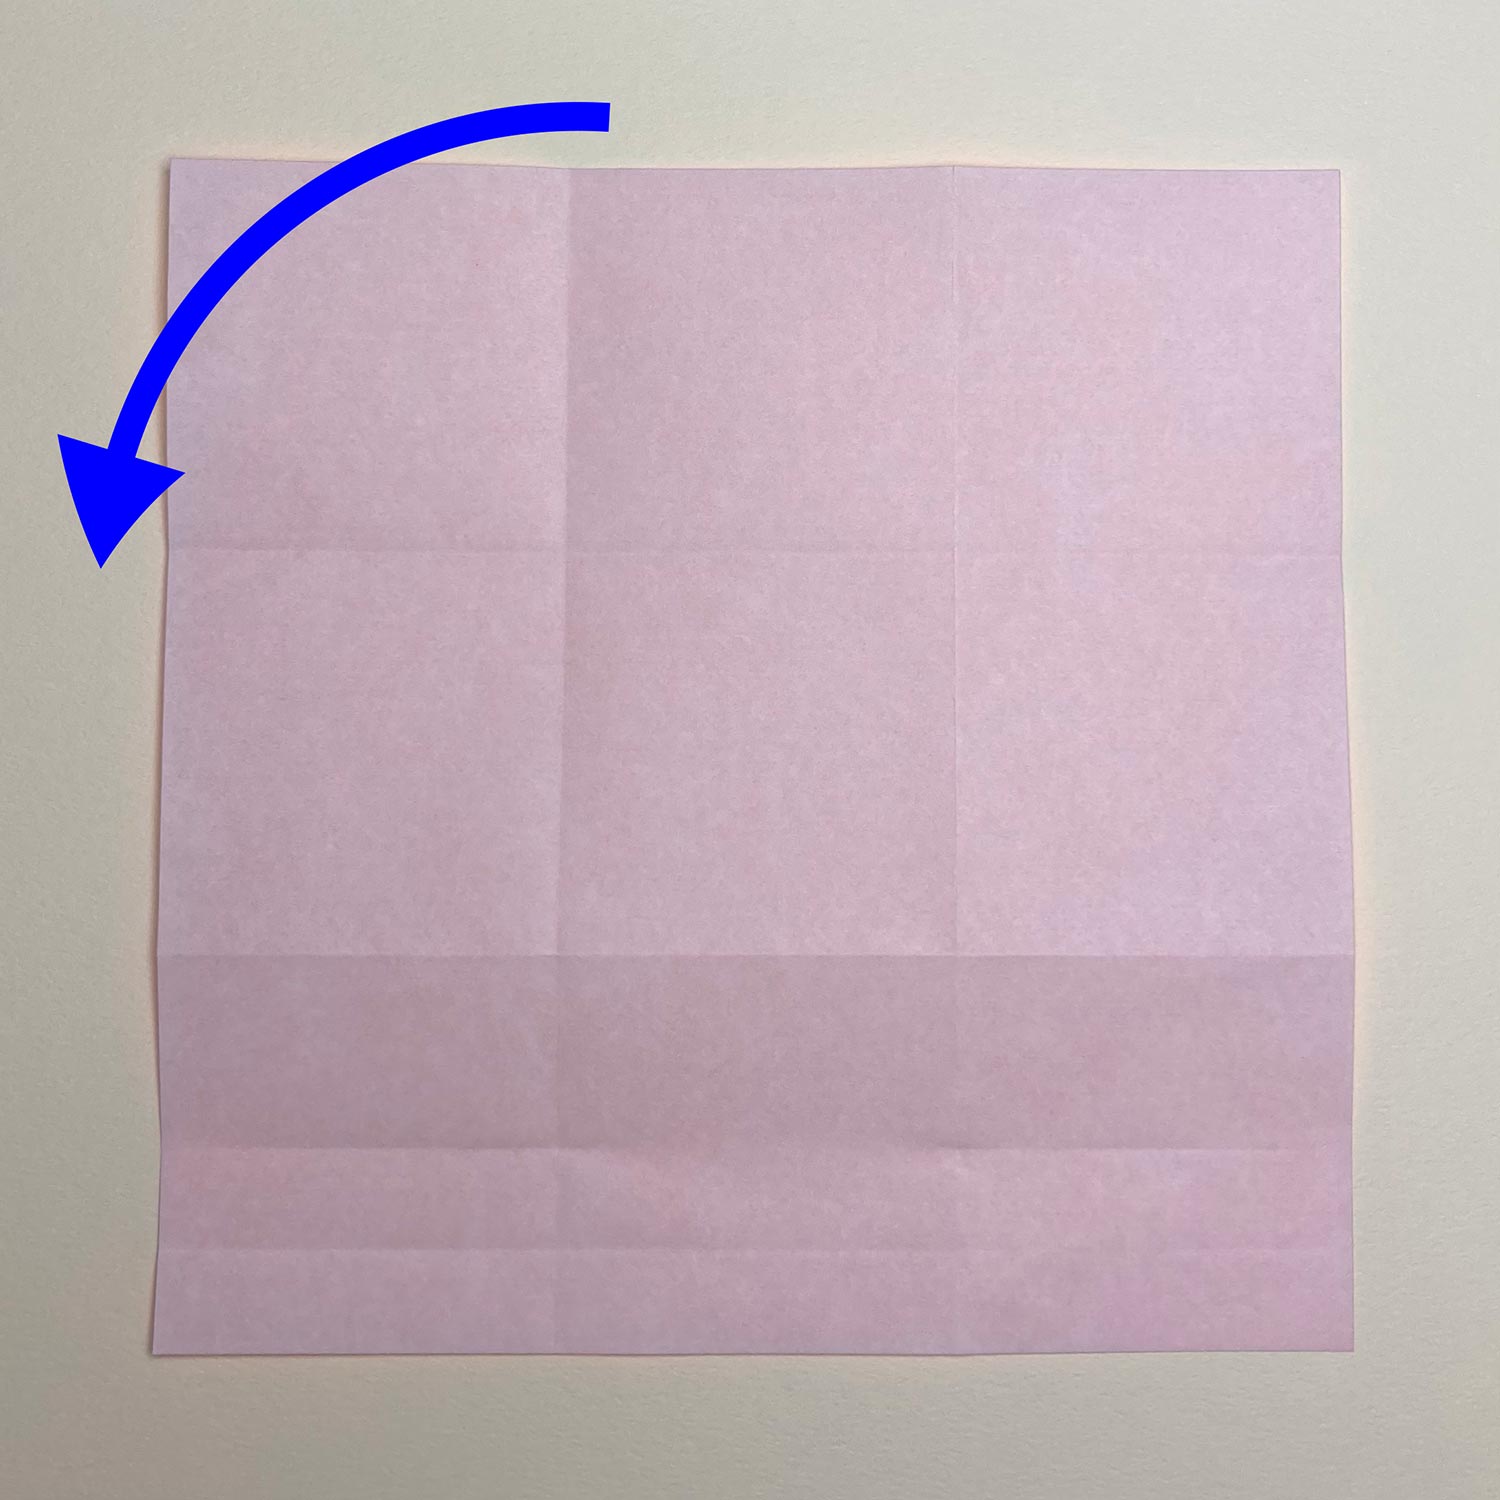
(8)
Then rotate the paper 90 degrees to the left.
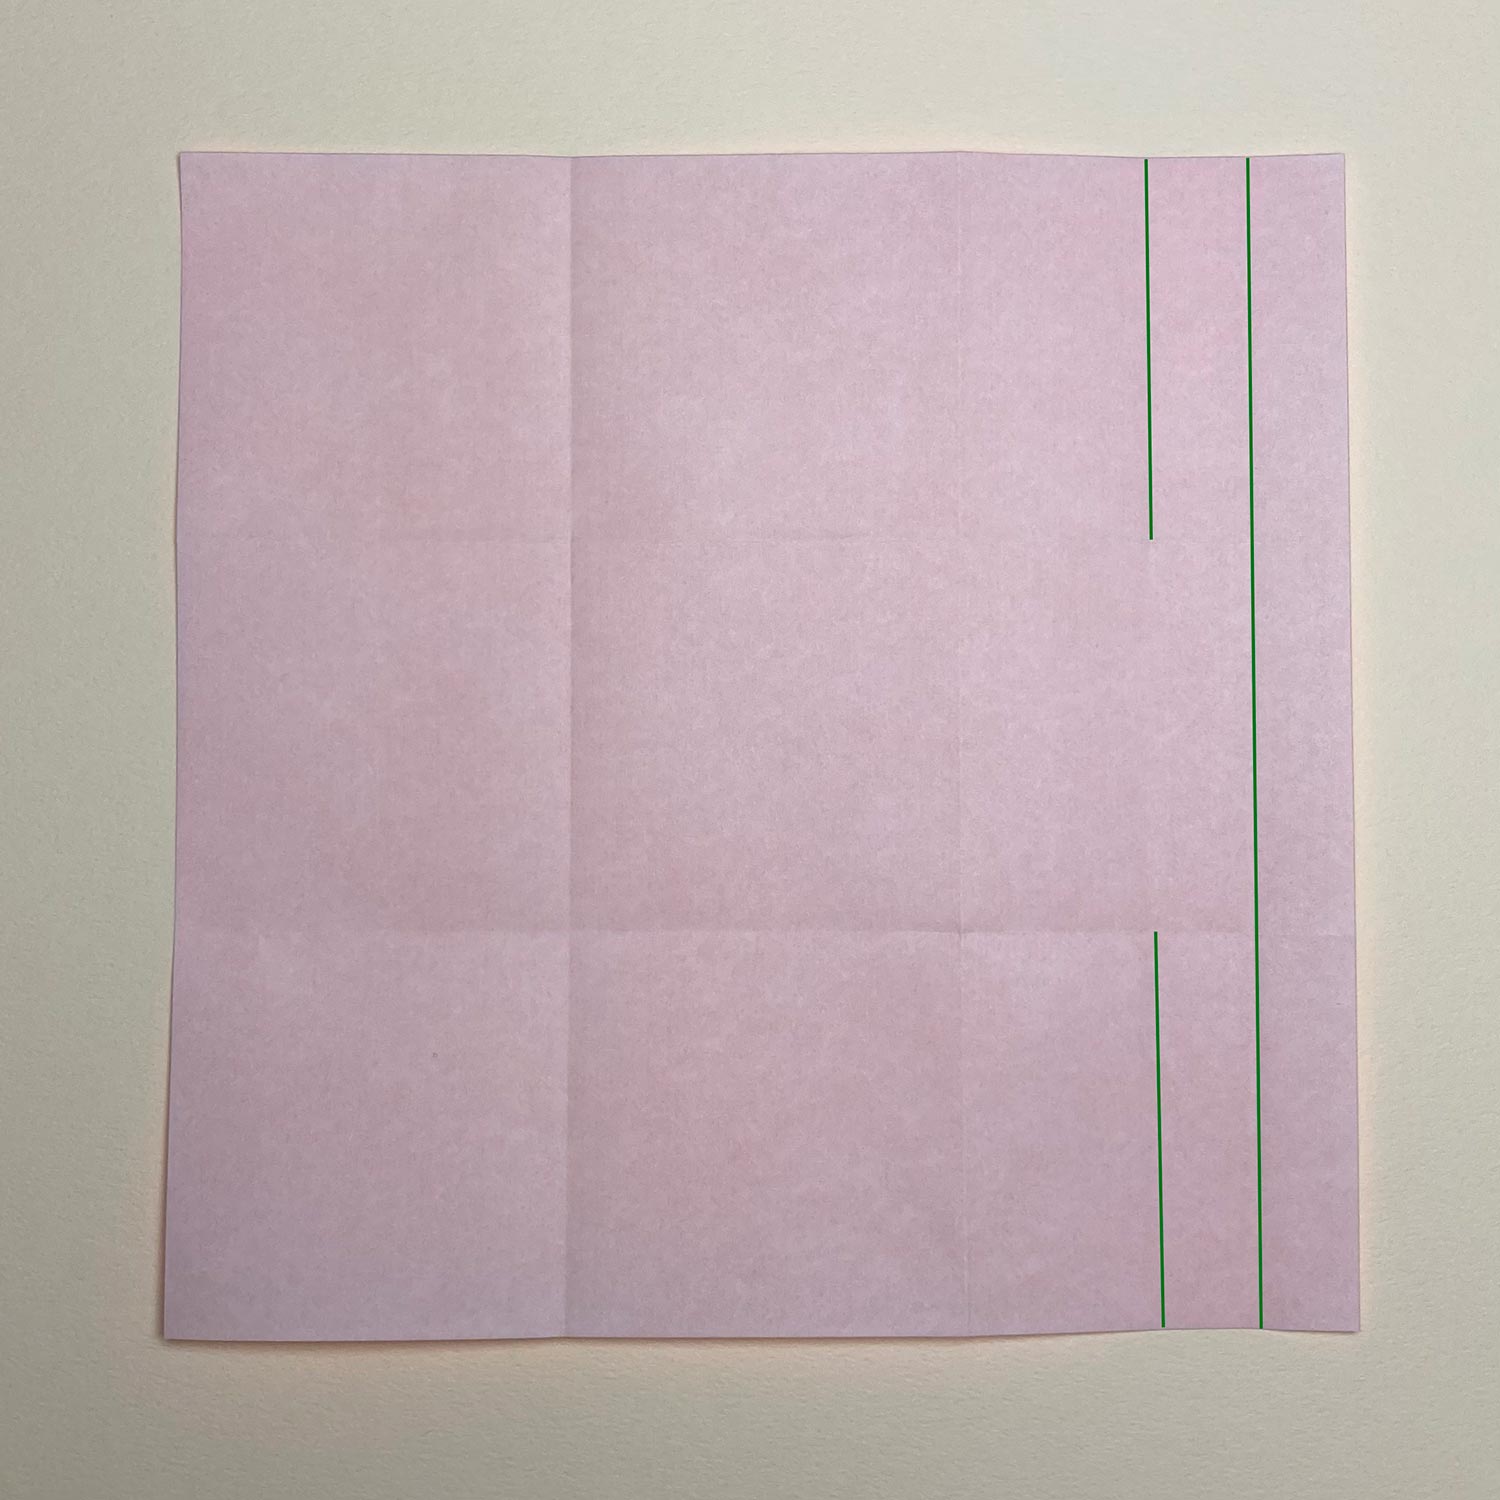
(9)
There are creases in the right because you rotate the paper 90 degrees to the left.
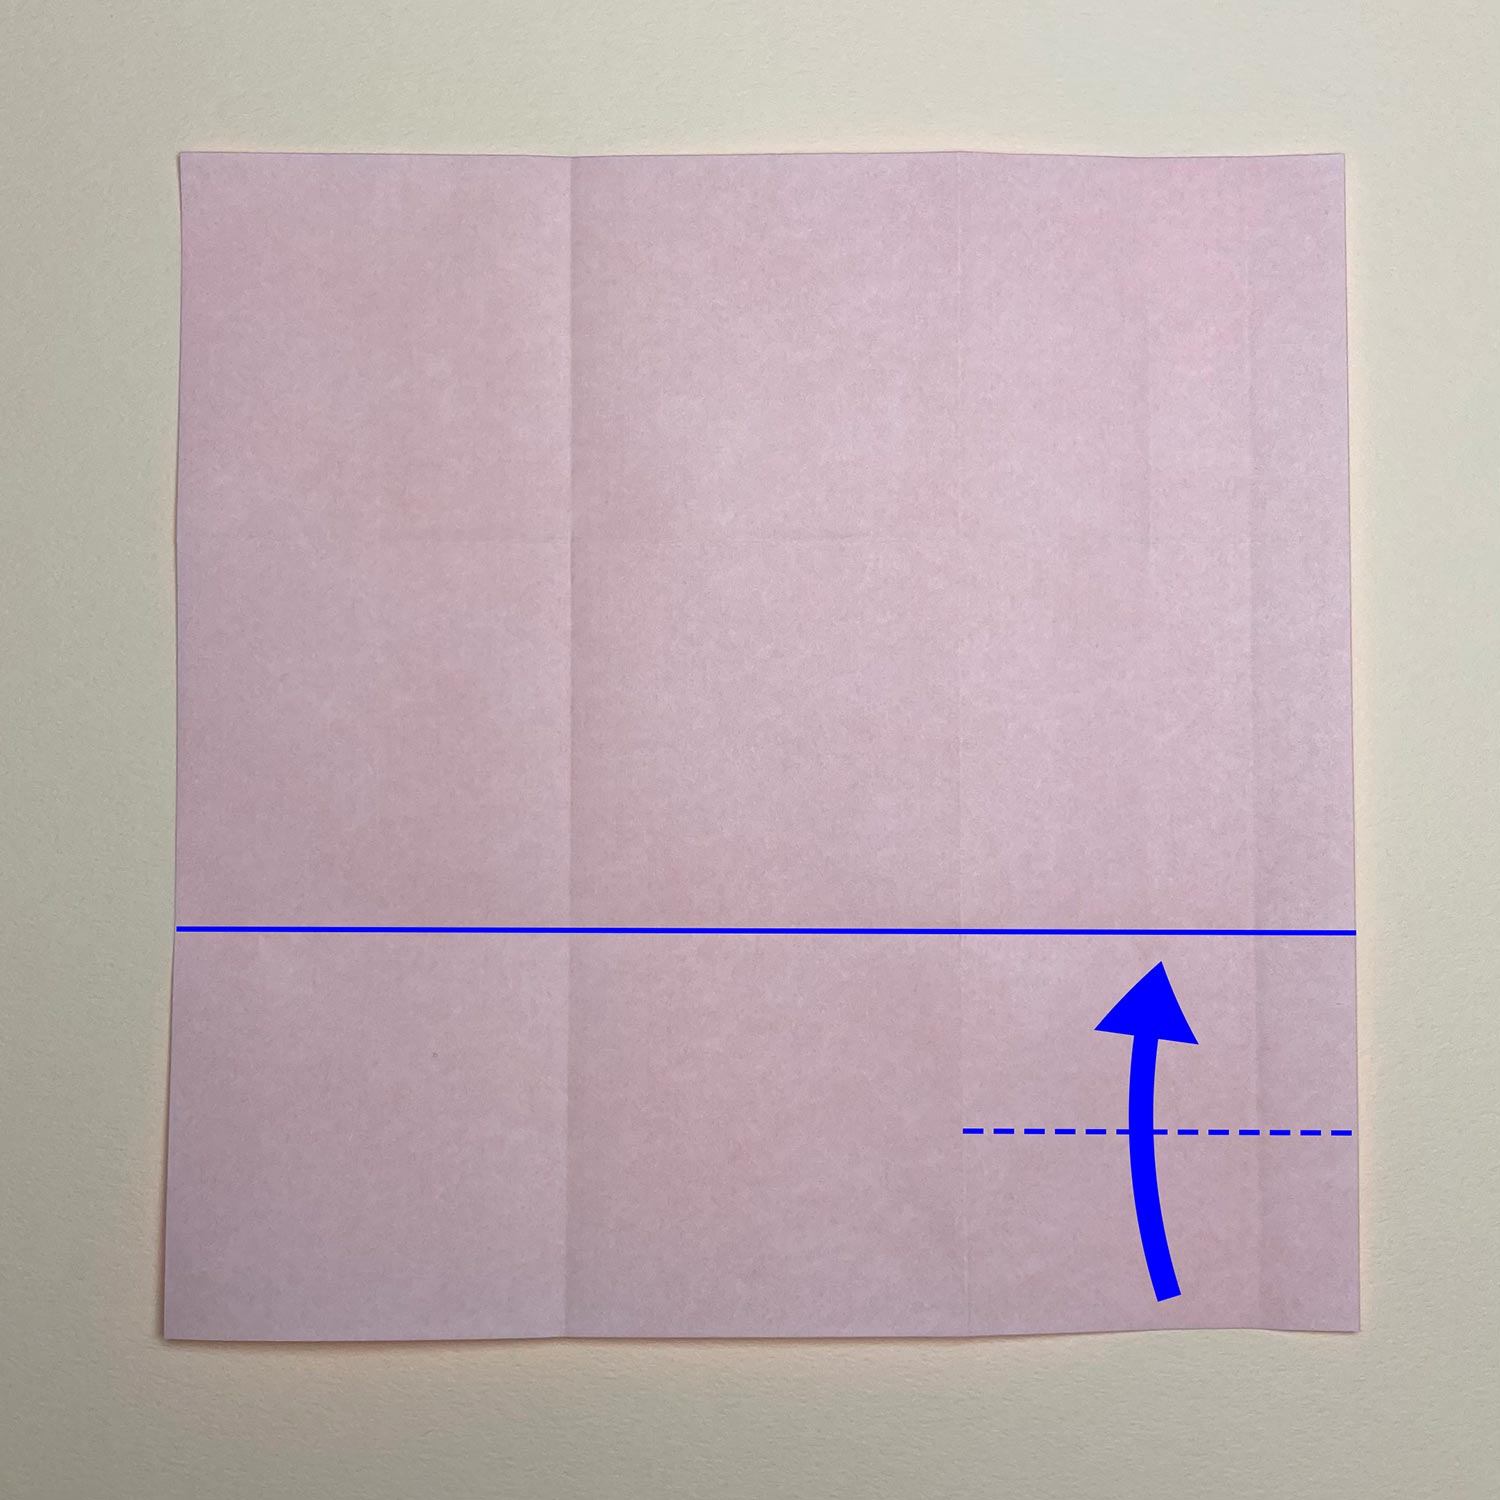
(10)
Fold the bottom to the blue line to make a crease at the dotted line.
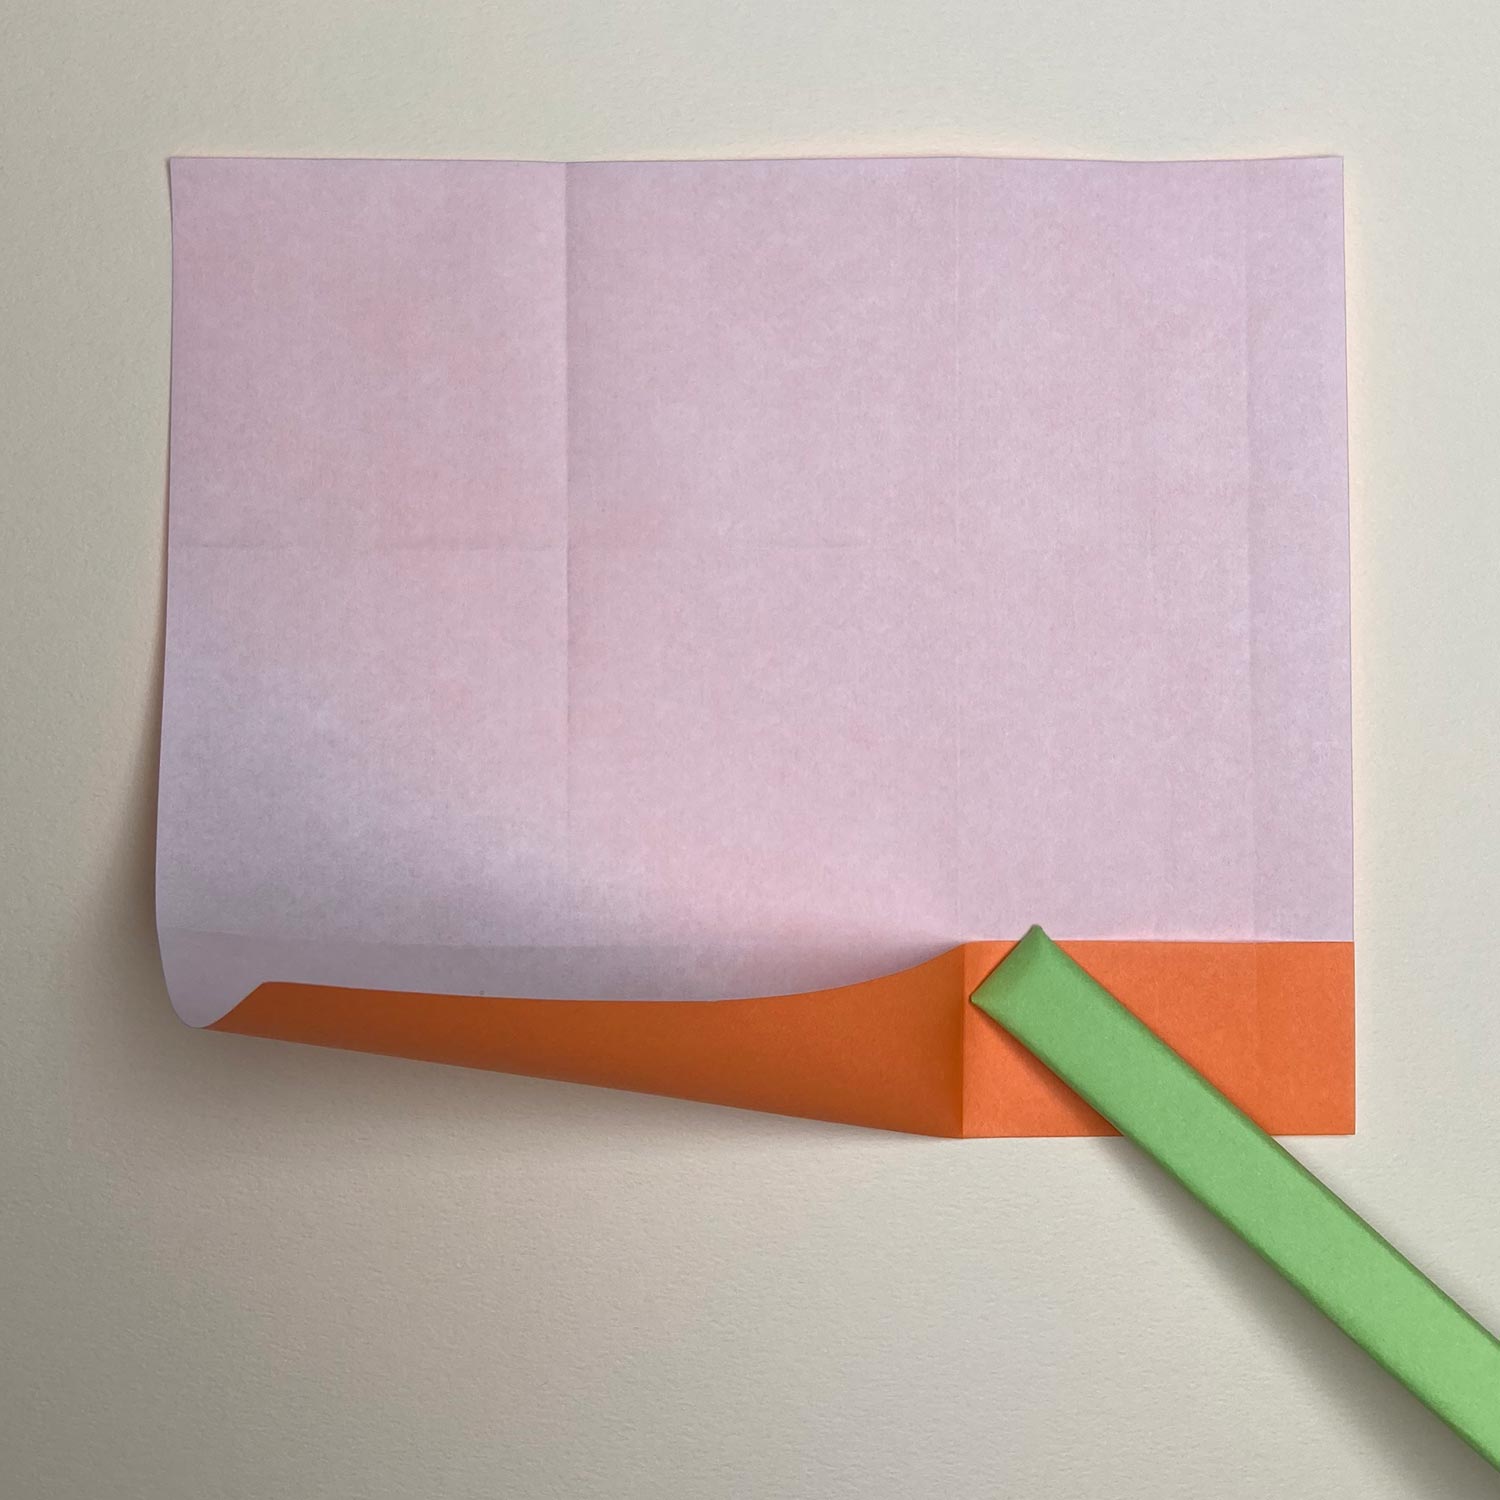
(11)
Fold the paper like this picture.
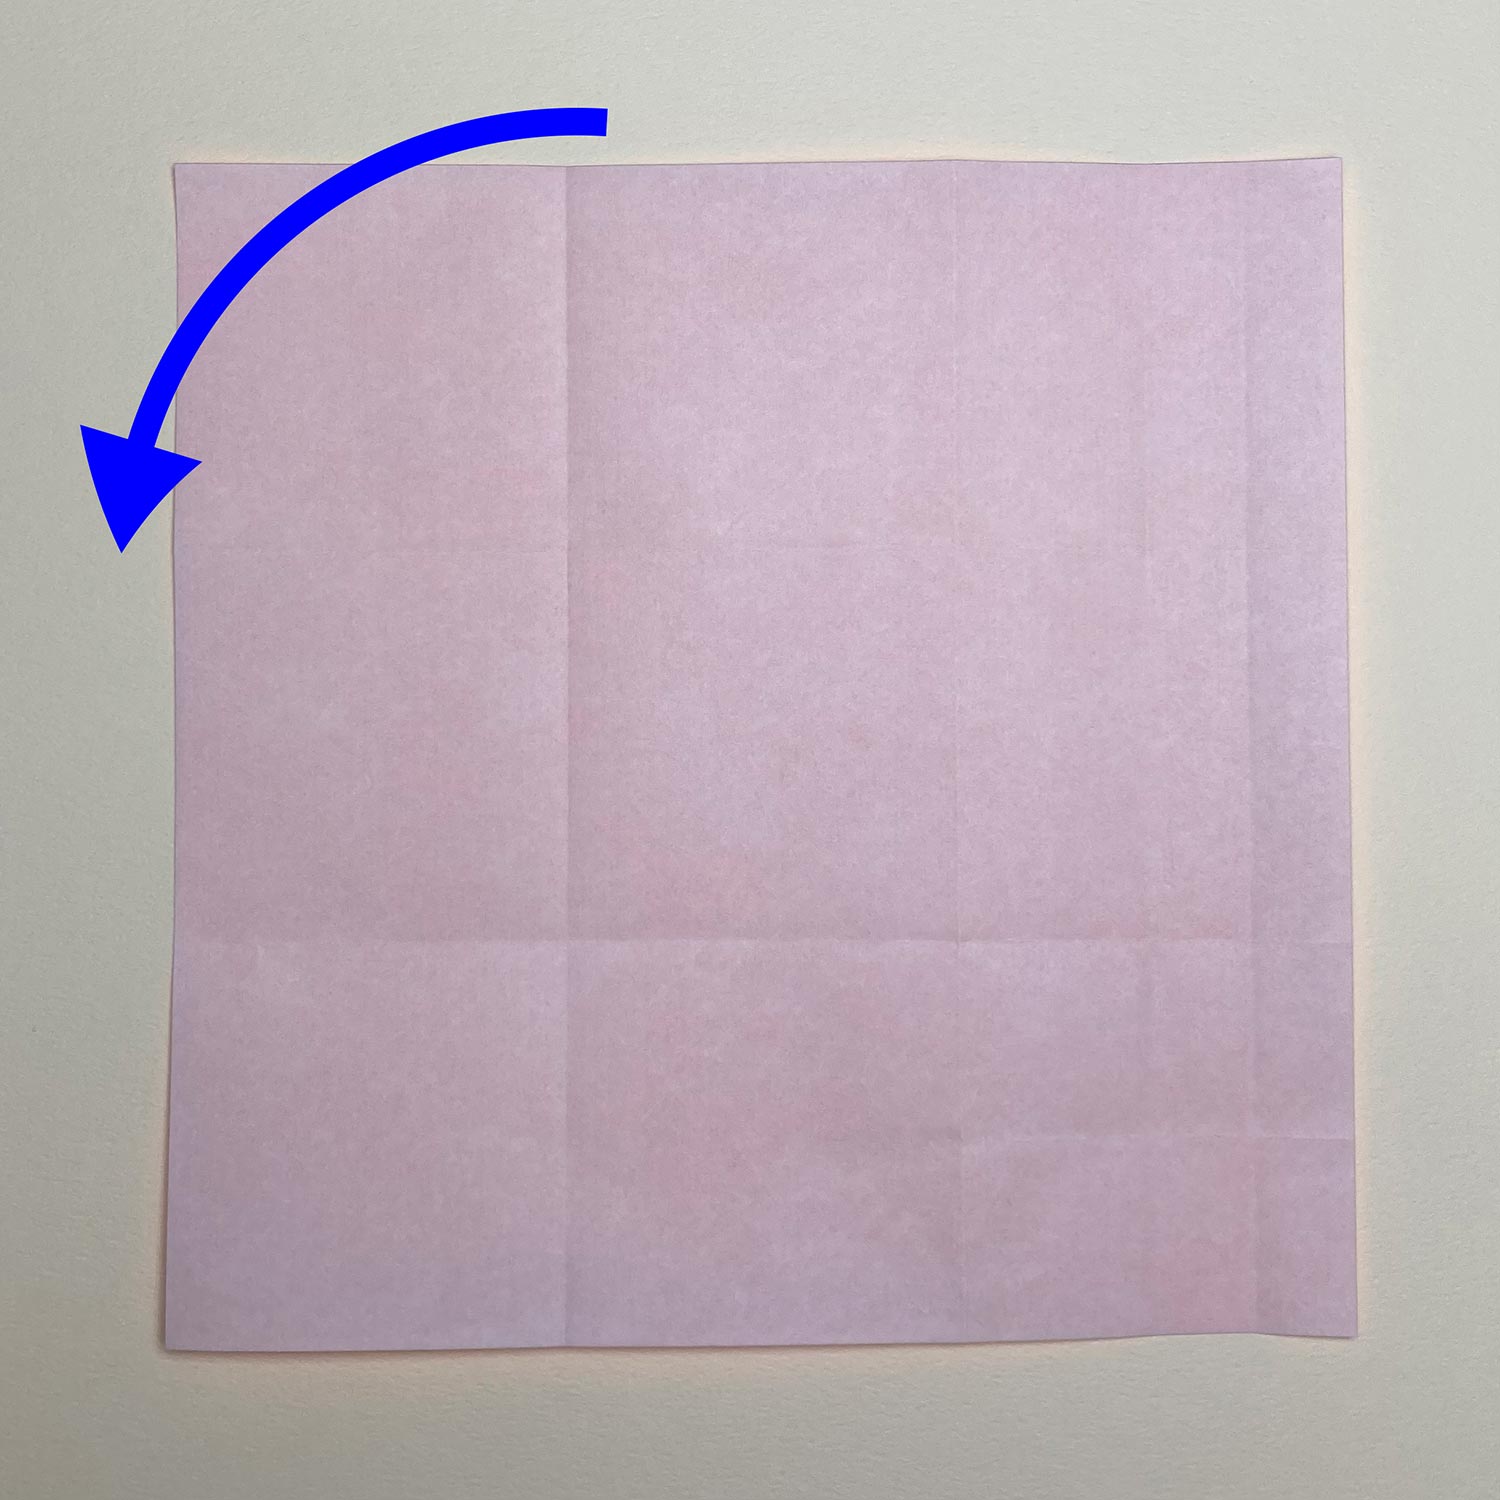
(12)
Then rotate the paper 90 degrees to the left.
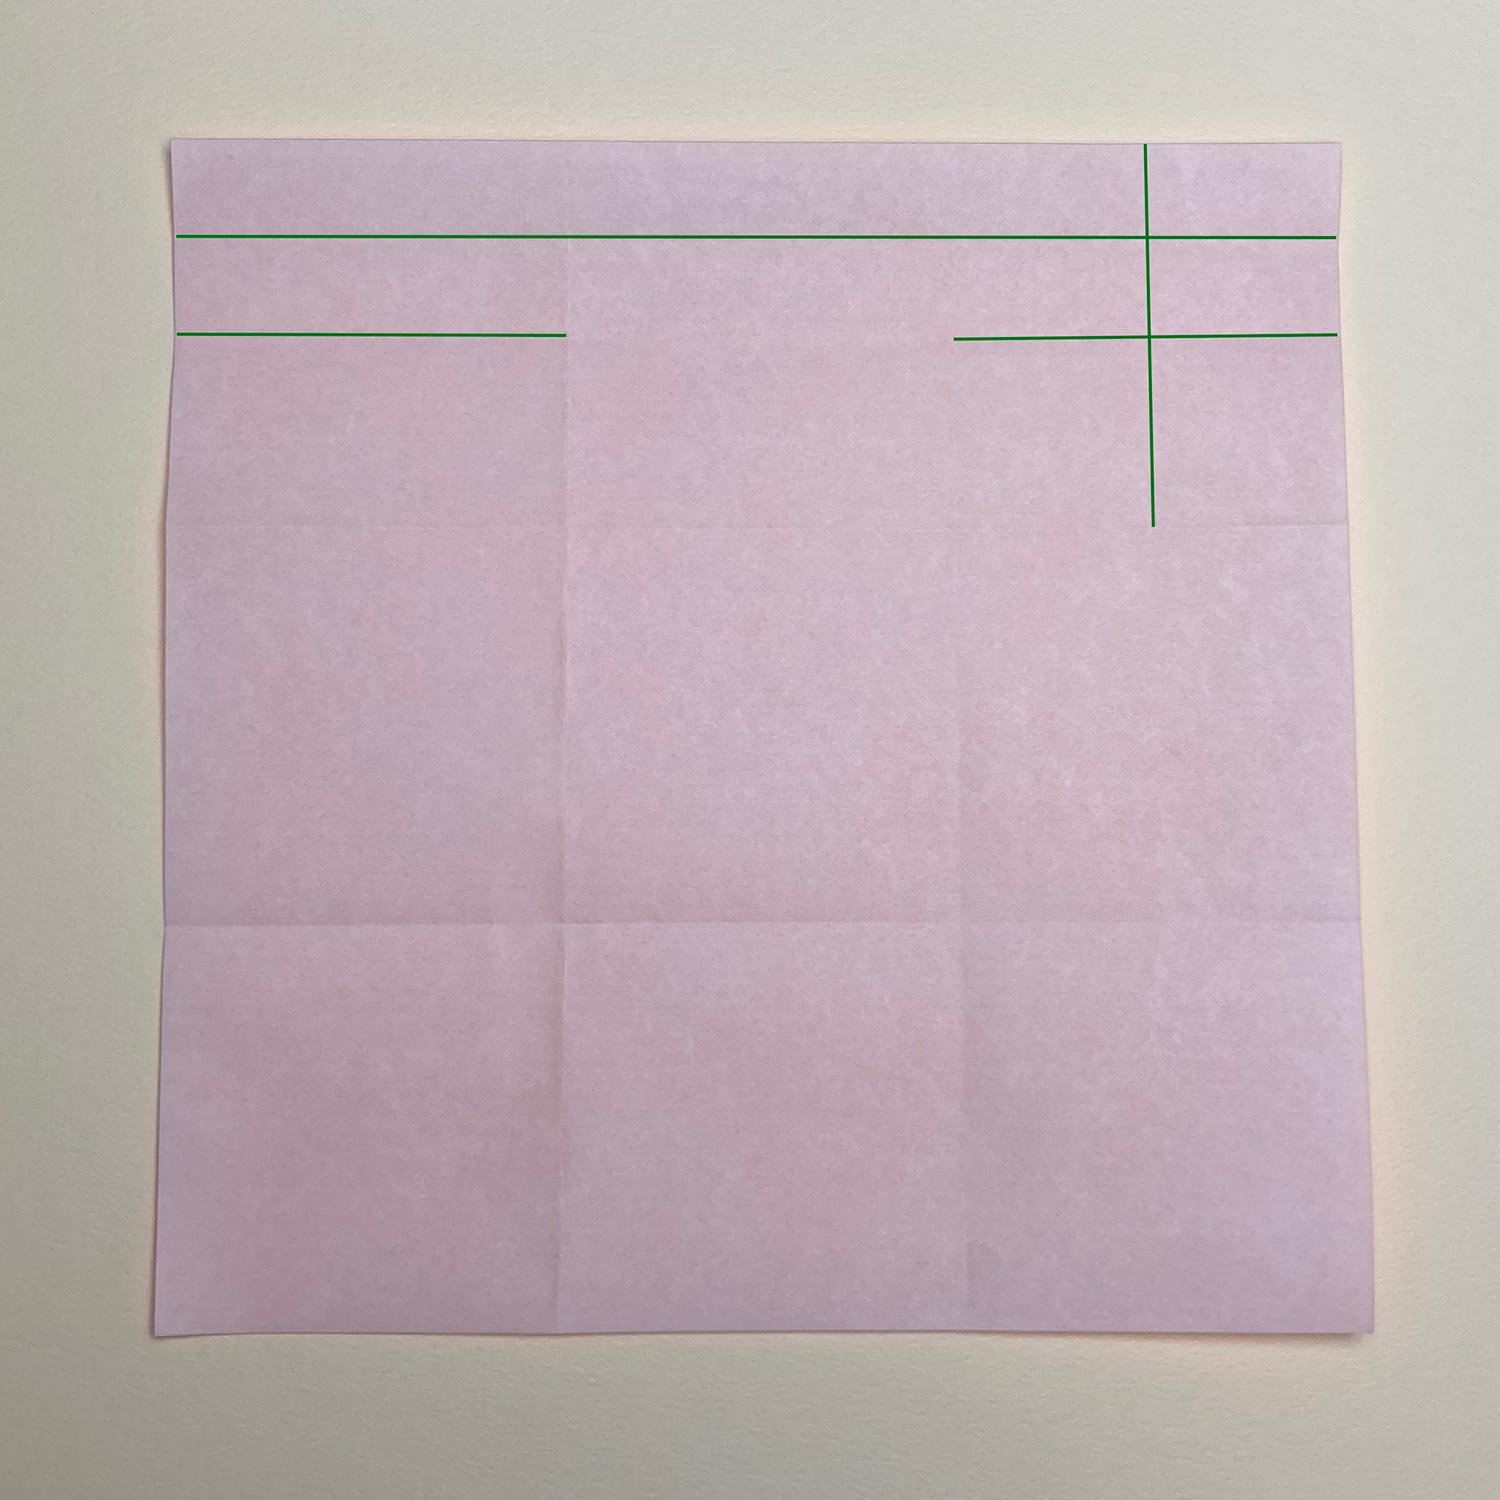
(13)
There are creases in the top because you rotate the paper 90 degrees to the left.
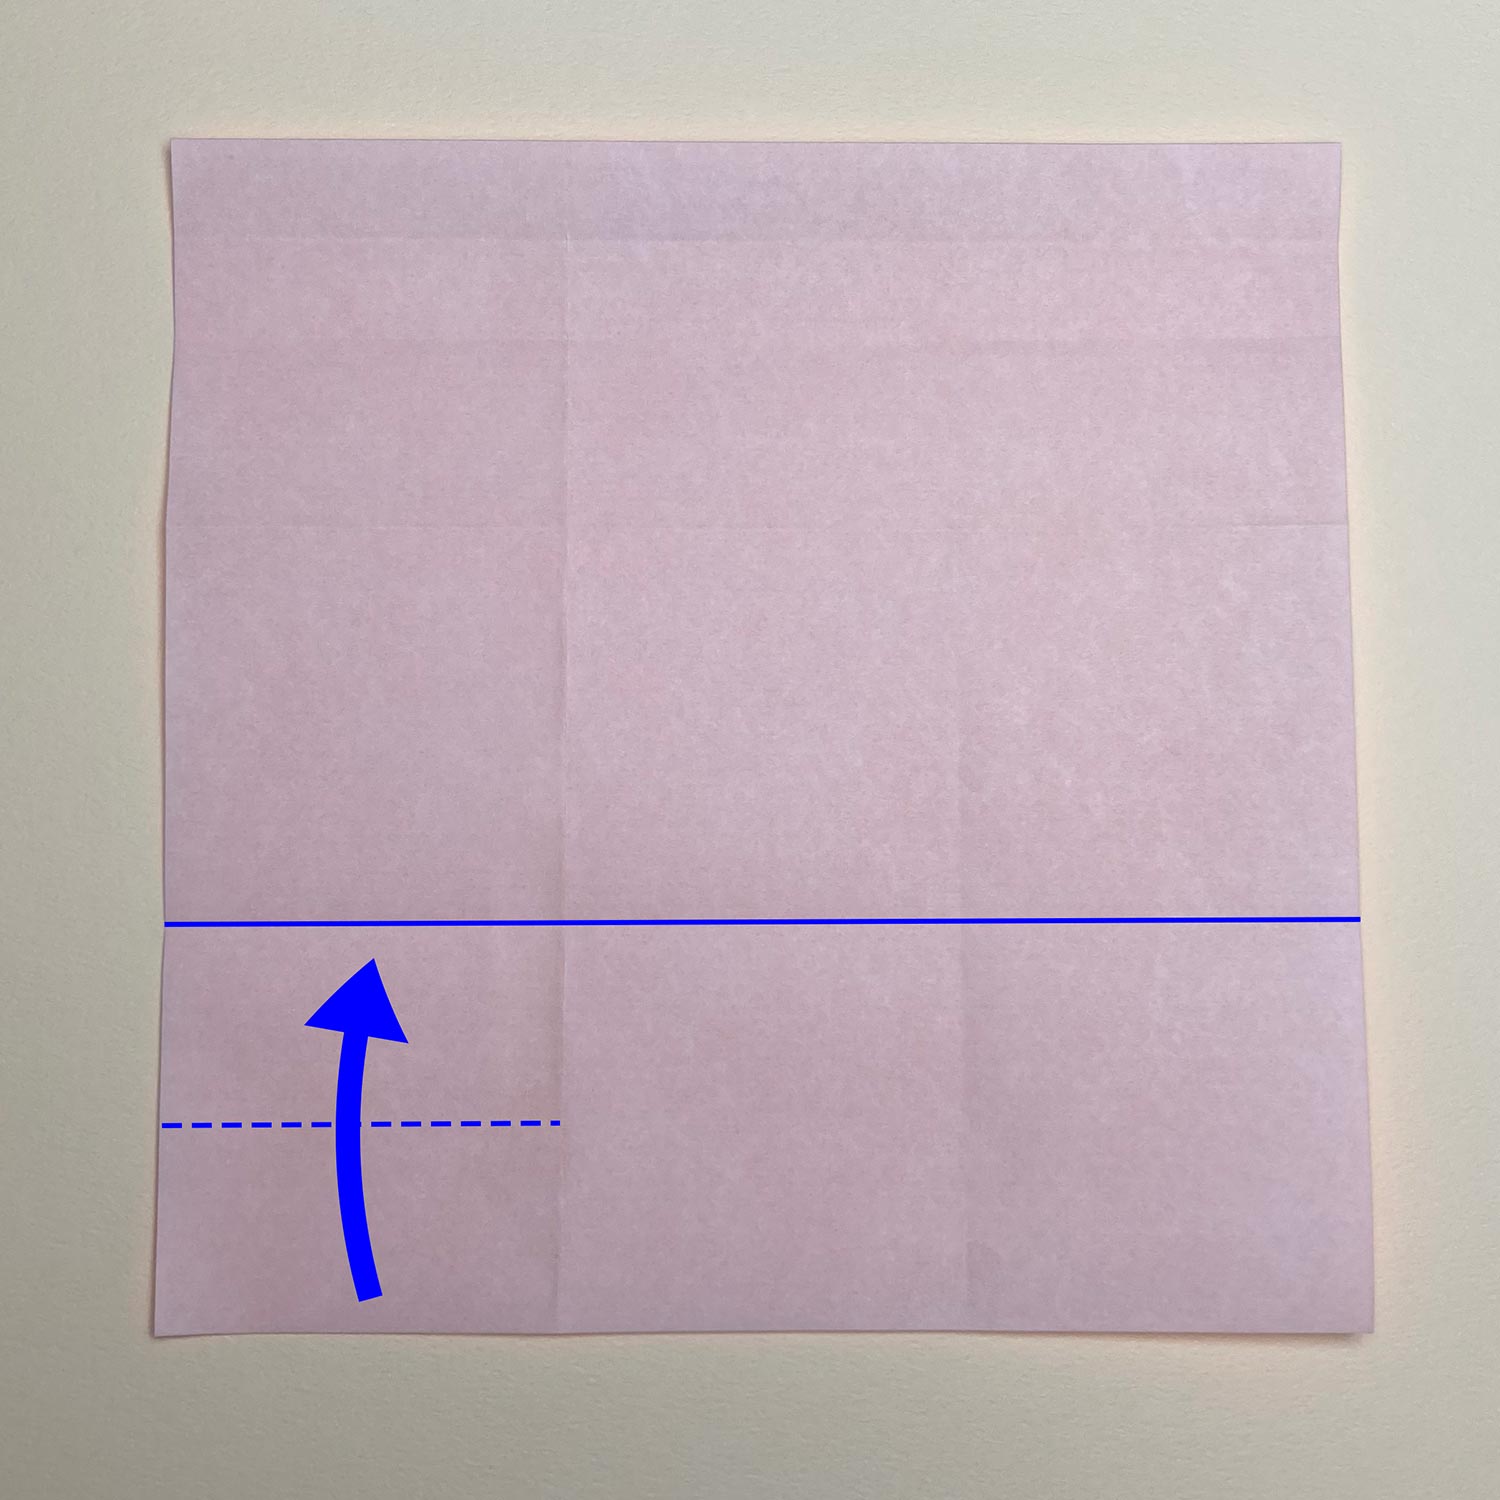
(14)
Fold the bottom to the blue line to make a crease at the dotted line.
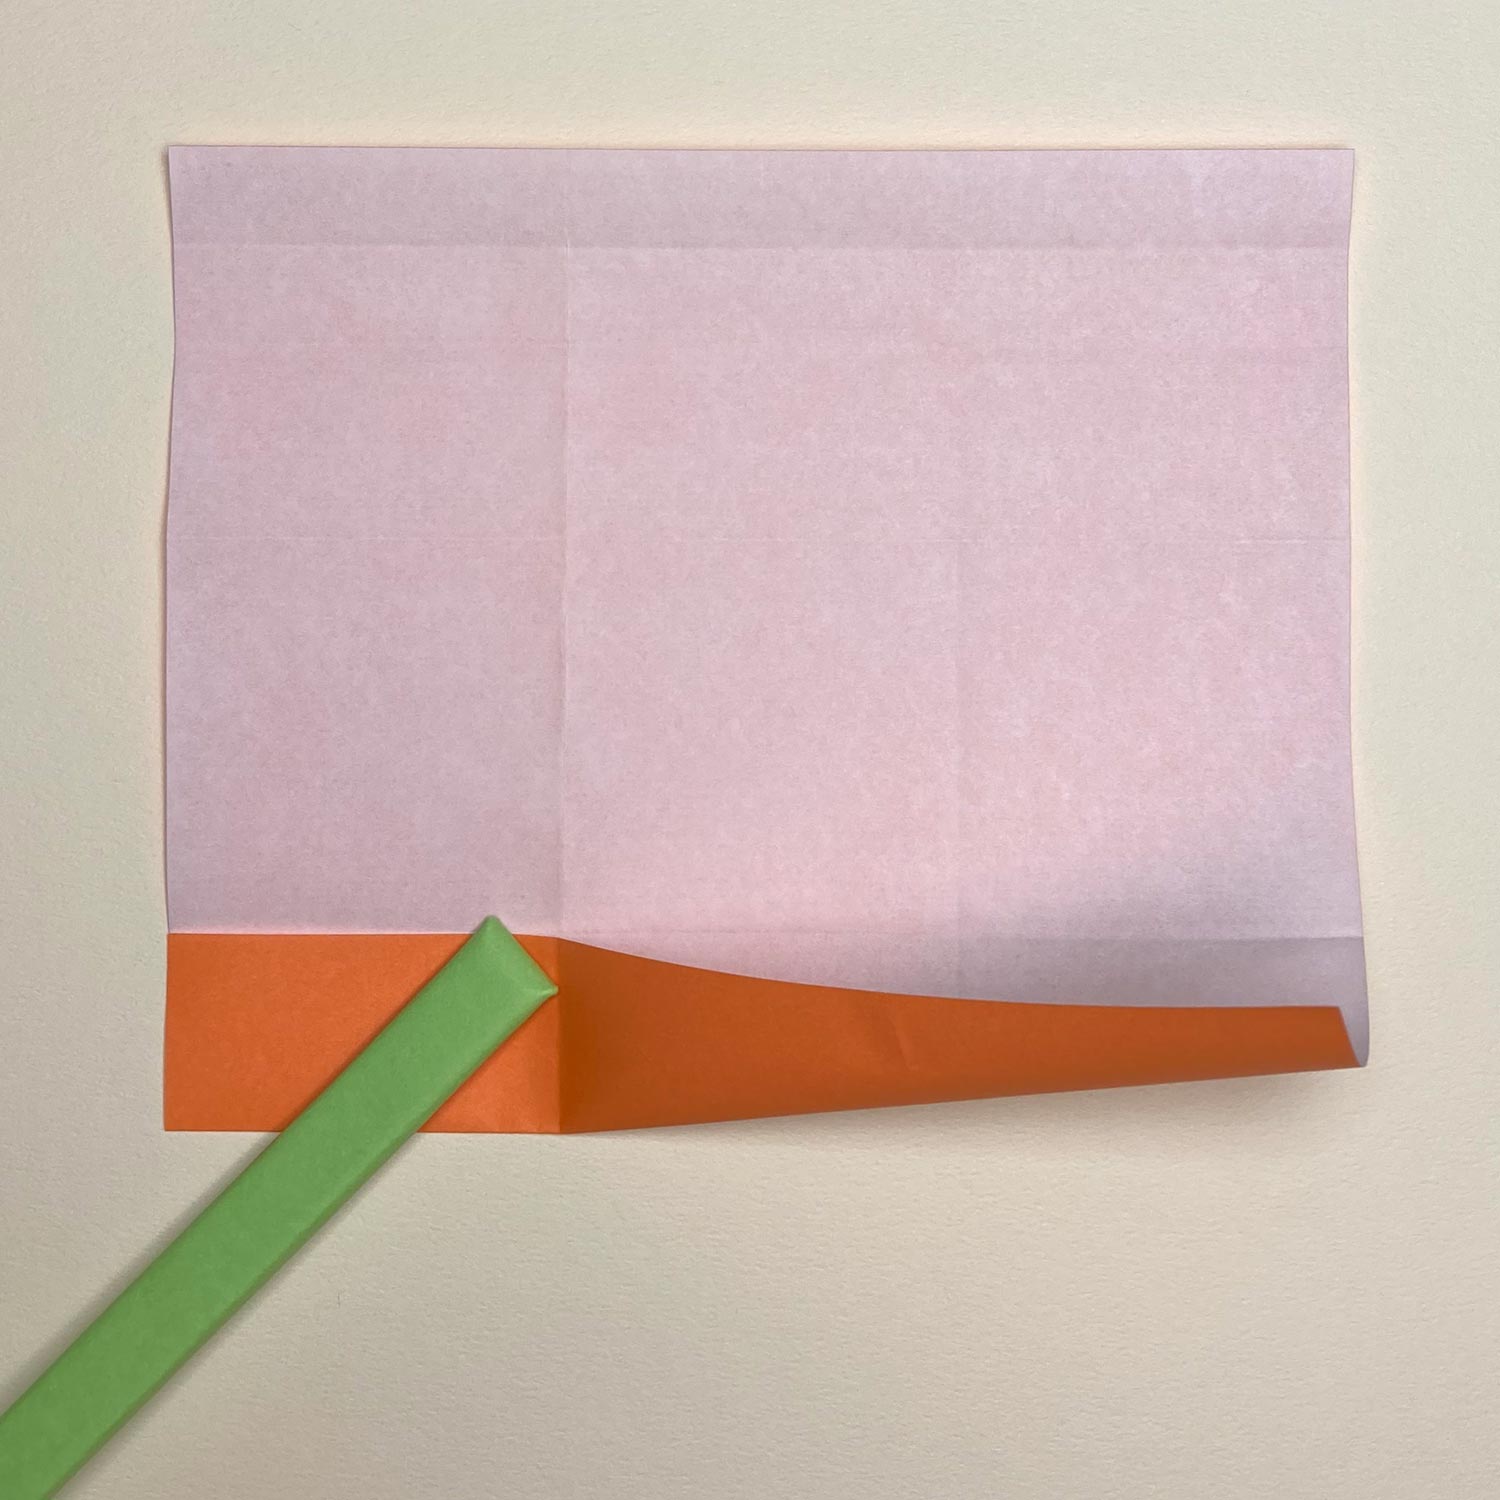
(15)
Fold the paper like this picture.
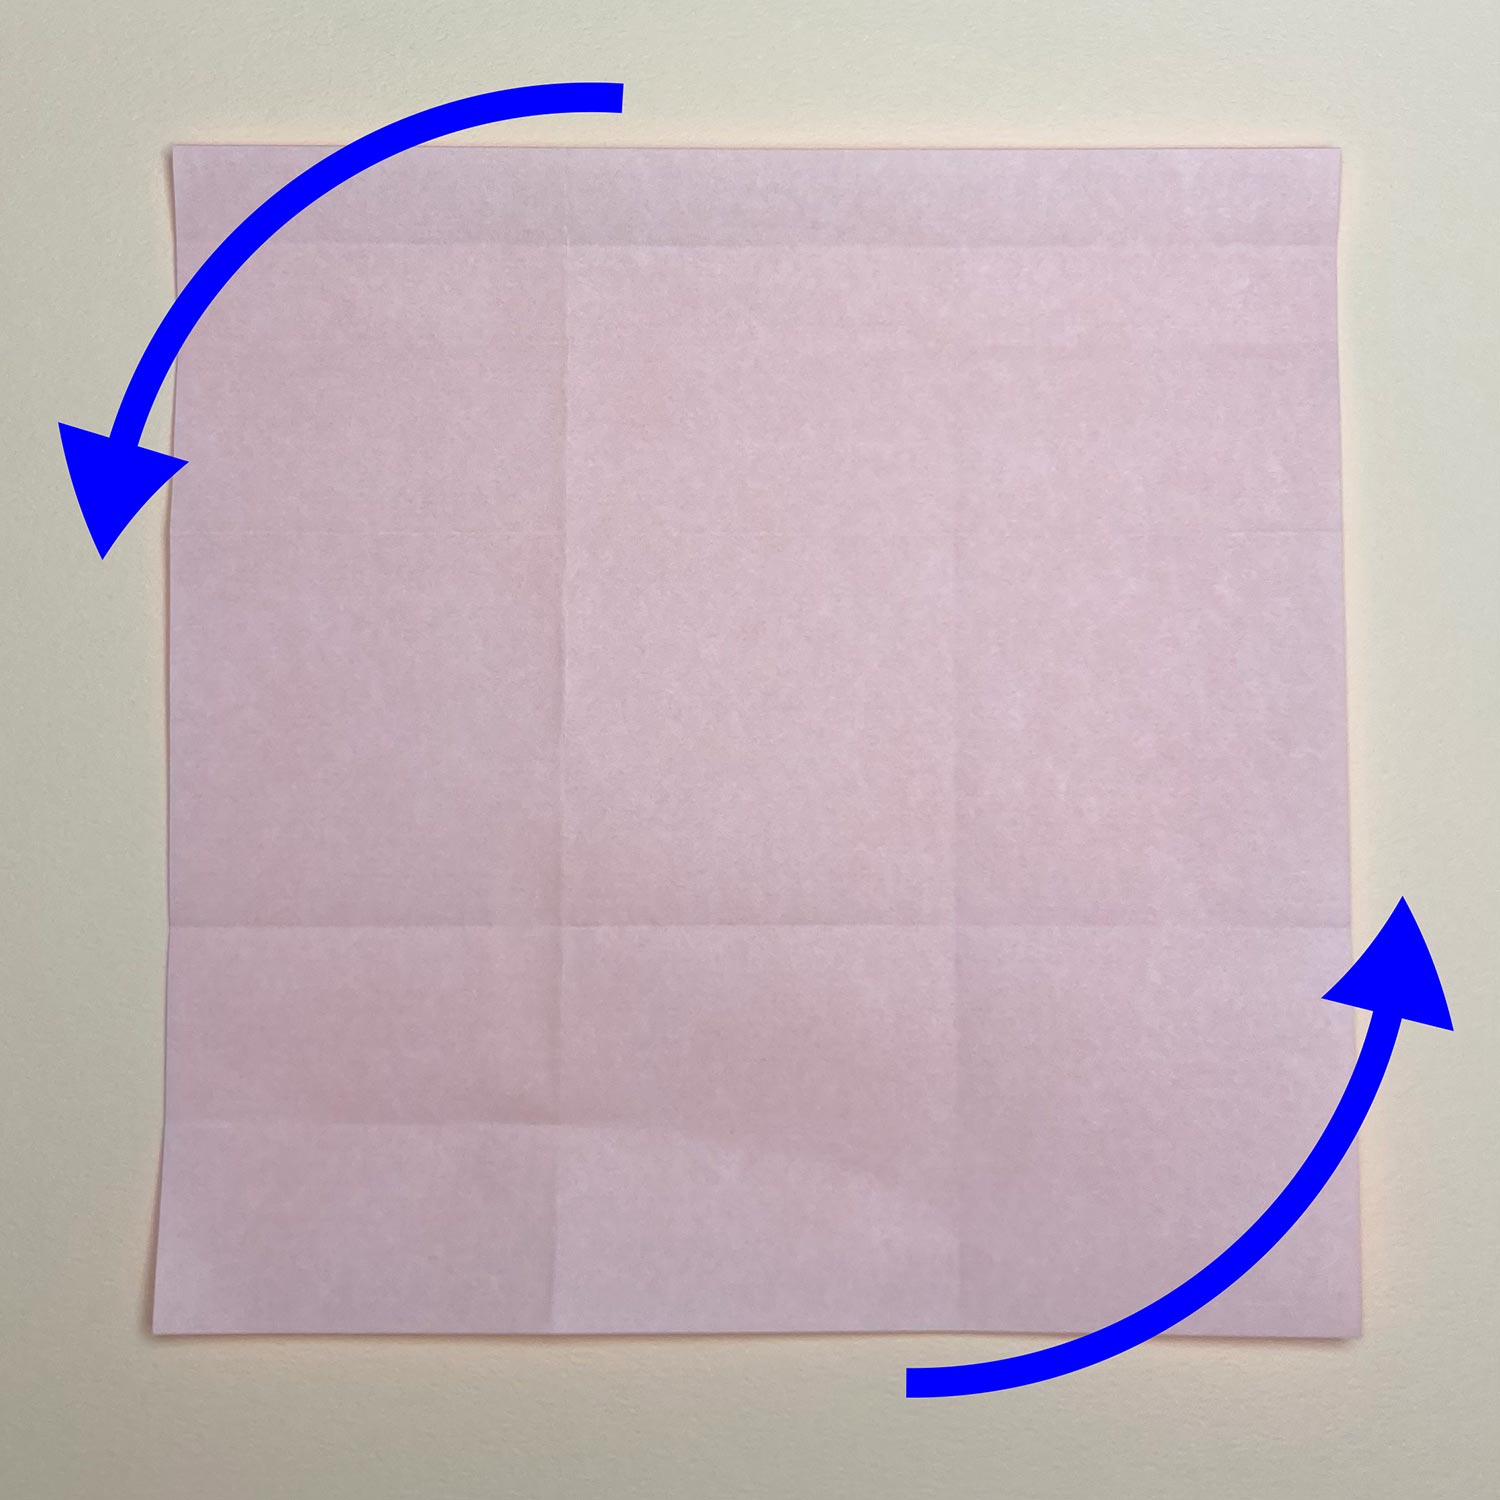
(16)
Then rotate the paper 180 degrees.
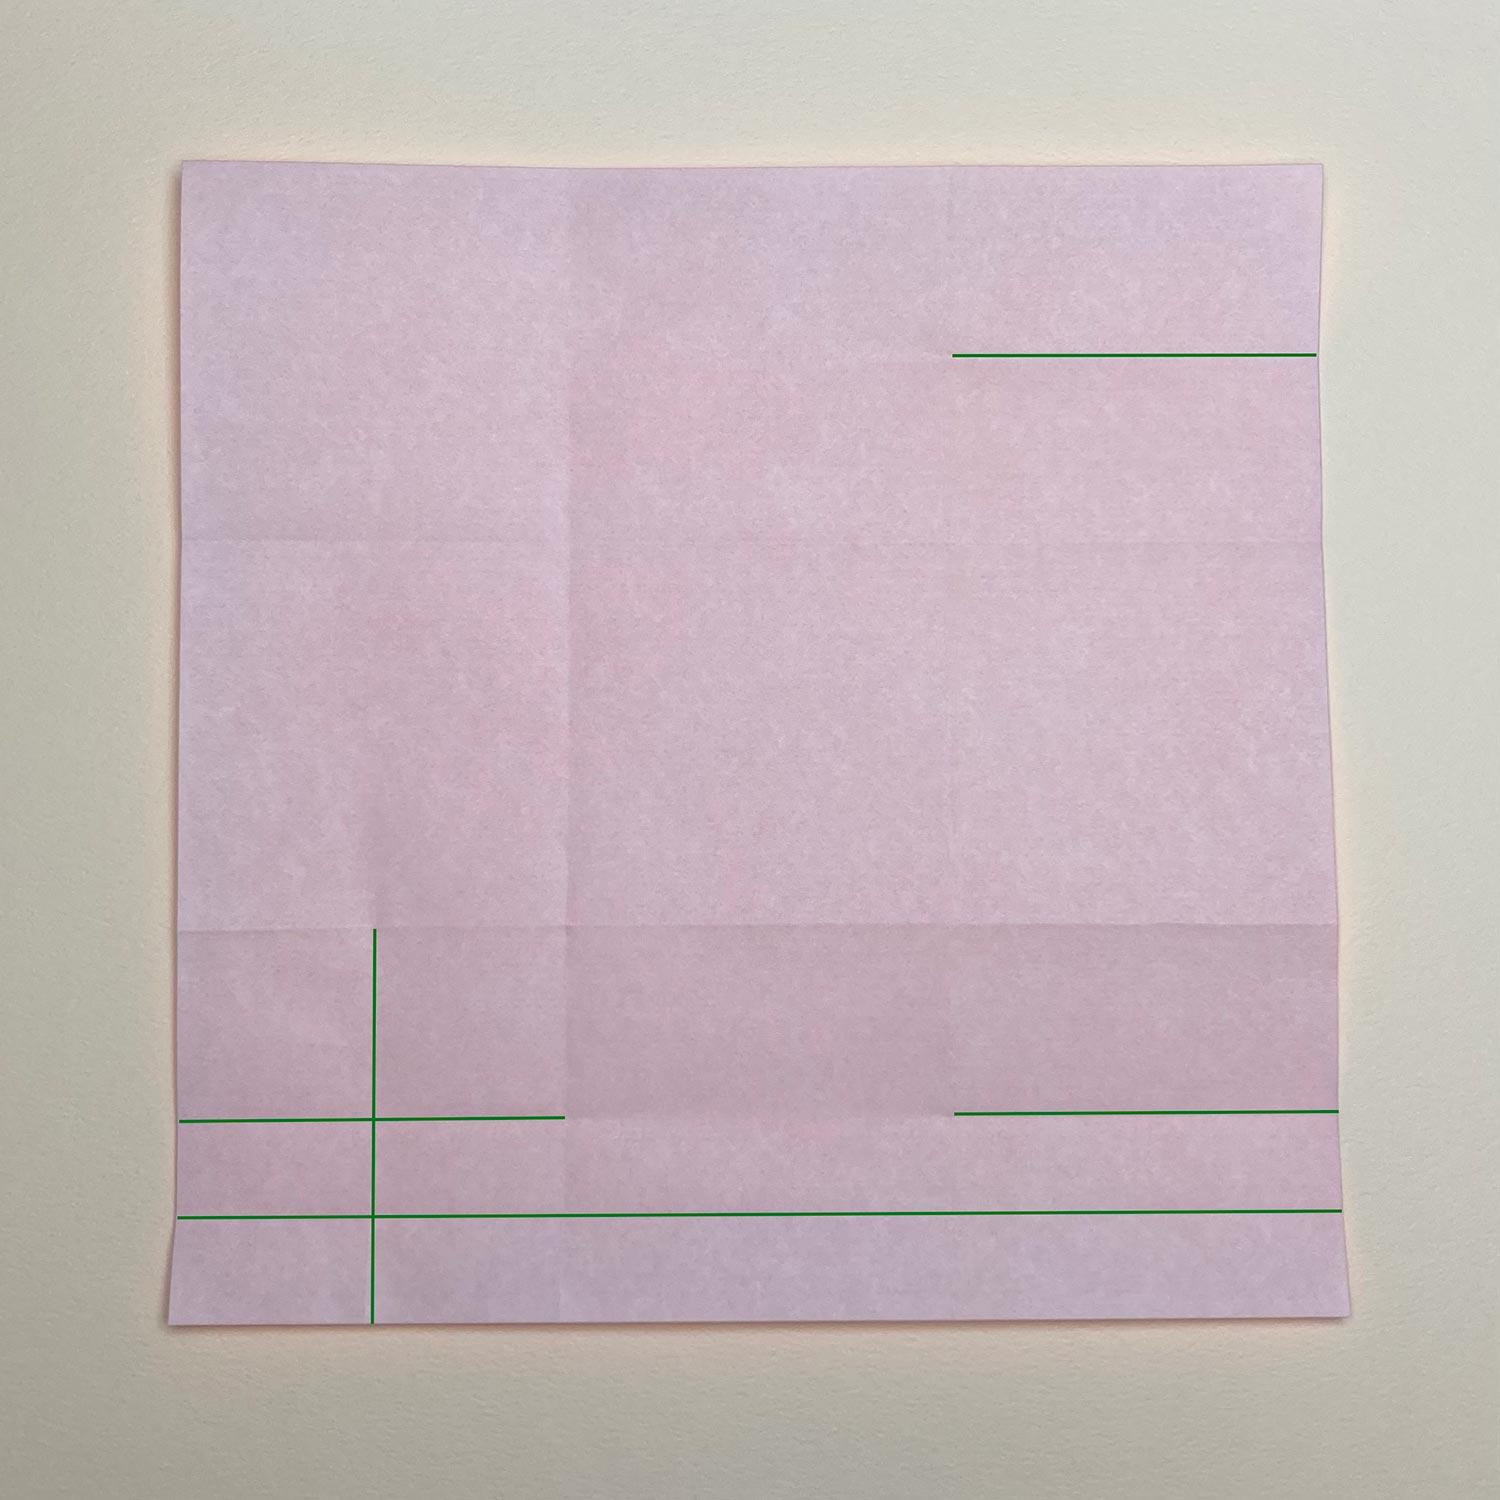
(17)
There are creases like this picture because you rotate the paper 180 degrees.
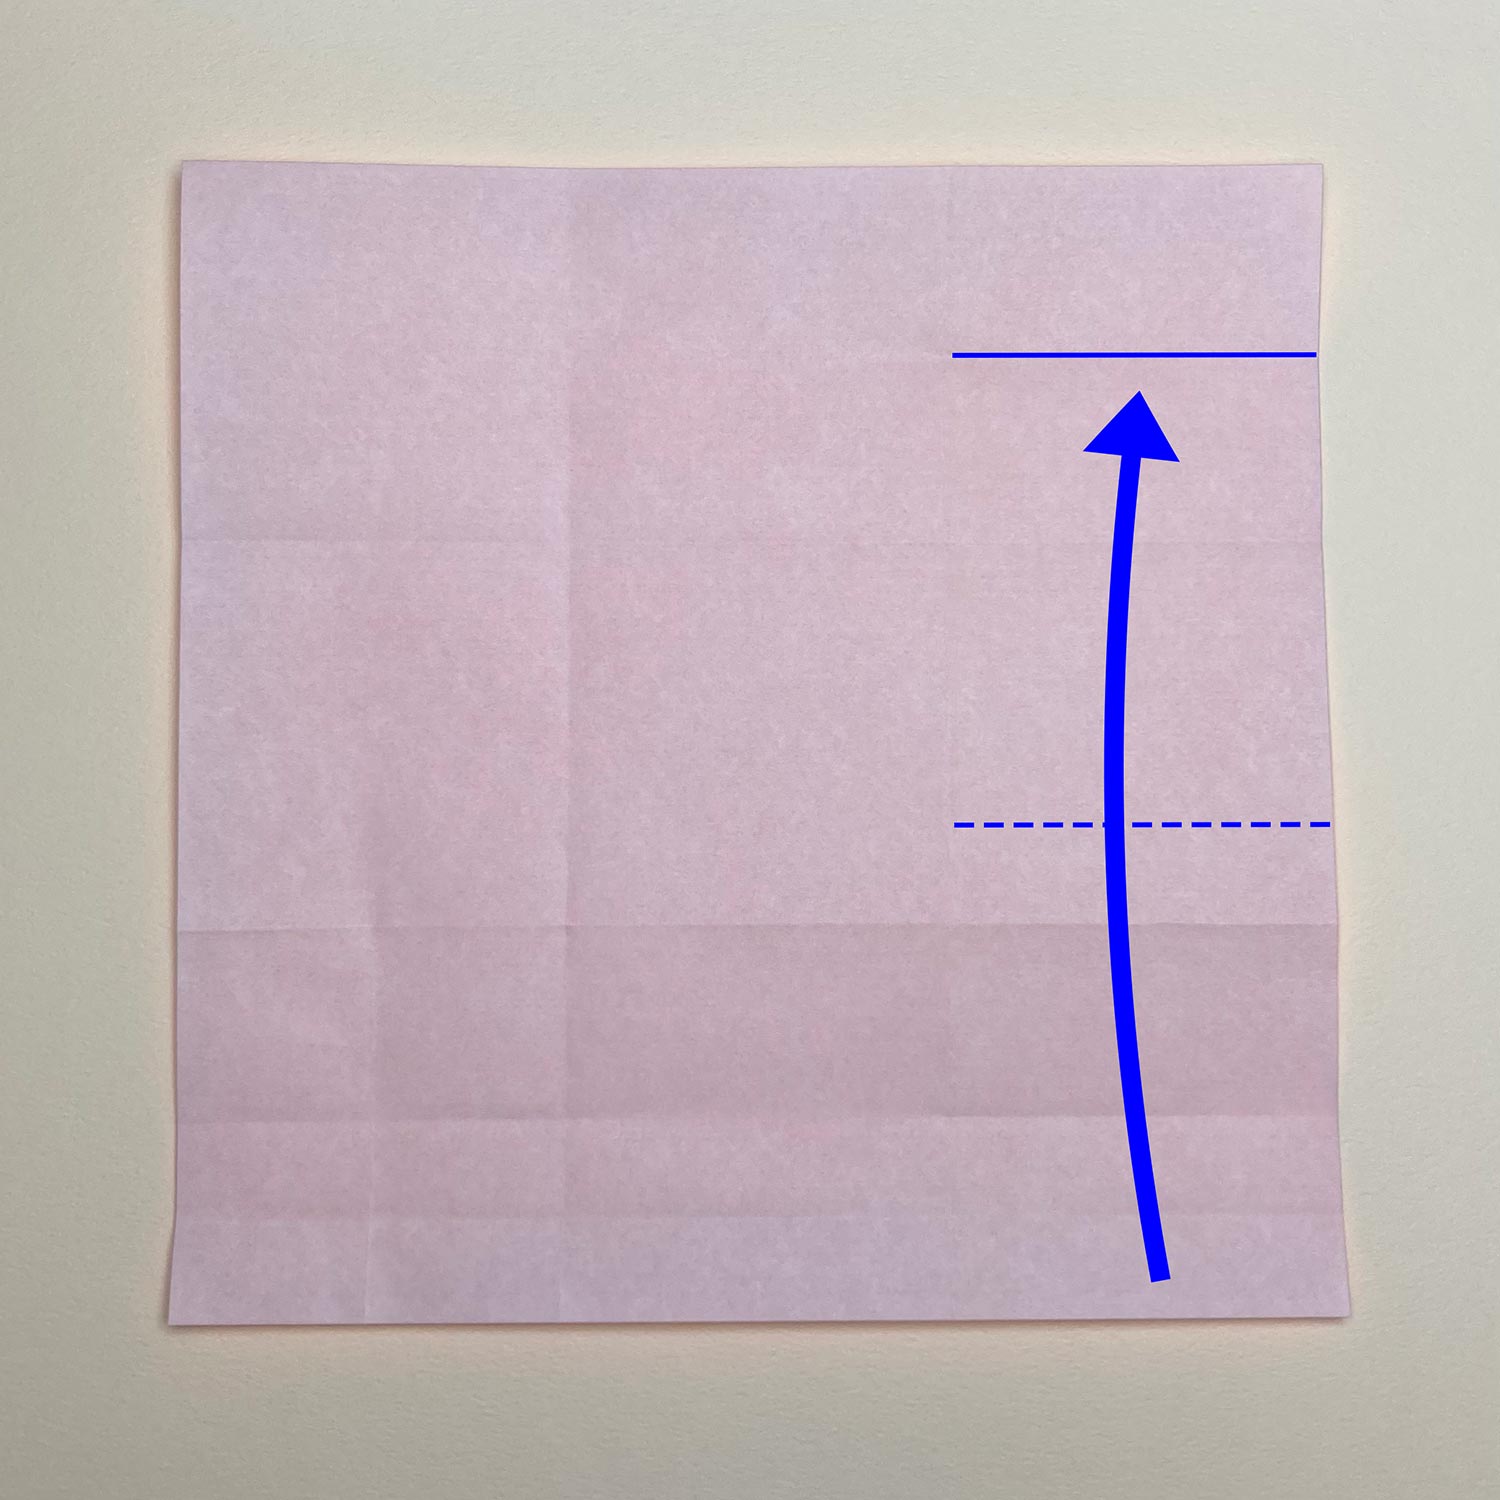
(18)
Fold the bottom to the top right crease to make a crease at the dotted line.
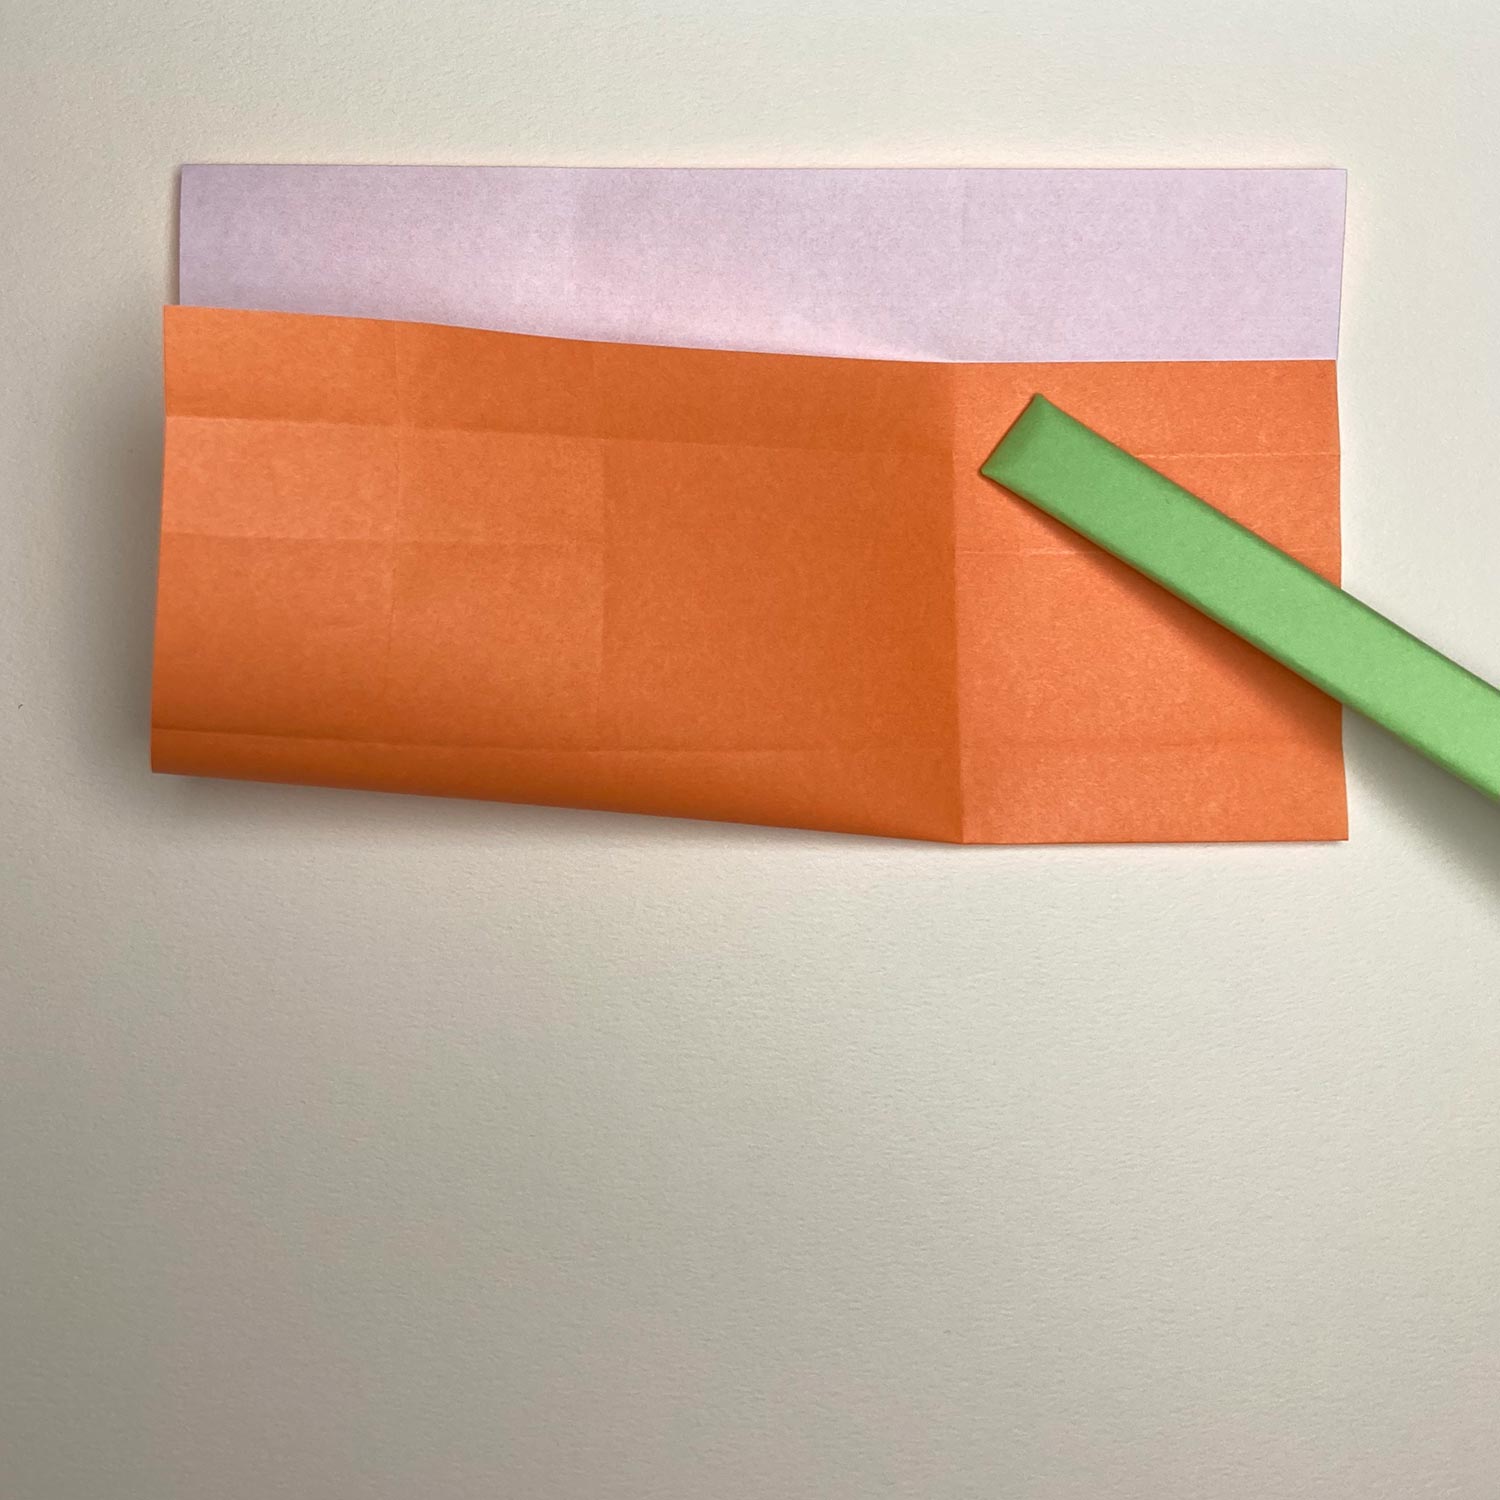
(19)
Fold the paper like this picture.
