(17)
First, fold the head/tail, which is not connected, to the center.

(18)
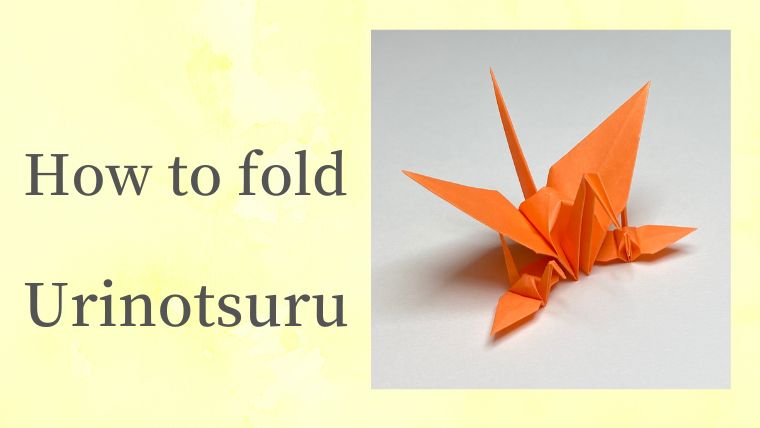
After folding the head/tail, raise it.
(19)
Raise it like this picture.
(20)
Then fold the other head/tail to the center.
(21)
After folding the head/tail, raise it while referencing the 22th and 23th steps.
(22)
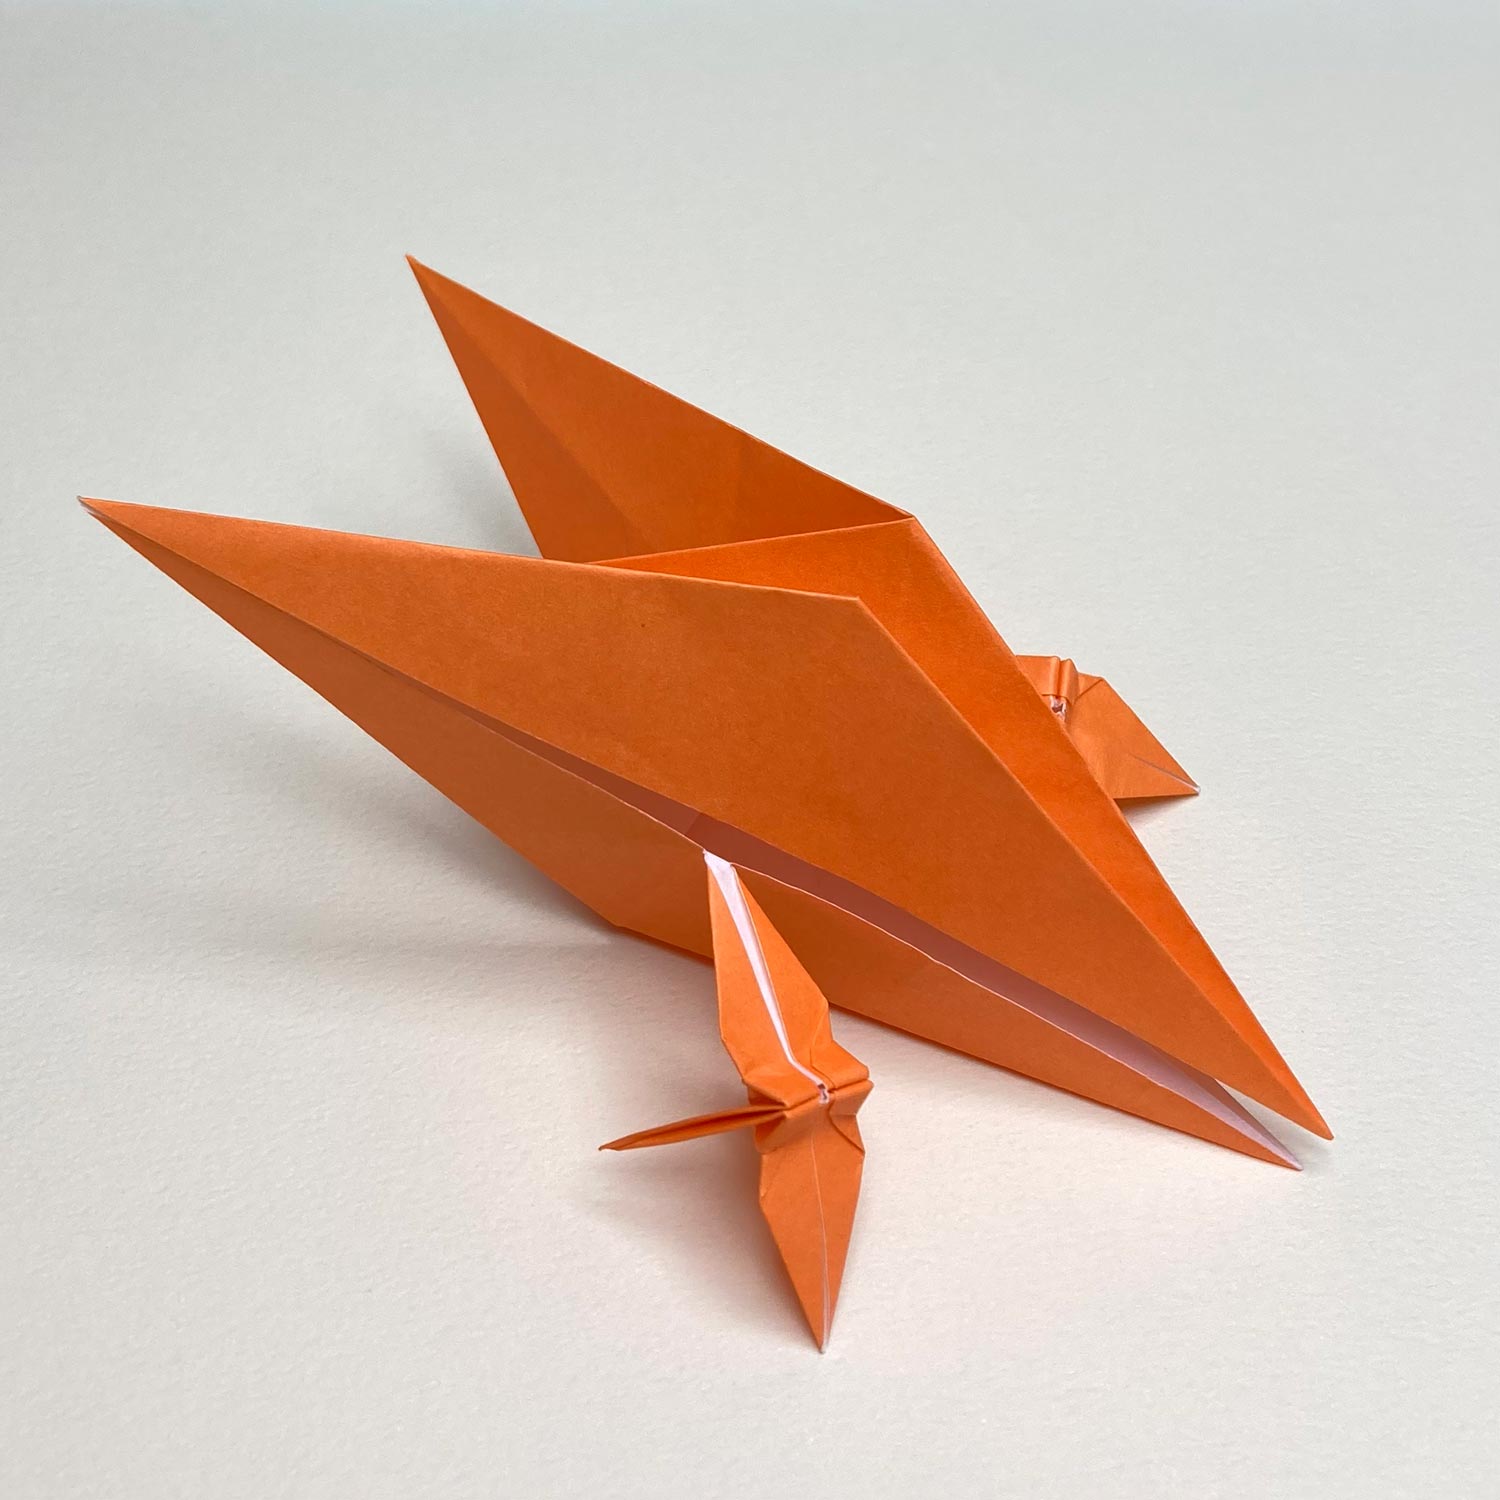
Raise the head/tail so that connecting parts are flatten like this picture.
(23)
This picture is taken when raising the head/tail too much.
Connecting parts are not flatten.

(24)
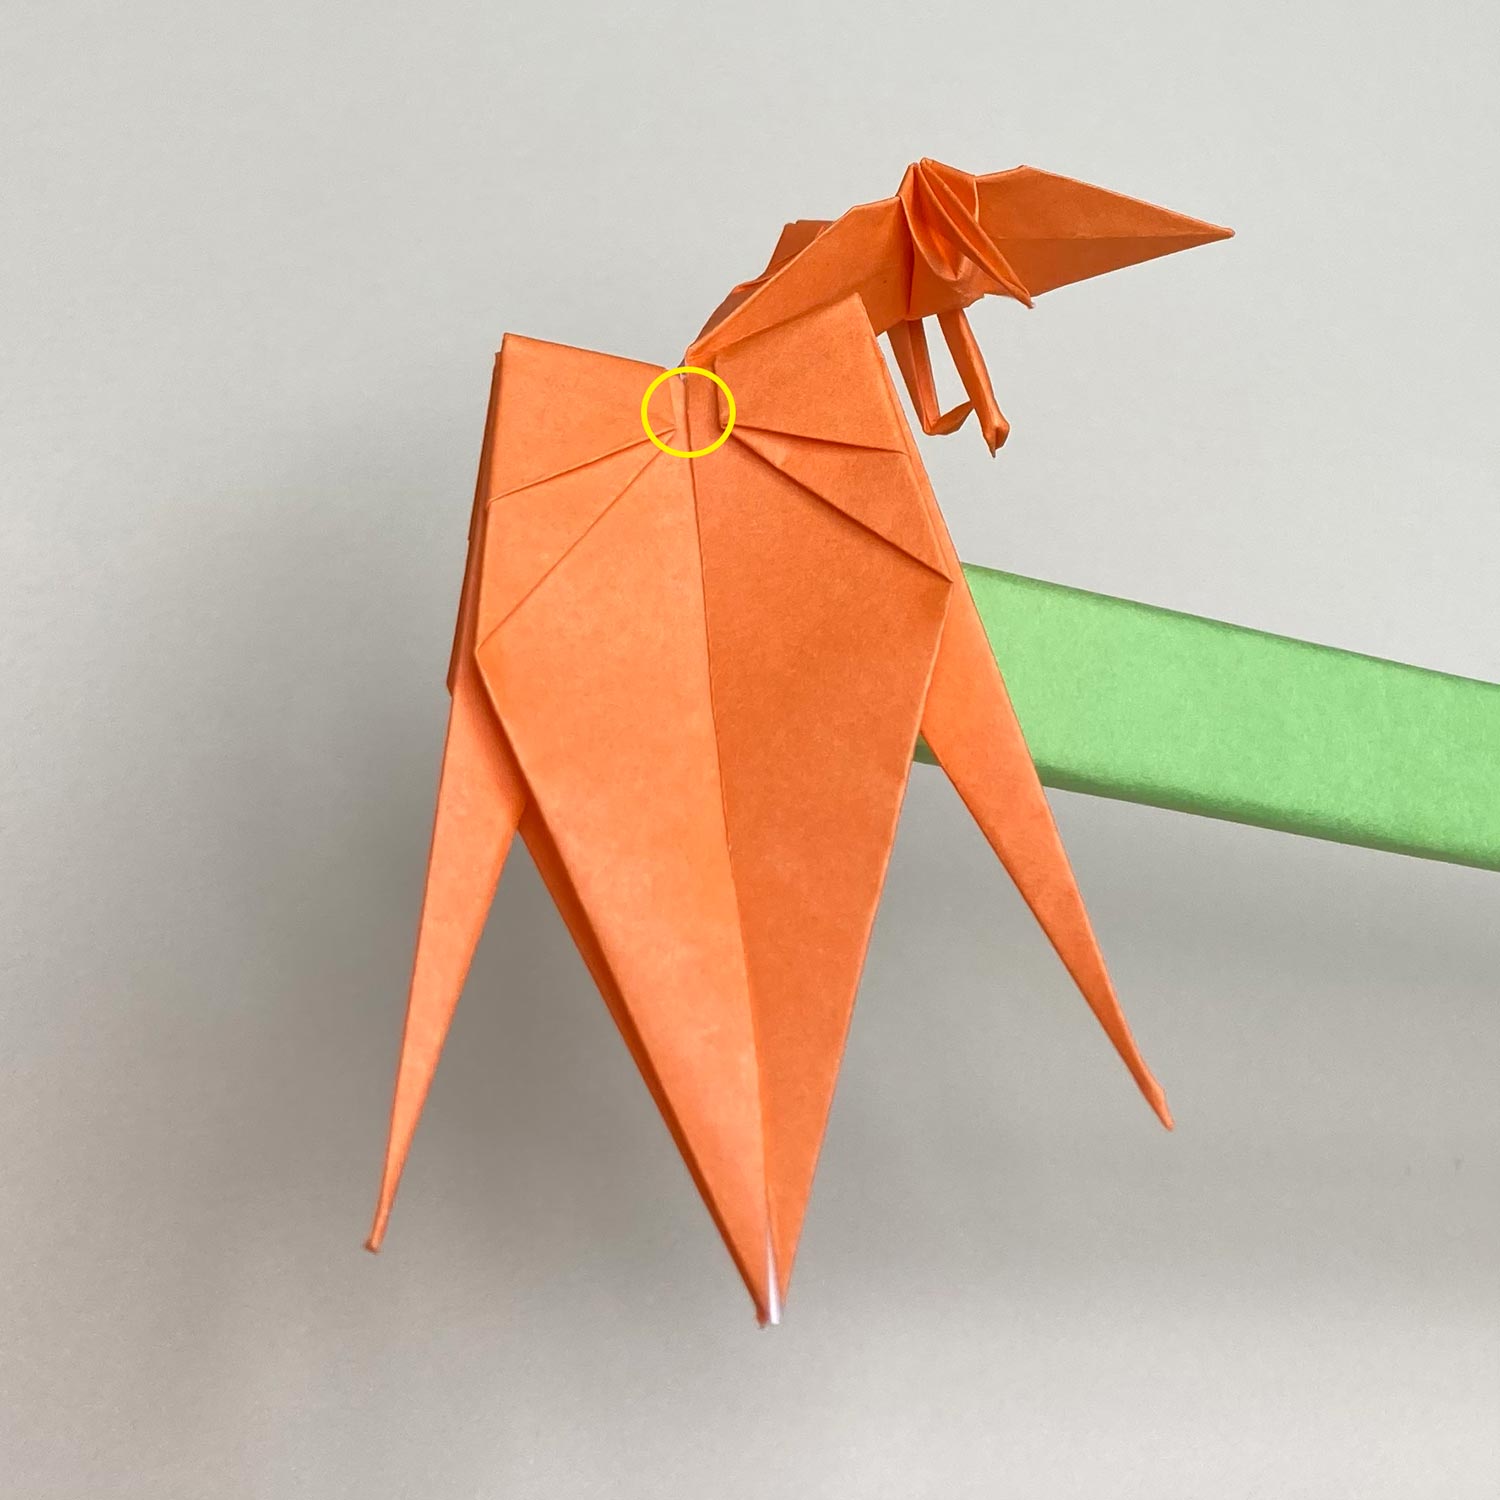
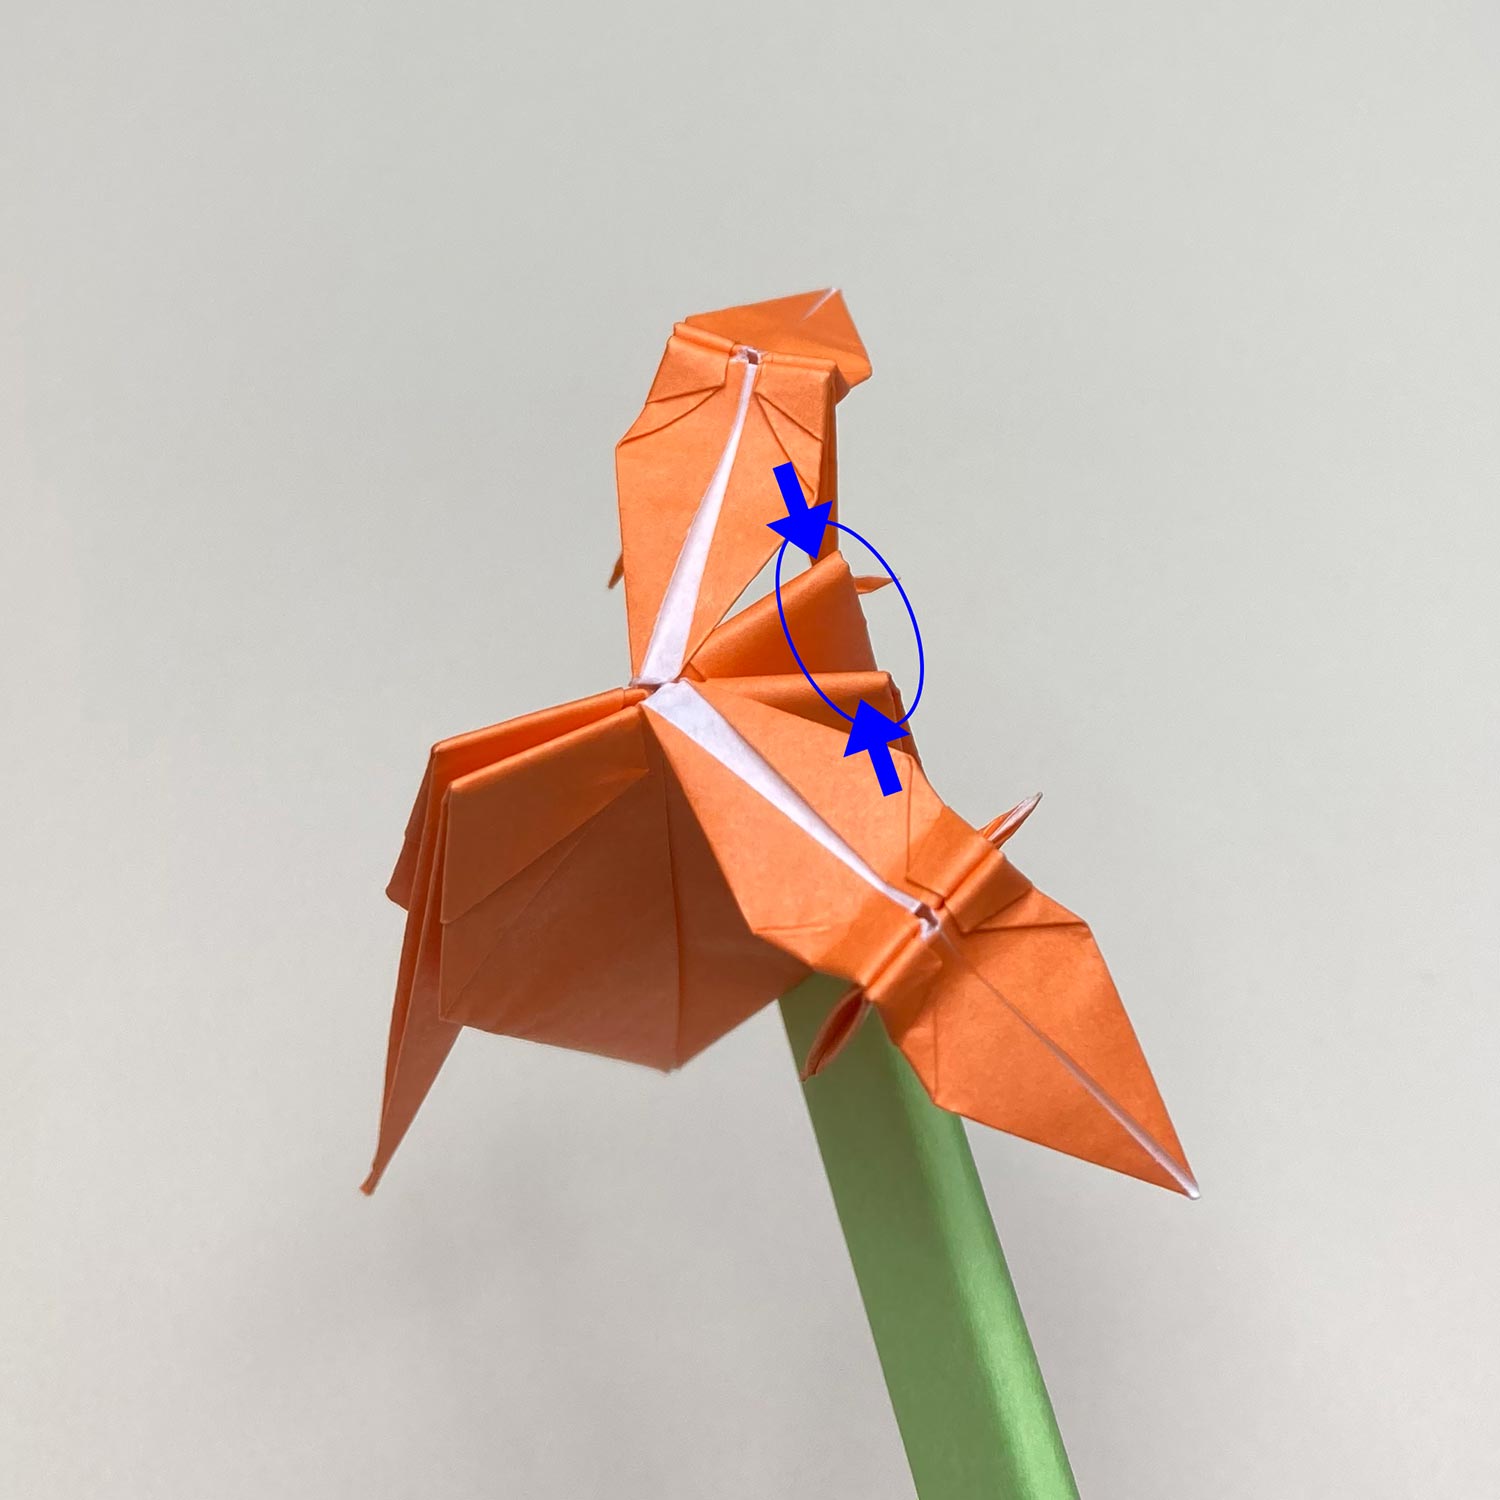
After raising the head/tail like the 22th picture, put the two yellow edges together and pinch the circled part to make a crease.

(25)
After making a crease, it looks like this picture.
(26)
On the opposite side too, put the two yellow edges together and pinch the circled part to make a crease.
(27)
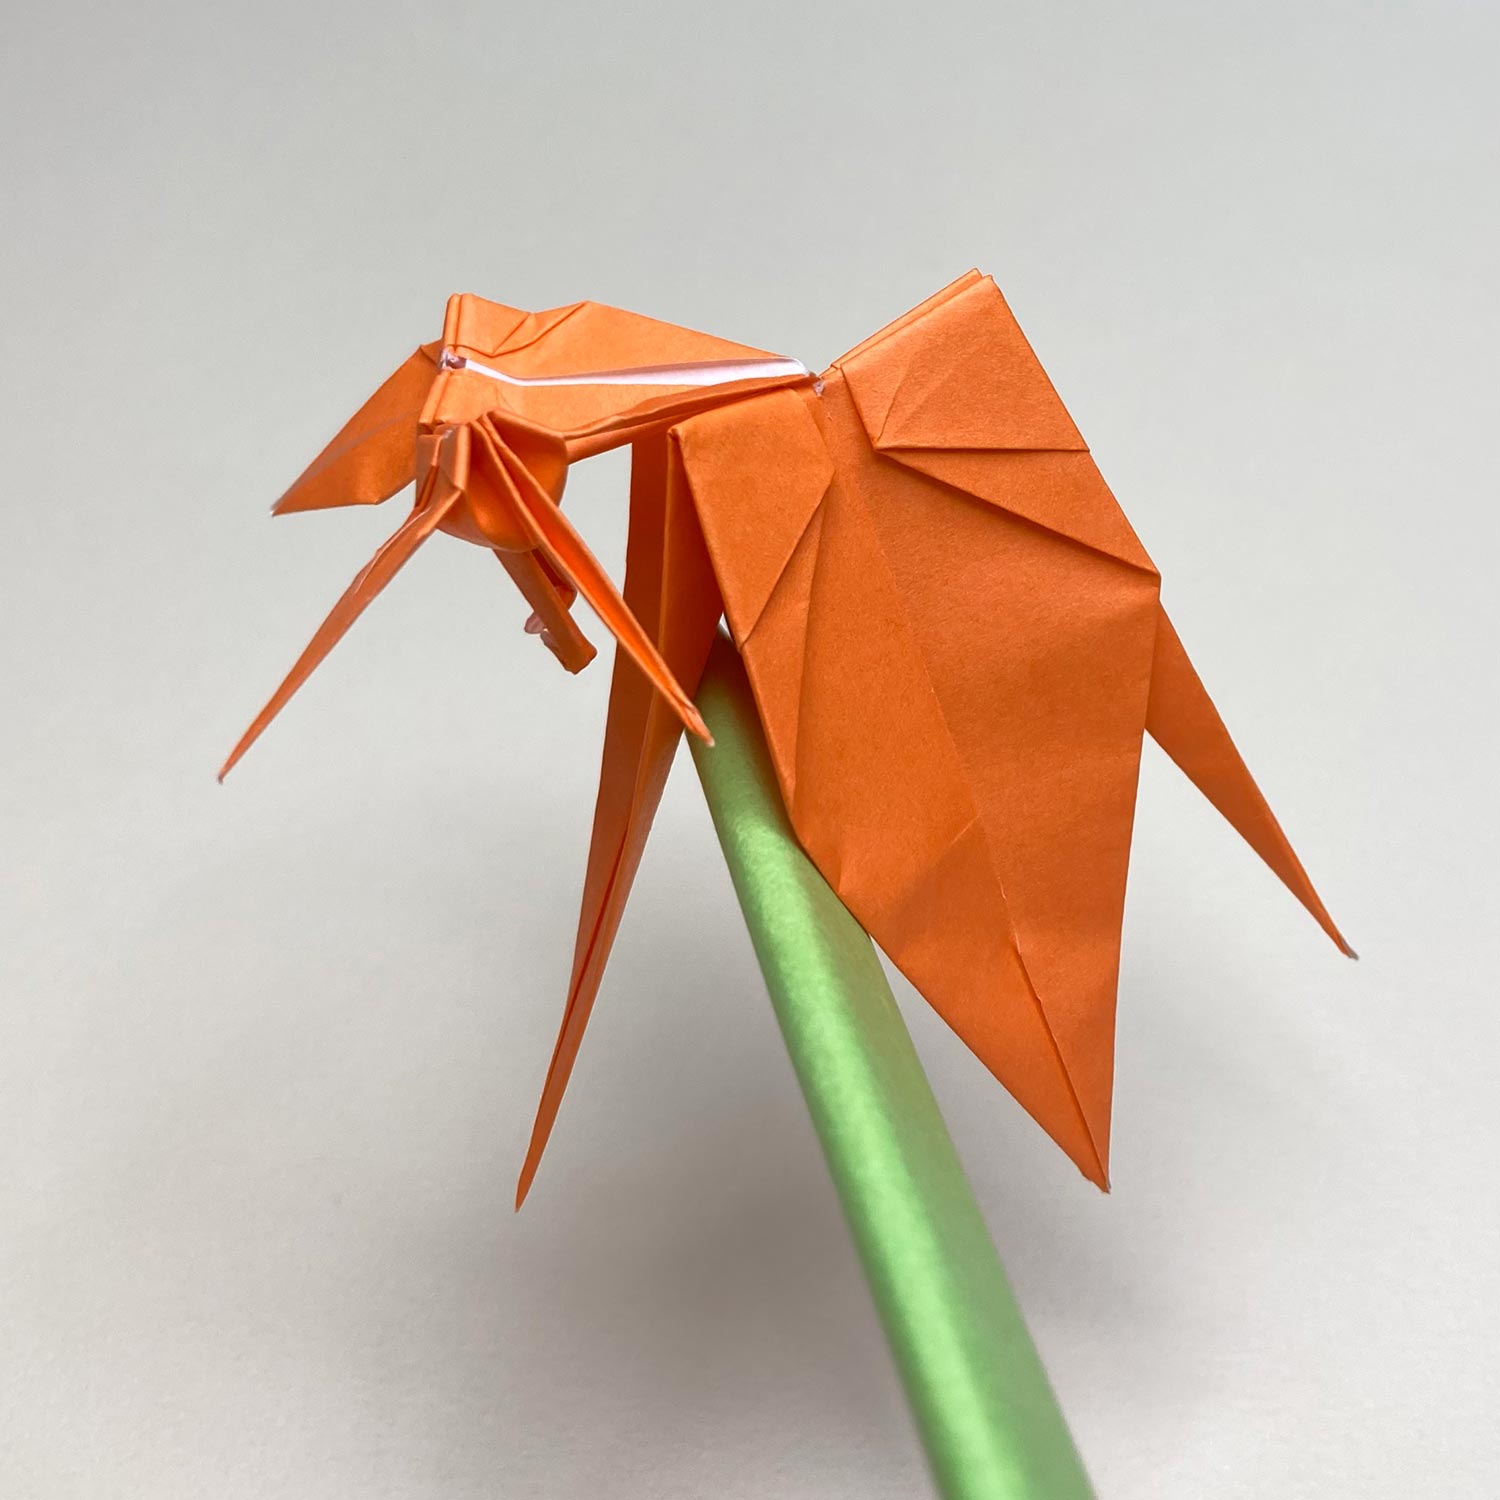
After making a crease, it looks like this picture.
(28)
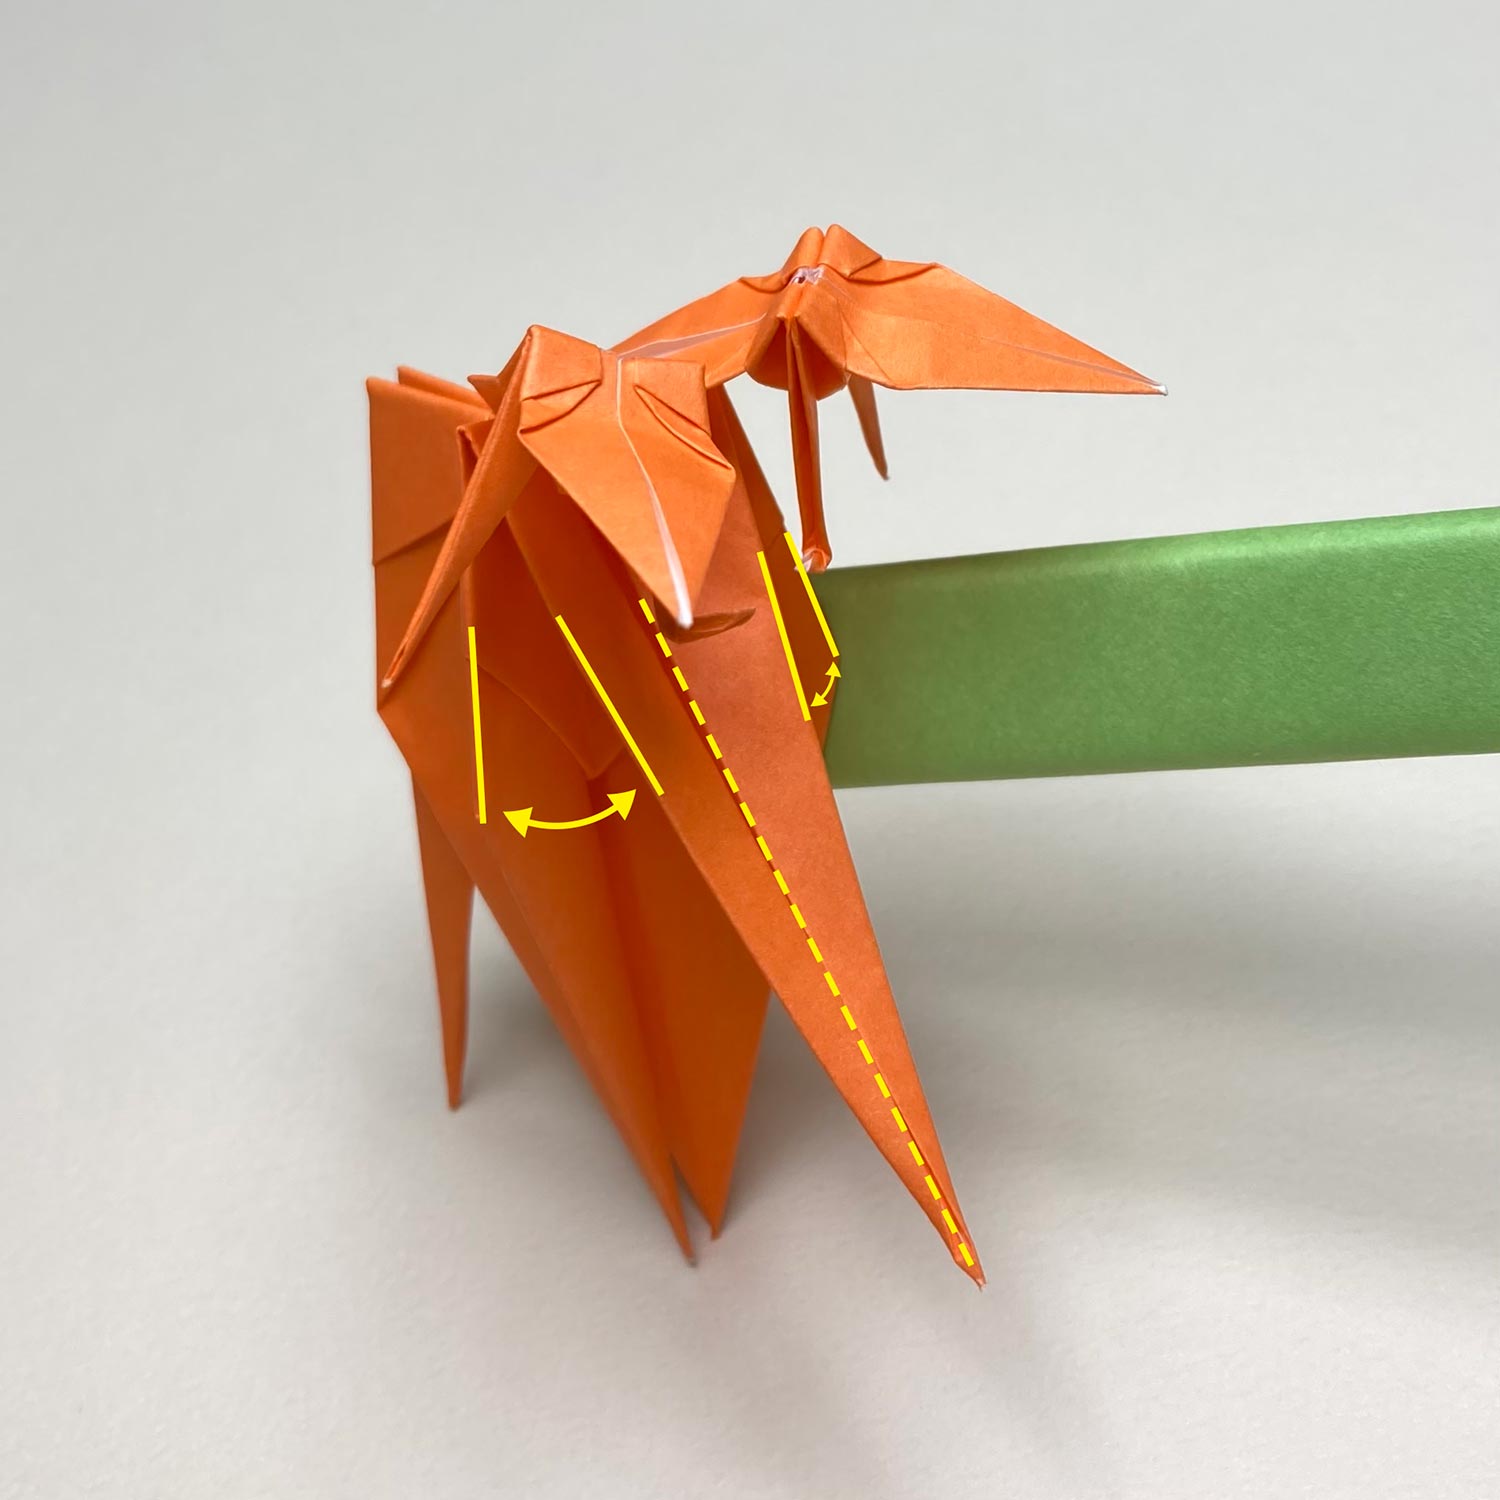
Put the two yellow right edges together and put the two yellow left edges together while making a valley-fold on the dotted line.
(29)
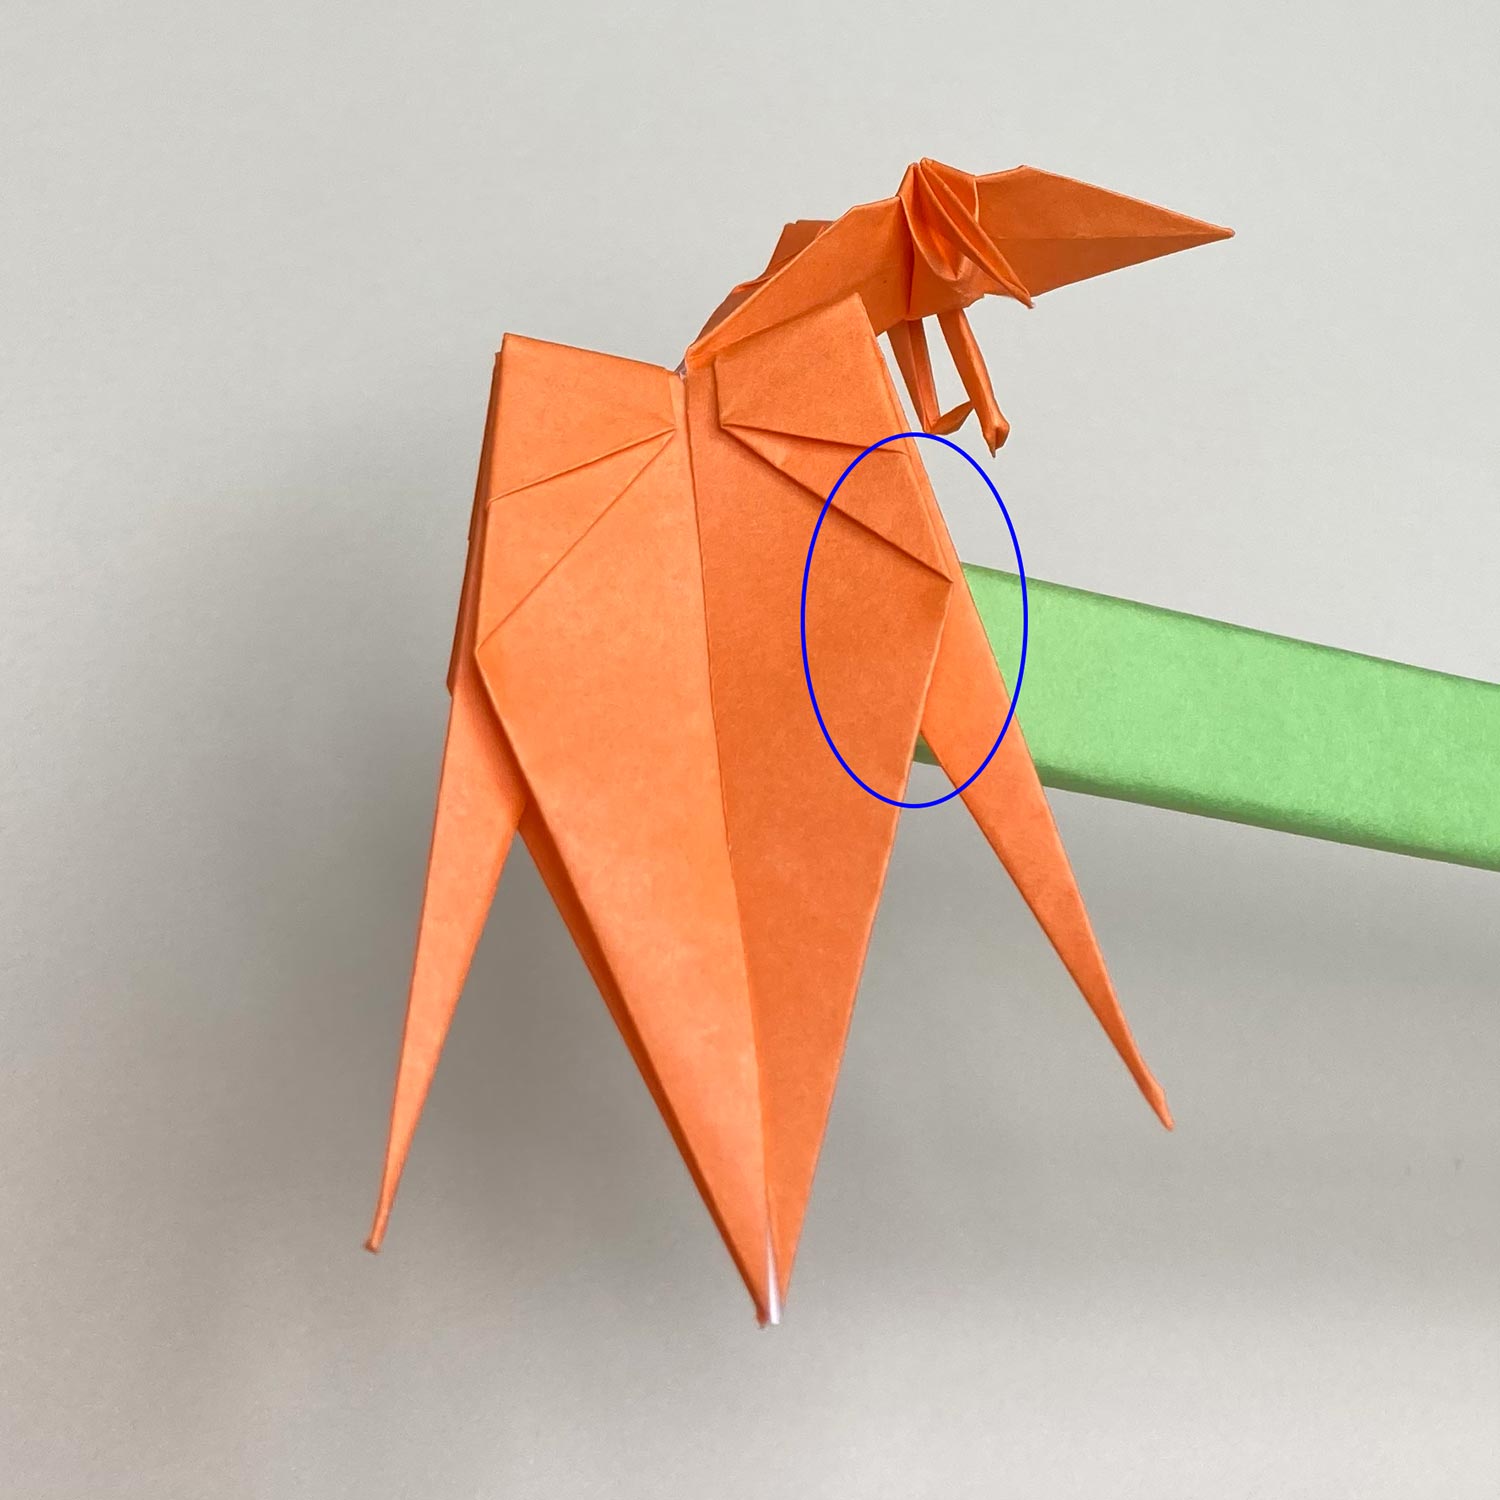
Then pinch the circled part to make creases.
At that time, try not to make creases at a part above the circled part.
(30)
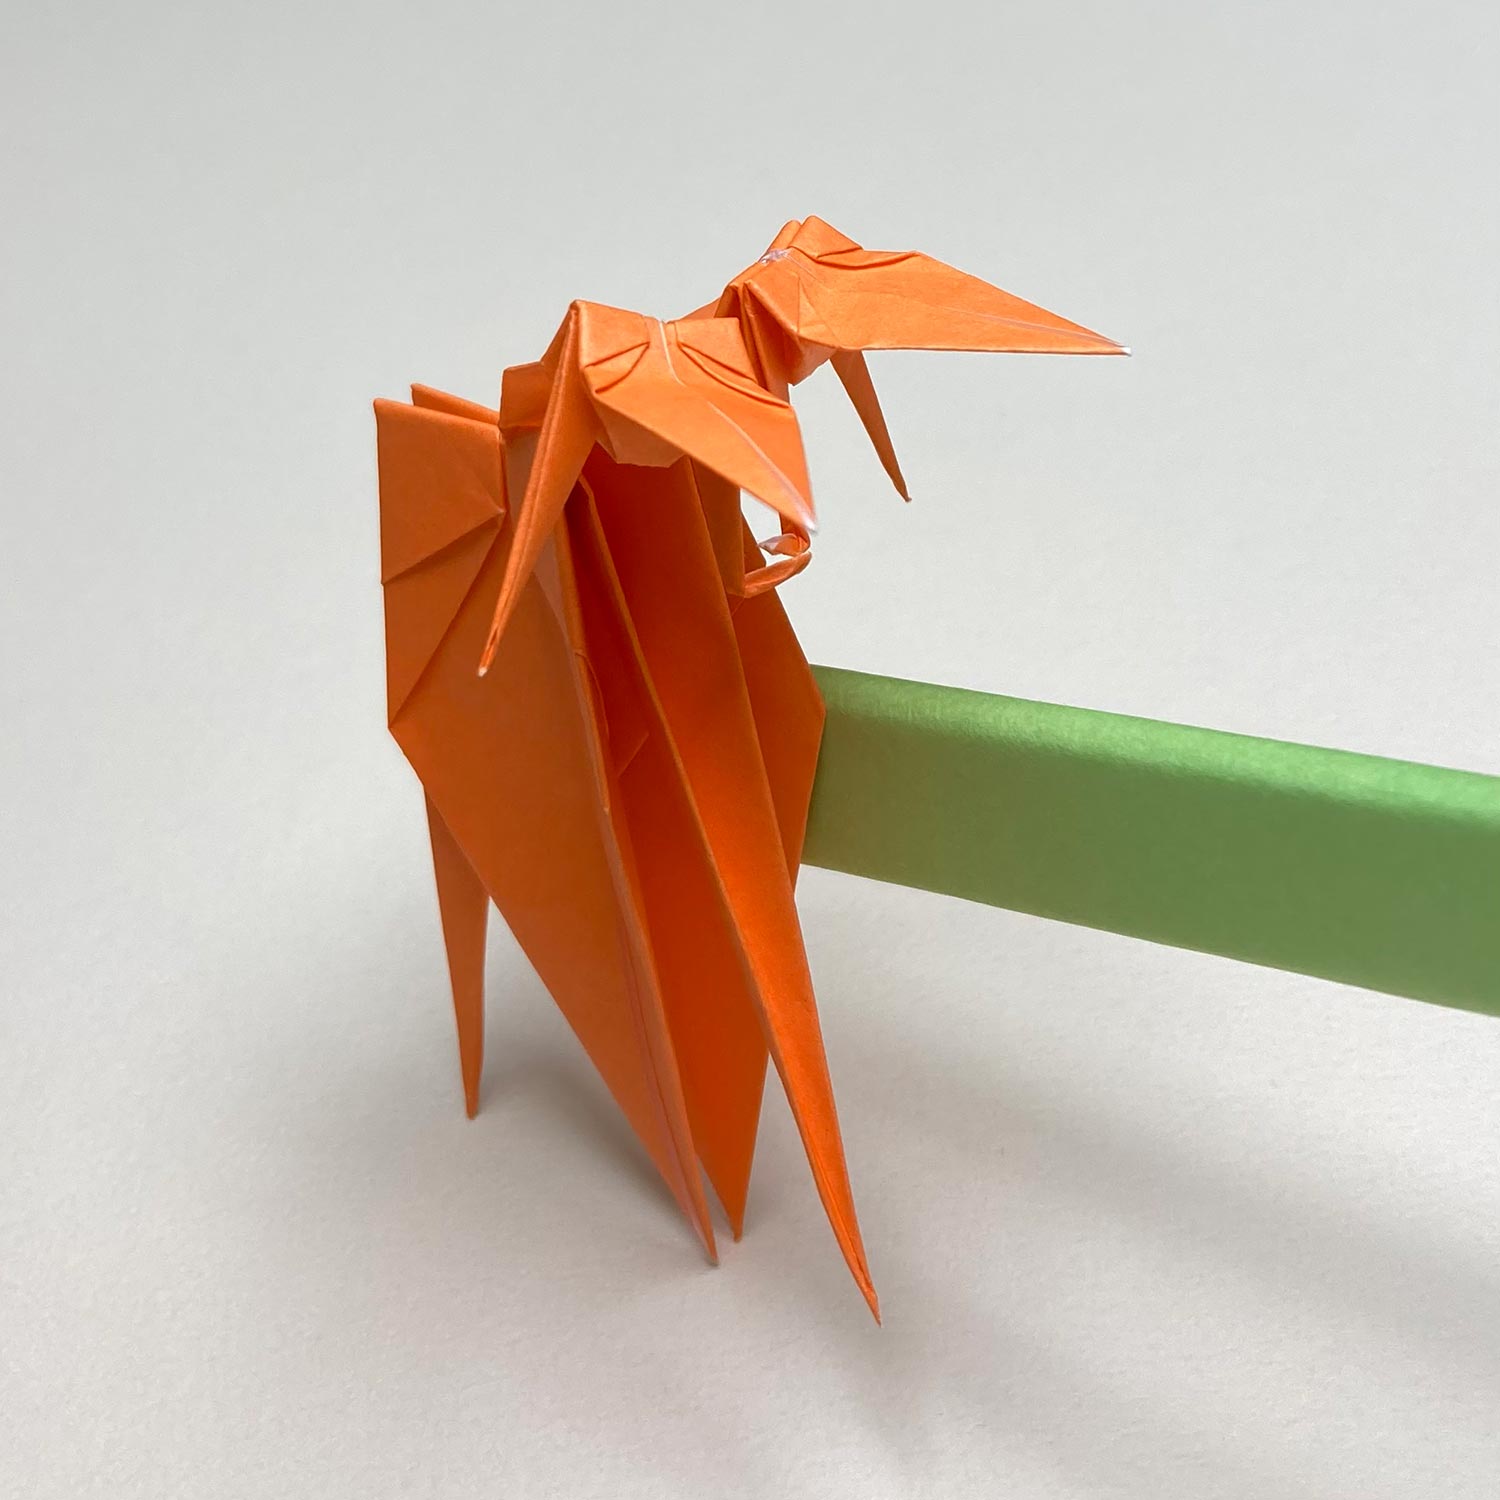
After making creases, it looks like this picture.
(31)
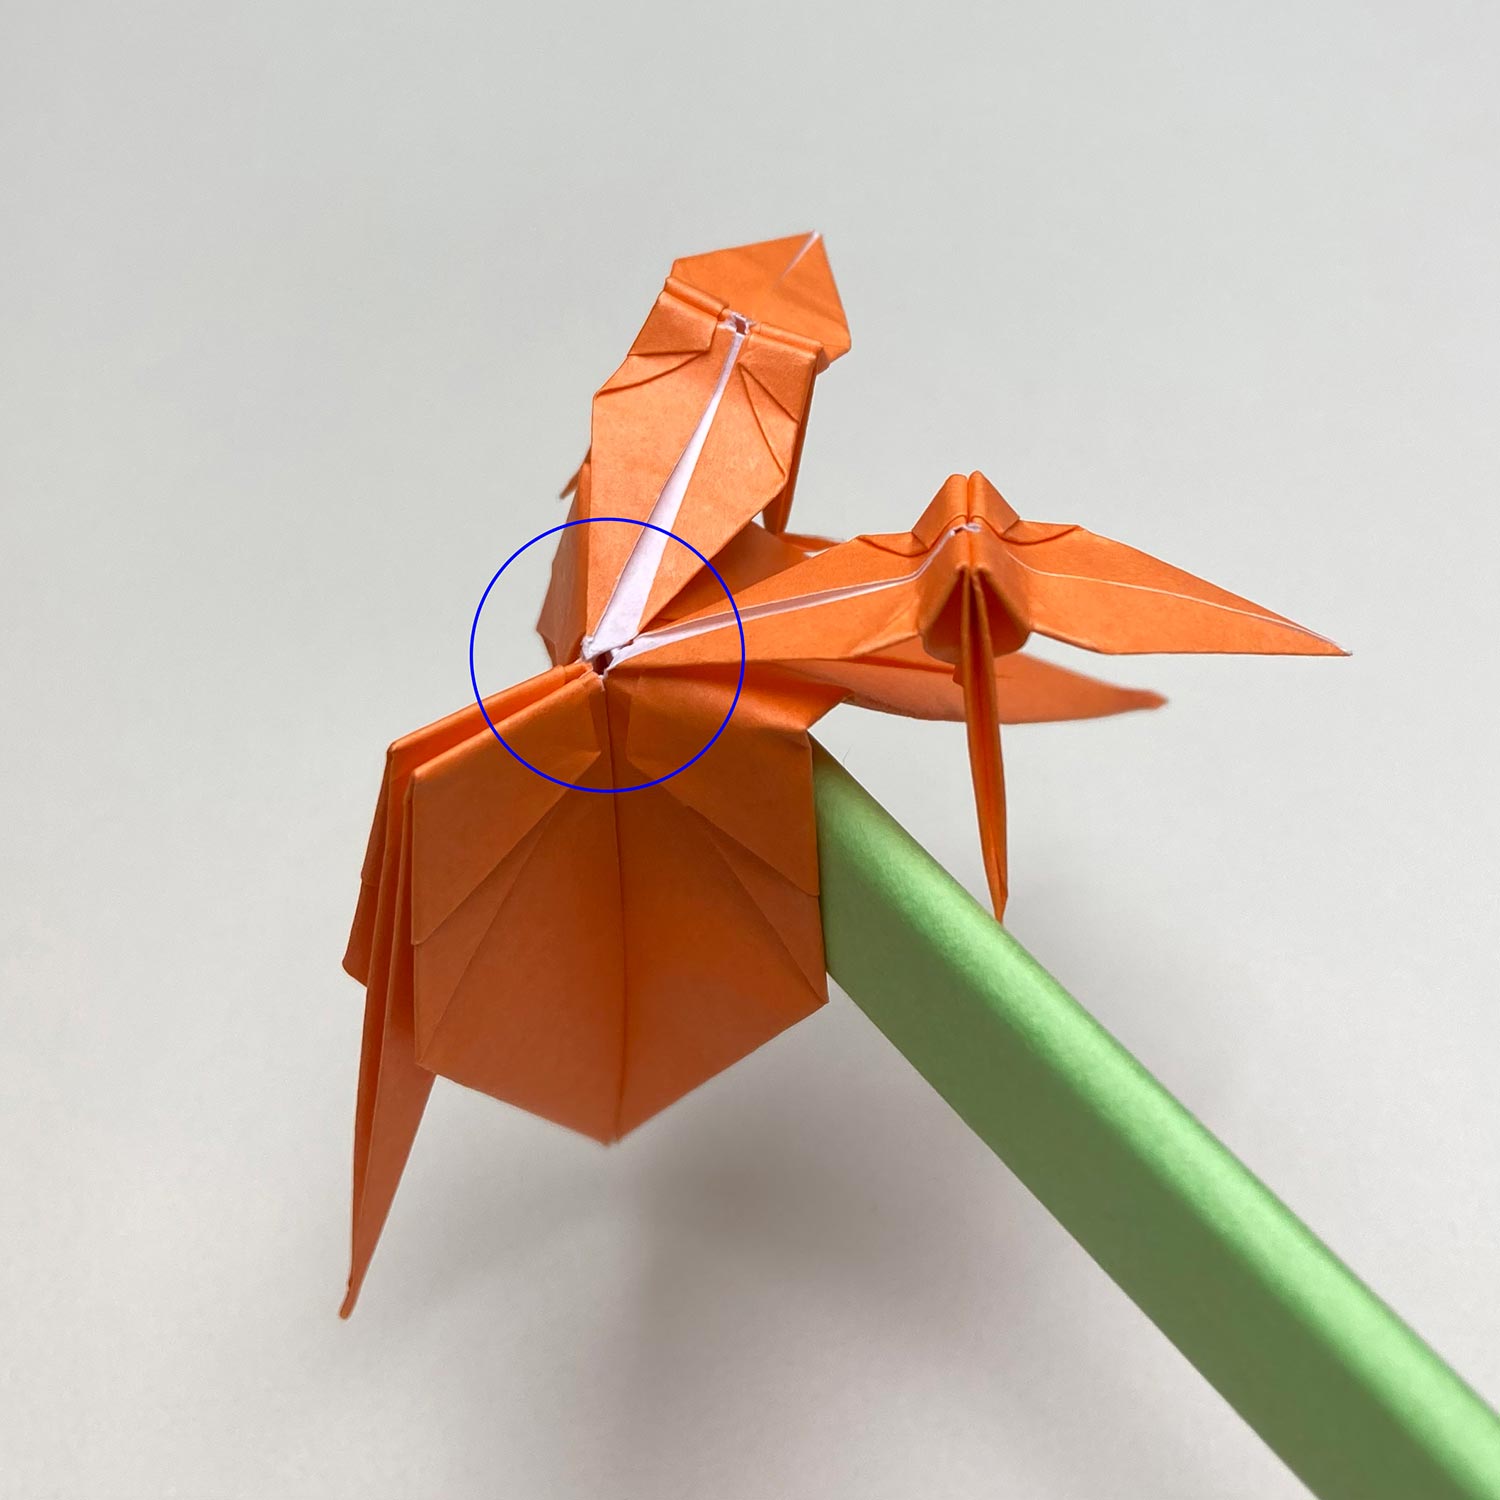
Then pinch the circled part.
Proceed with steps until the 33th step while pinching the circled part.
(32)
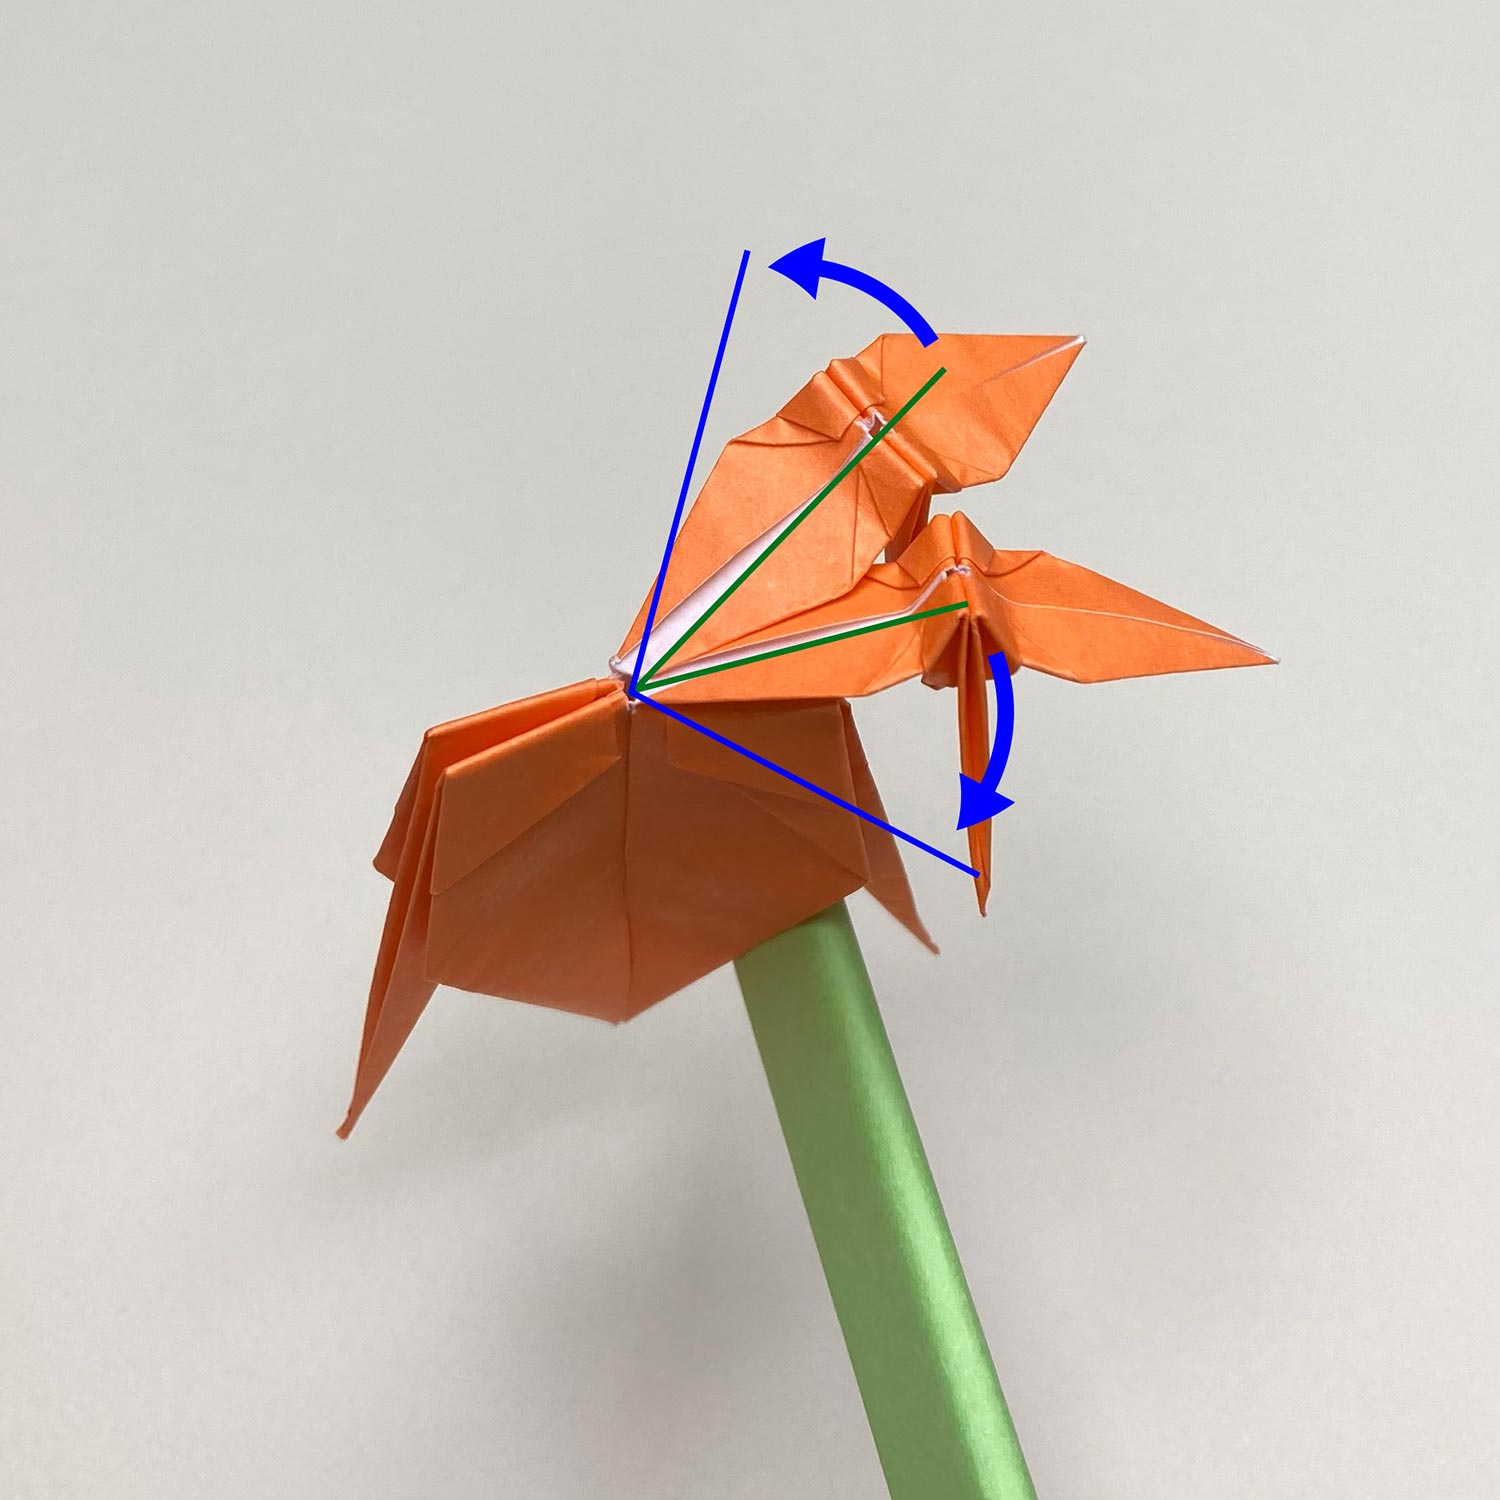
Move the small cranes to the blue lines.
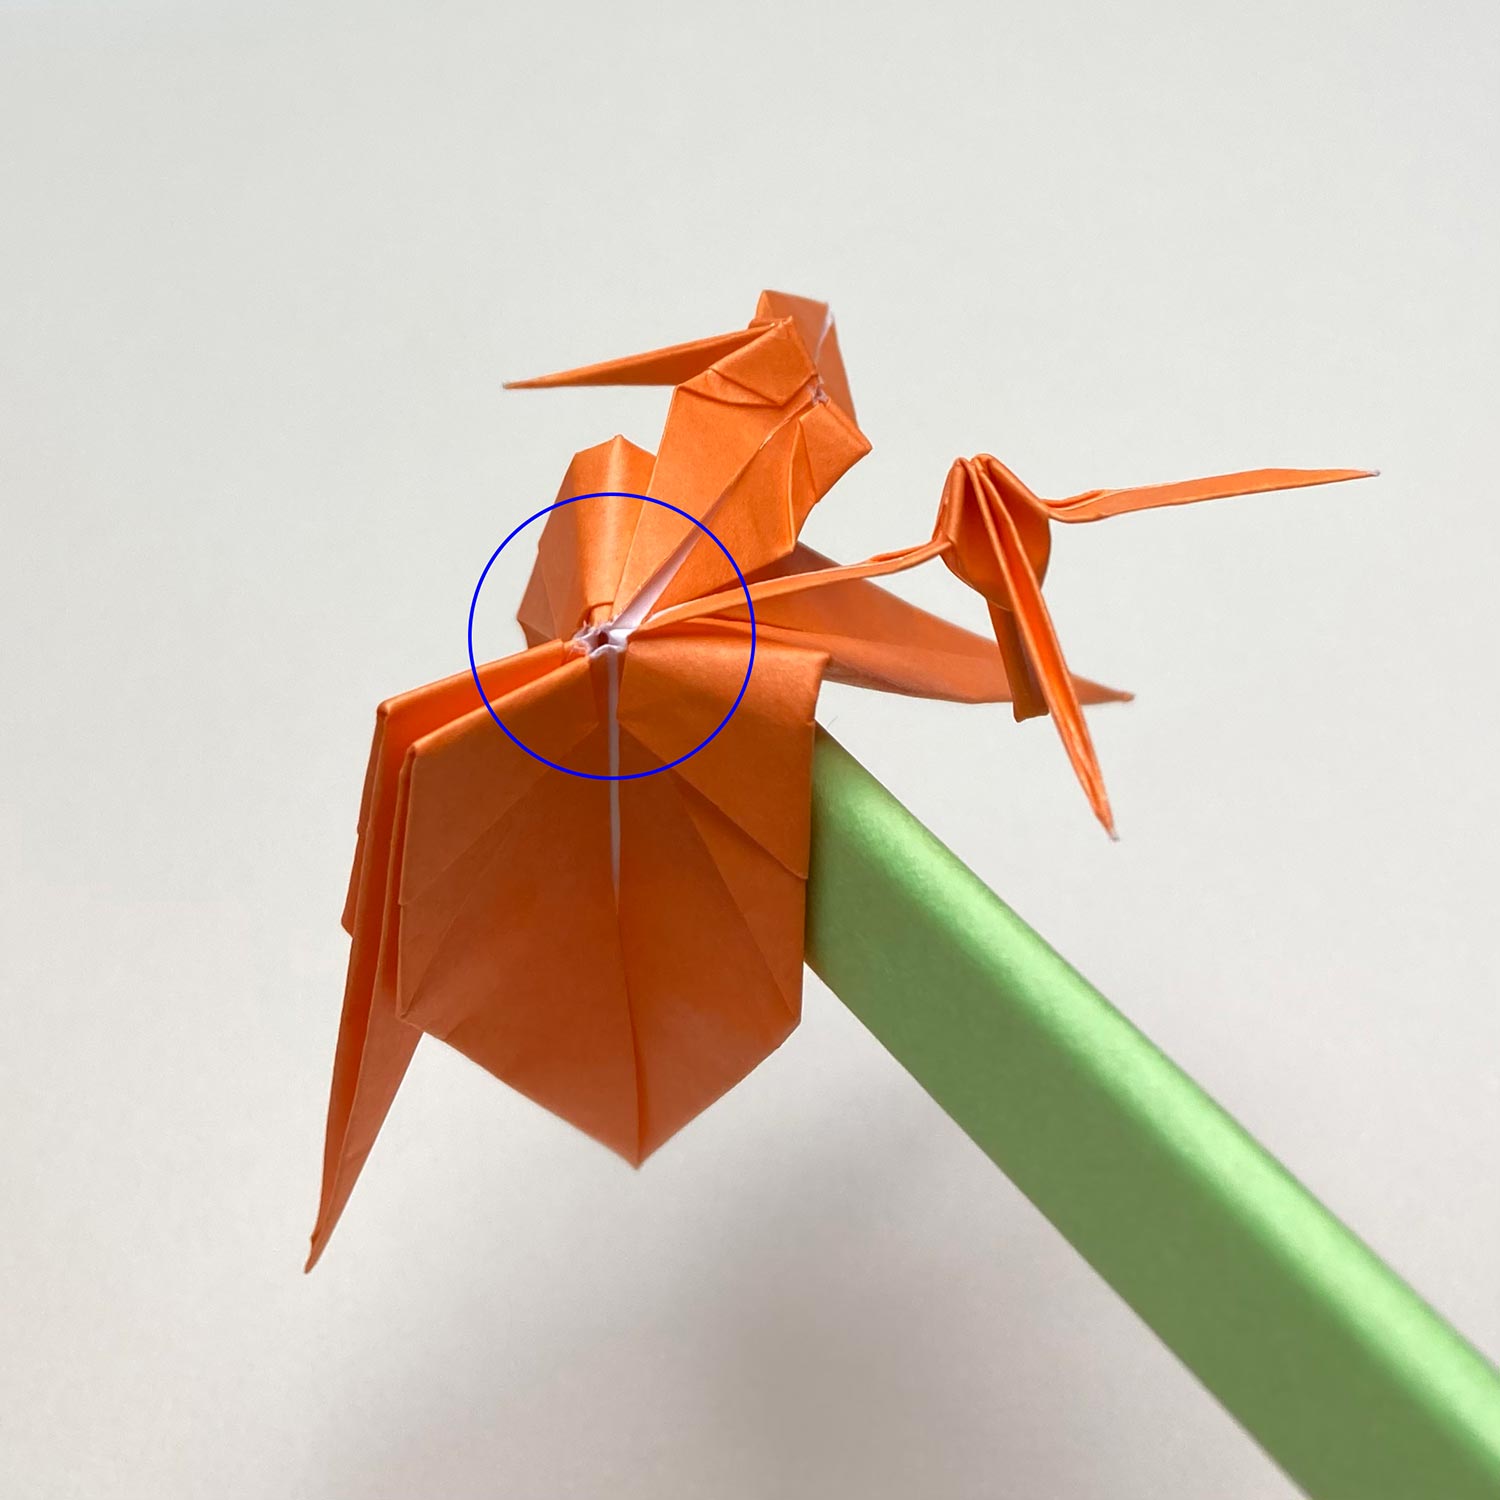
(33)
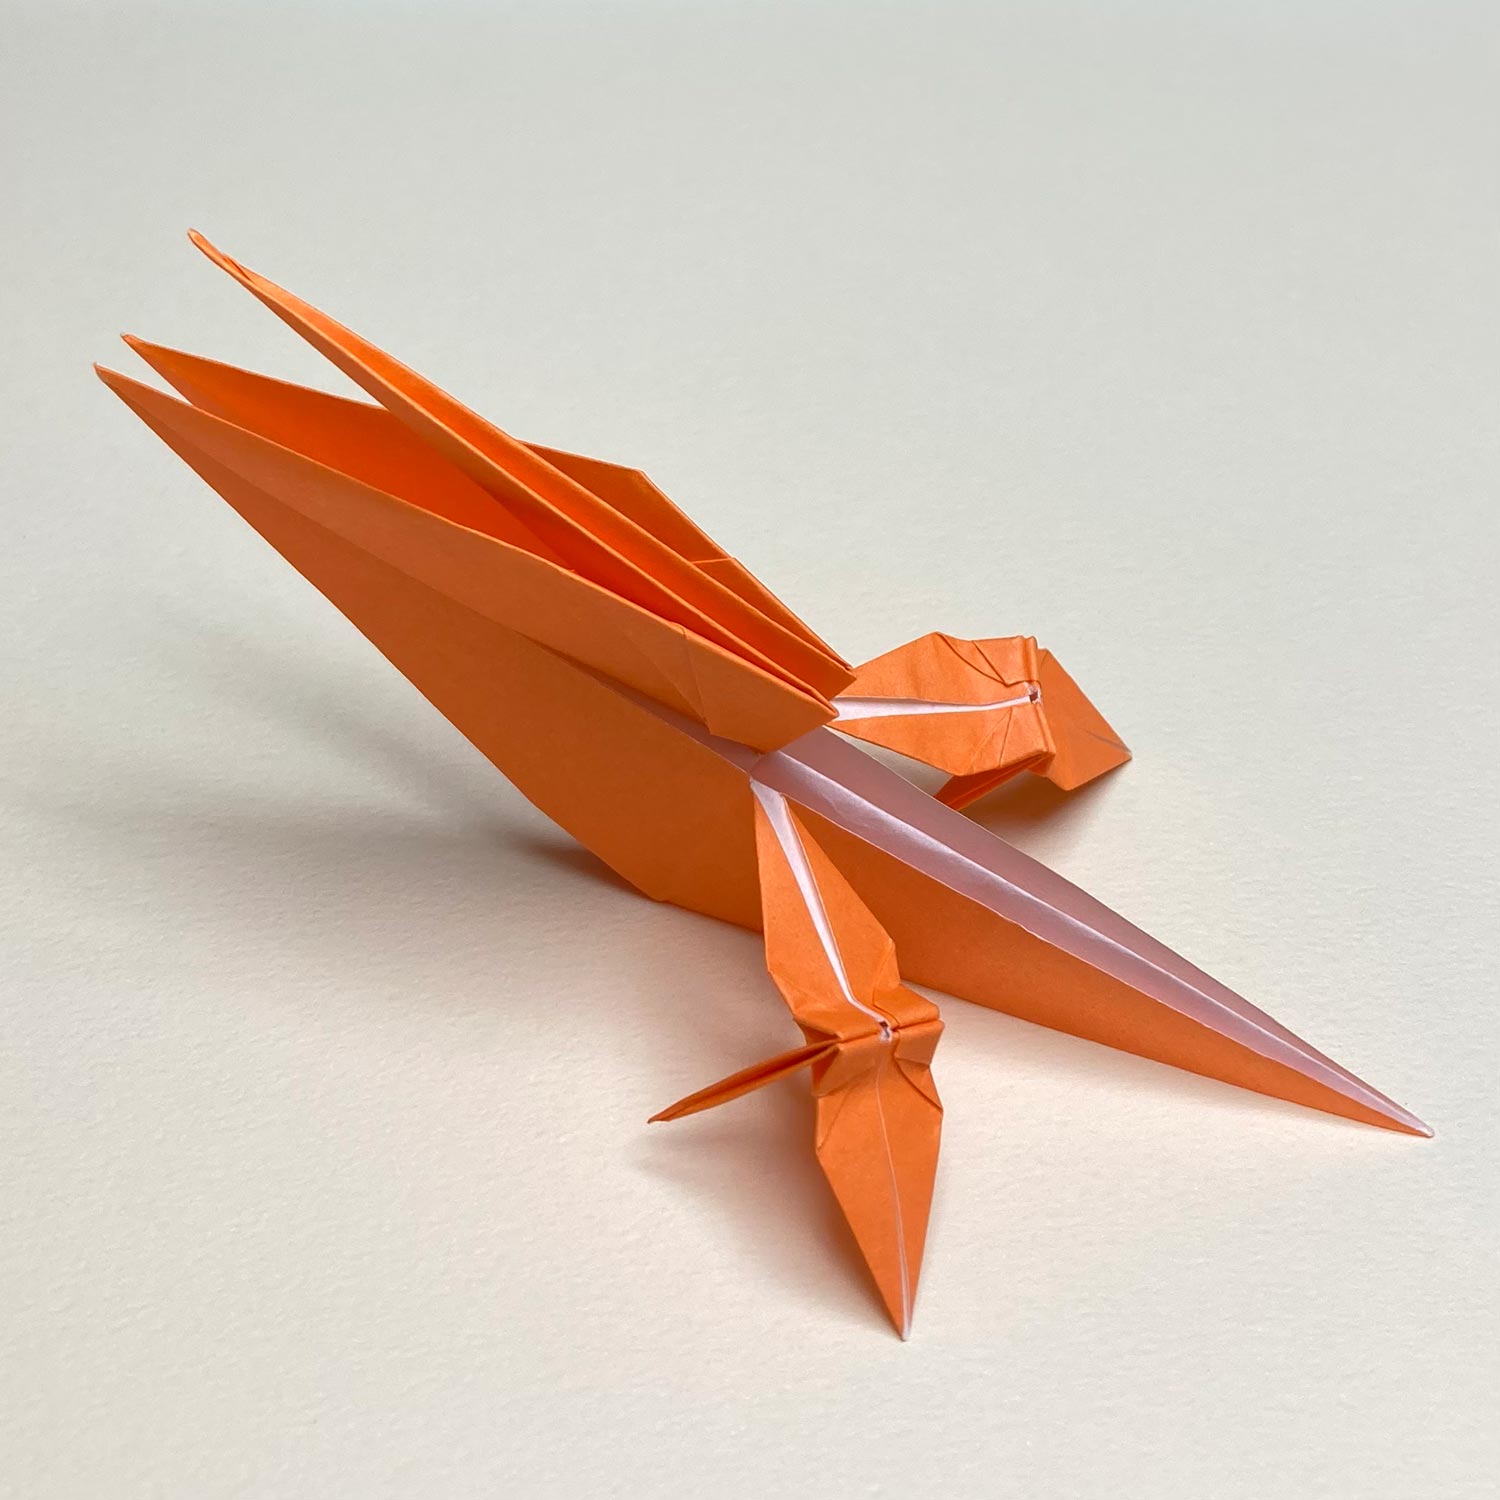
Move the small cranes like this picture.
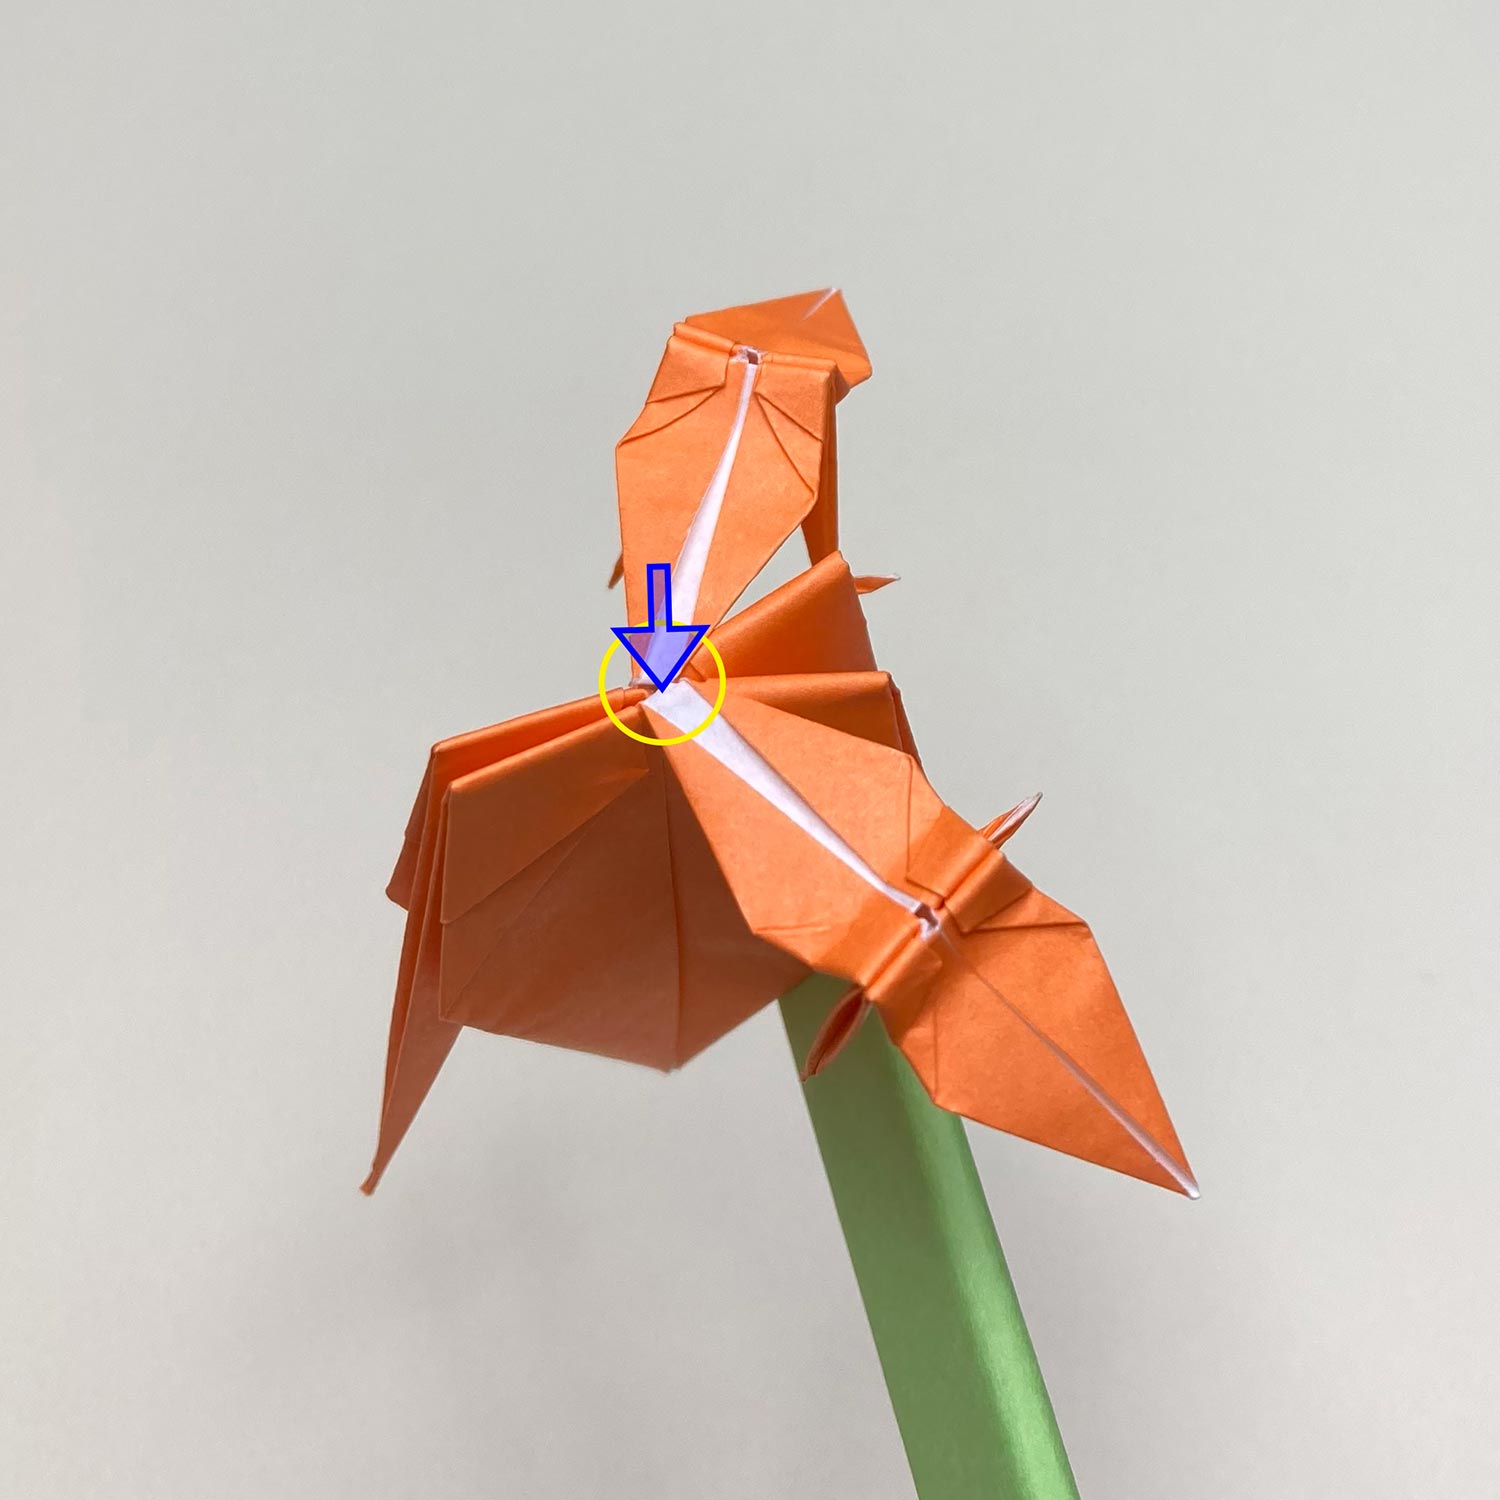
Then push connecting parts from top to make creases.
(34)
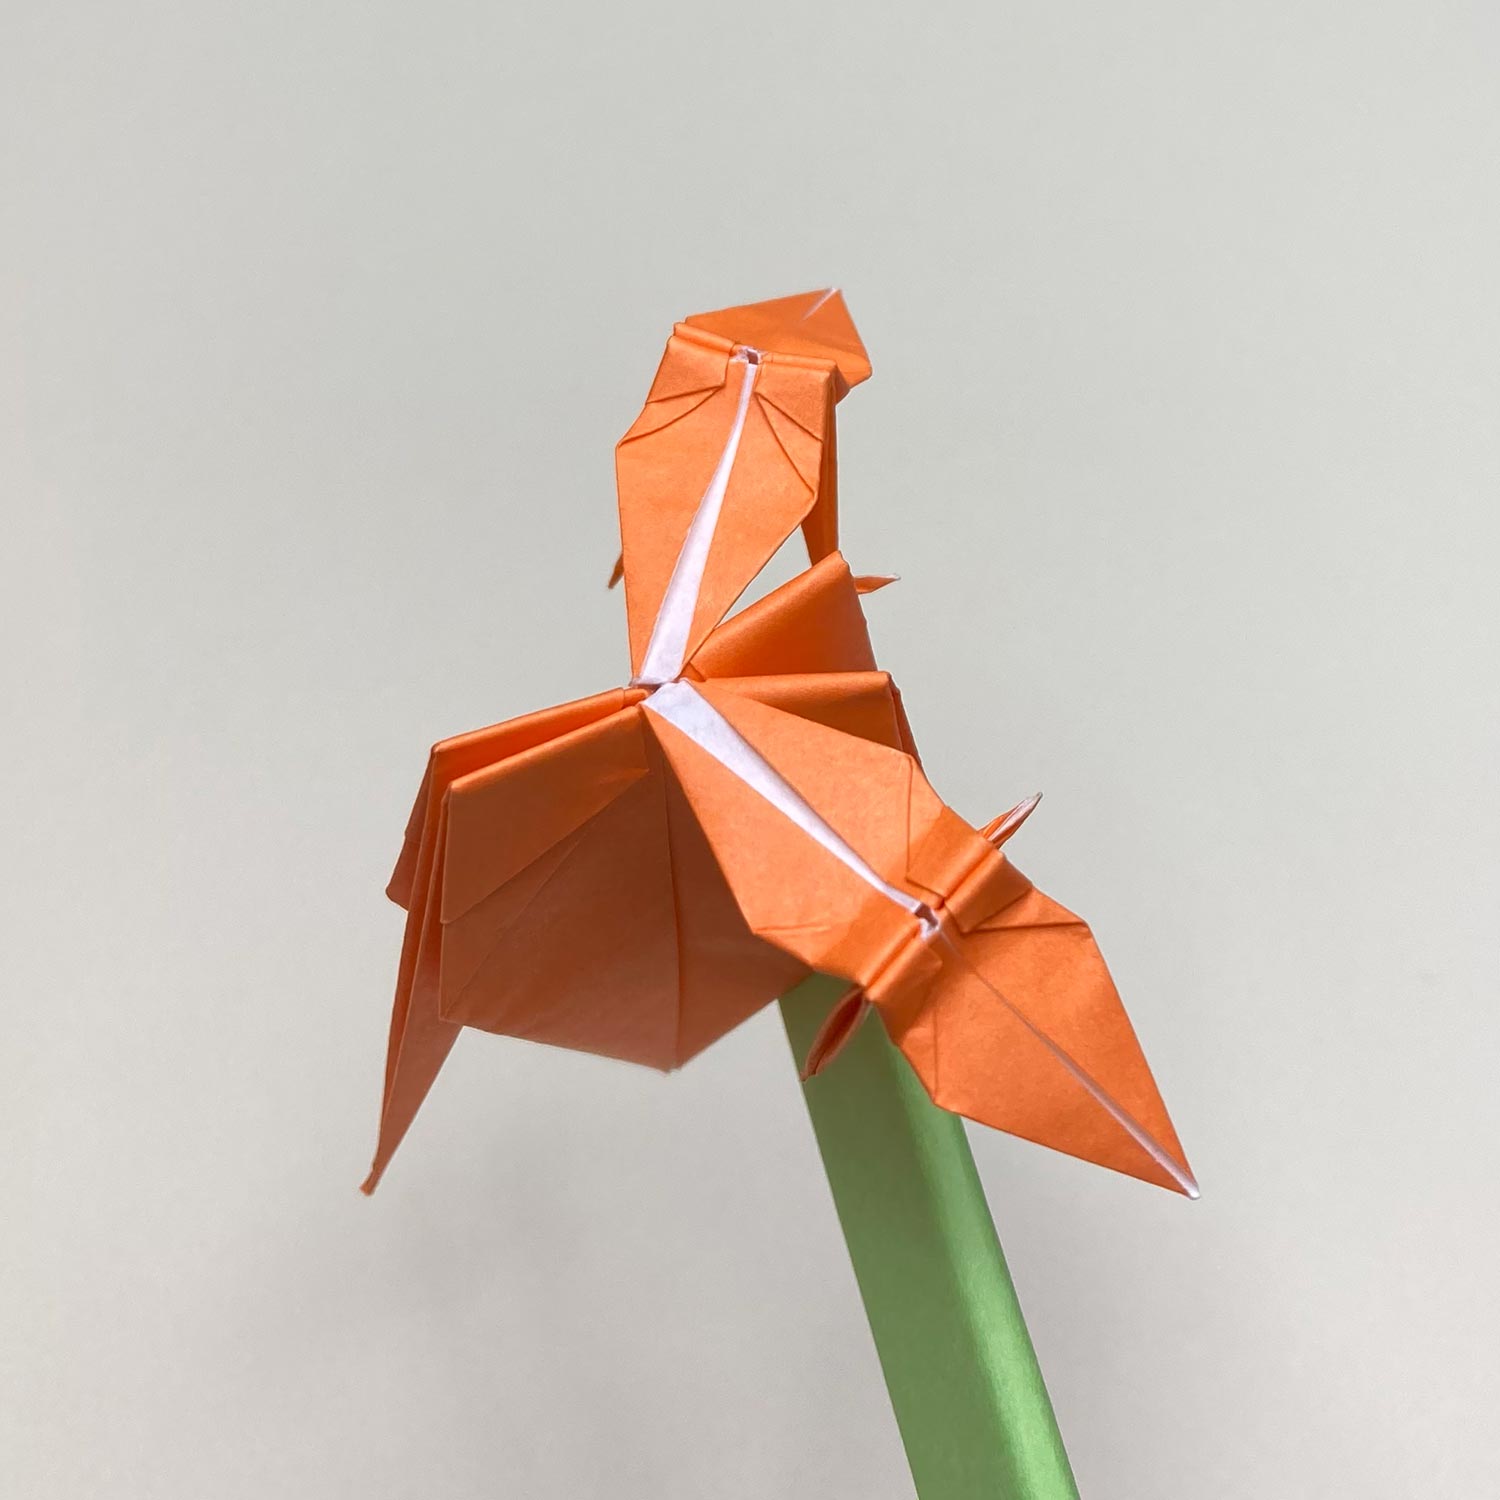
After making creases, it looks like this picture.
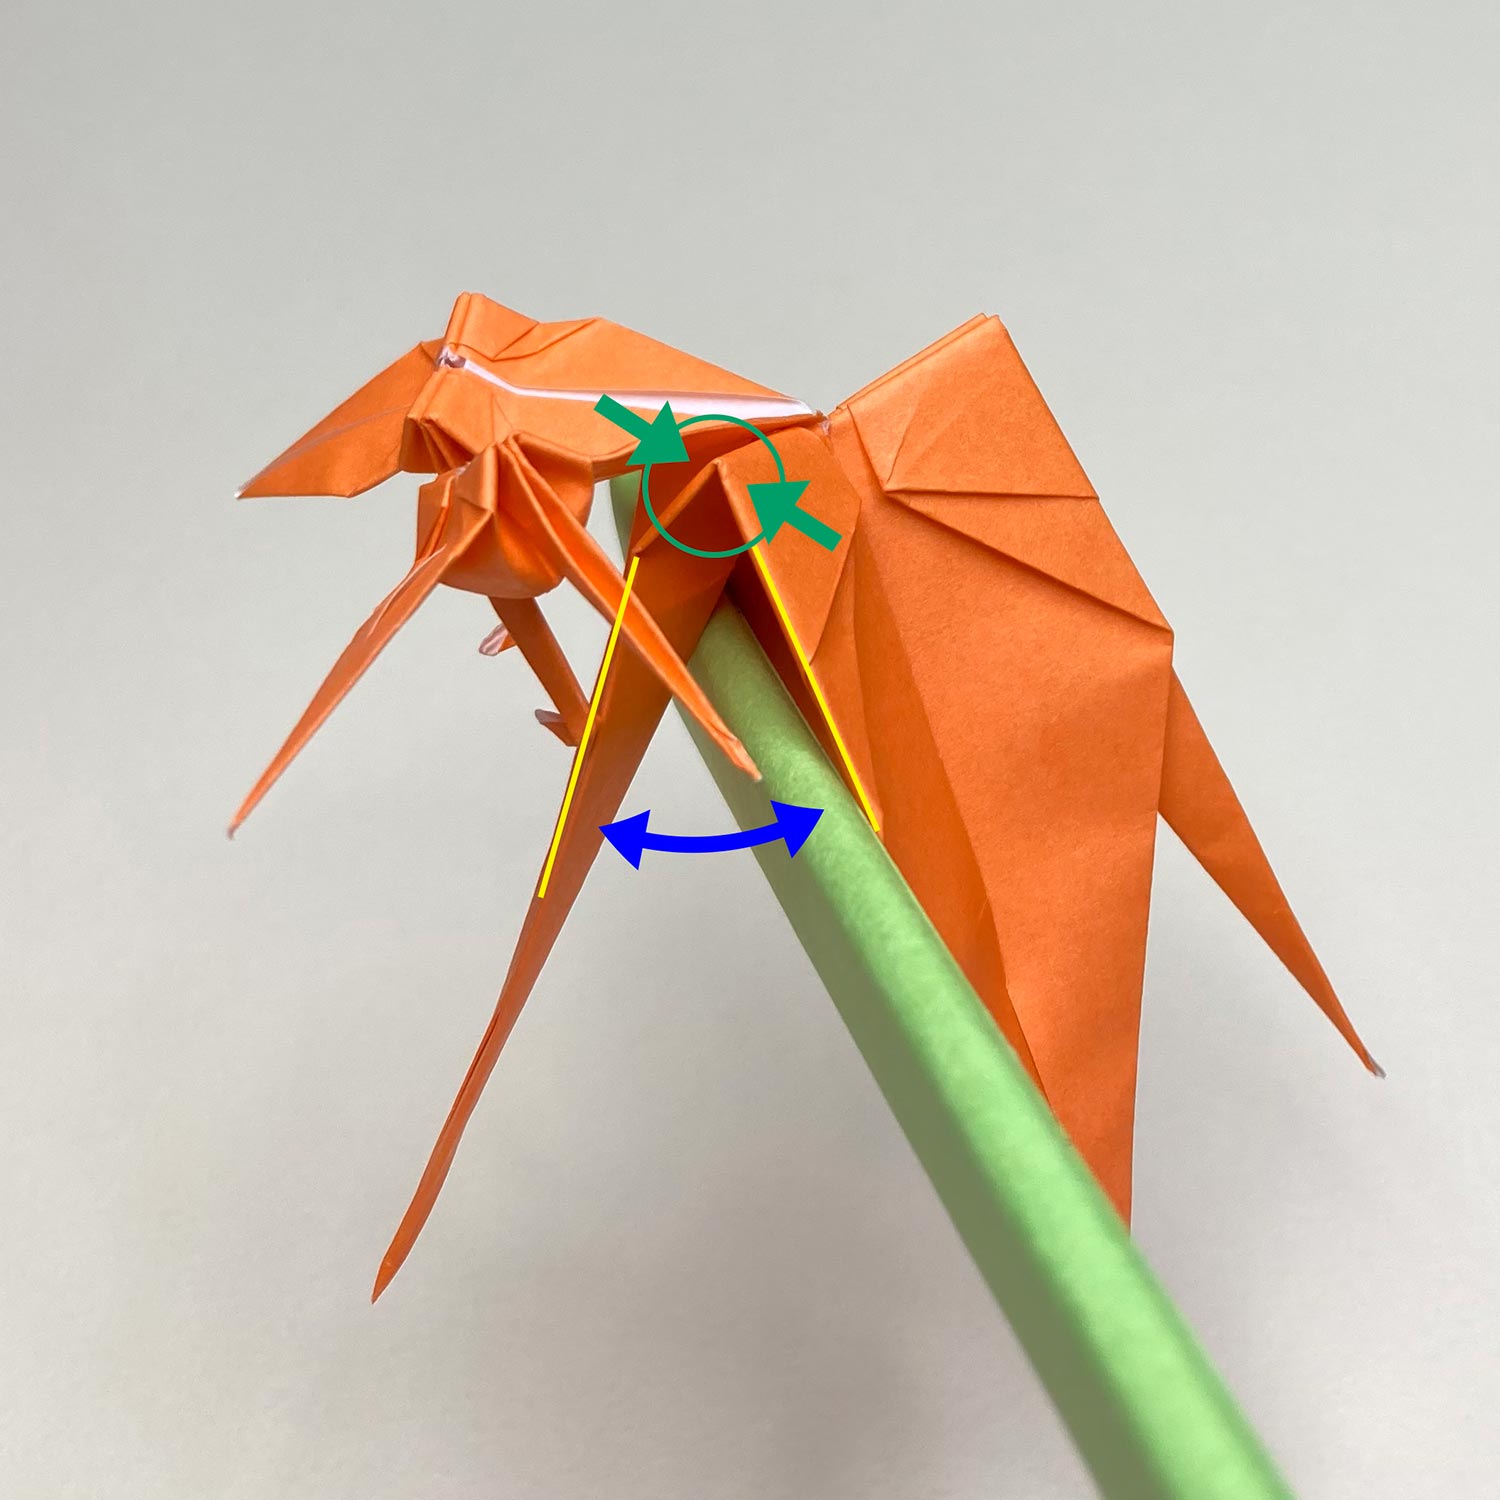
(35)
Then pinch the circled parts in the direction of the arrows to make creases.
At that time, try not to make creases near connecting parts.

(36)
After making creases, it looks like this picture.
(37)
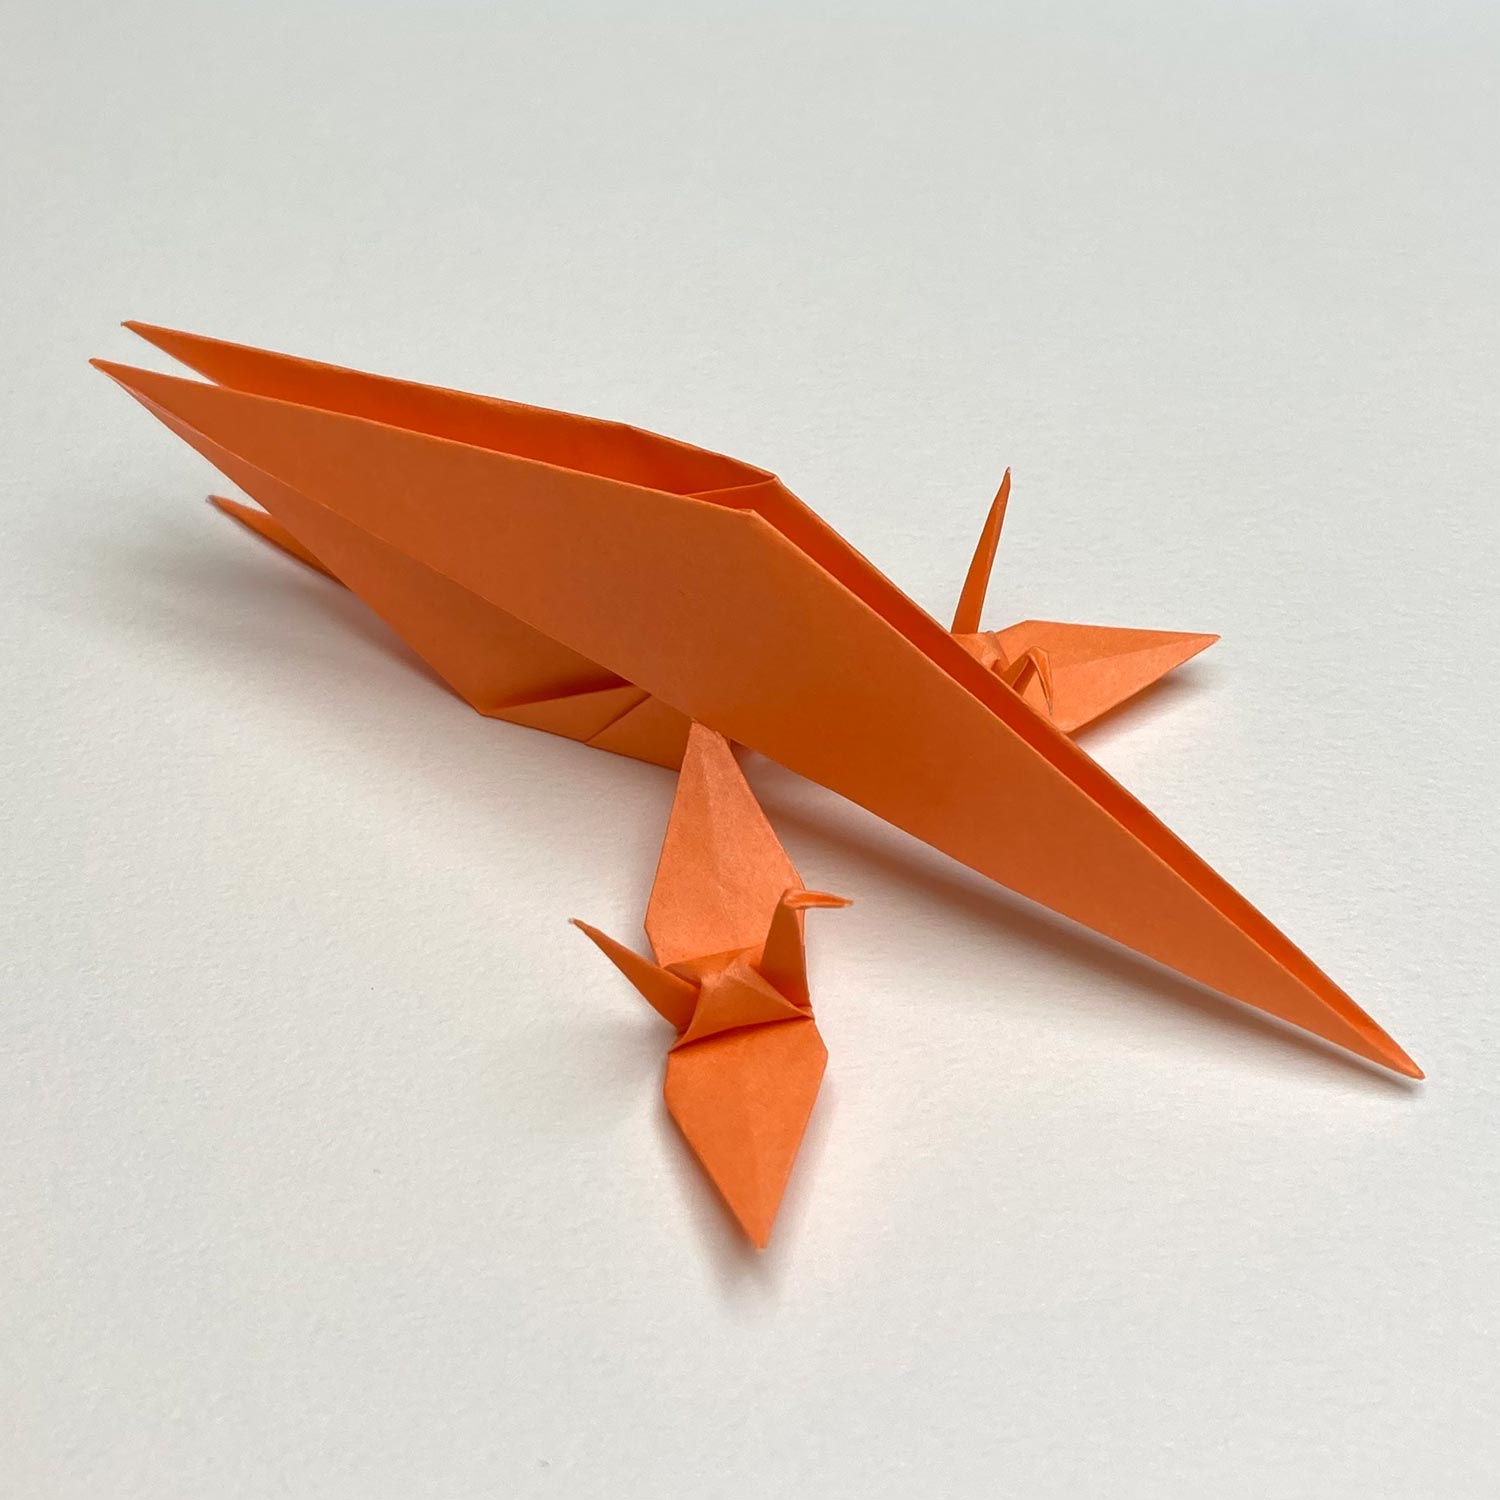
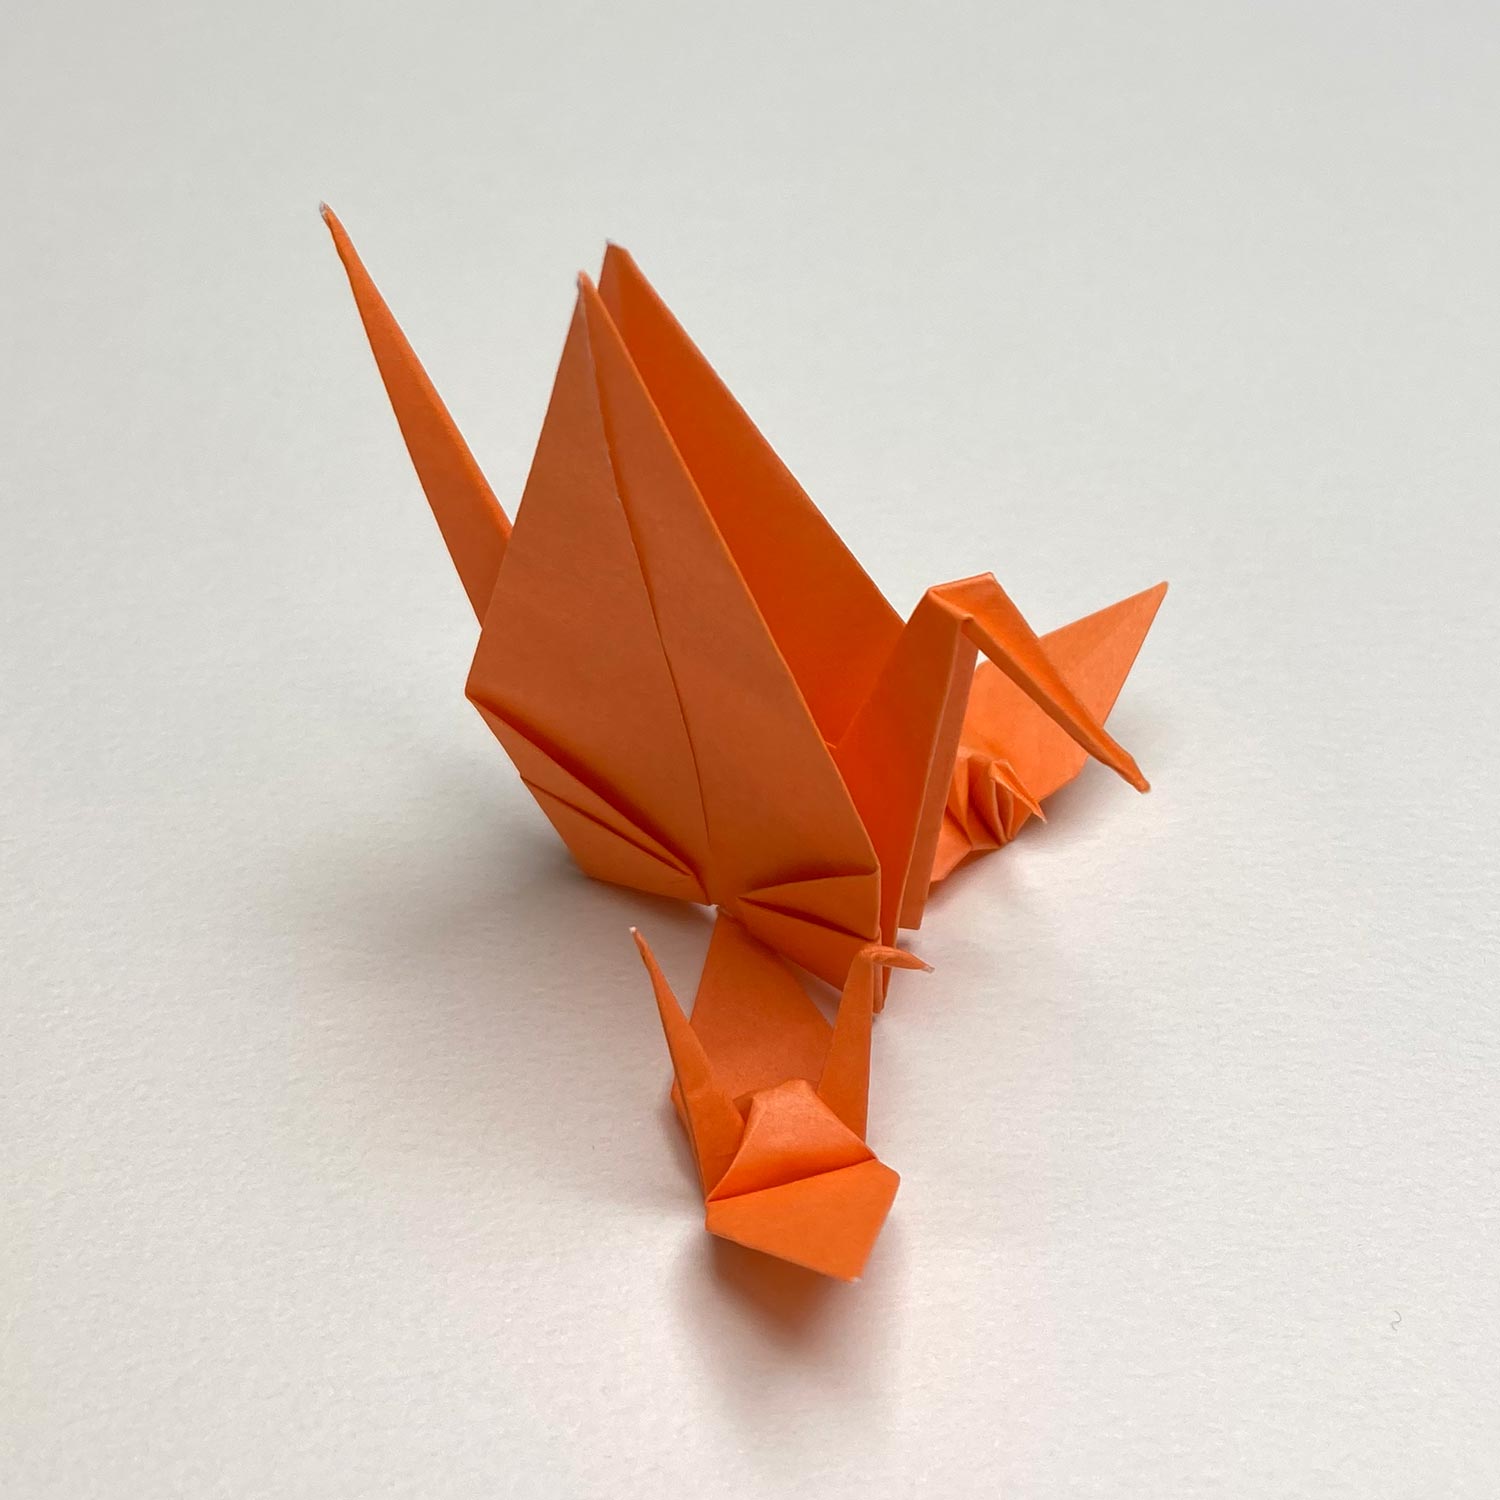
Then make a beak so that a big crane faces in the same direction as small cranes.
Finally, swell the big crane’s back without spreading wings while referencing the next page.
If you swell the big crane’s back without spreading wings, this model will be more beautiful.