Make Arino-to

(1)
Start with folding the small square.
(2)
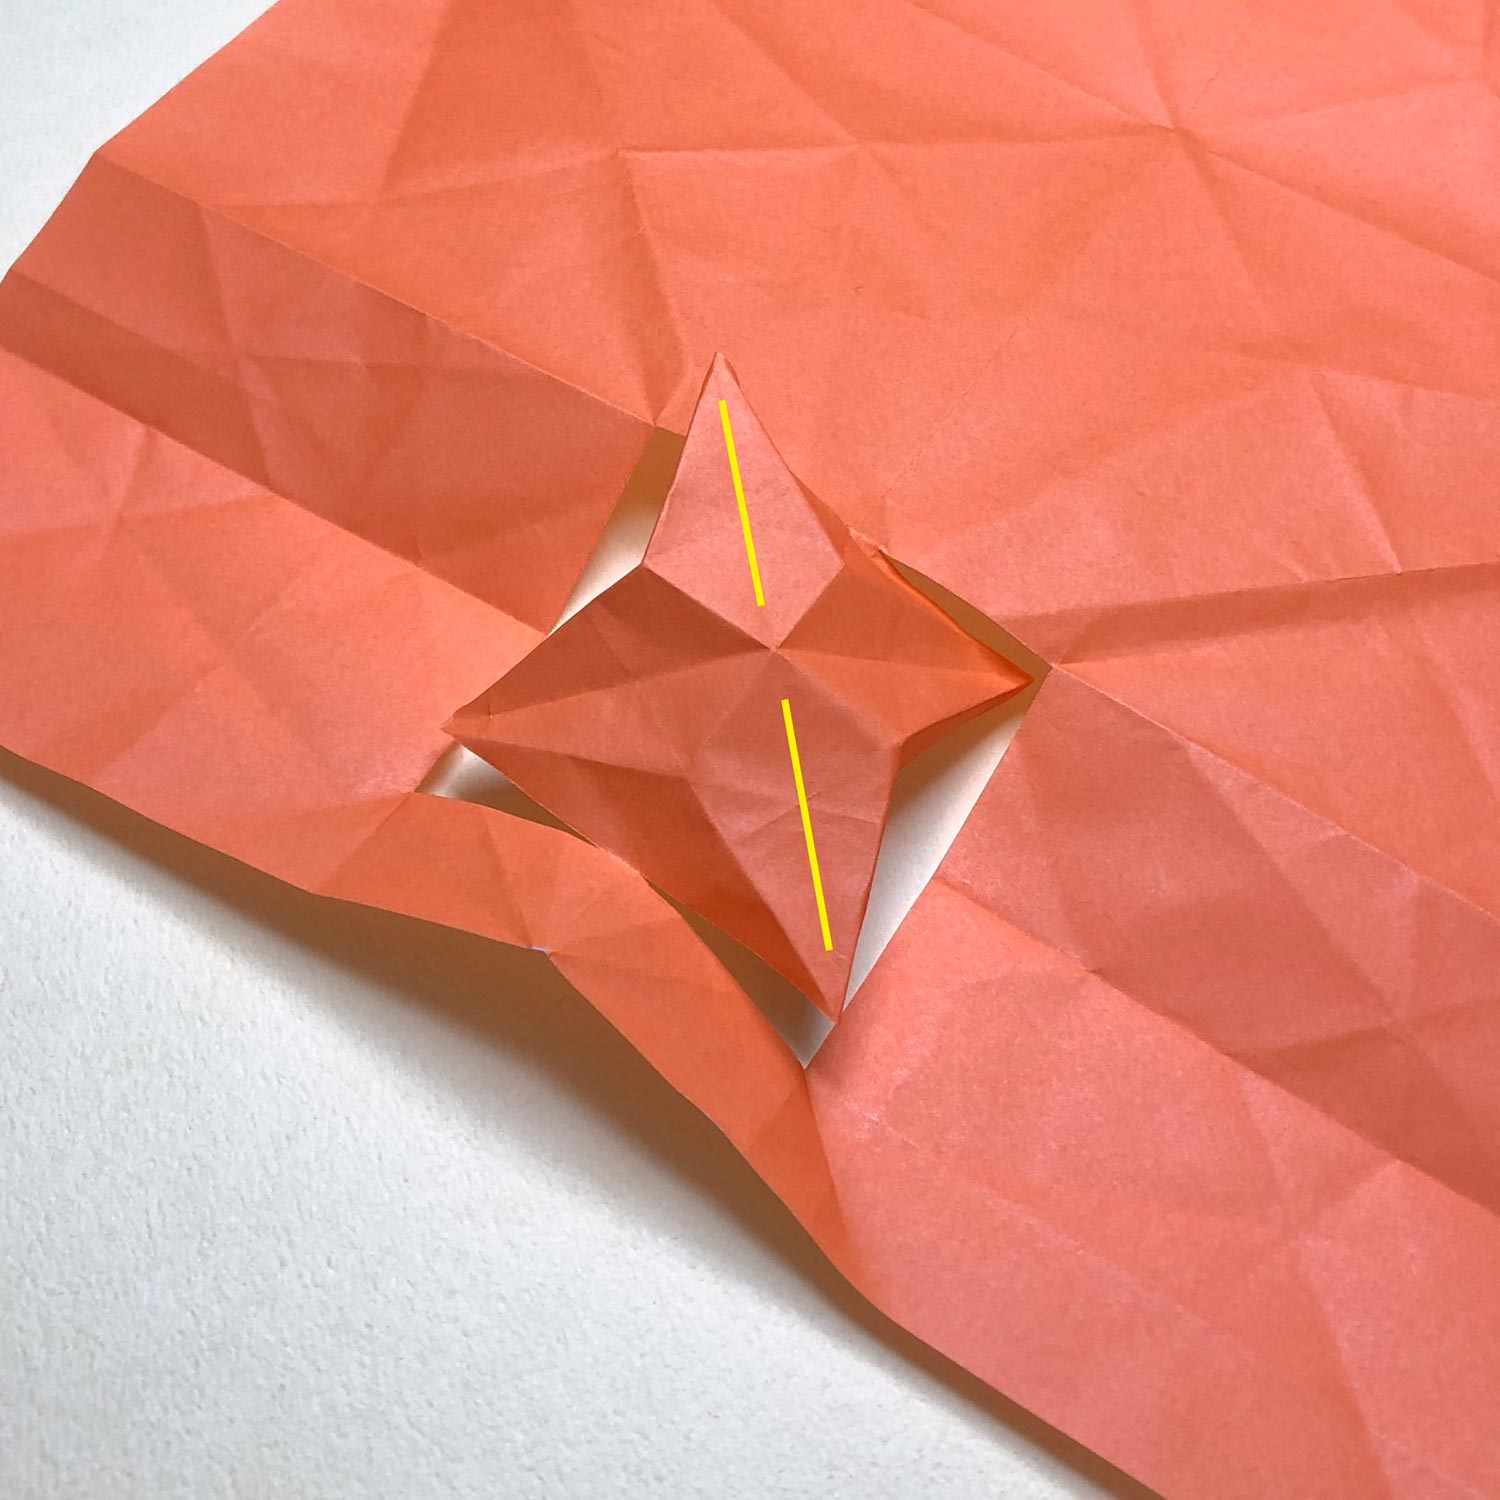
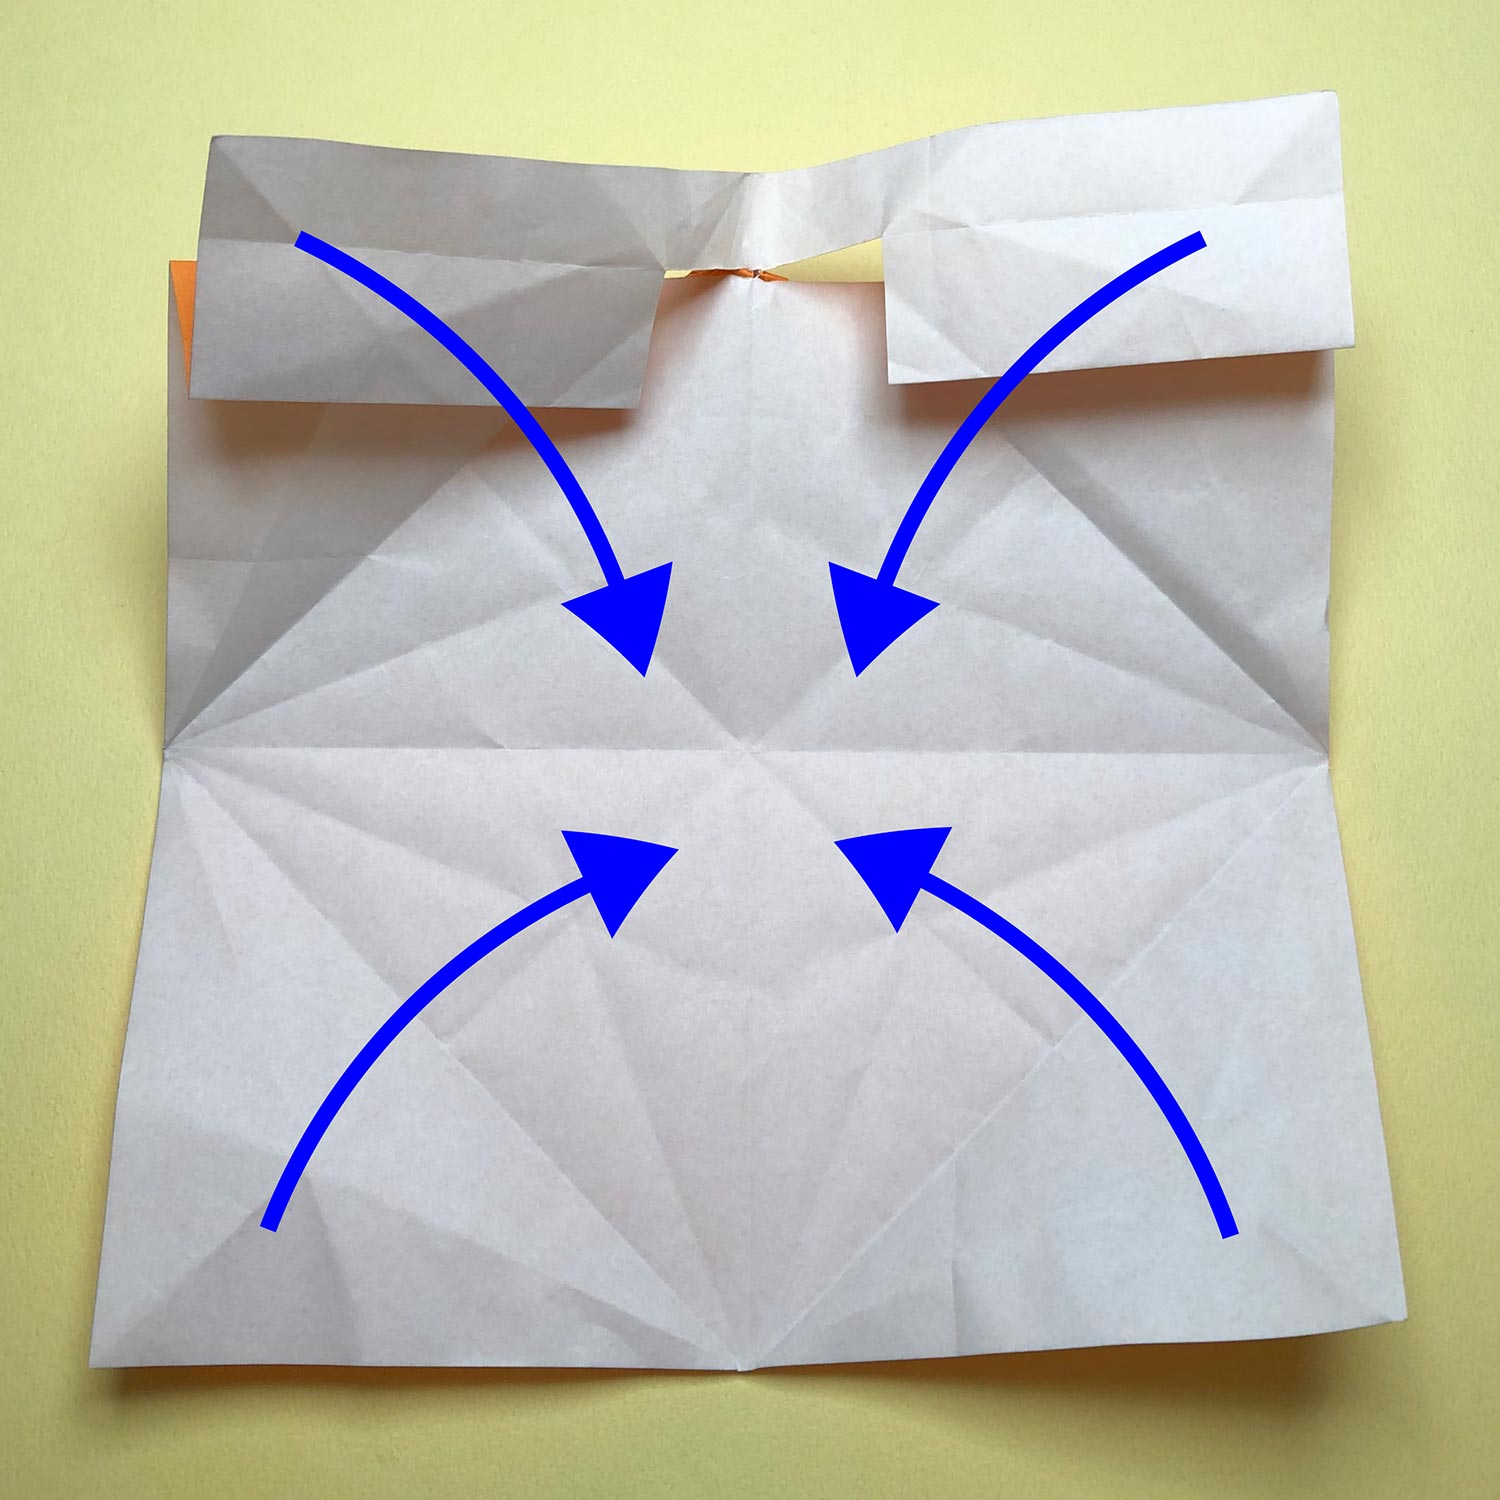
Make a star-shape like this picture.
Then make a bird-base so that the yellow lines are changed to wings.

(3)
This picture is halfway through.

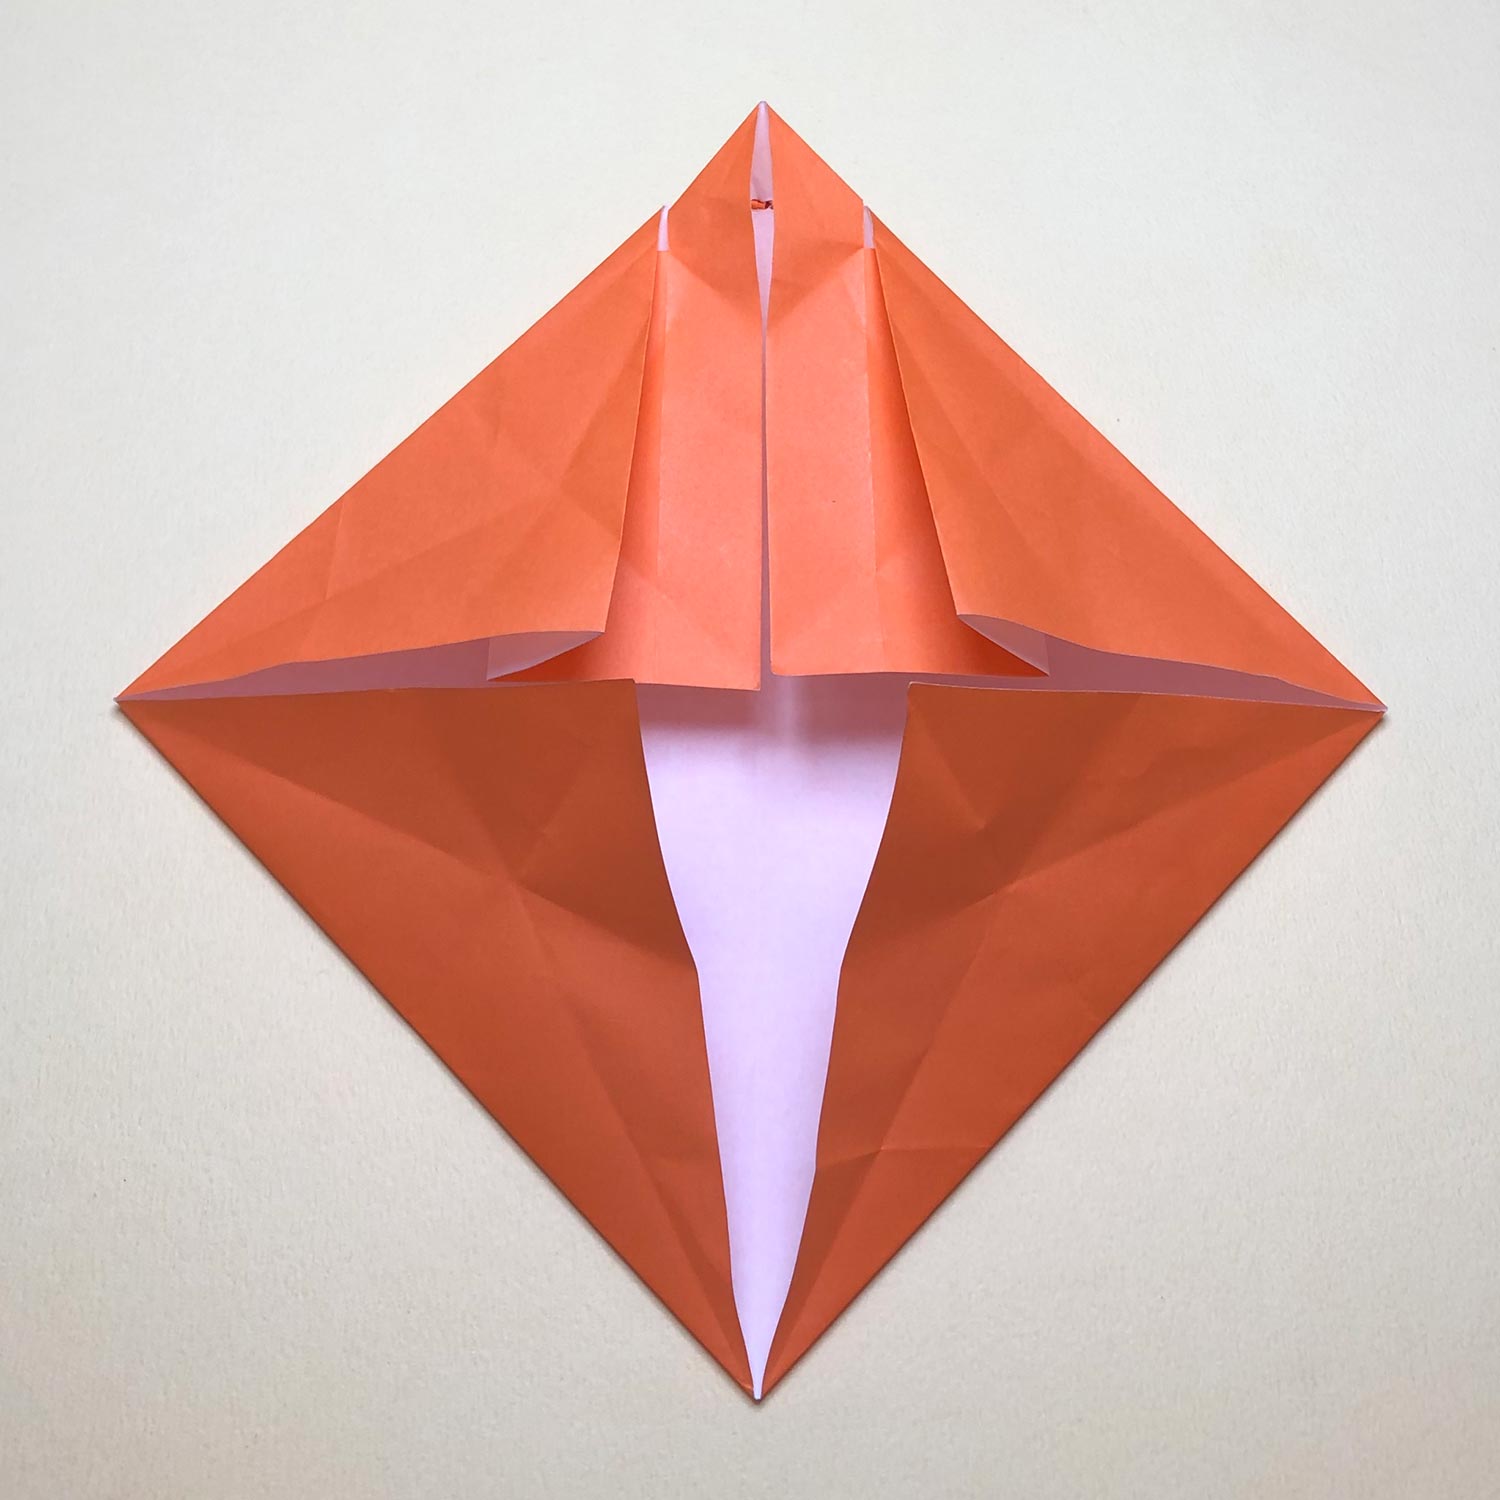
(4)
The bird-base is finished.
(5)
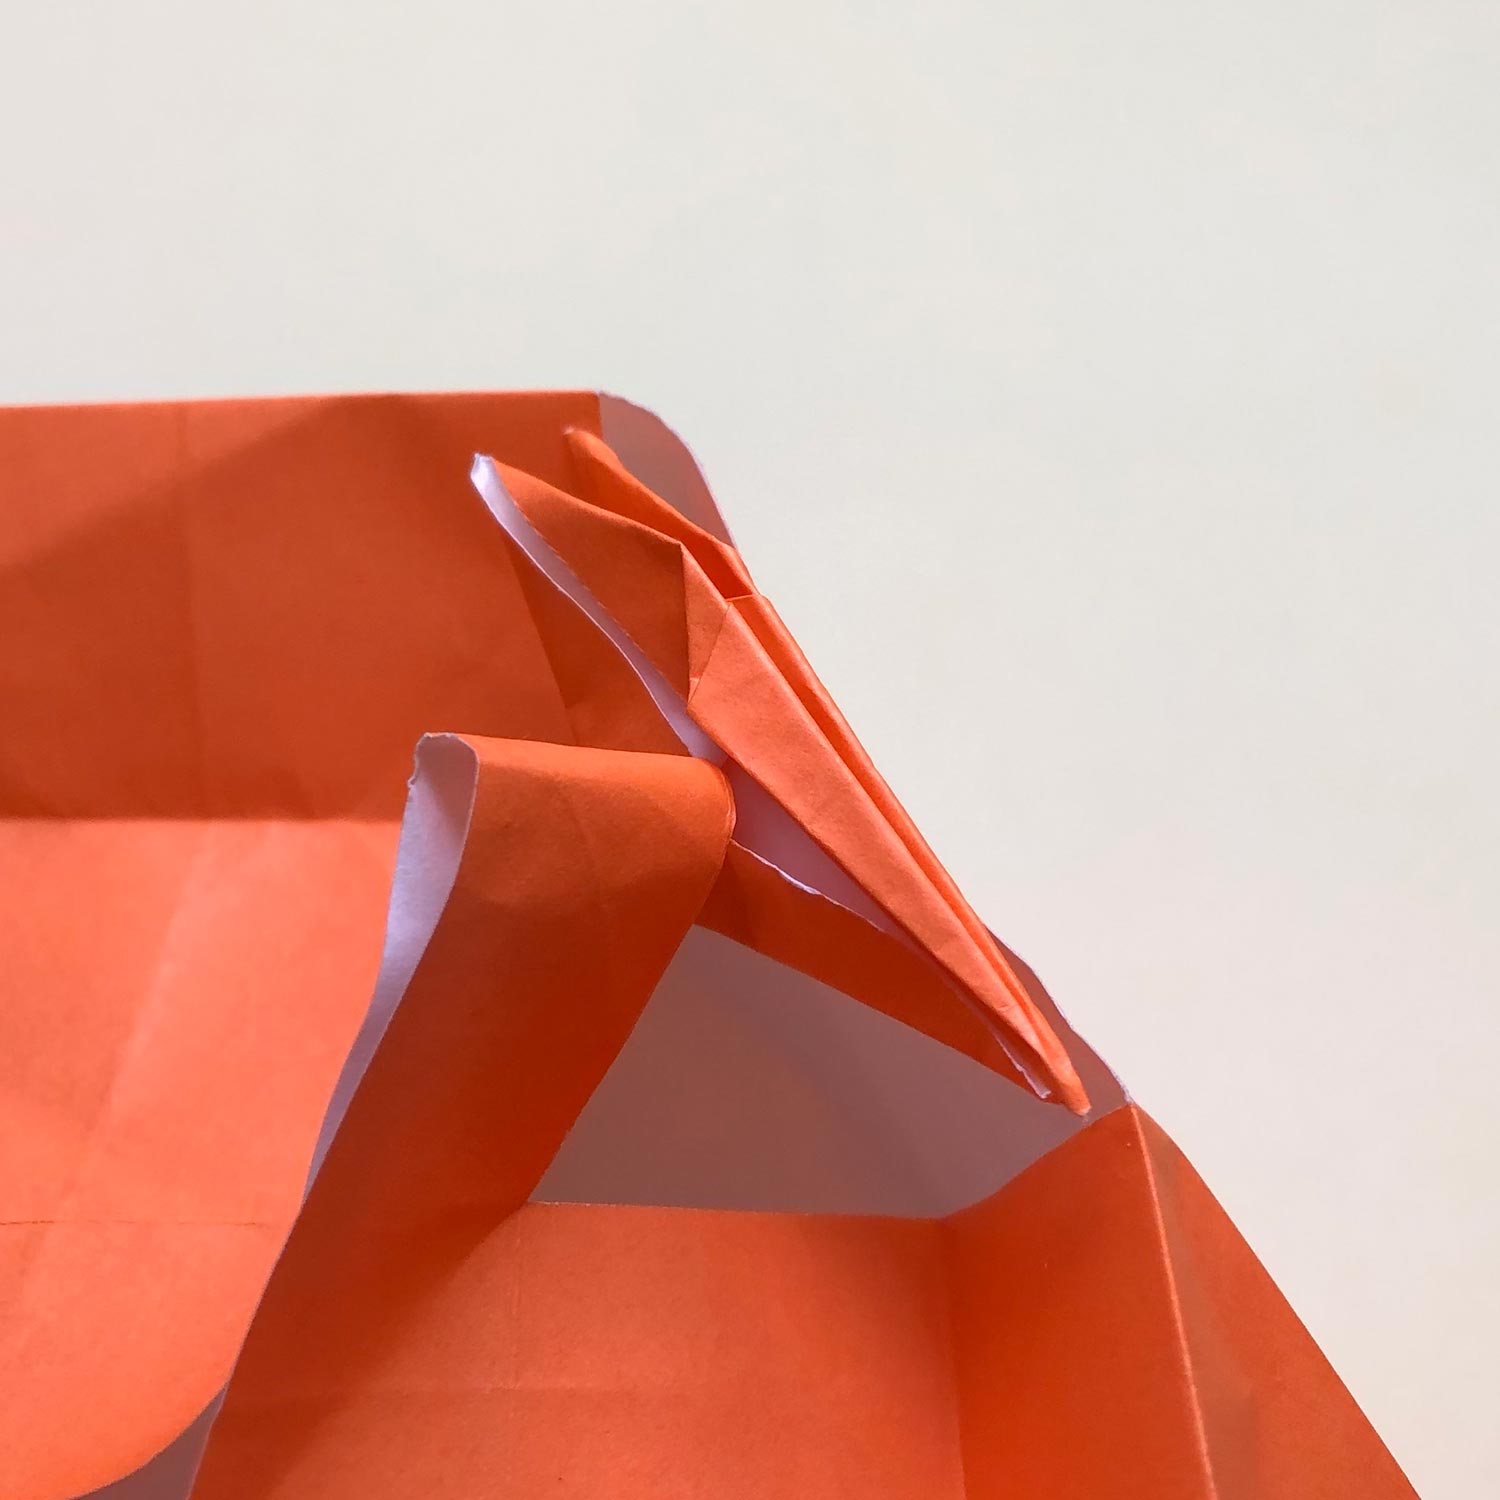
Fold the head/tail to the center.
Connecting parts tear easily.
Therefore, fold the head/tail carefully.

(6)
After folding the head/tail, fold the other head/tail to the center.
(7)
Fold the other head/tail like this picture.
(8)
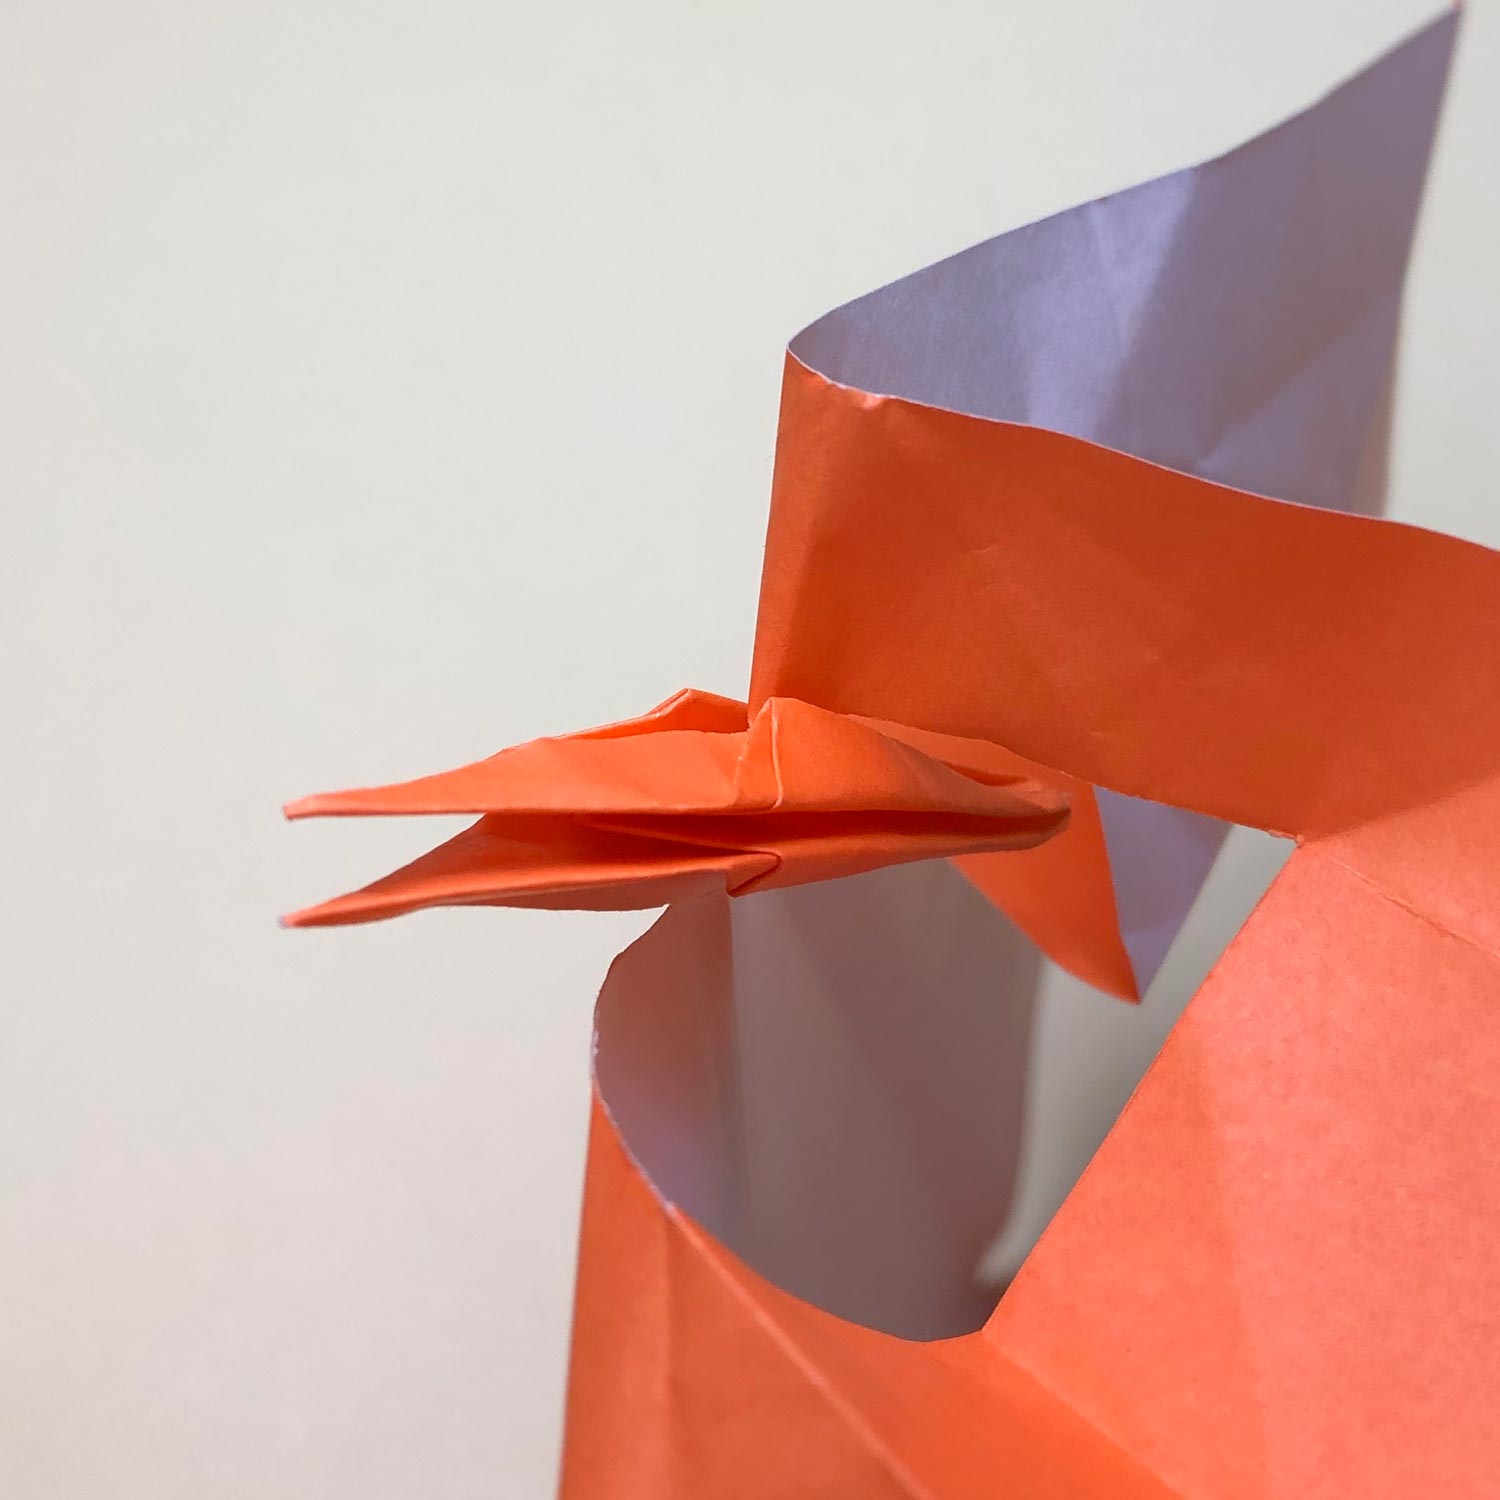
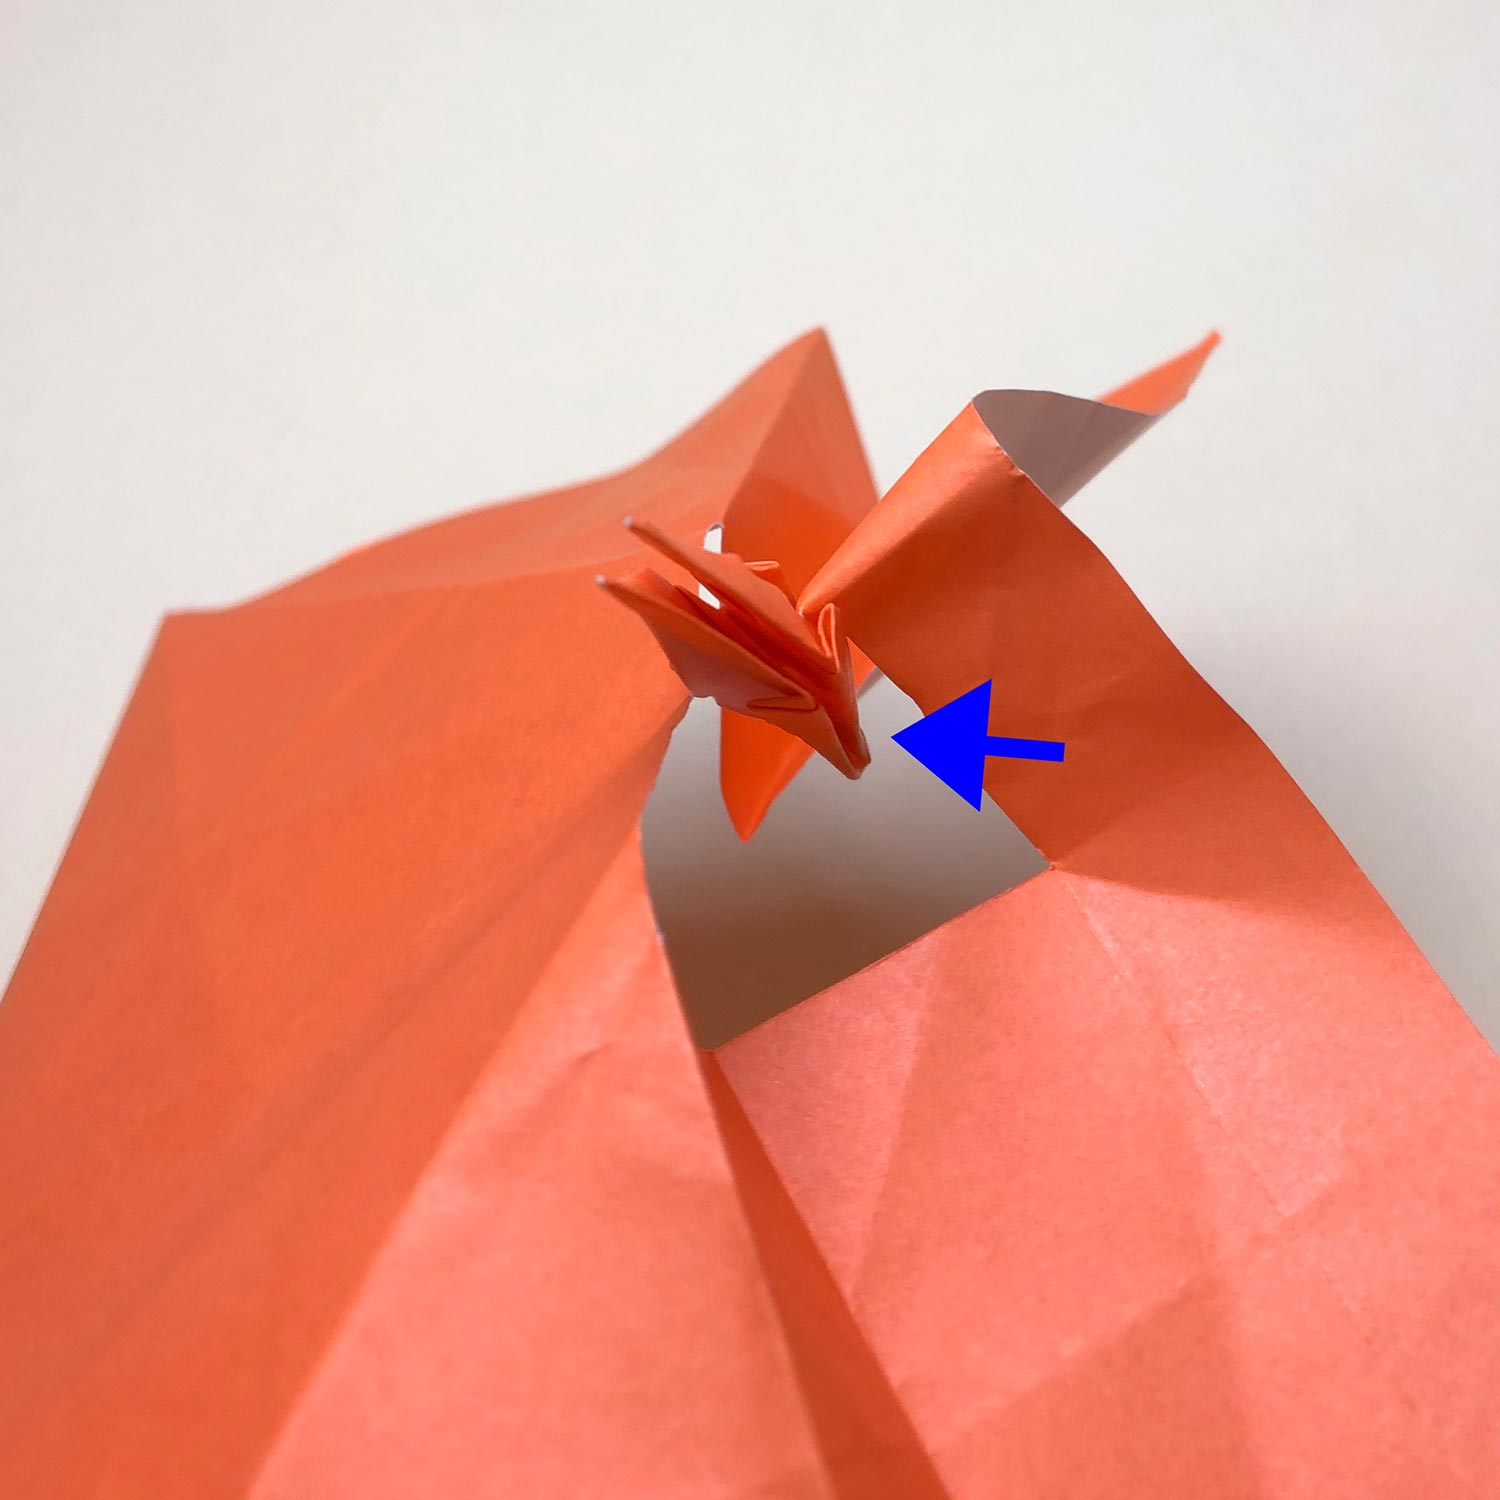
Then raise the head/tail which is shown by the arrow first while referencing the next step.
(9)
Although there are connecting parts on roots of two head/tail, raise a head/tail all the way as usual.
Also, raise a head/tail carefully so that connecting parts are not made a cut as much as possible.
(10)
After raising the head/tail, it looks like this picture.

(11)
Then raise the other head/tail as well.

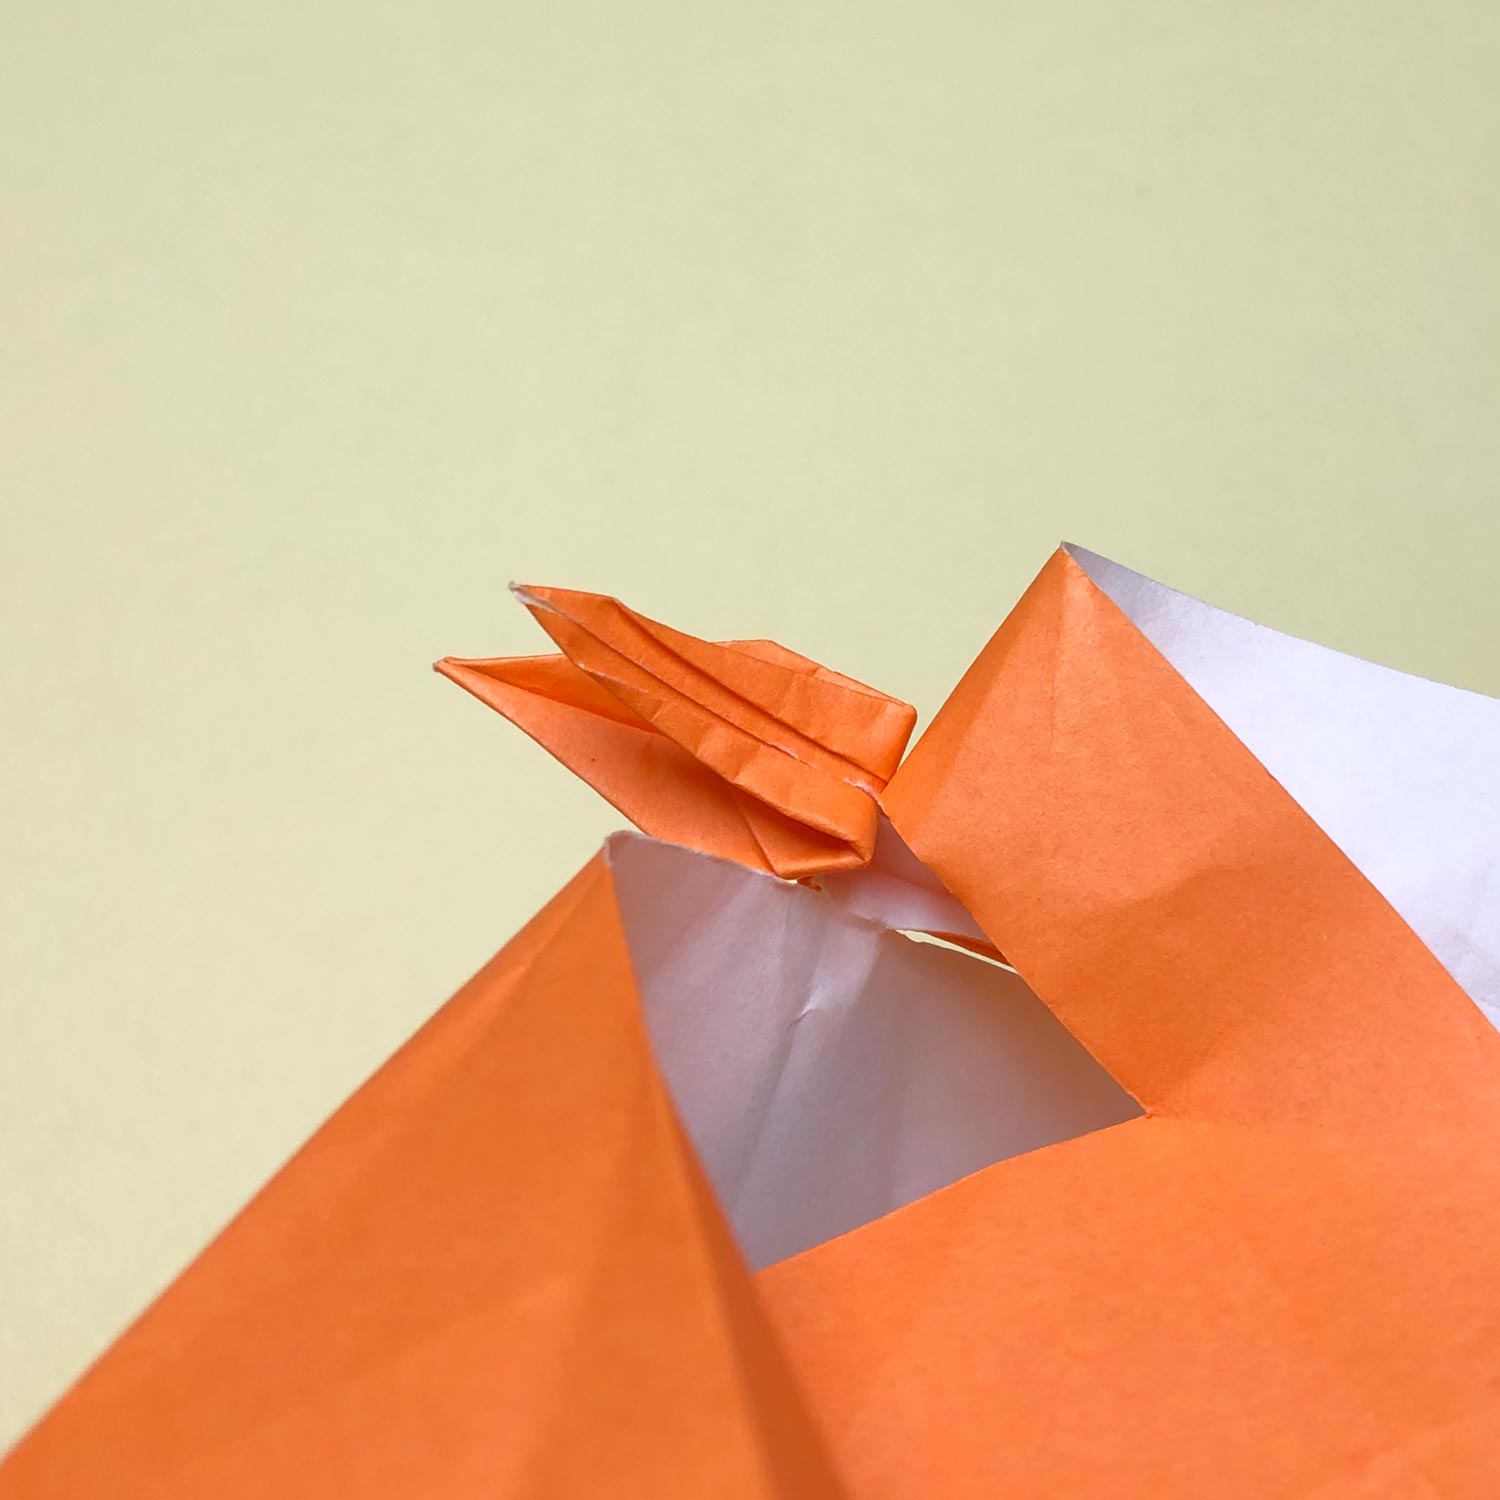
(12)
This picture is halfway through.
Raise the head/tail carefully so that connecting parts are not made a cut as much as possible.
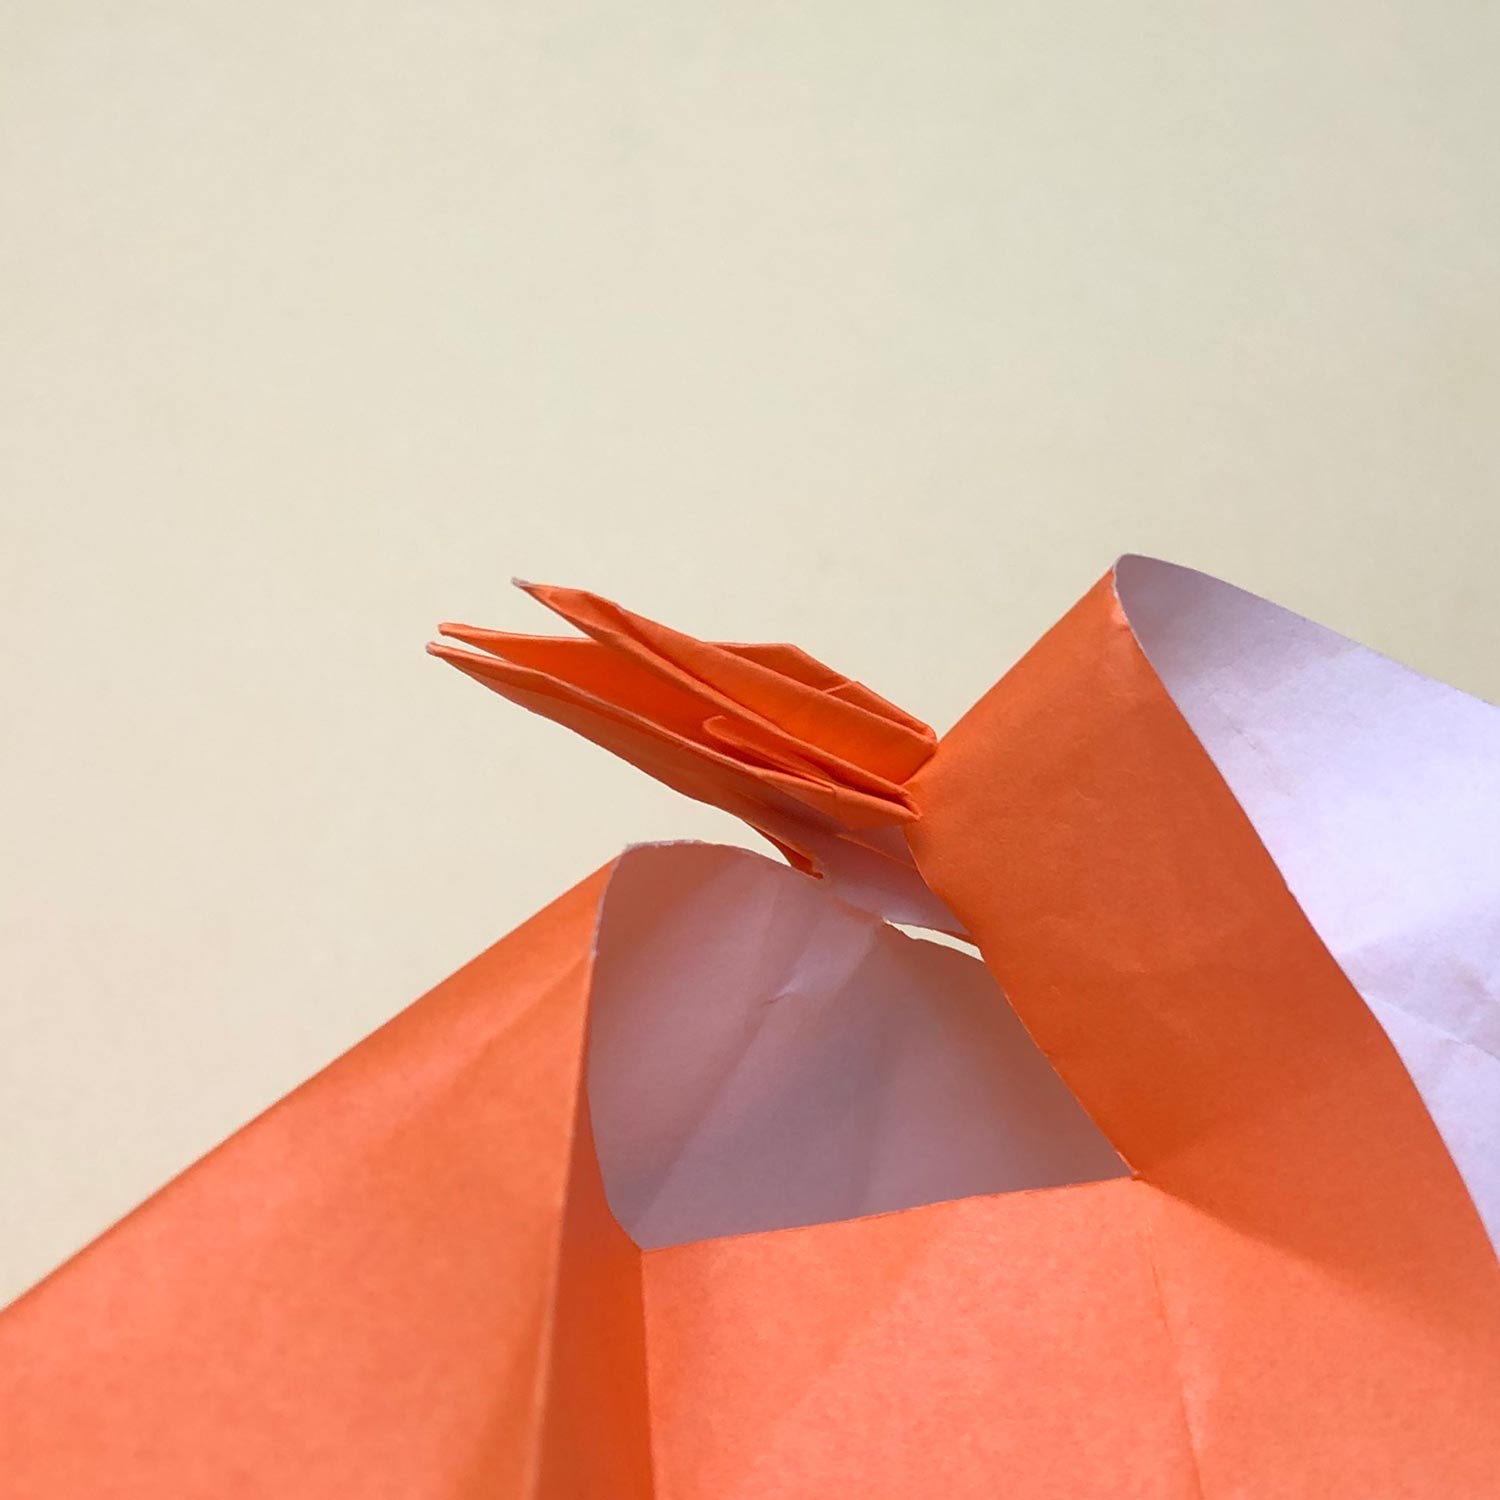
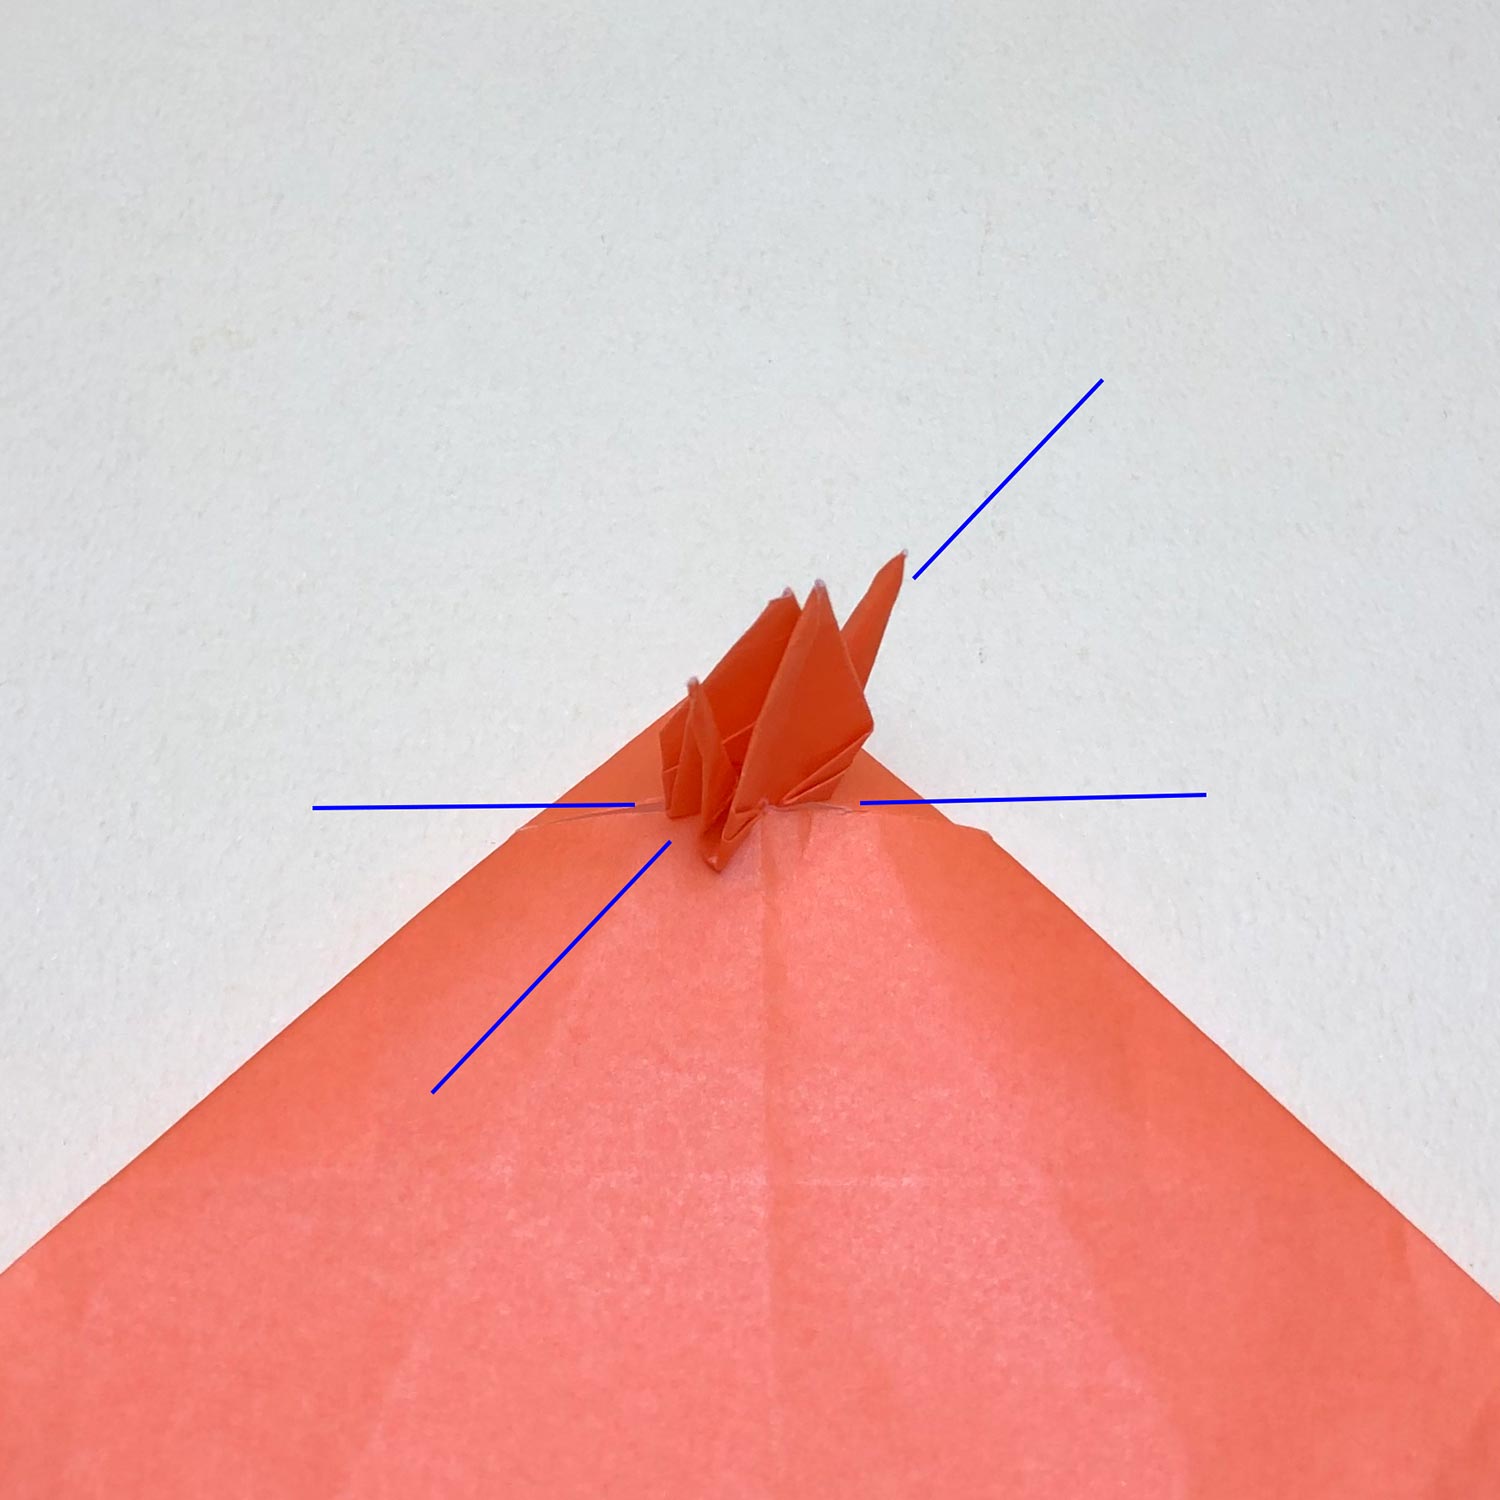
(13)
After raising the head/tail, it looks like this picture.
The small crane is finished.
(14)
Then fold the big square.
Fold four corners to the center point.
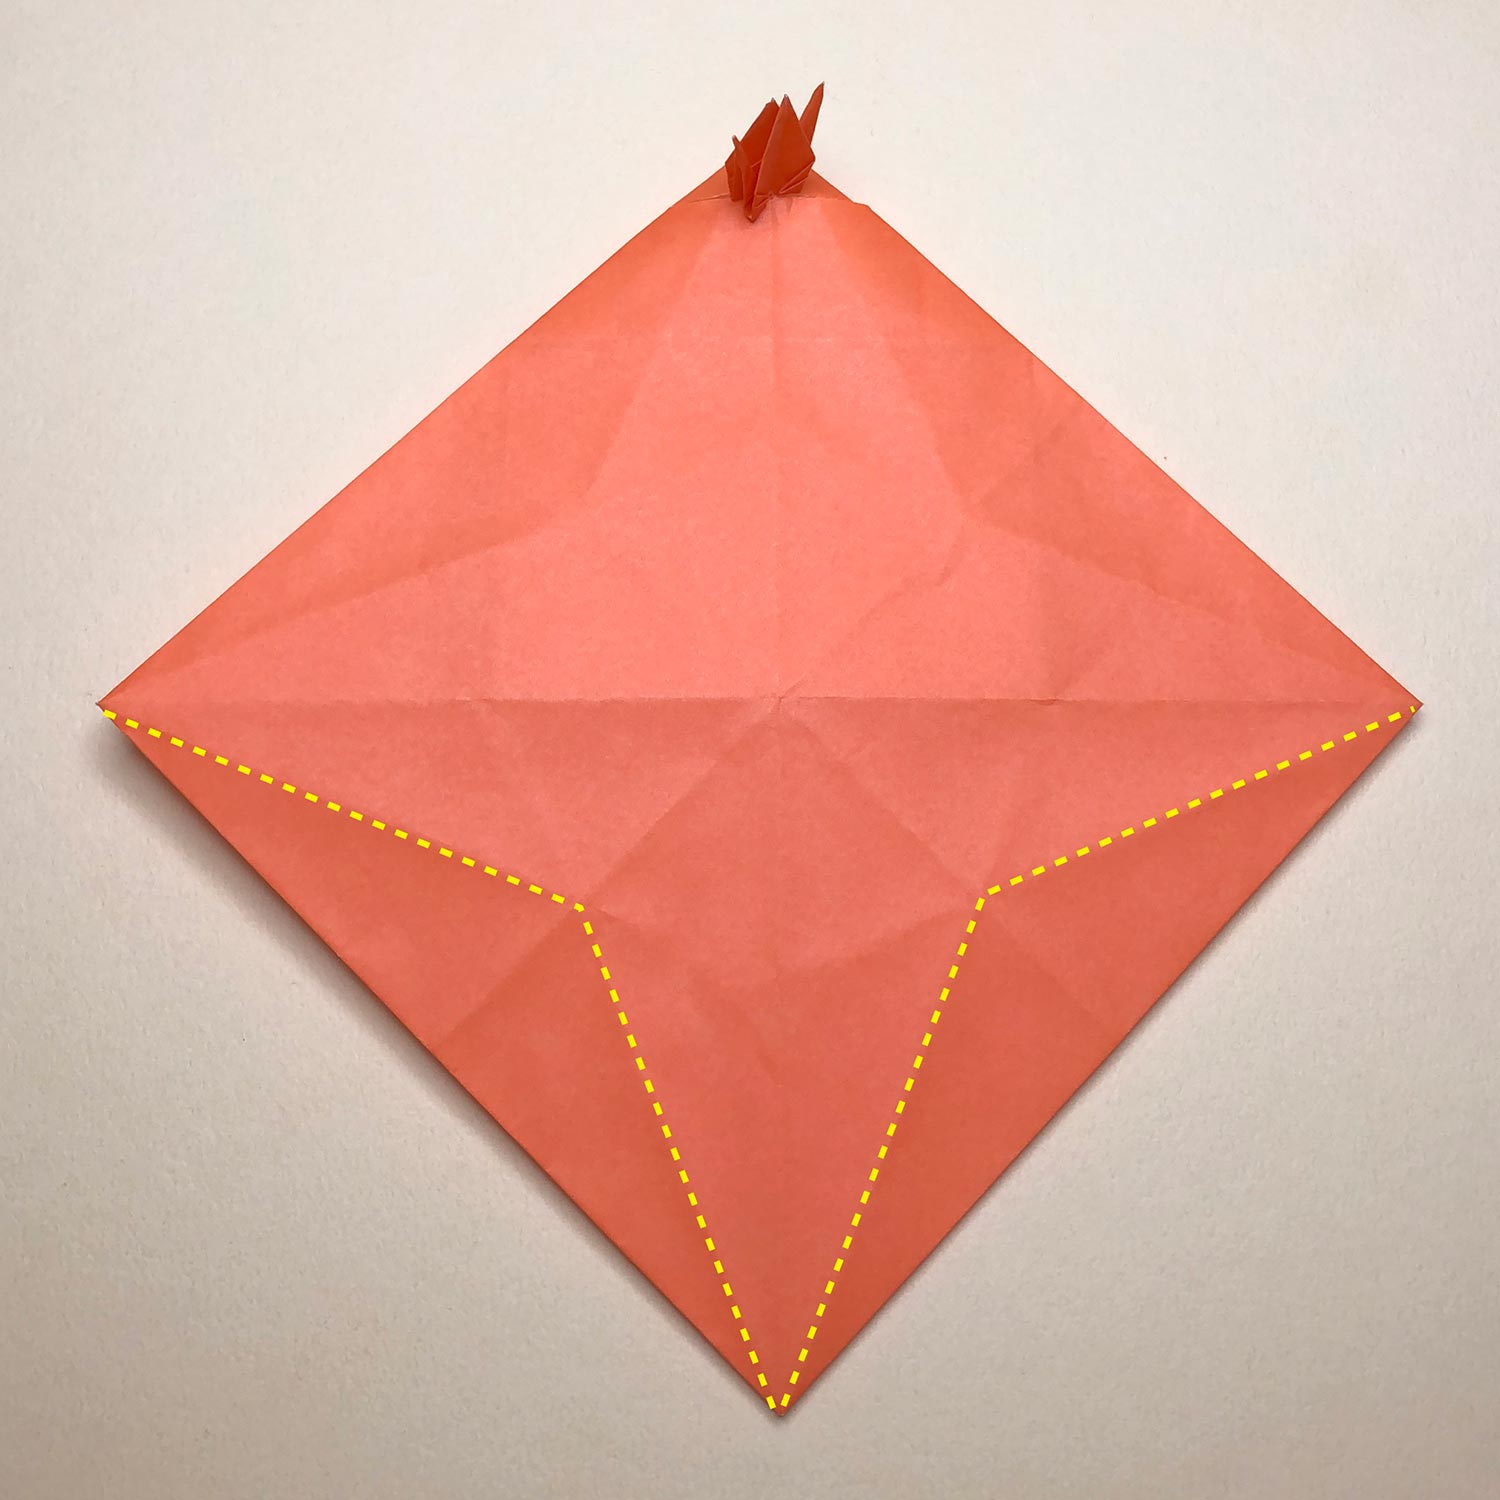
(15)
Fold the four corners to the center point like this picture.
Then turn the paper over as it is.
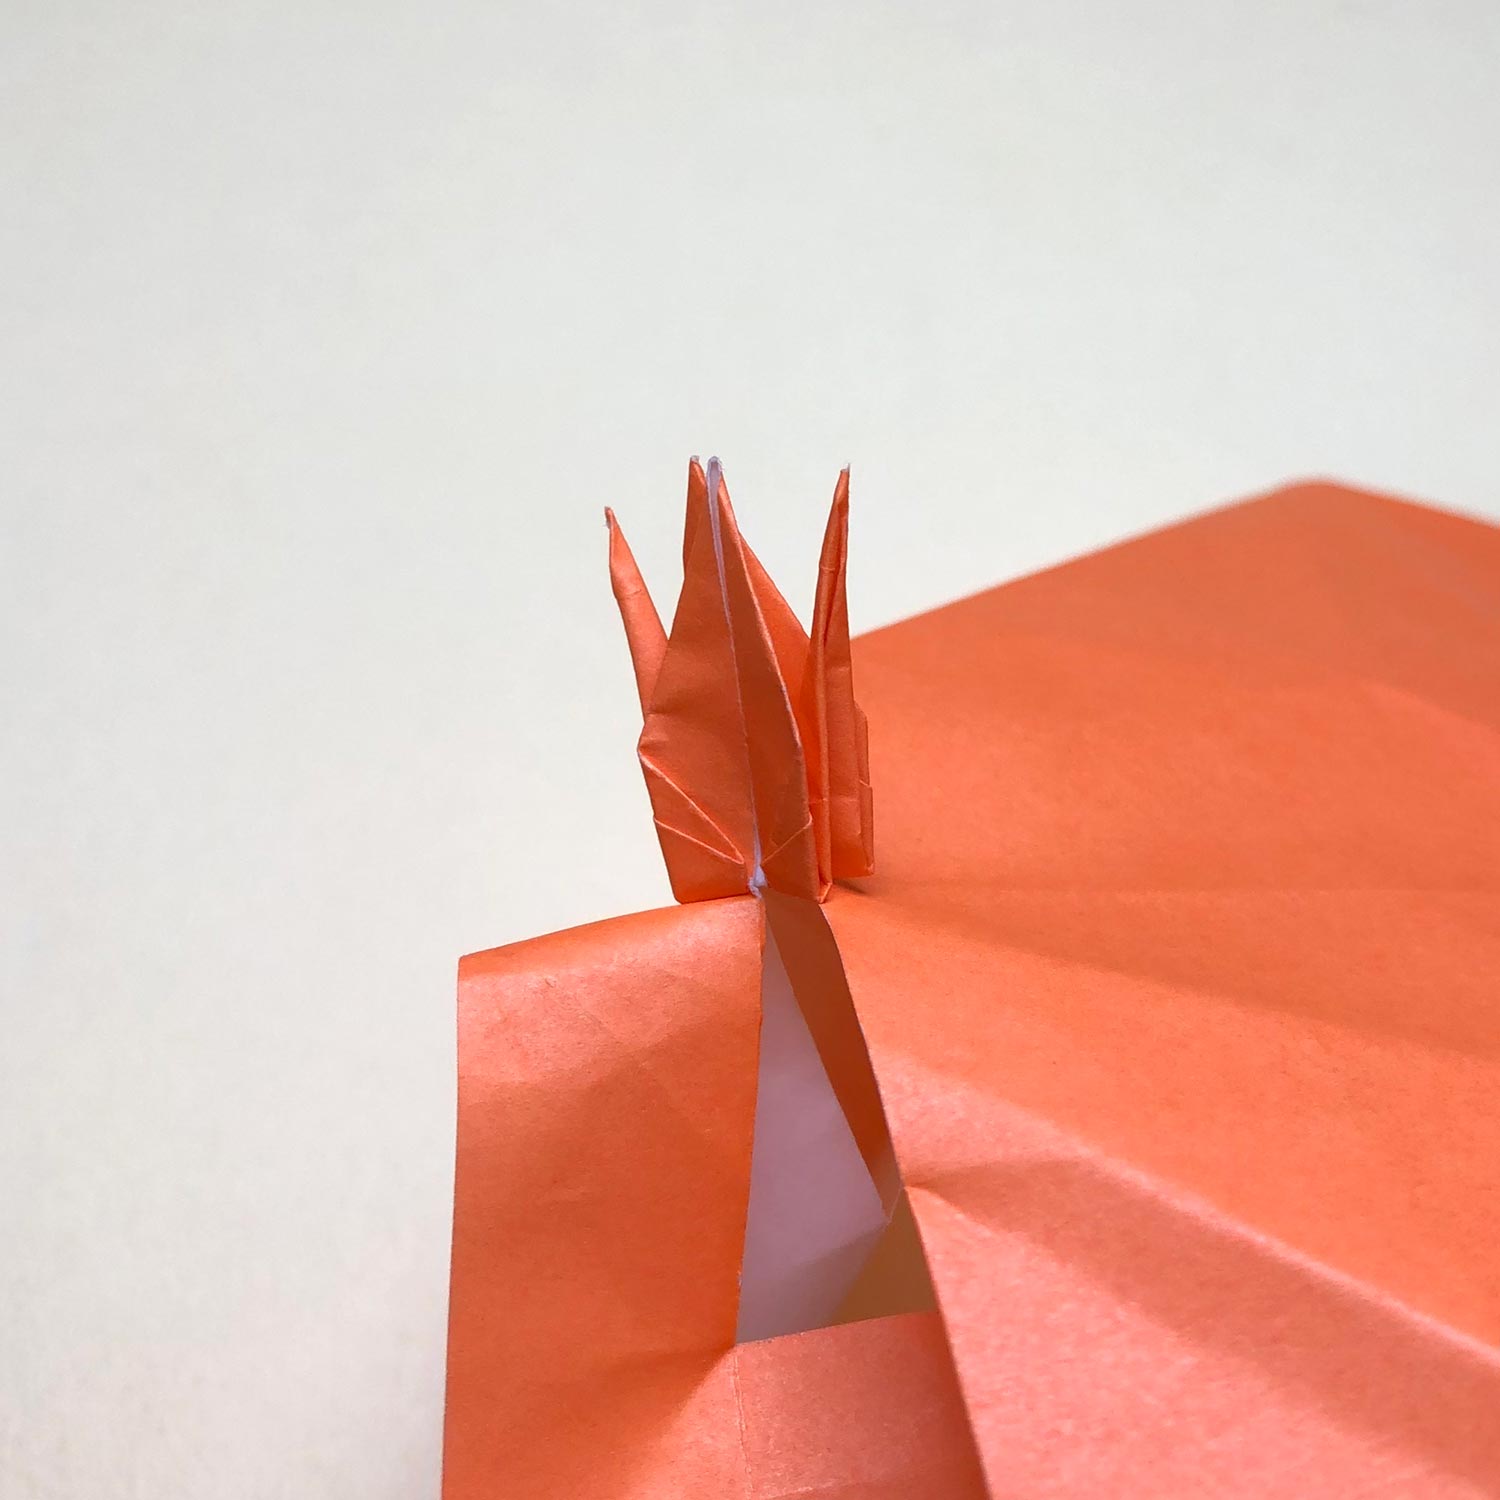
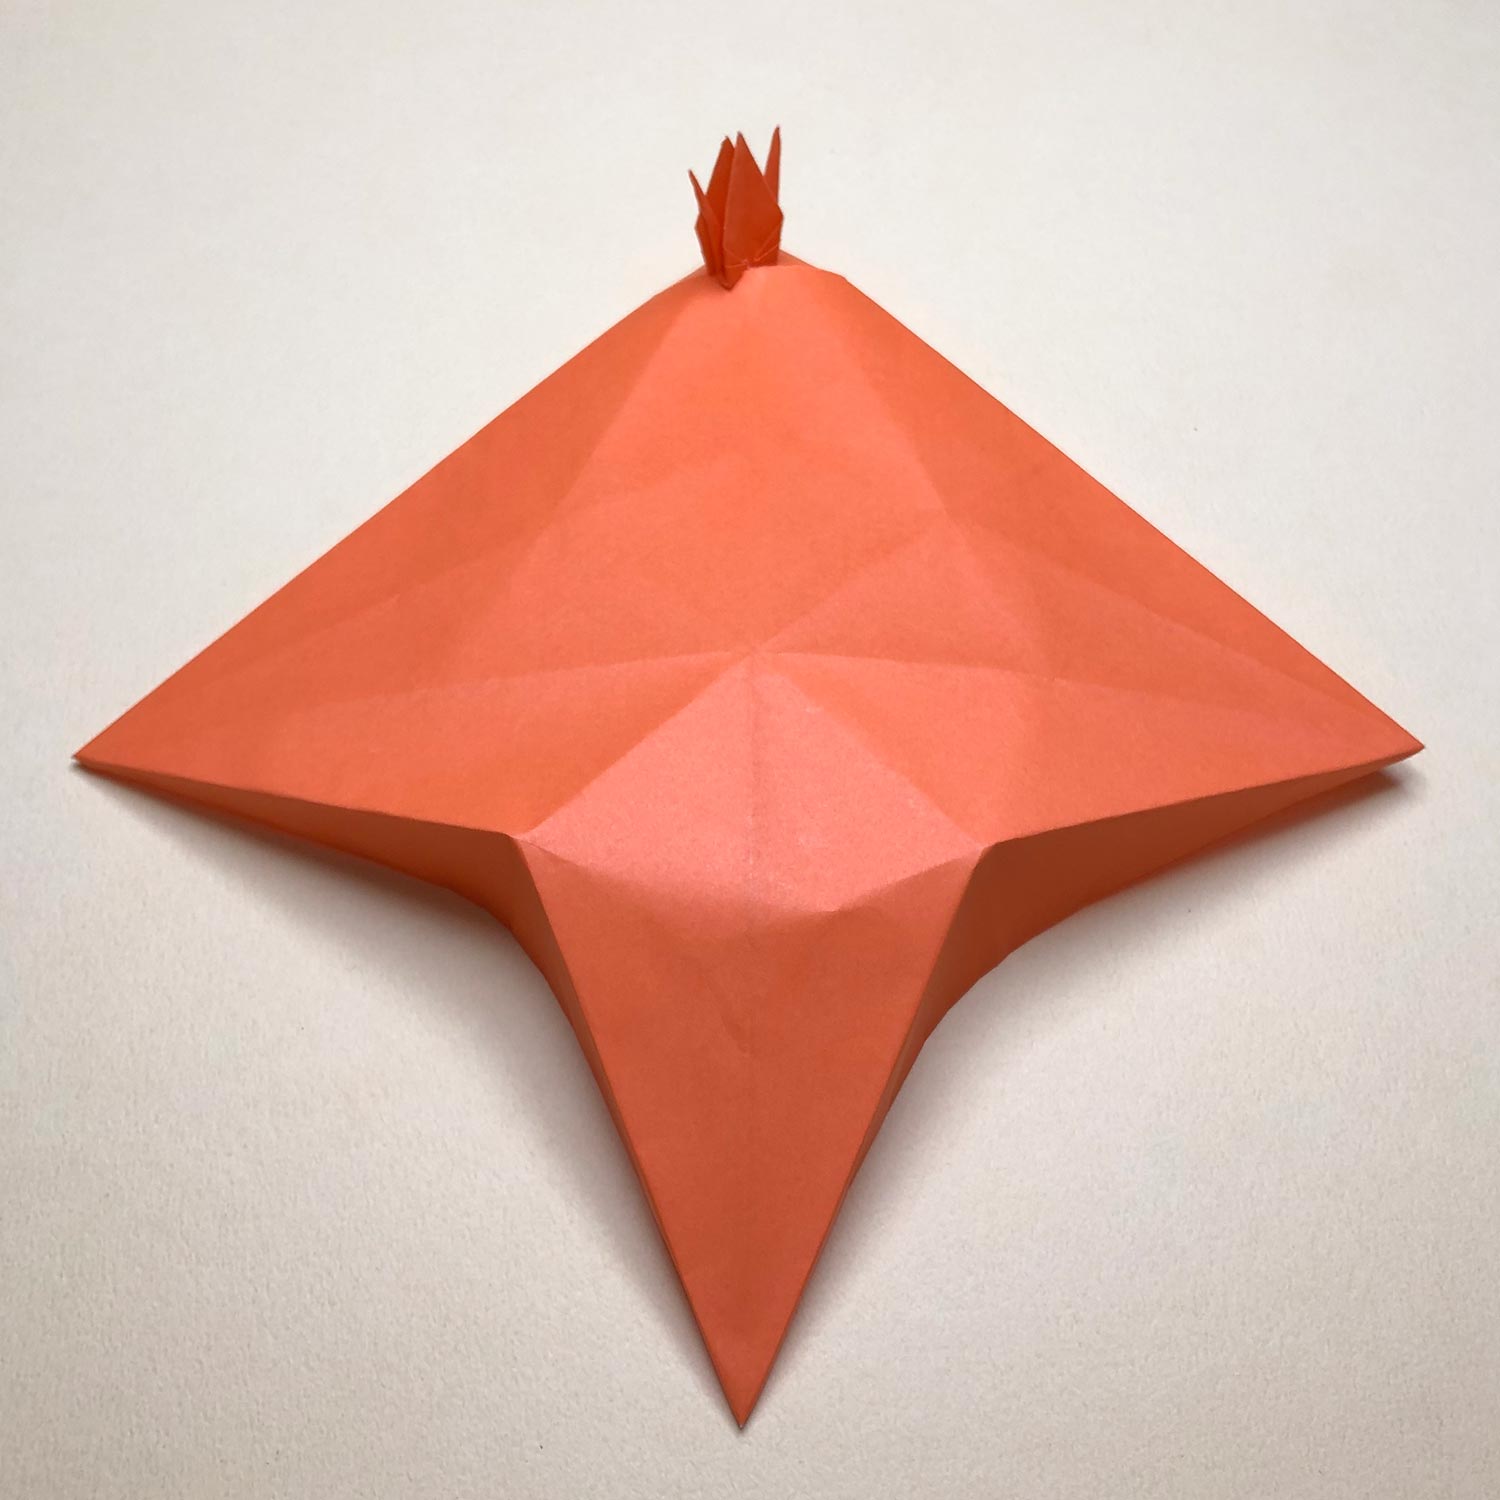
(16)
If you can raise two head/tail so that connecting parts are not made a cut much, a small crane will face at 45 degrees.
(17)
Then make mountain-folds on the dotted lines.
(18)
Make mountain-folds like this picture.
Then make mountain-folds on the other four creases around to make a star-shape.
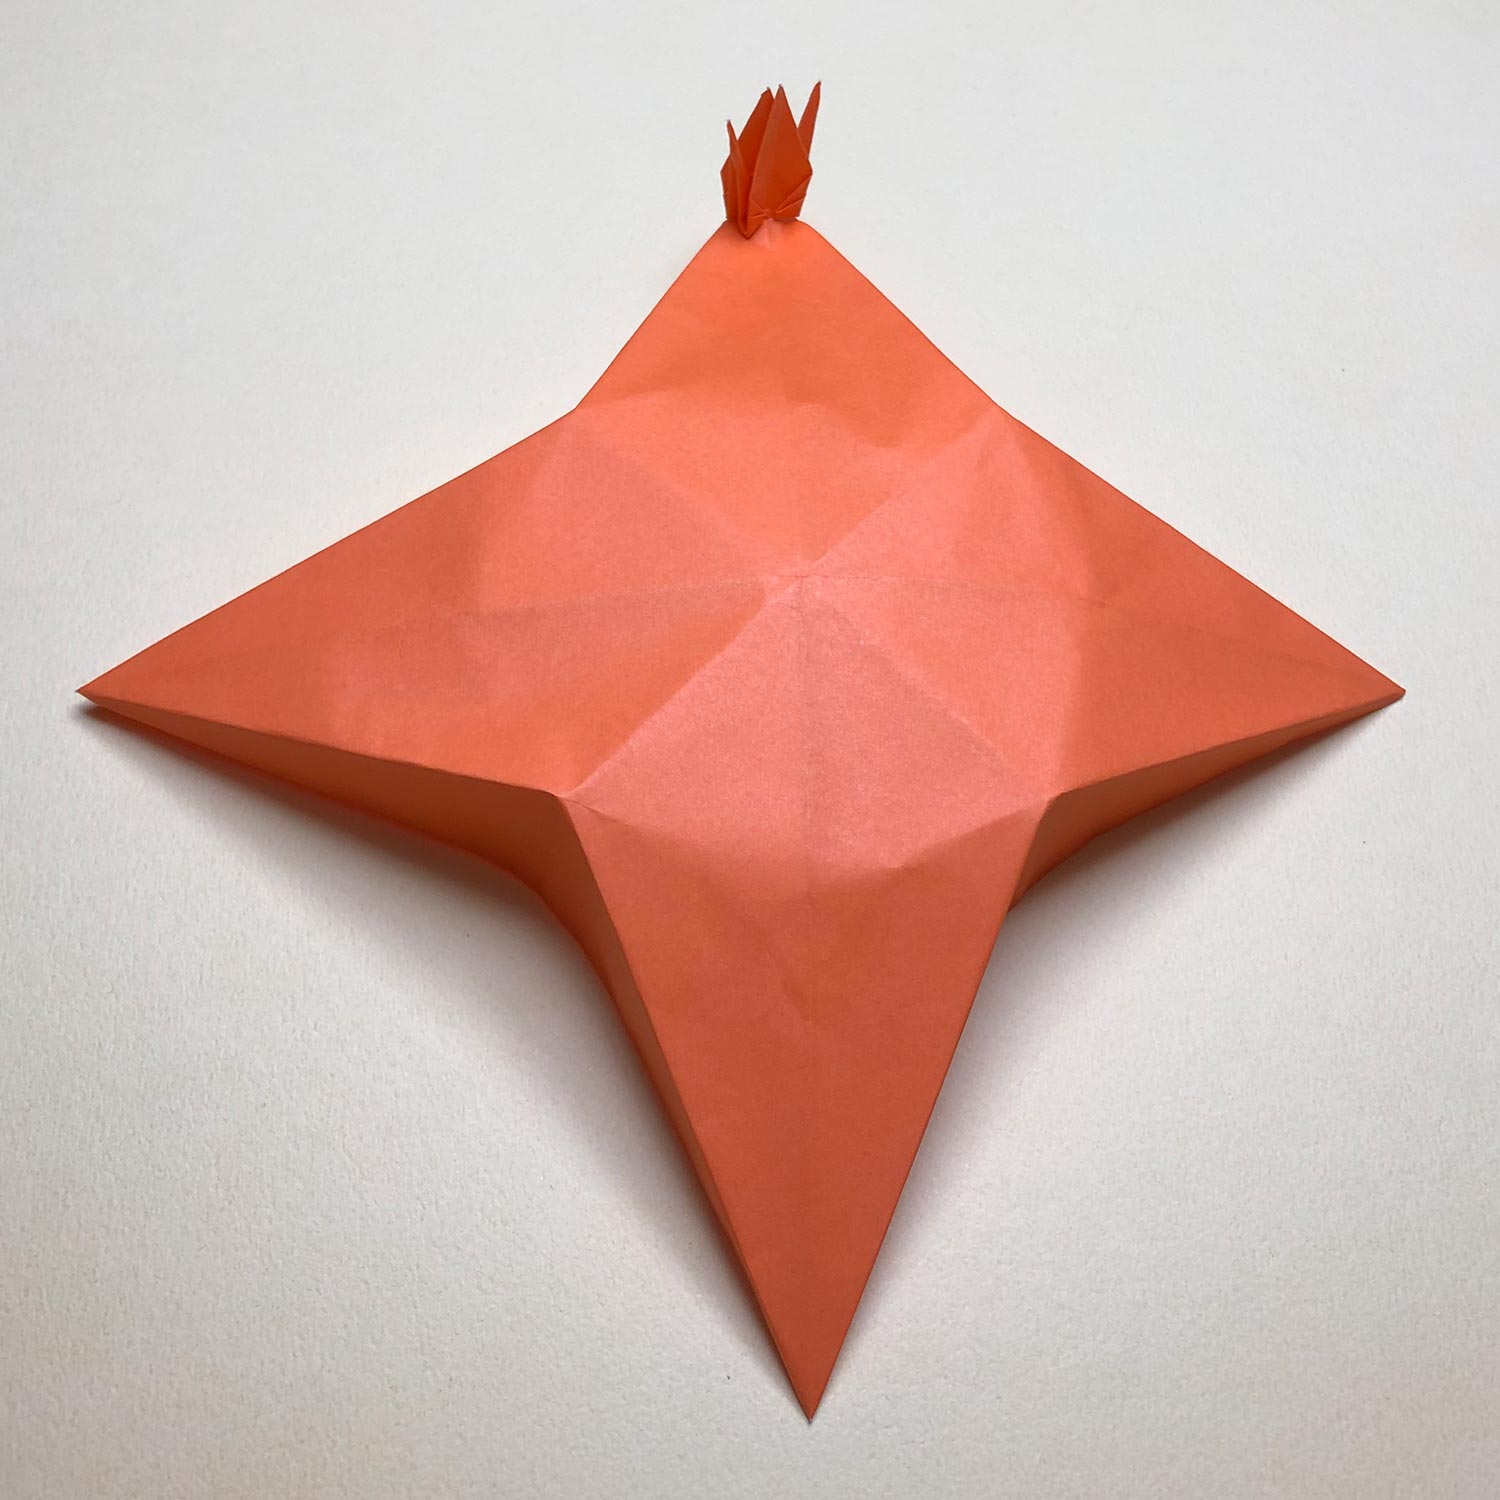
(19)
Make a star-shape like this picture.