(146)
Check that each part of a bird-base is put between wings of the cranes.
In the state of that, pinch the parts which are shown by the arrows to make creases.
(147)
Pinch the parts like this picture.
(148)
Then pinch the back of a bird-base to make creases.
(149)
After pinching the back, move both sides in the direction of the arrows.
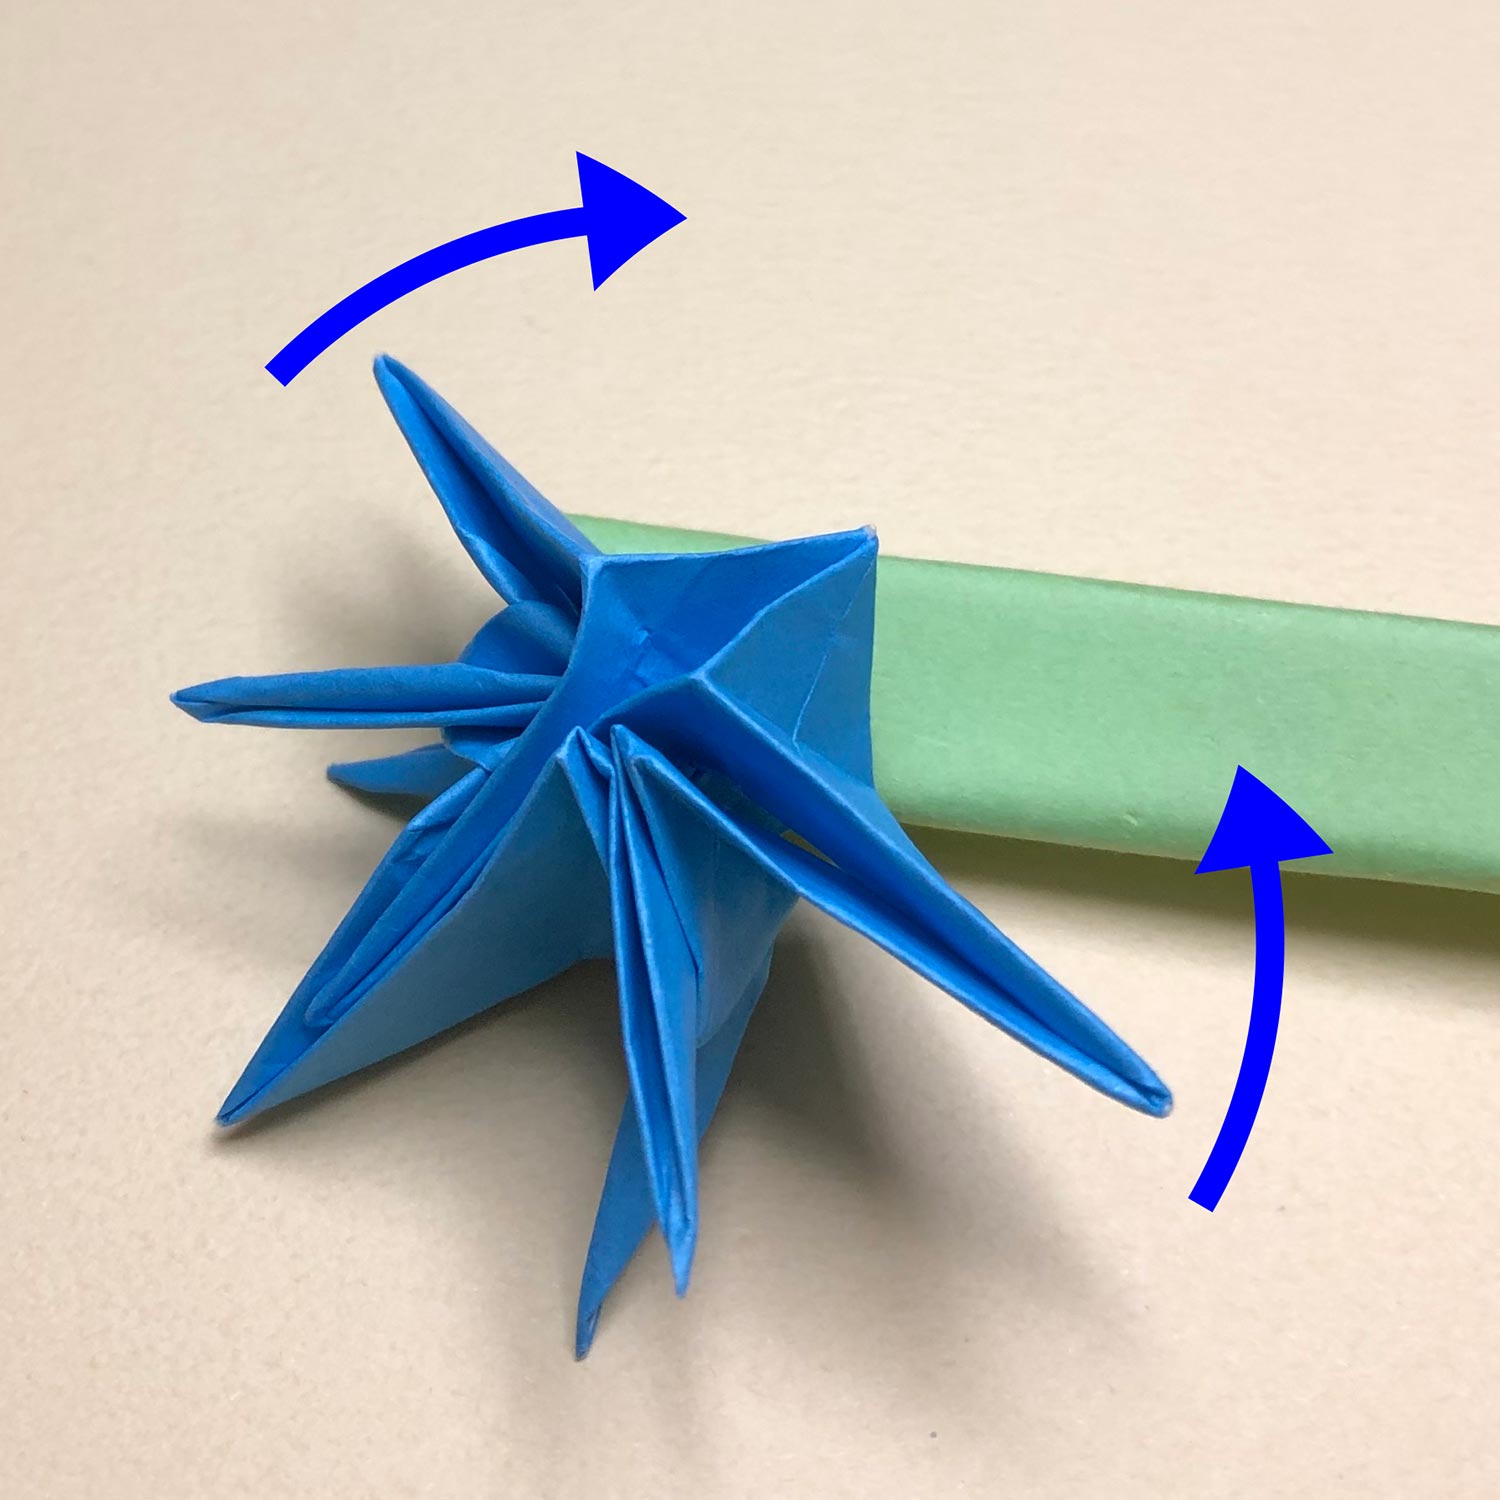
(150)
This picture is halfway through.
(151)
Move both sides like this picture.
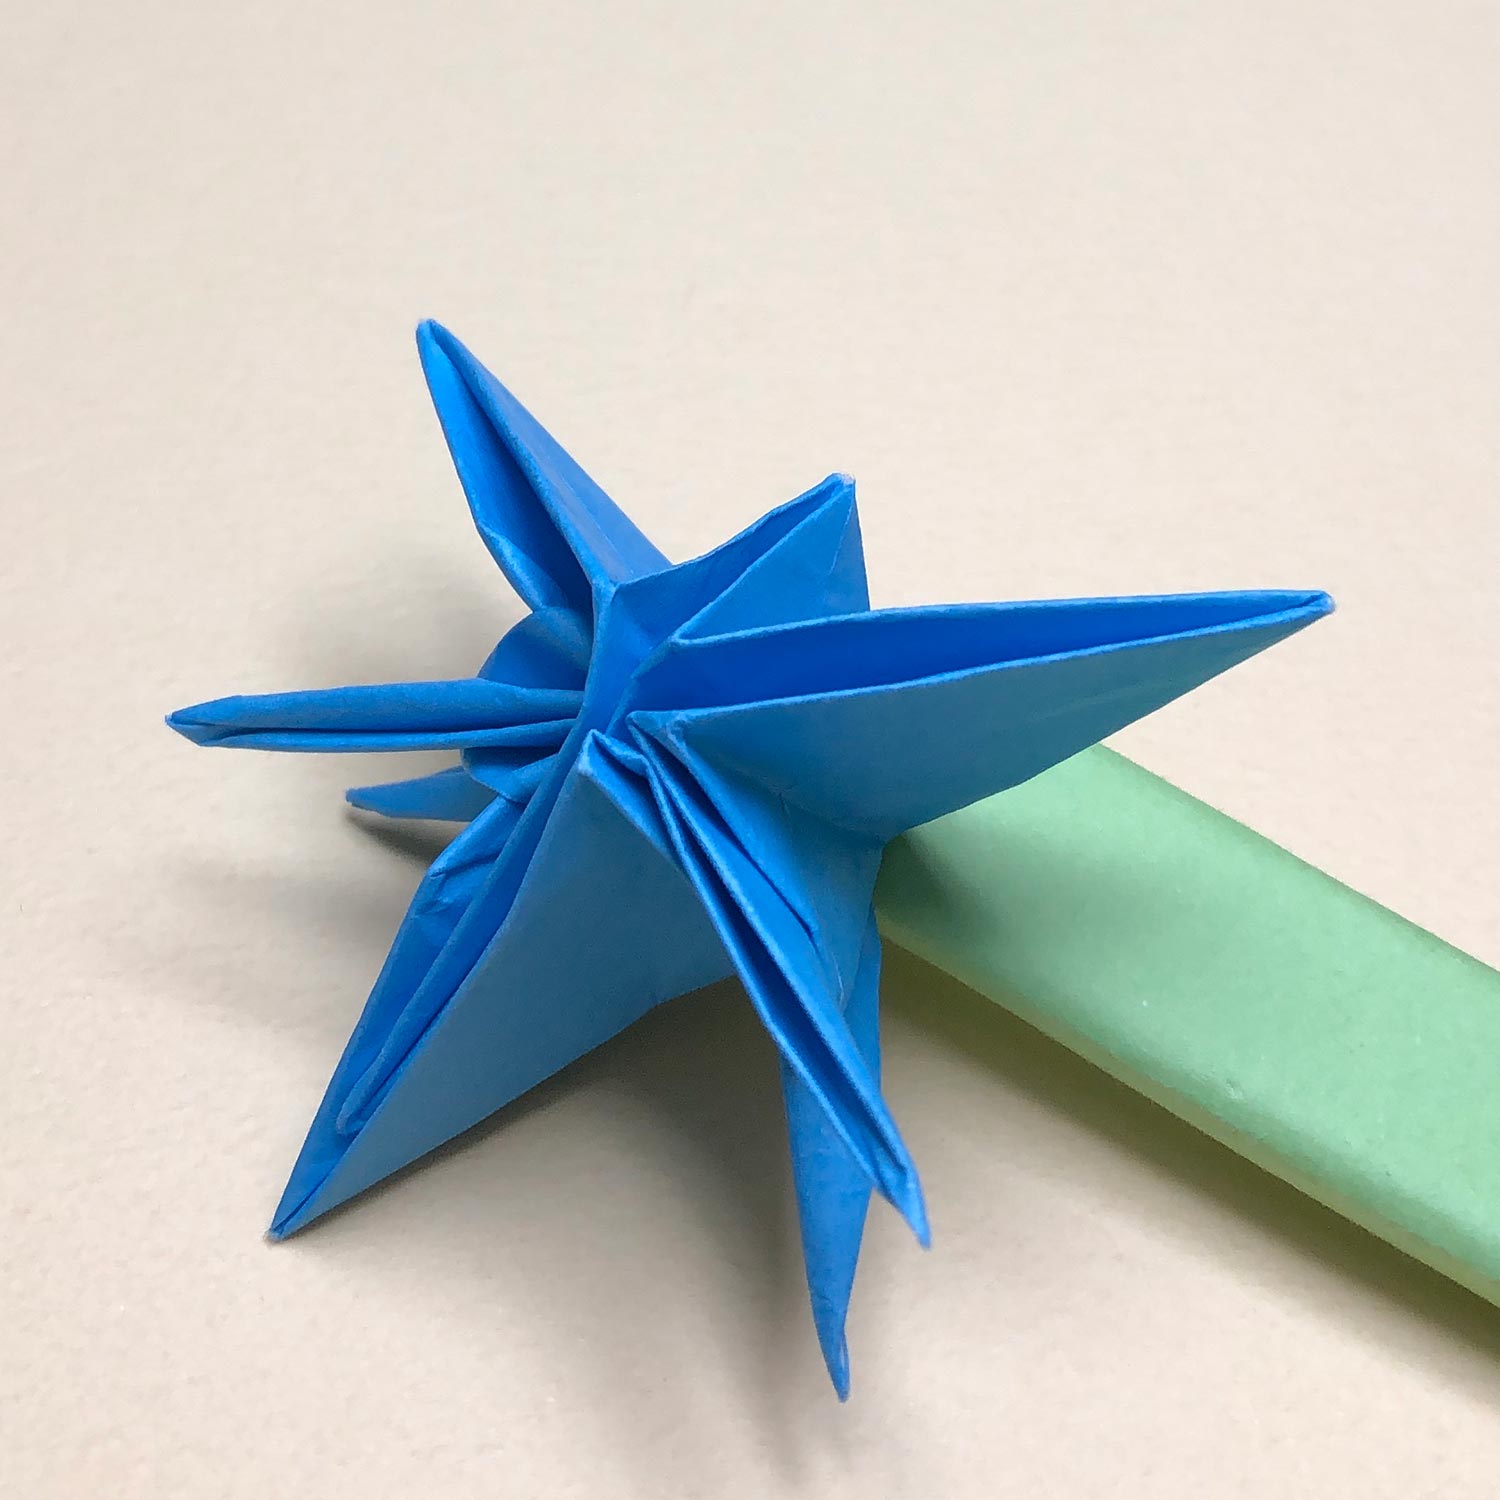
(152)
I rotated the paper.
First, fold the head/tail in the arrowed side to the center.
(The side is beside the completed crane)
(153)
Fold the head/tail in the side like this picture.
Then fold the head/tail in the other side to the center.
(154)
Fold the head/tail in the other side like this picture.
Then raise the head/tail carefully.
Because it is easy to put pressure on connecting parts.
(155)
Raise it like this picture.
(156)
On the opposite side, fold the head/tail to the center.
(Fold the head/tail in the side, which is beside the completed crane, to the center first and then fold the head/tail in the other side.)
(157)
After folding the head/tail, raise it.
(158)
Raise it like this picture.
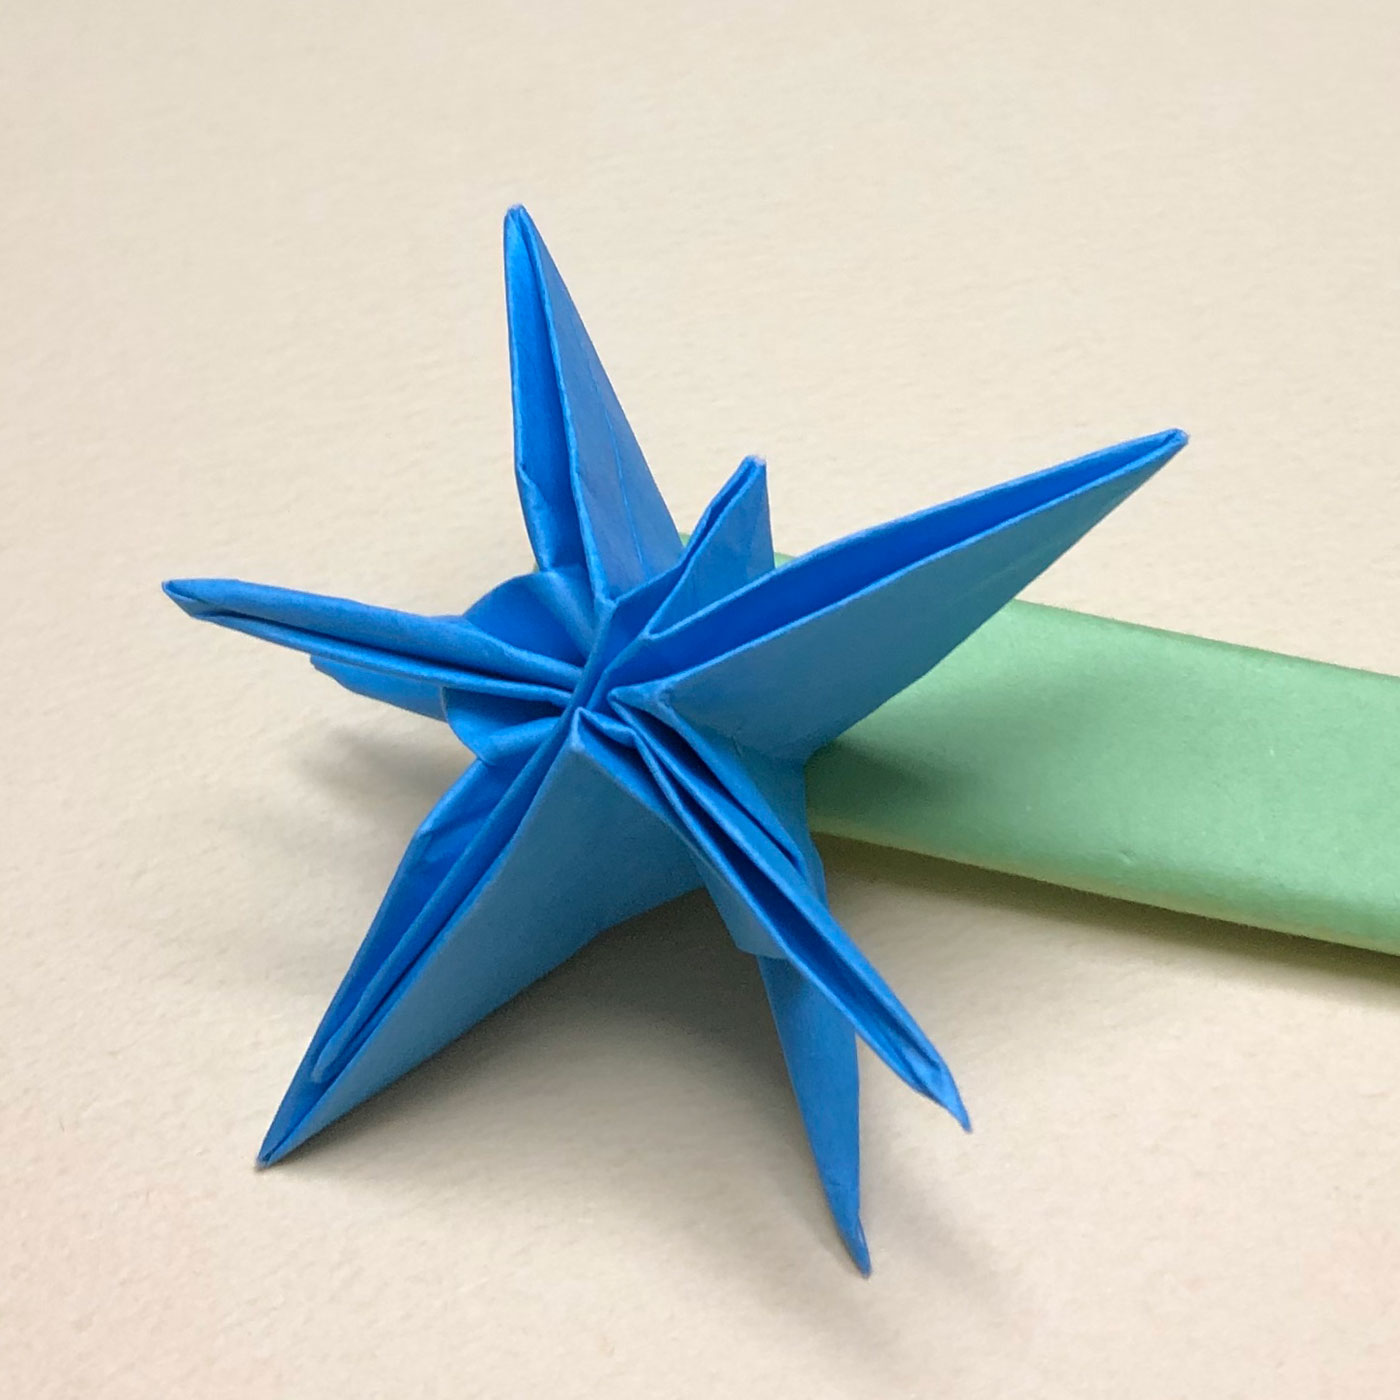
The second crane is finished.
(159)
I rotated the paper.
Complete the uncompleted crane.
Lower the head/tail between wings of the two cranes.
(160)
Lower the head/tail like this picture.
Then move both sides in the direction of the arrows.
Connecting parts tear easily.
Therefore, move them carefully.

(161)
Move them like this picture.
Then fold the head/tail to the center.
You would not be able to raise wings higher than when you make the second crane.
Therefore, fold the head/tail while making space well.

(162)
After folding the head/tail, raise it.
It is easier to put pressure on connecting parts than when you make the second crane.
Therefore, raise it carefully.
(163)
Raise it like this picture.
Then turn the paper over.
(164)
After turning the paper over, lower the head/tail between wings of the two cranes.
(165)
Lower the head/tail like this picture.
Then fold the head/tail to the center.

(166)
After folding the head/tail, raise it.
(167)
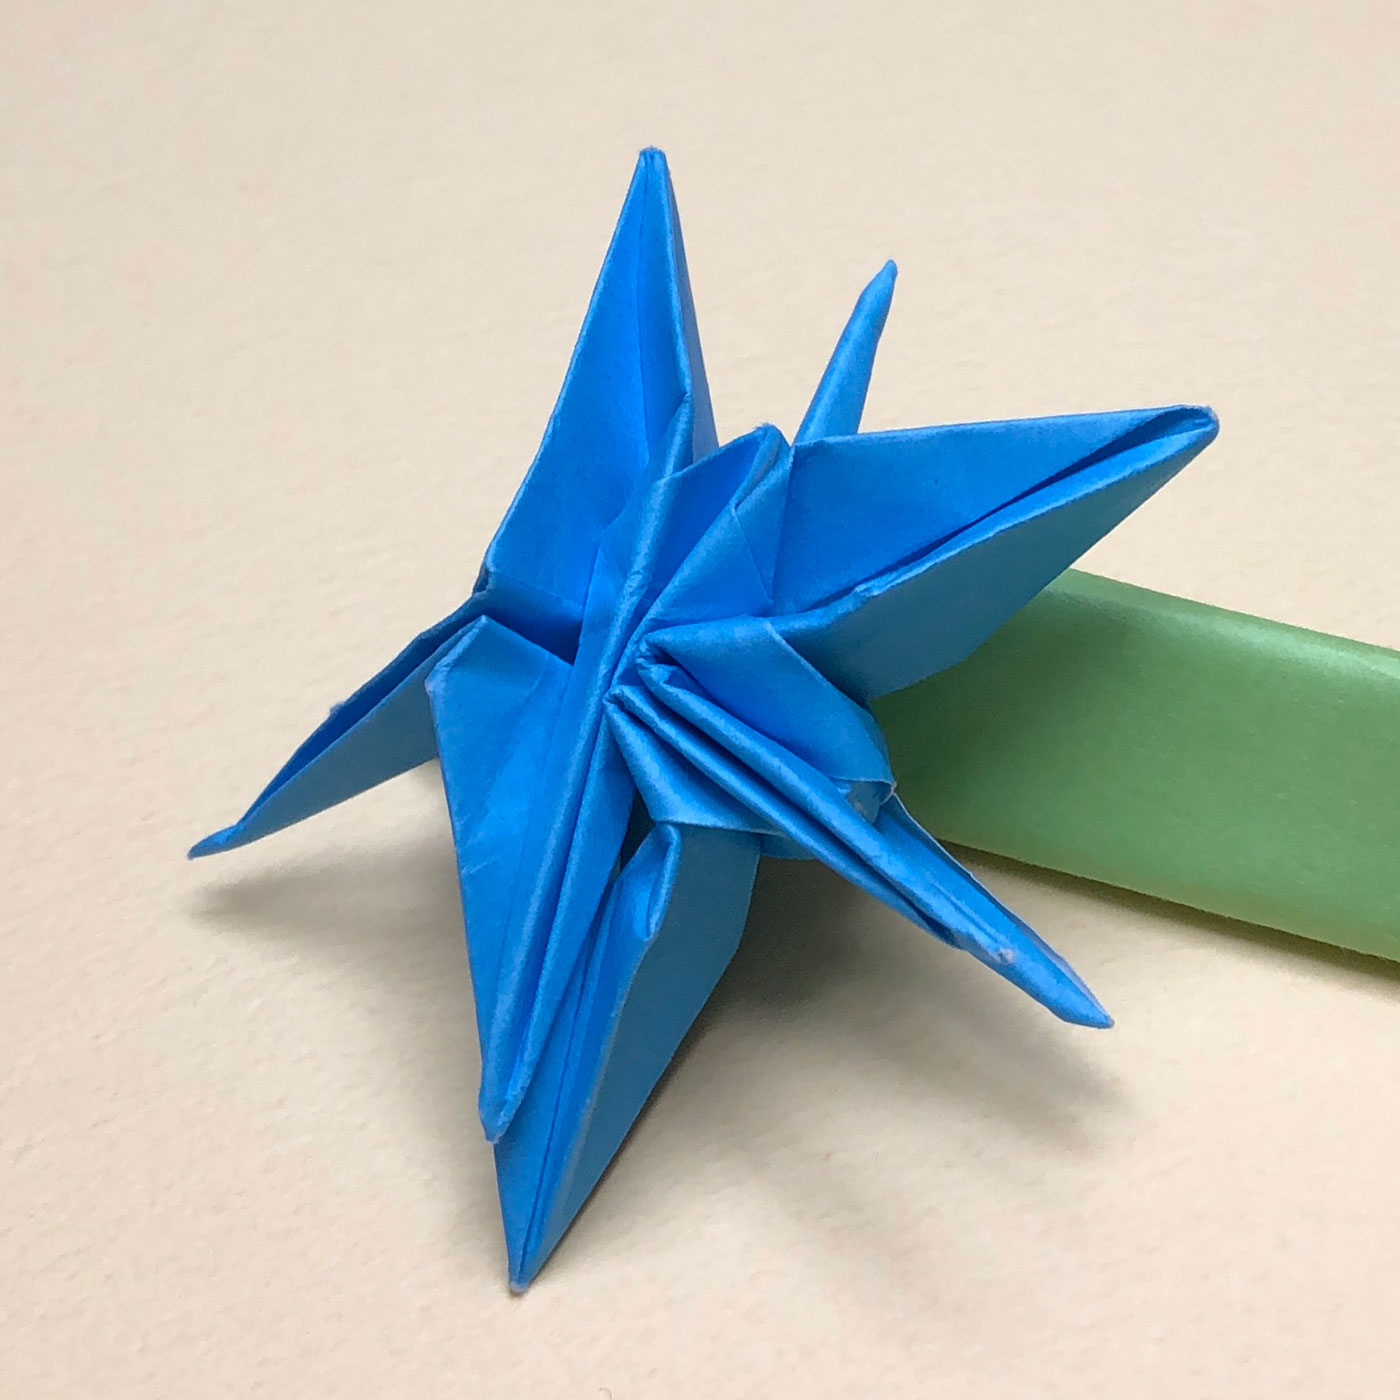
Raise it like this picture.
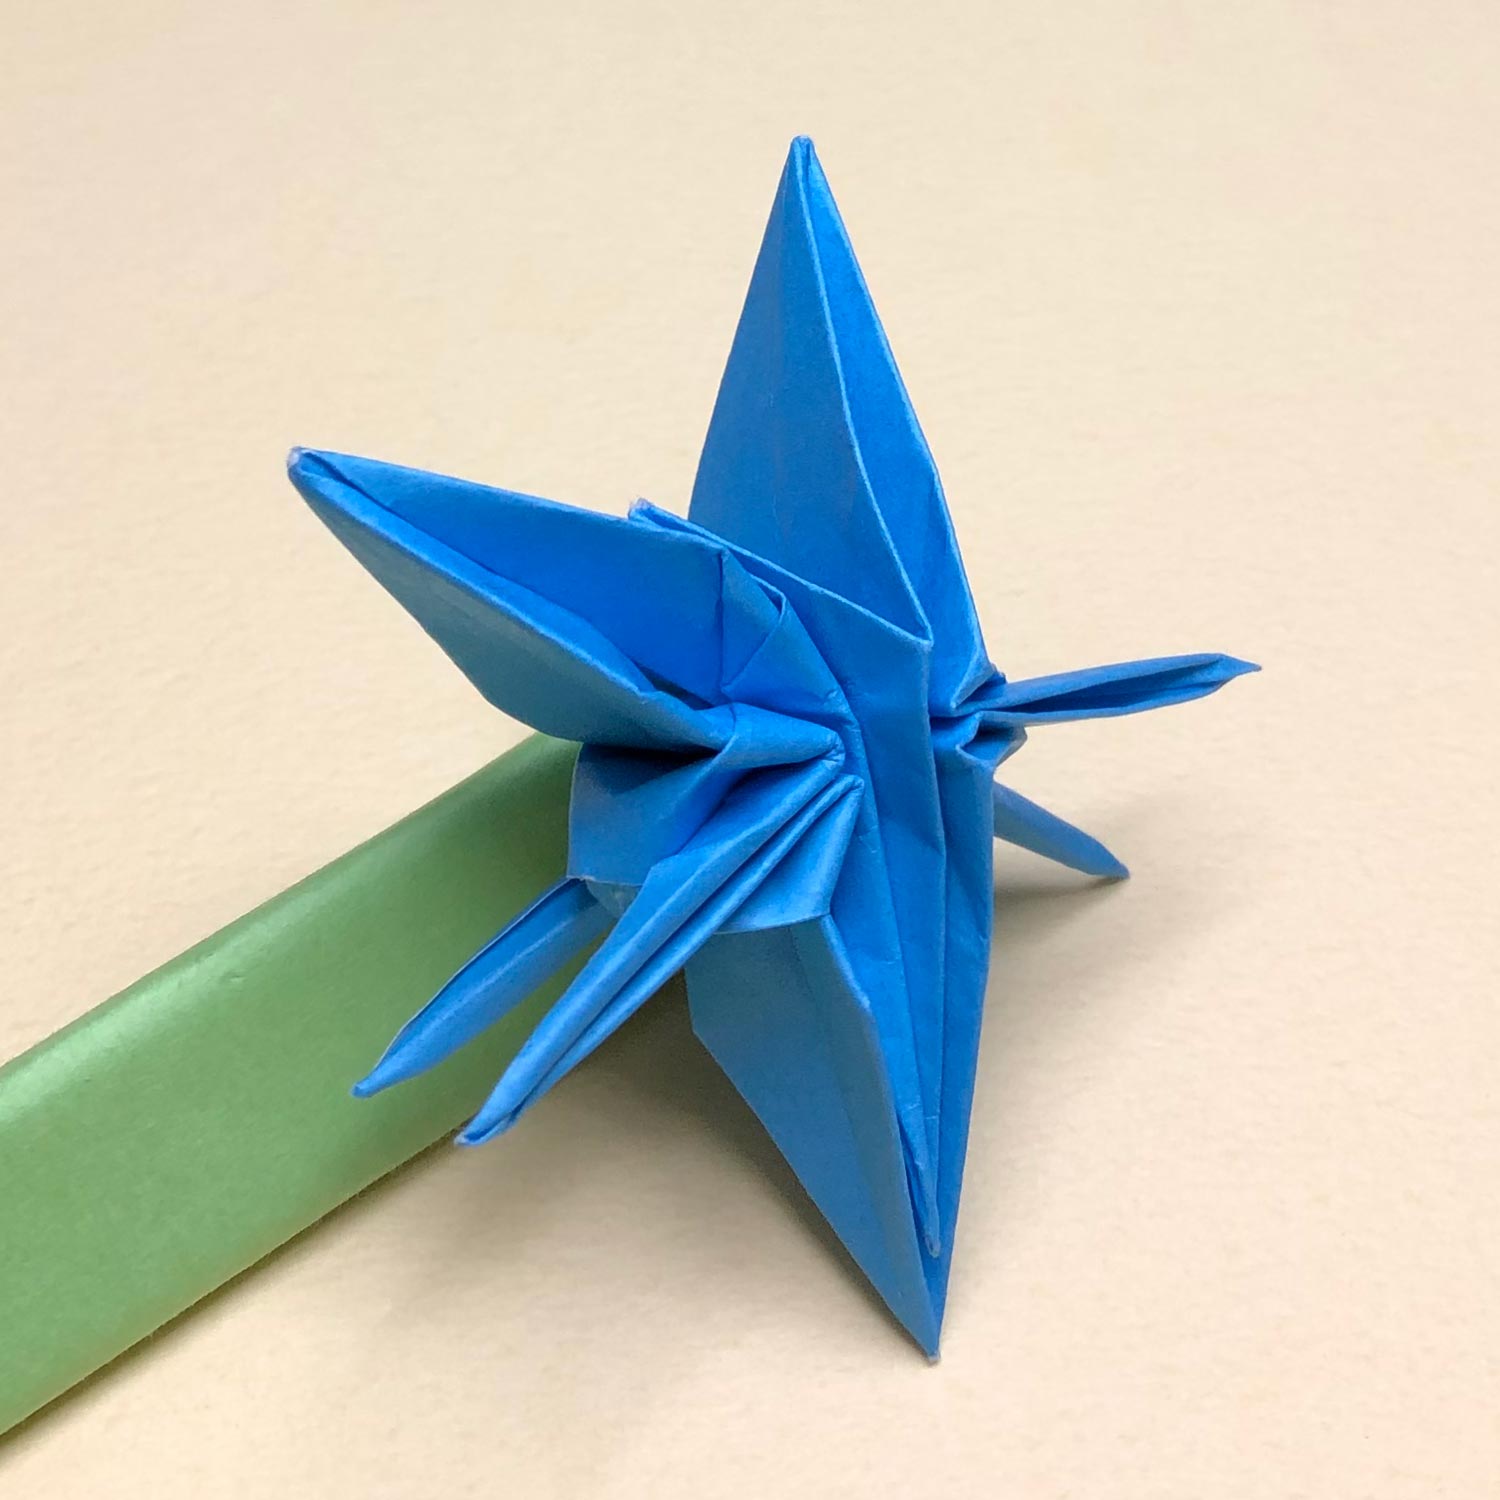
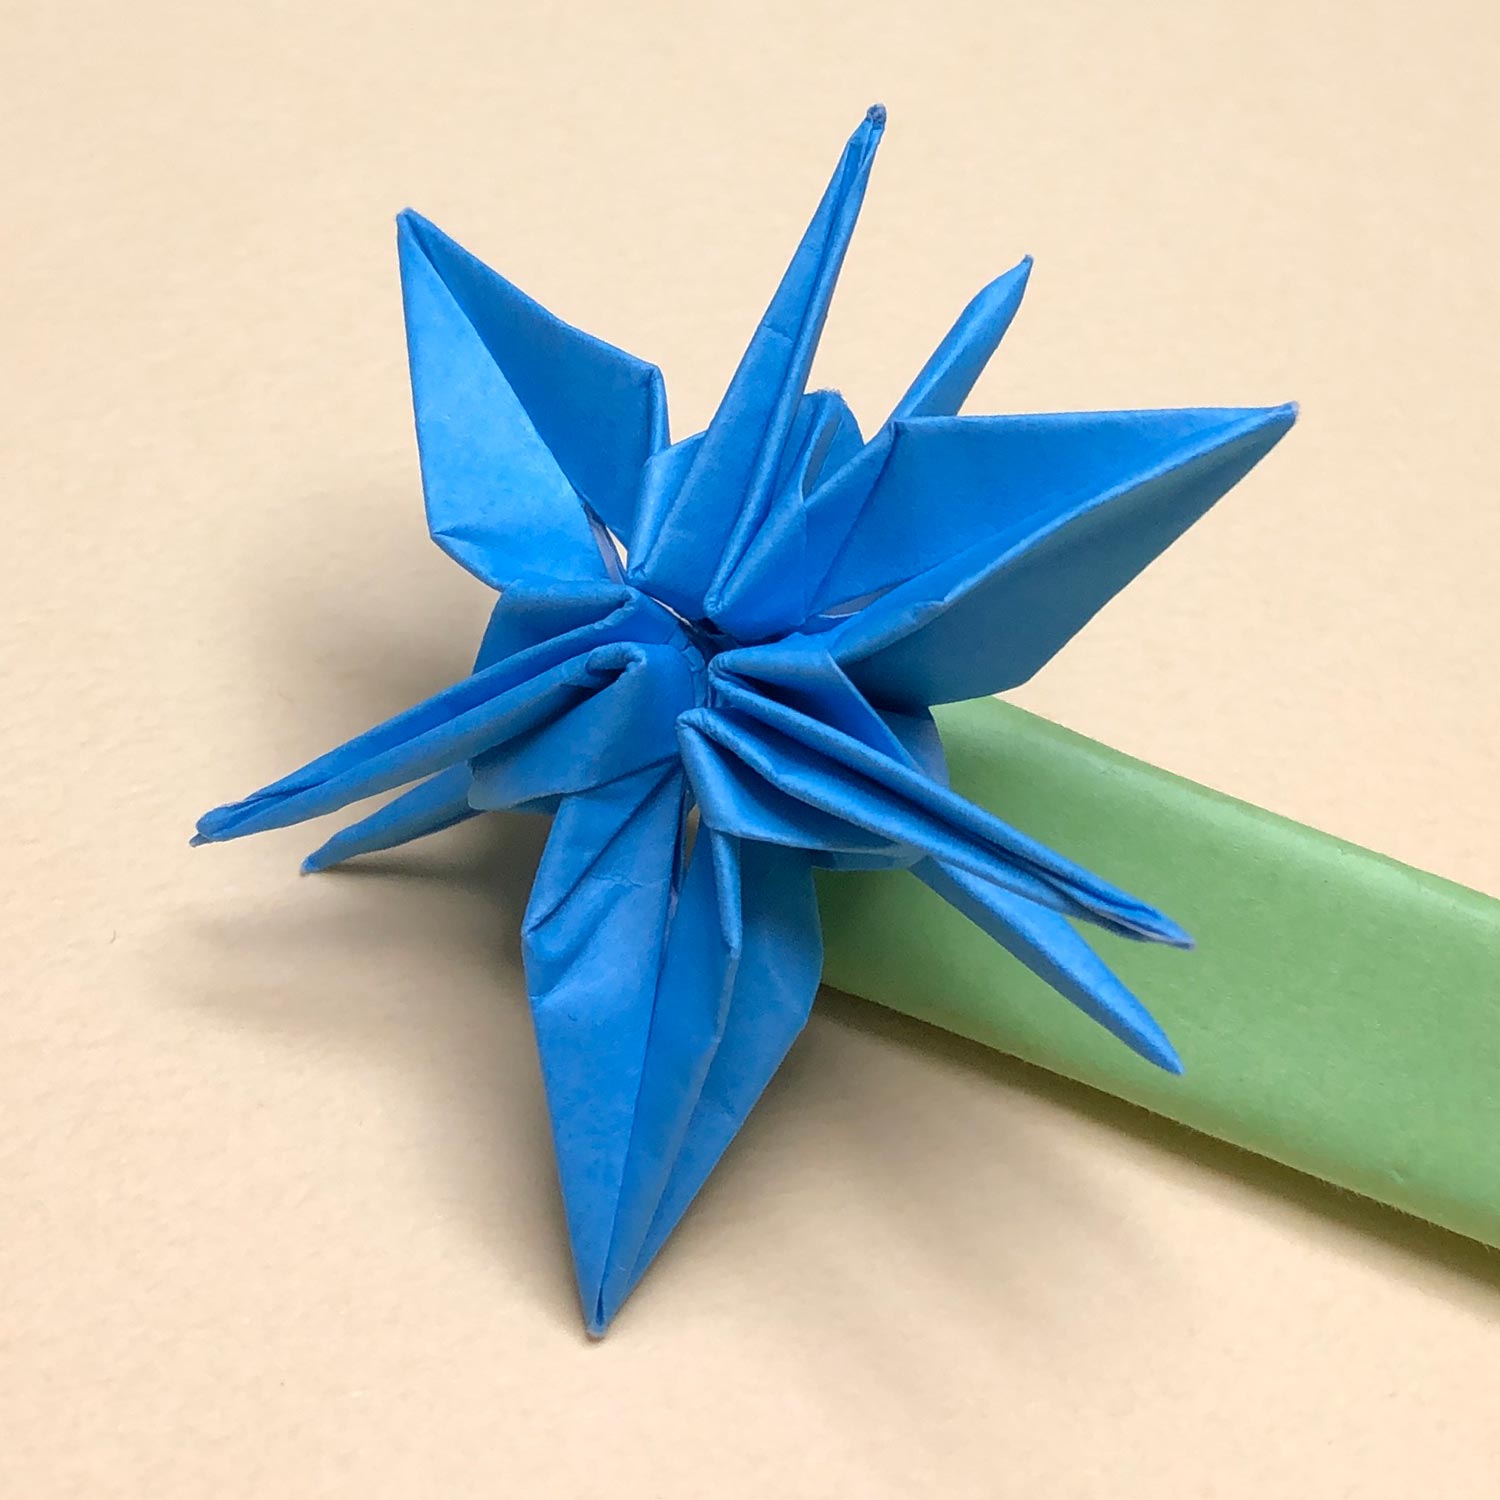
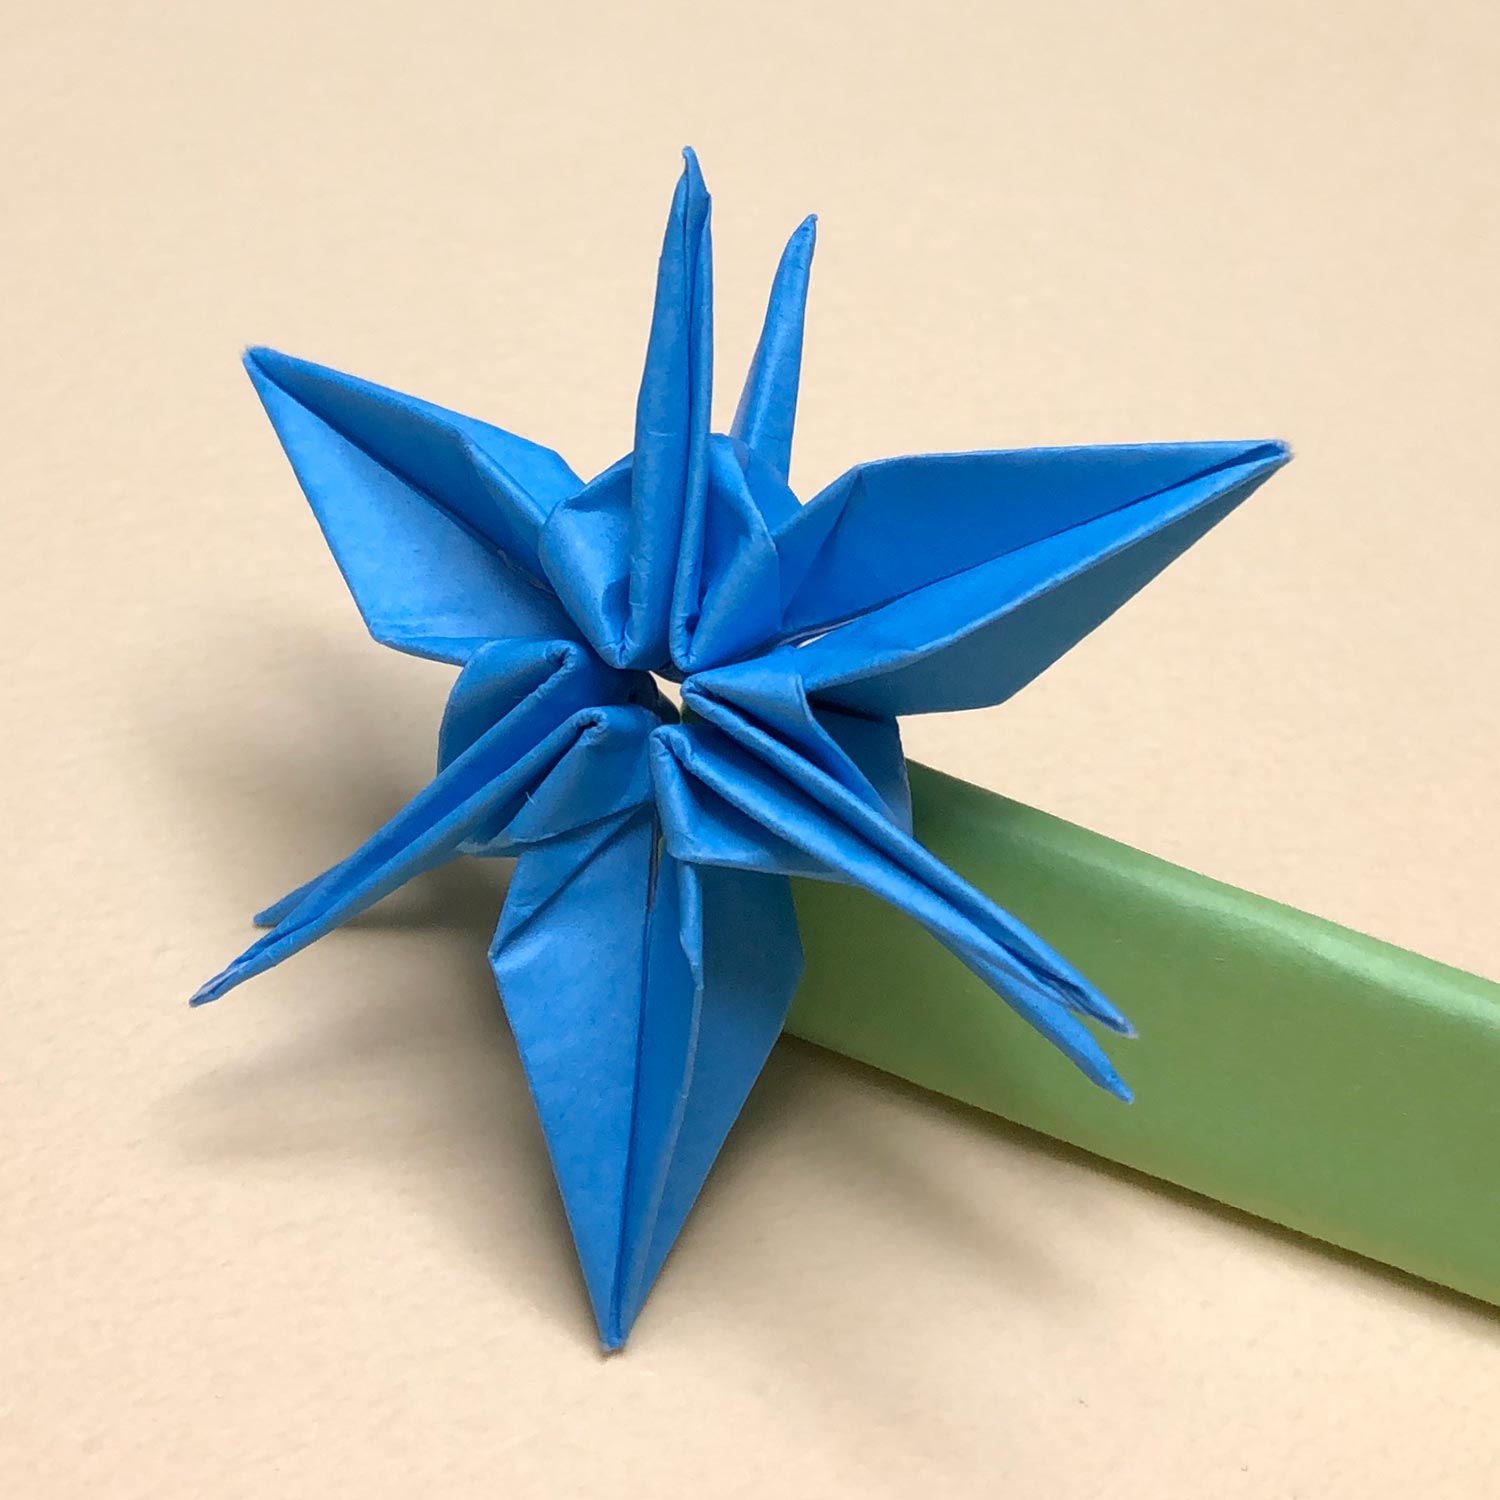
All the cranes are finished.
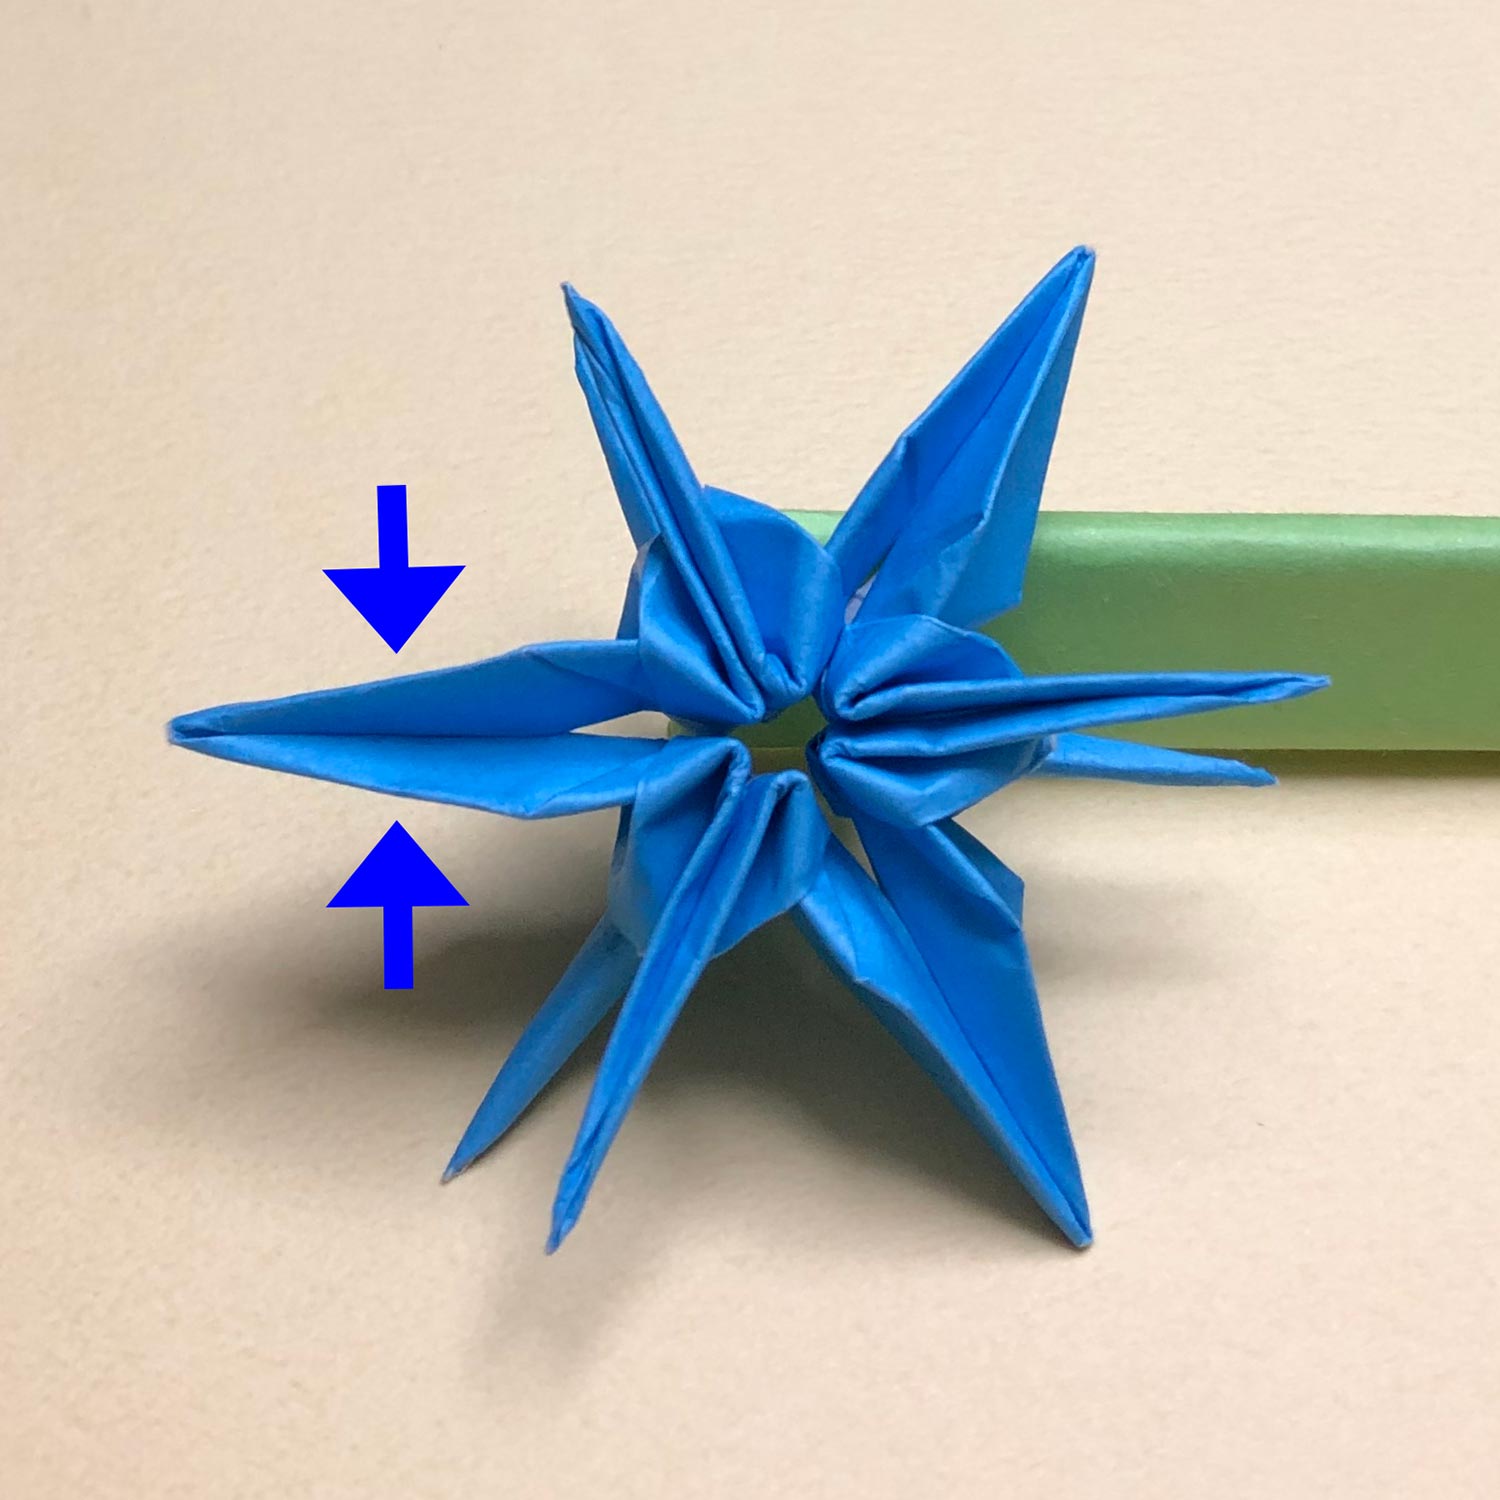
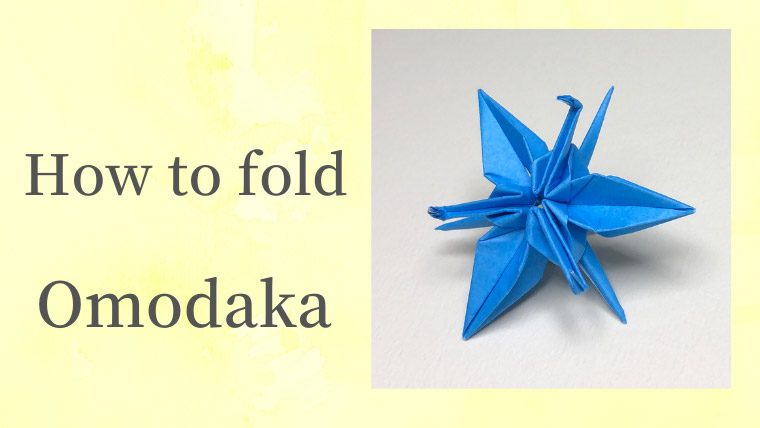
(168)
Then arrange wings so that this model get more beautiful.
First, pinch wings in the direction of the arrows and make creases neatly.
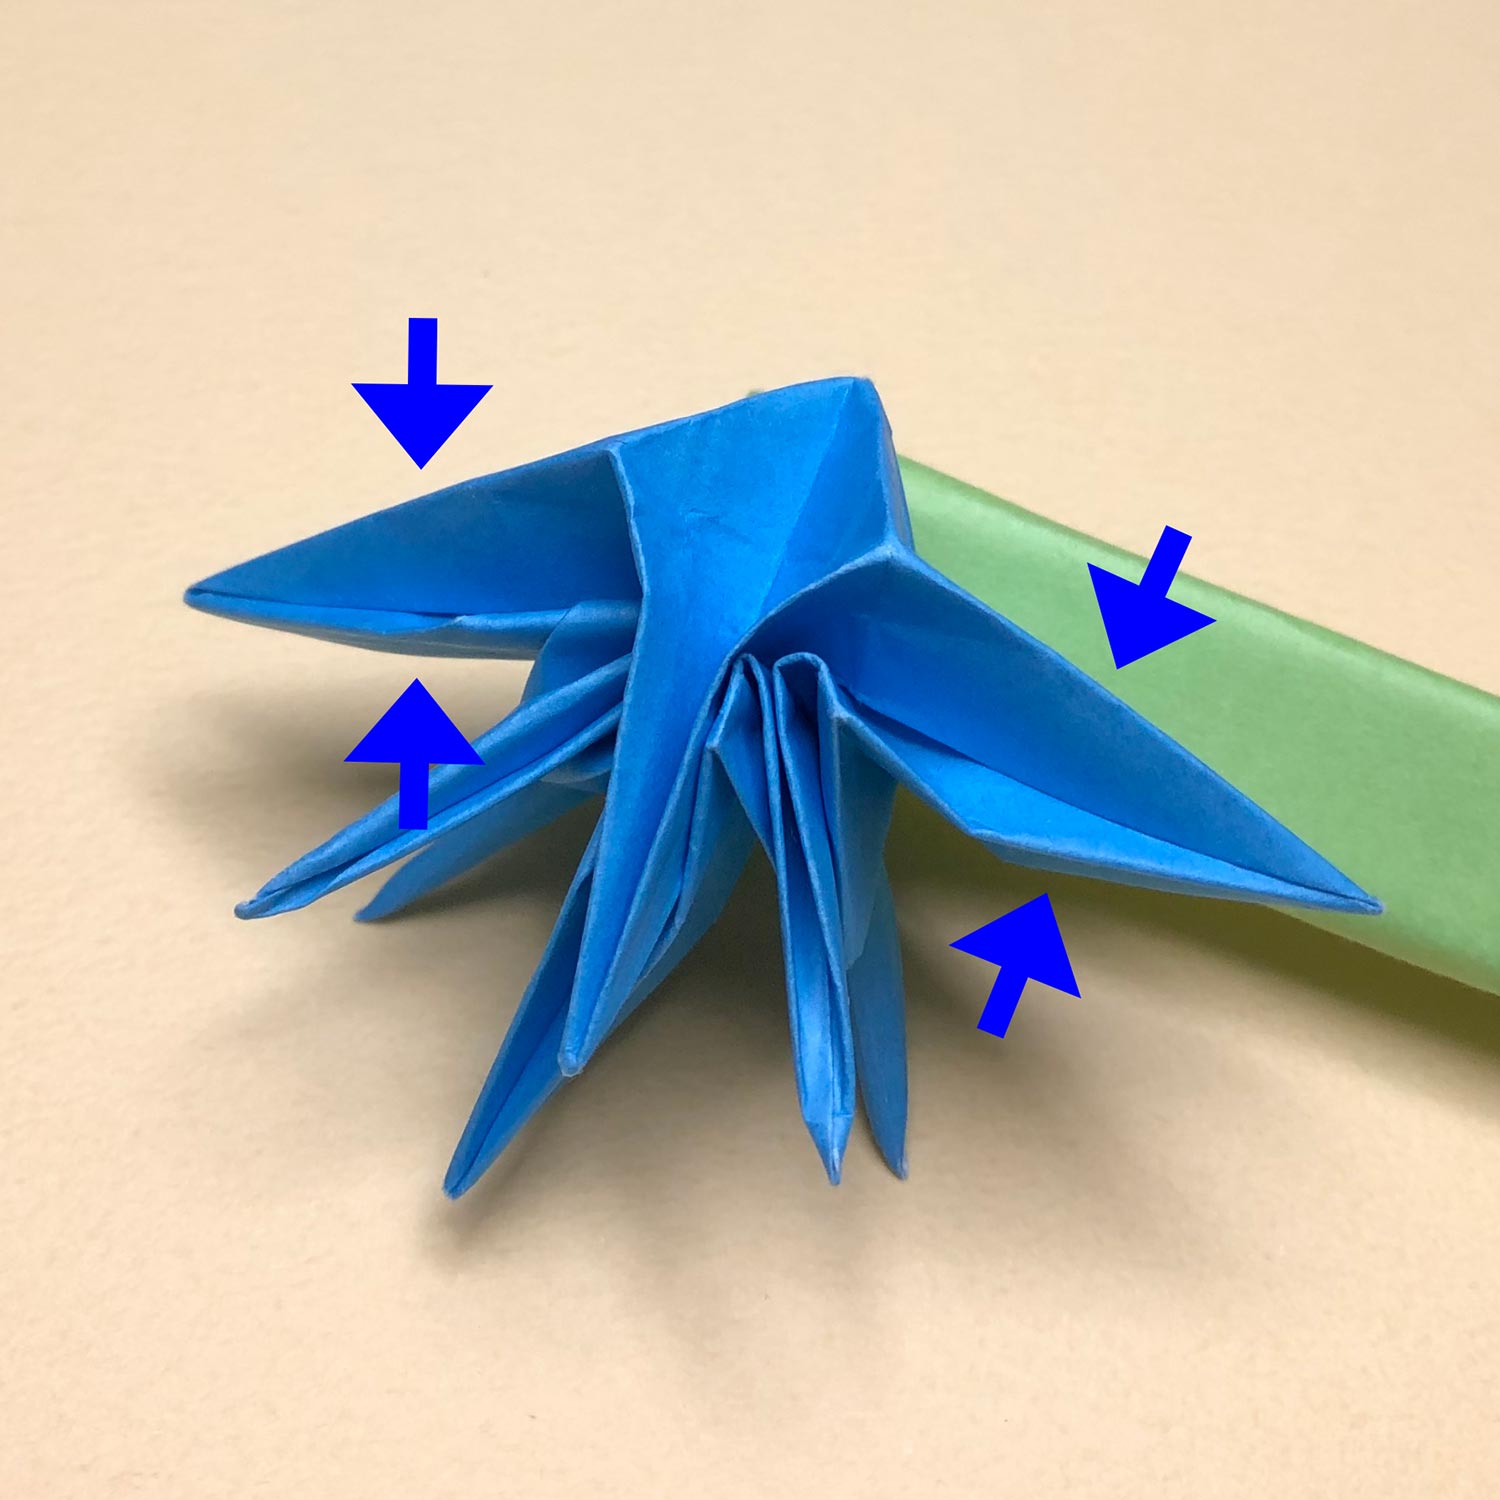
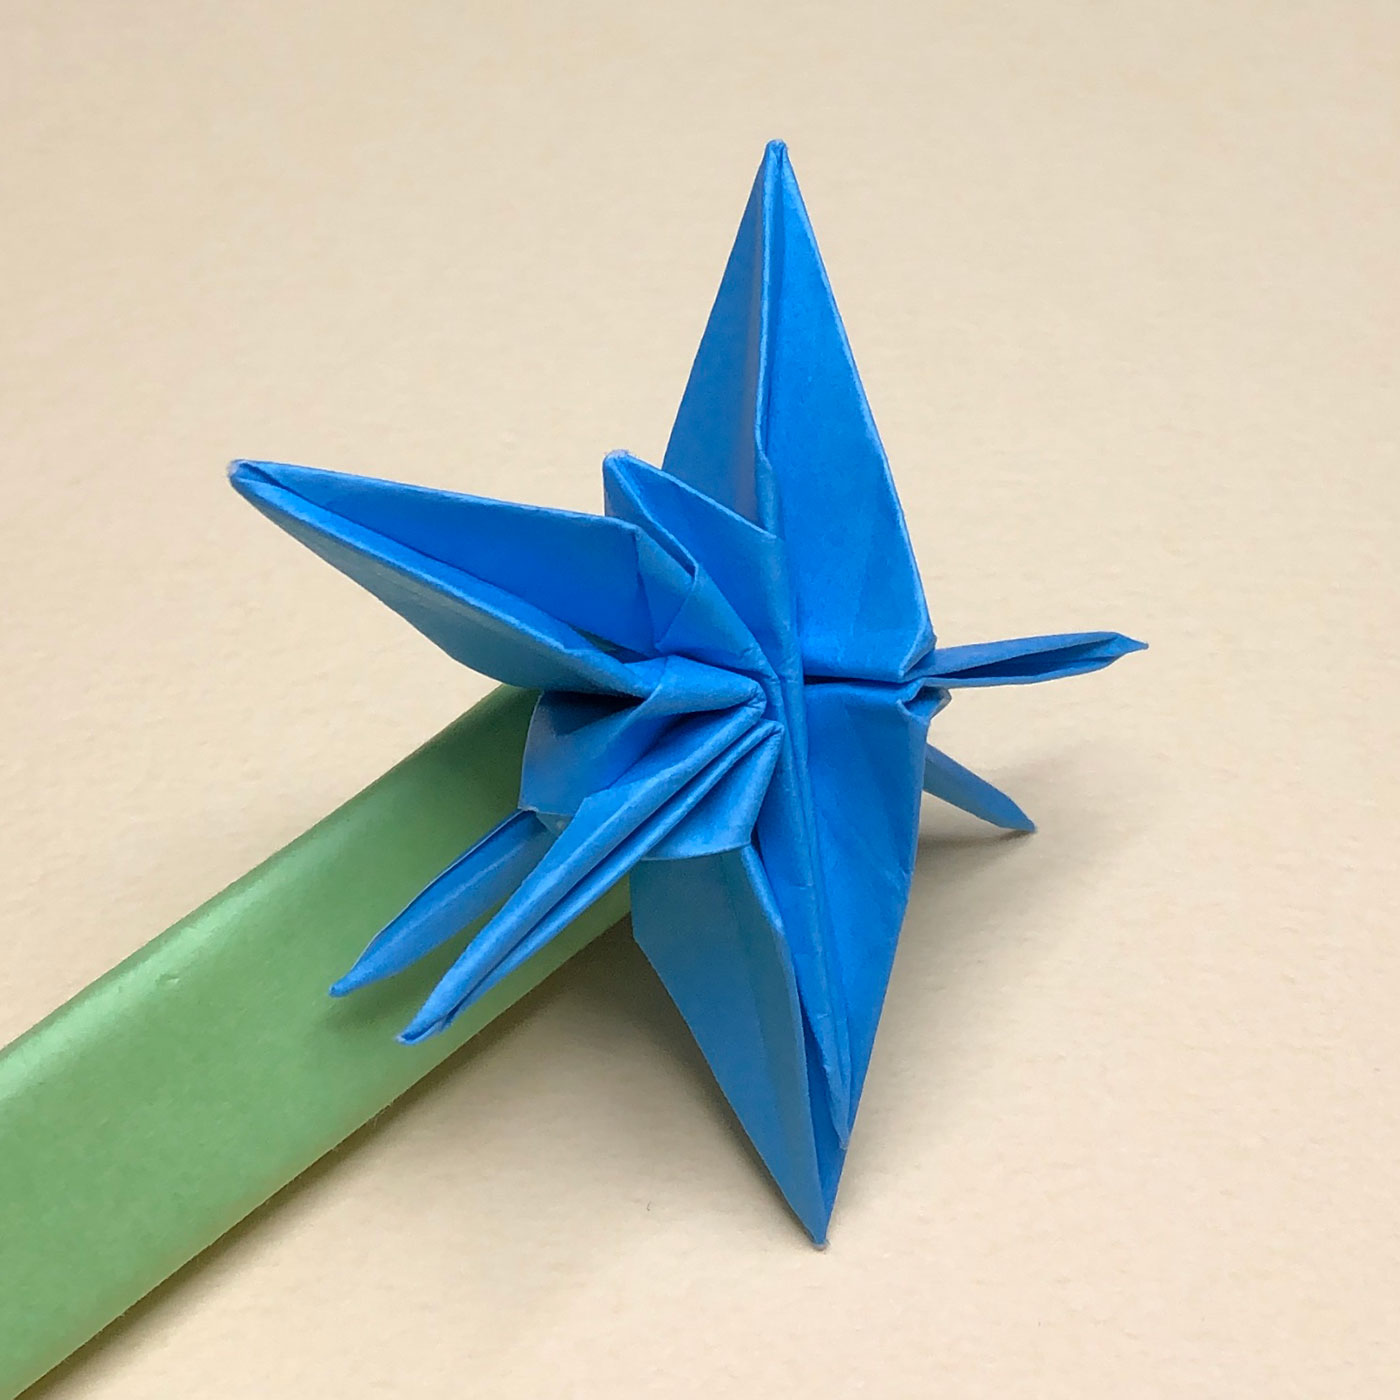
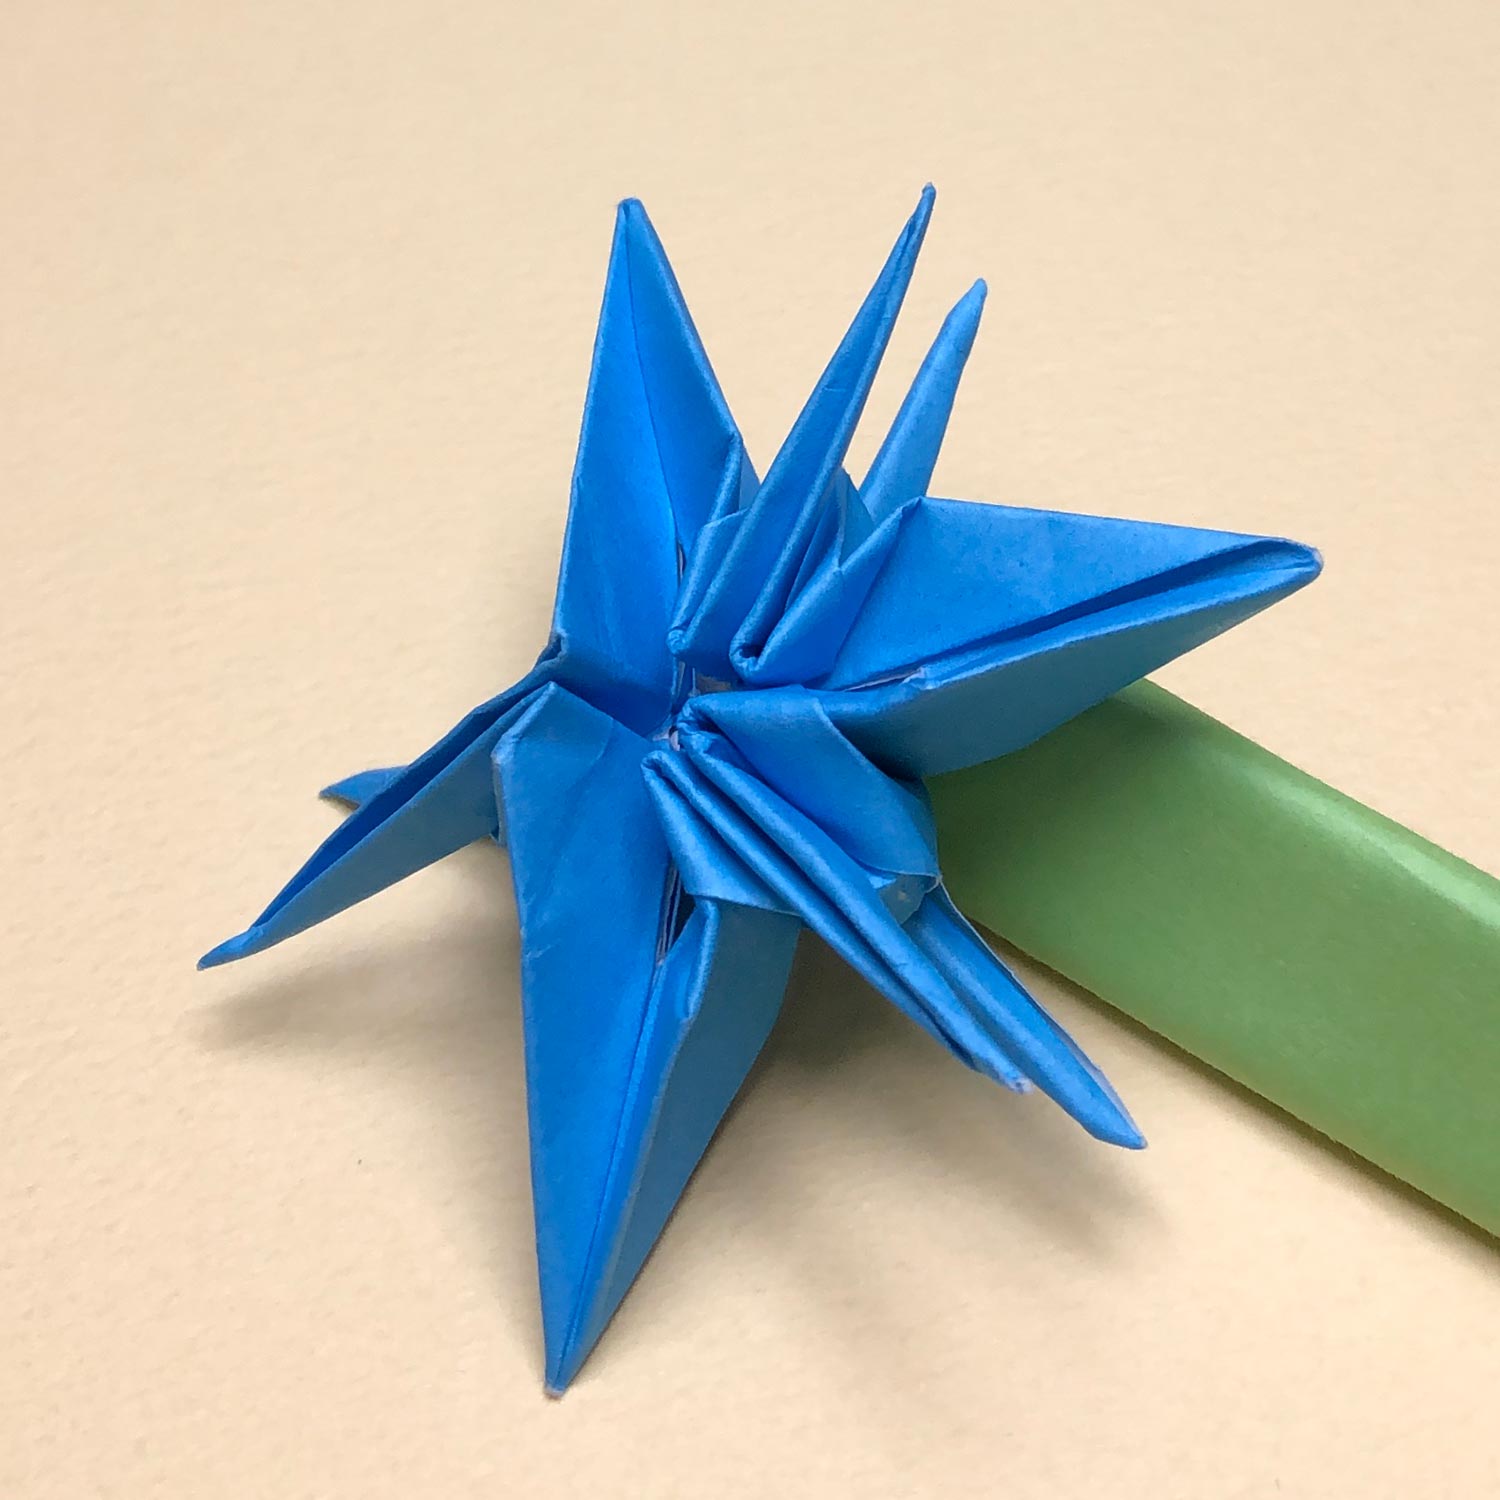
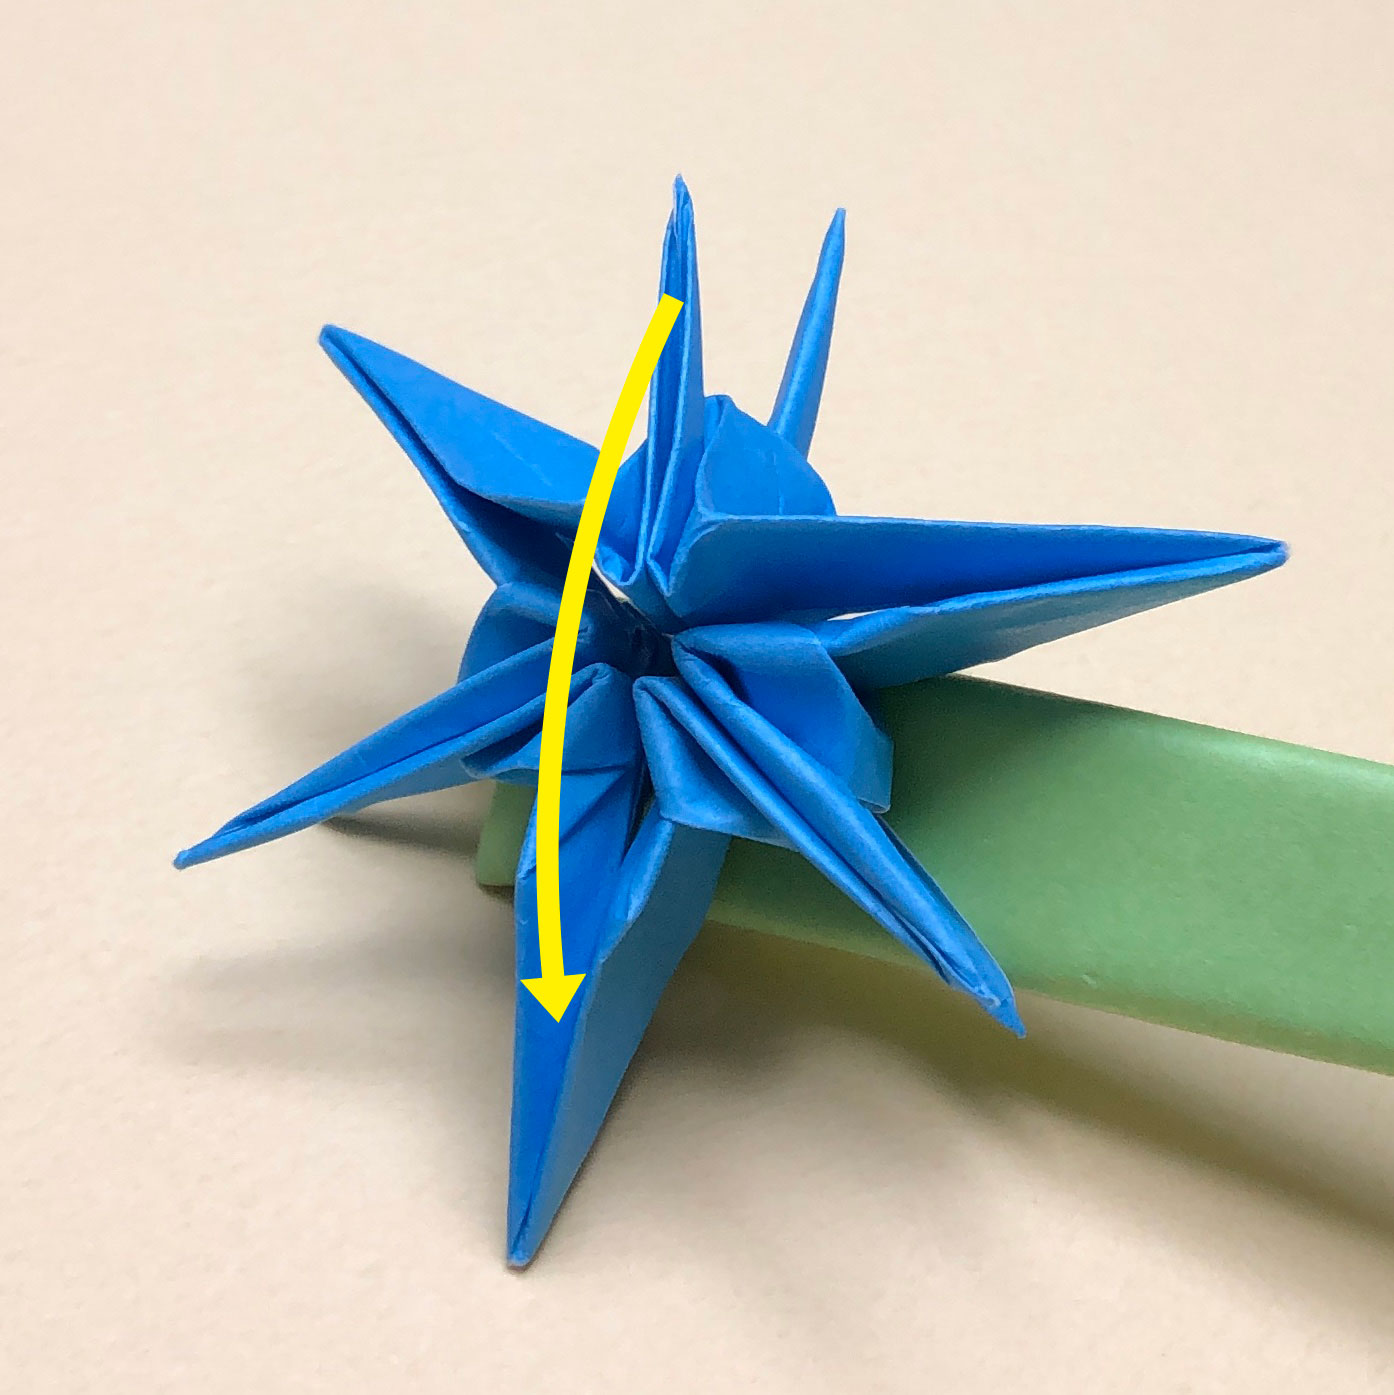
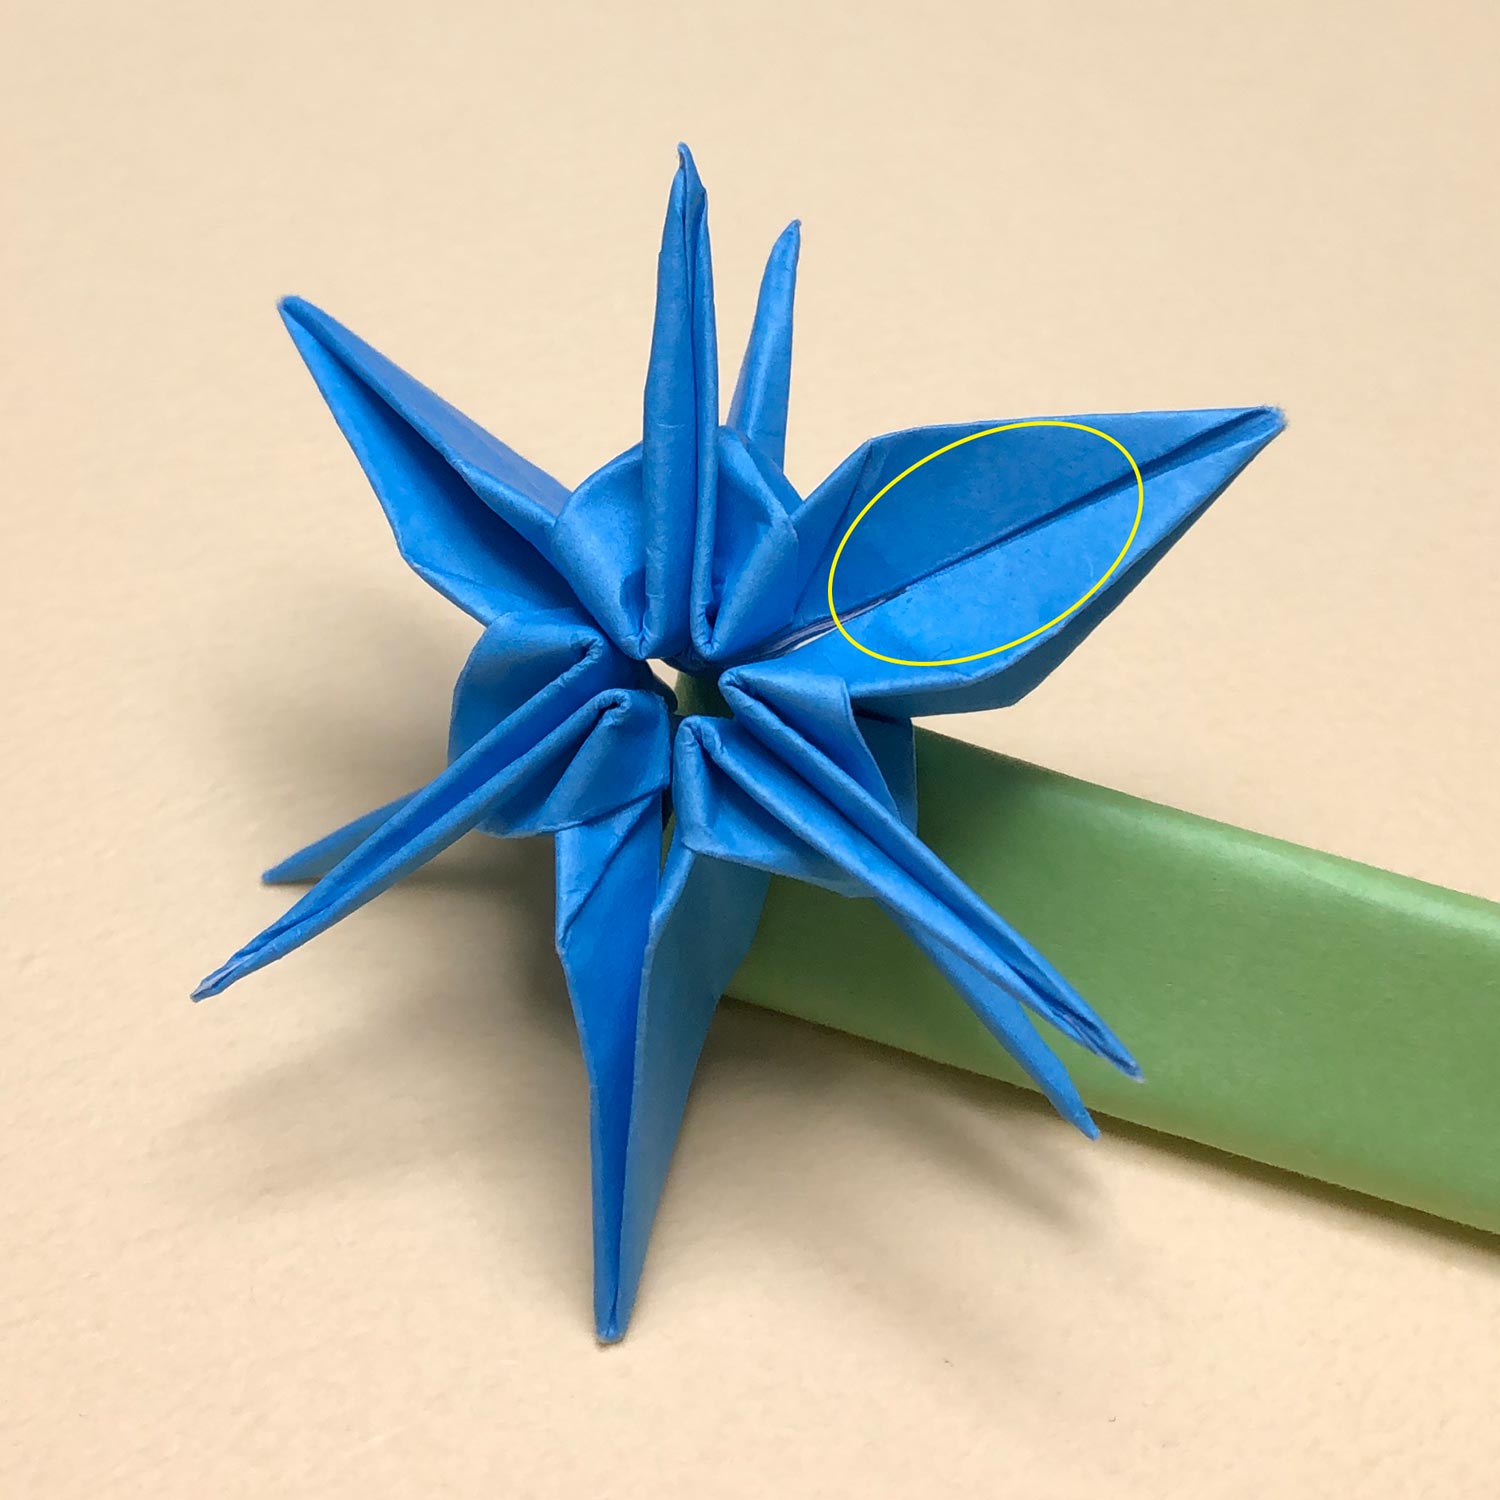
(169)
Make a valley-fold on the dotted line.
(On the opposite side, make a valley-fold on the dotted line as well.)
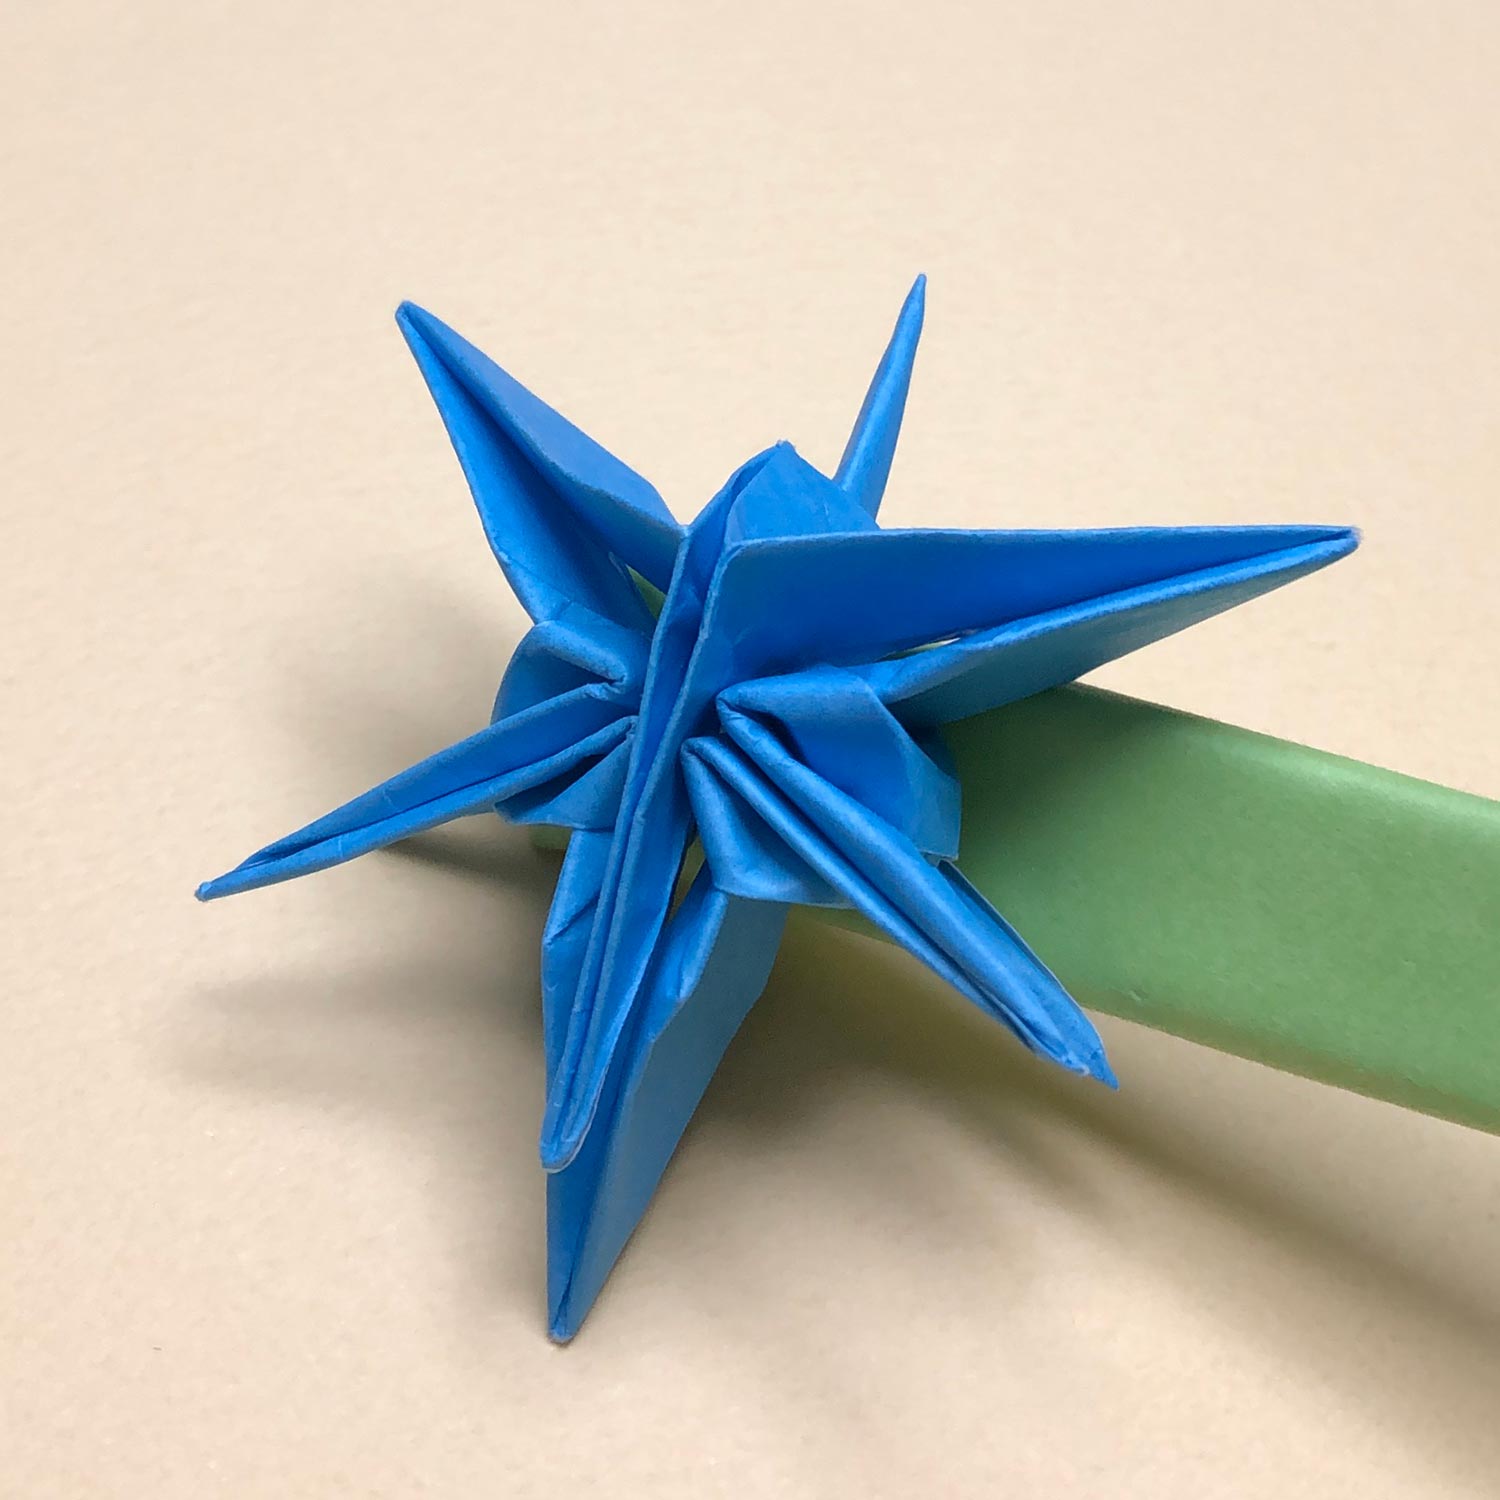
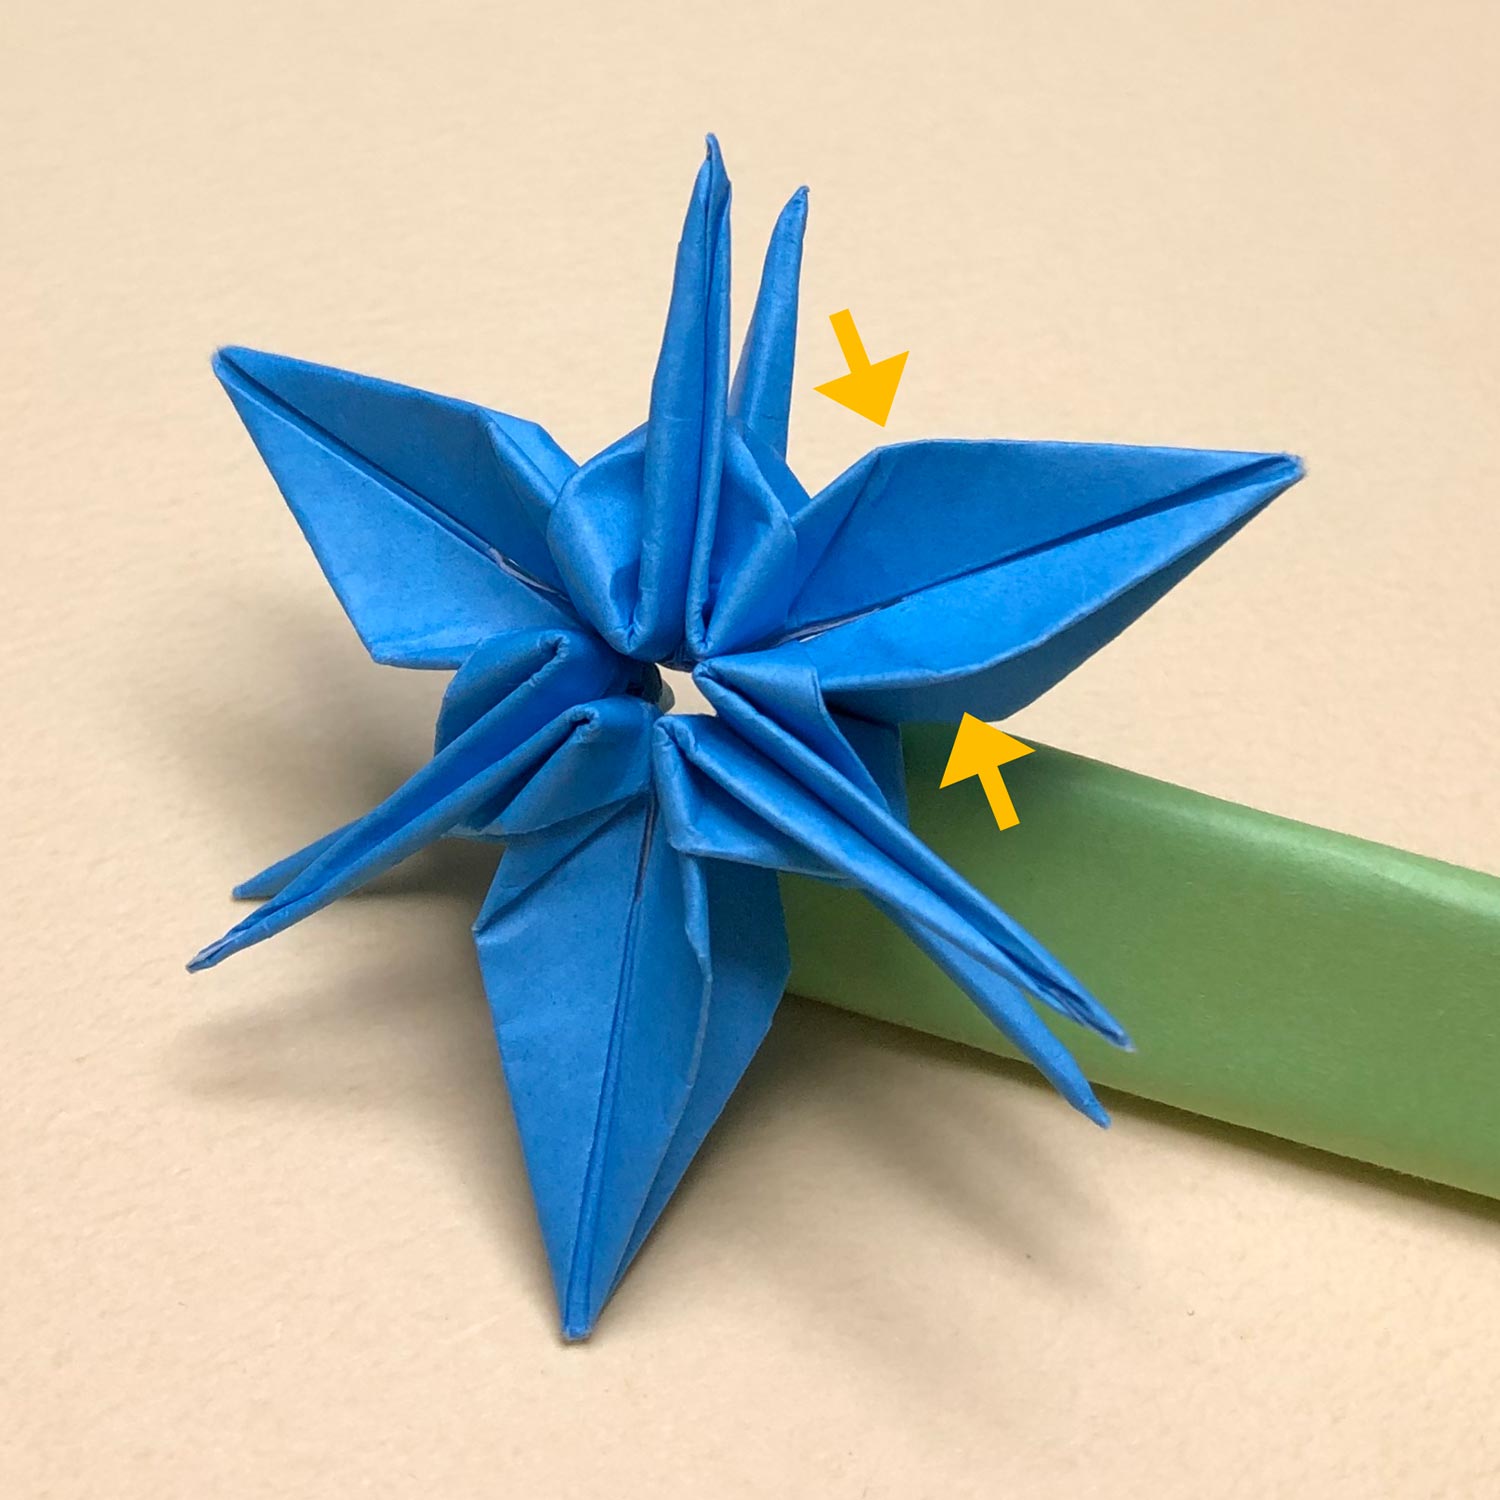
(170)
Then pinch the part which has been circled.
Repeat the 168th step to the 170th step on the other two parts.(on the other two wings)
(171)
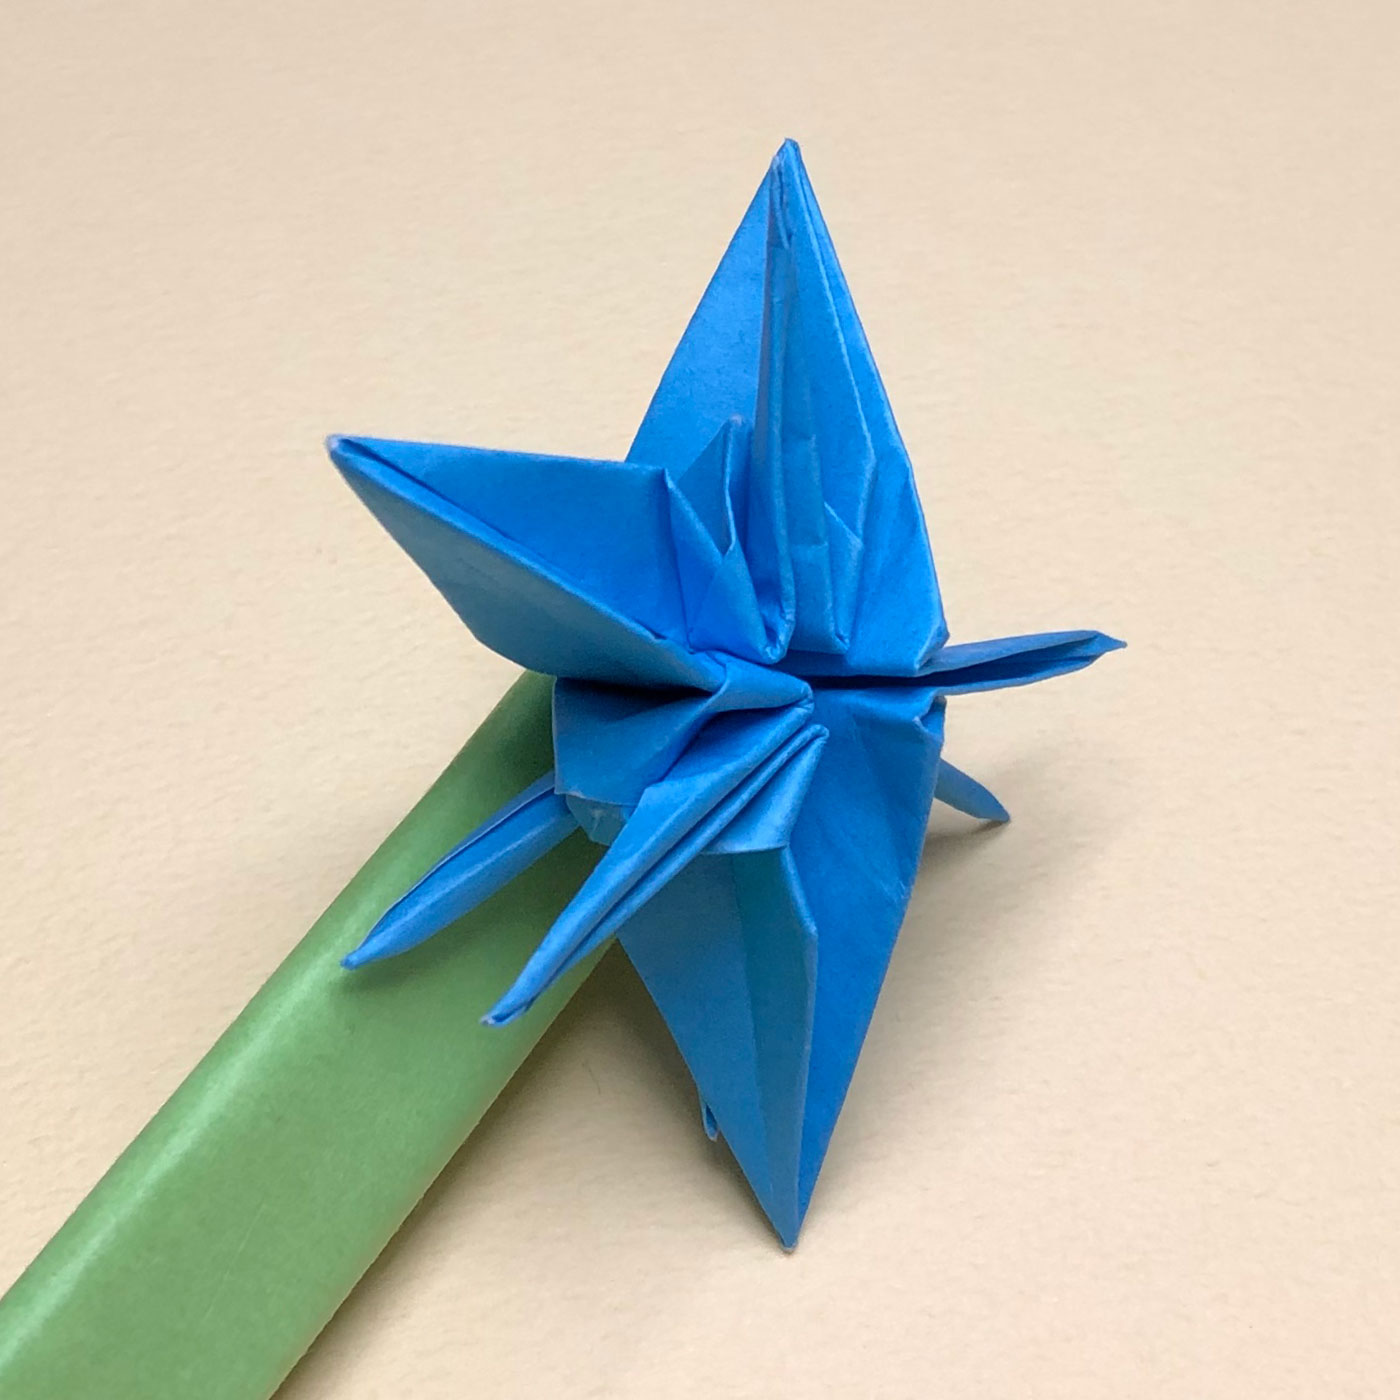
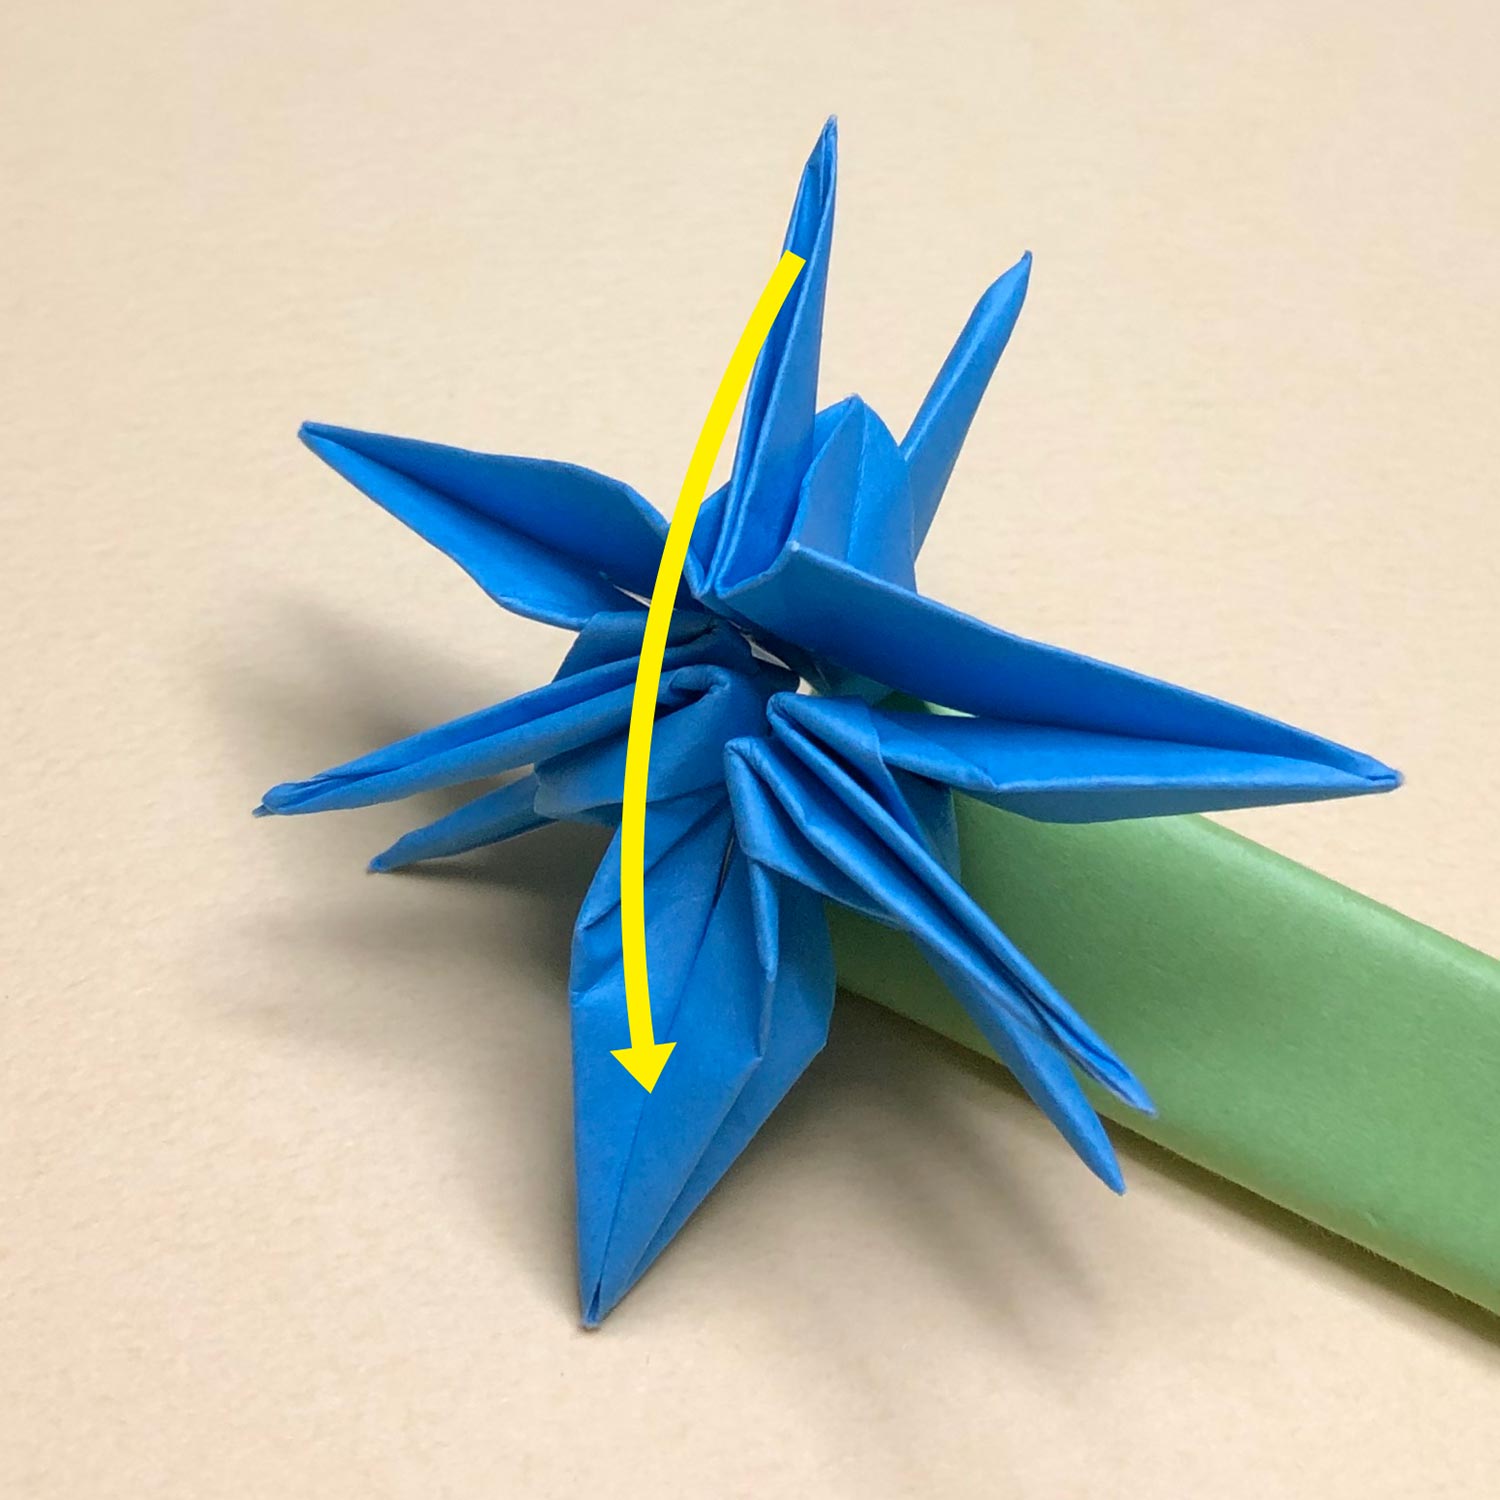
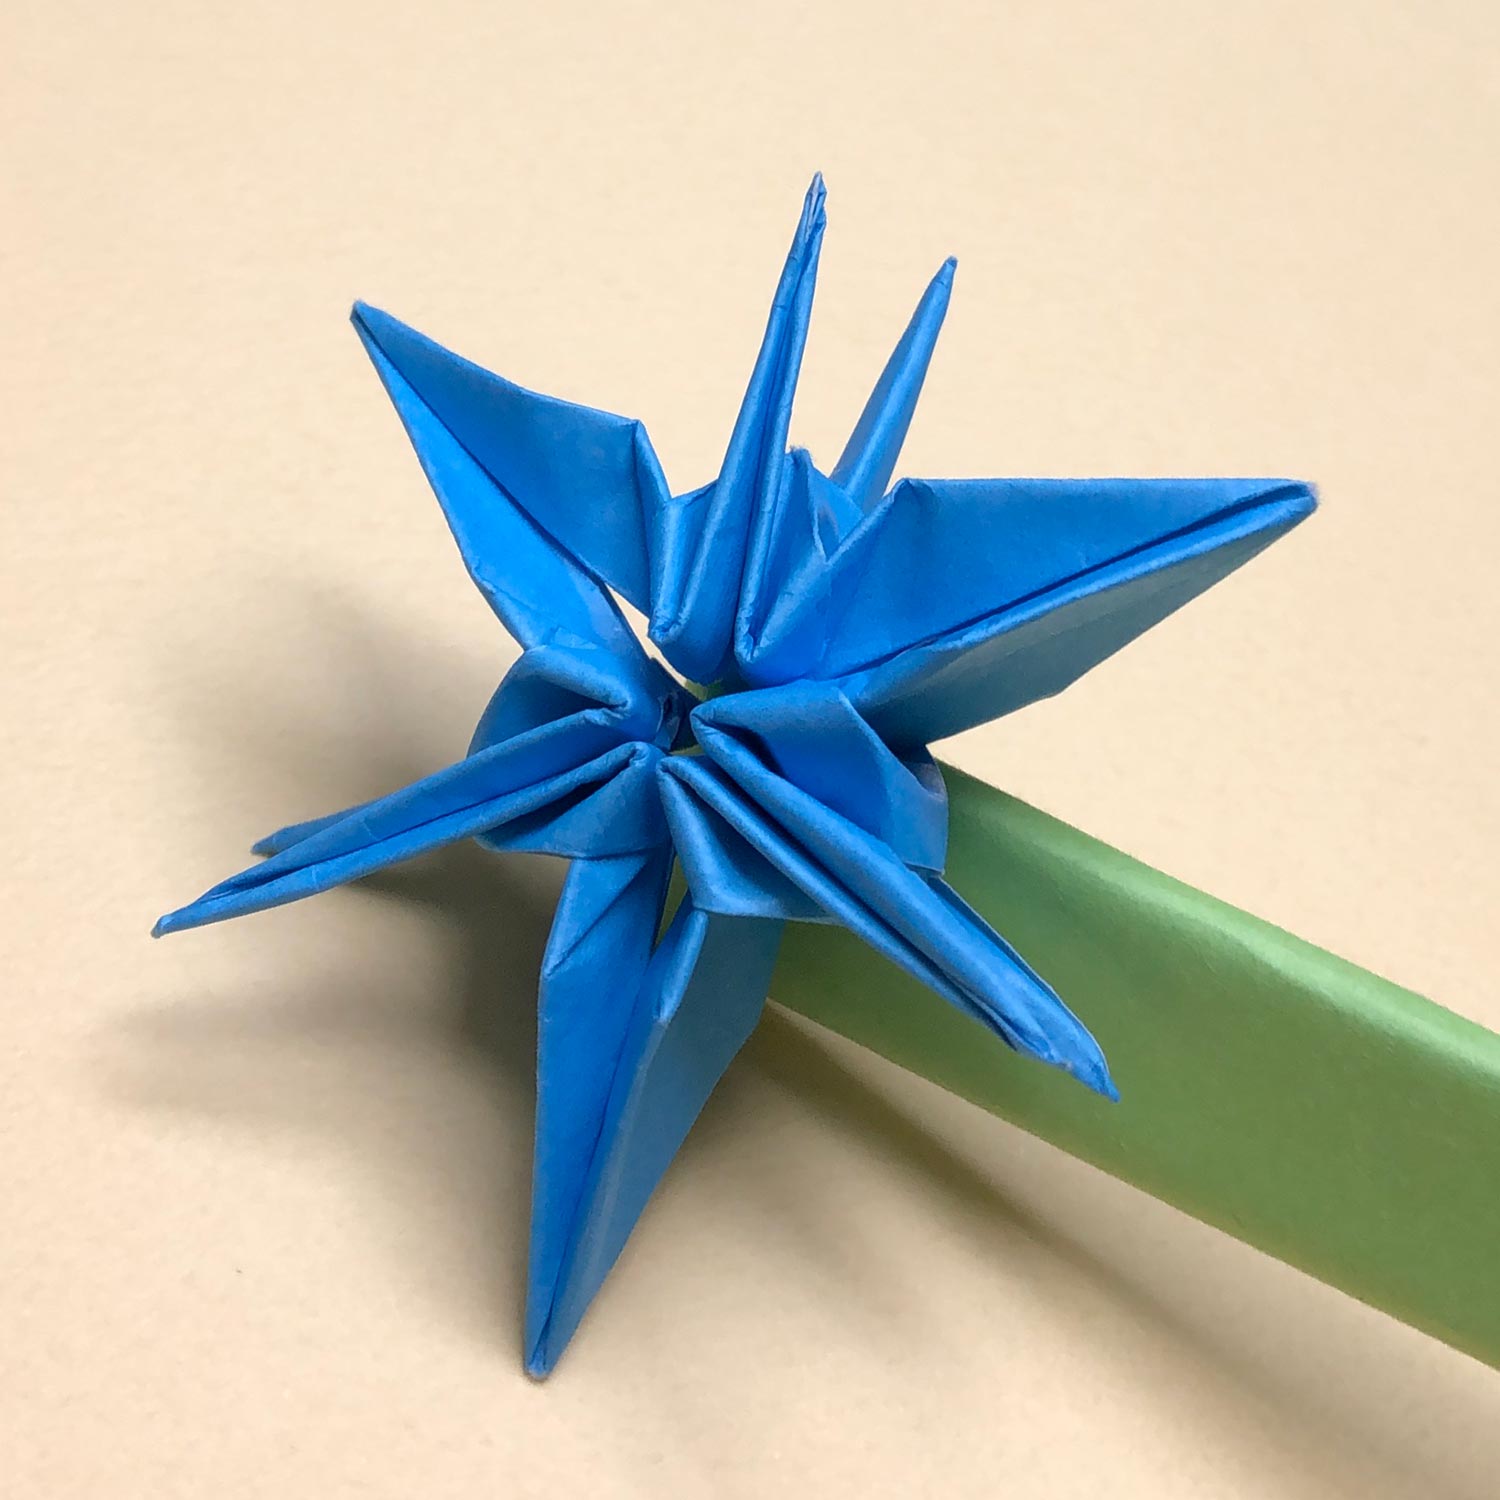
Finally, pinch wings in the direction of the arrows a little to make them narrow.
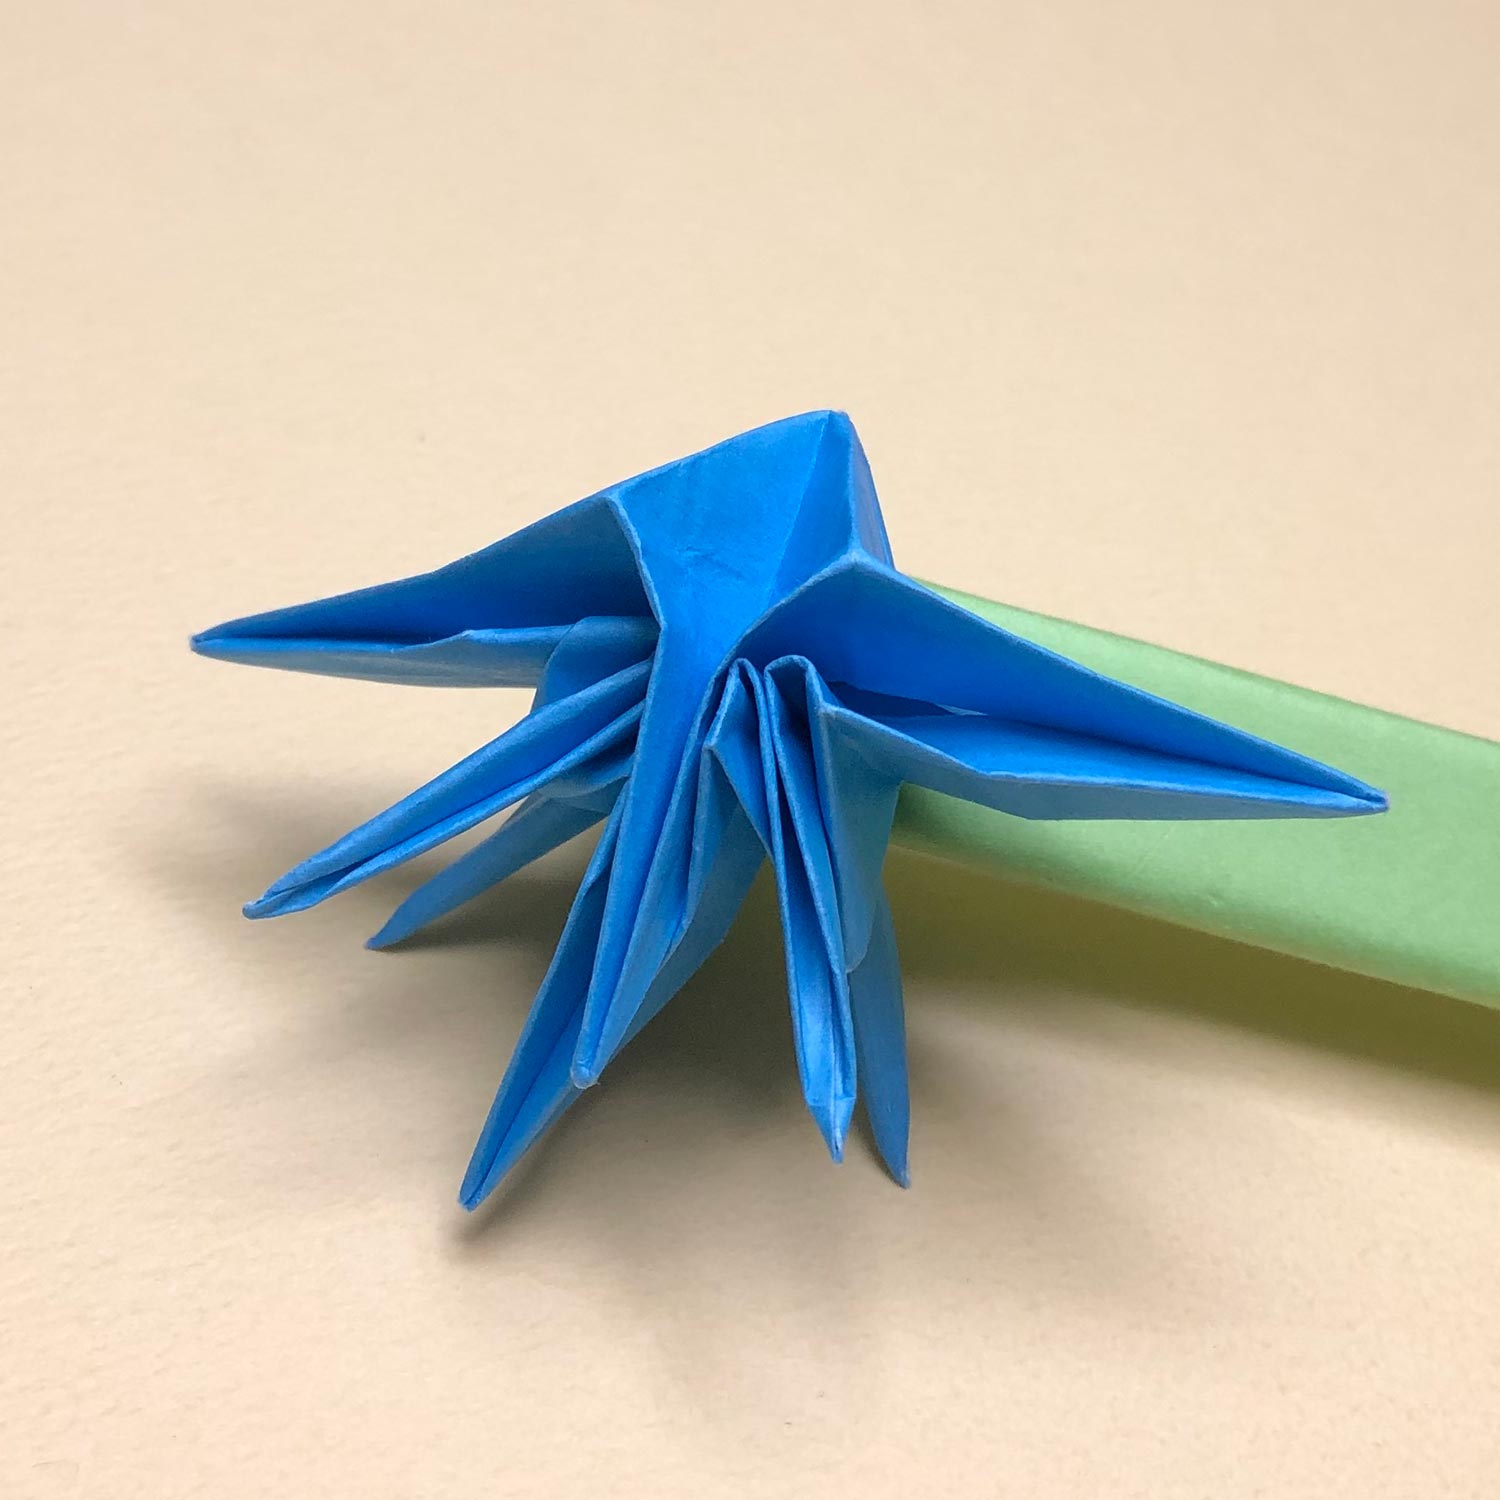
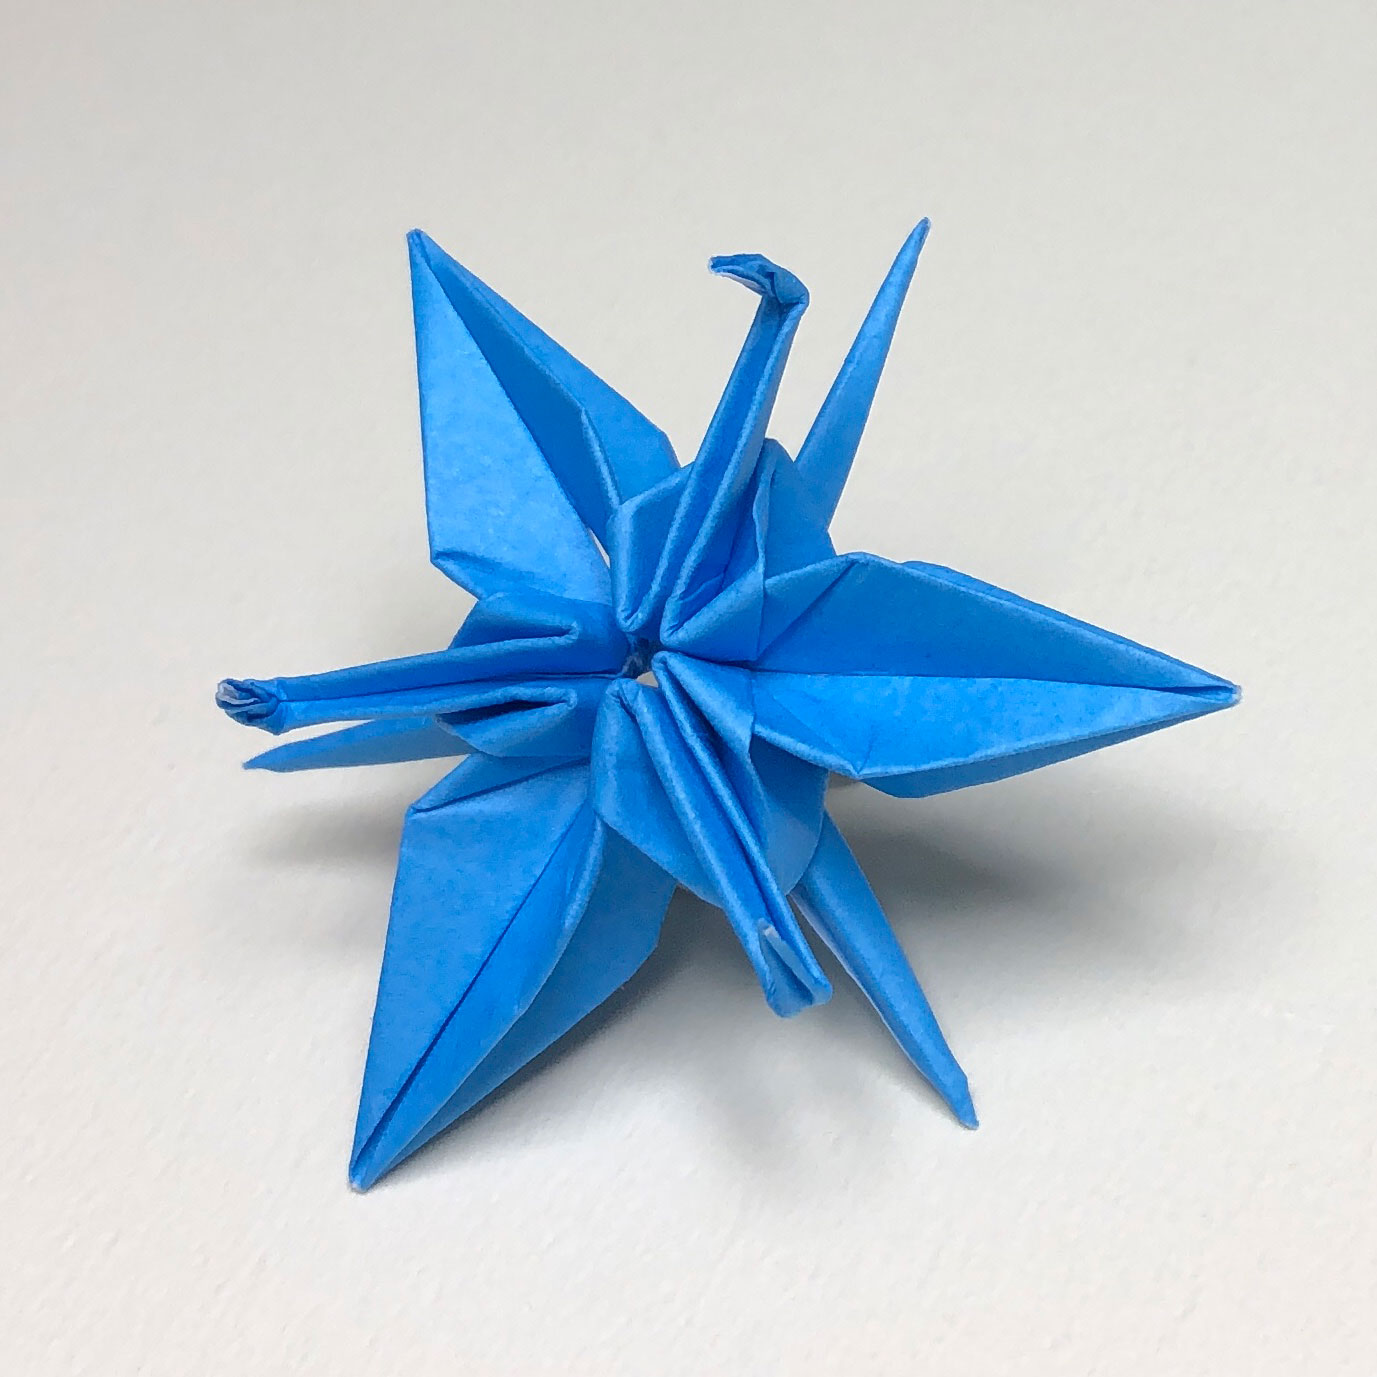
(172)
After pinching the three parts, it looks like this picture.
Arranging wings is finished.
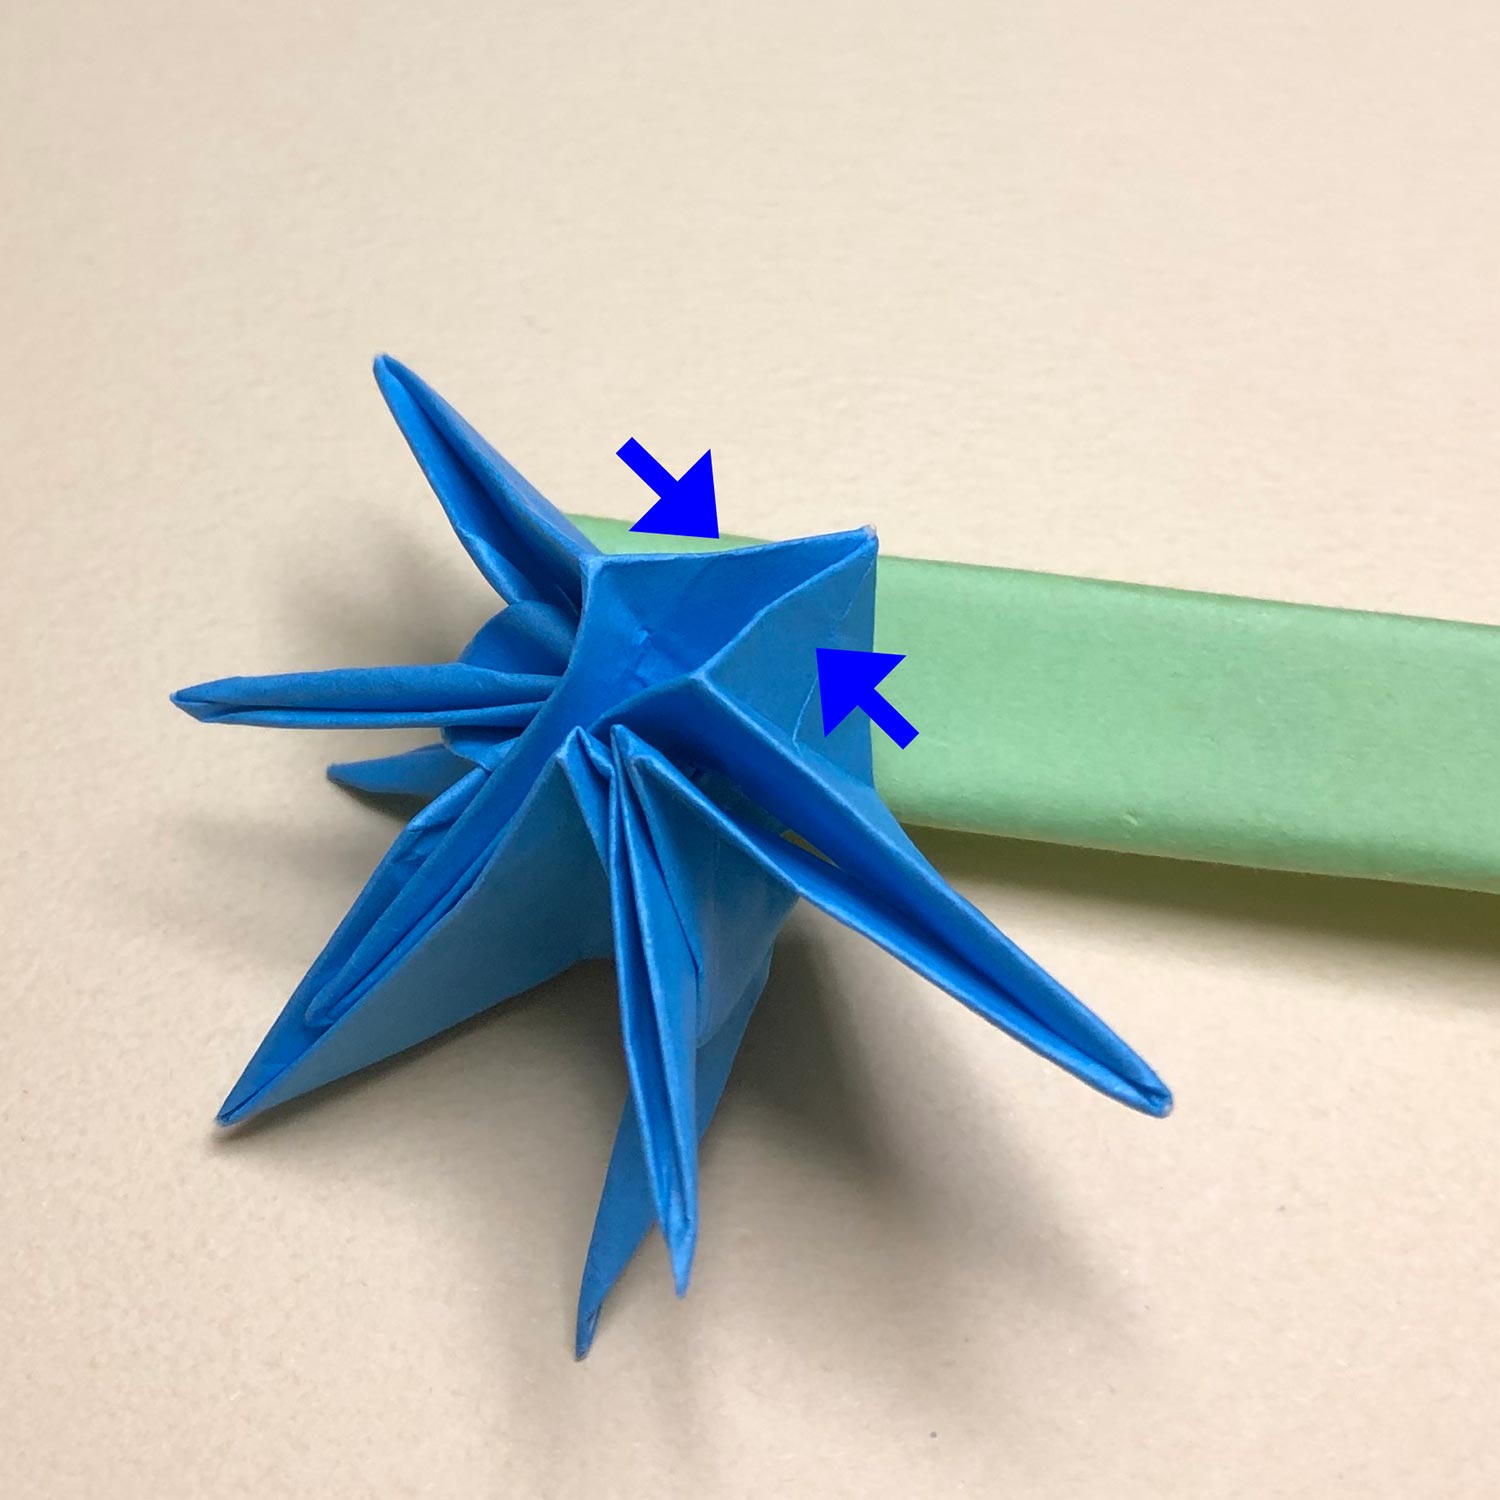
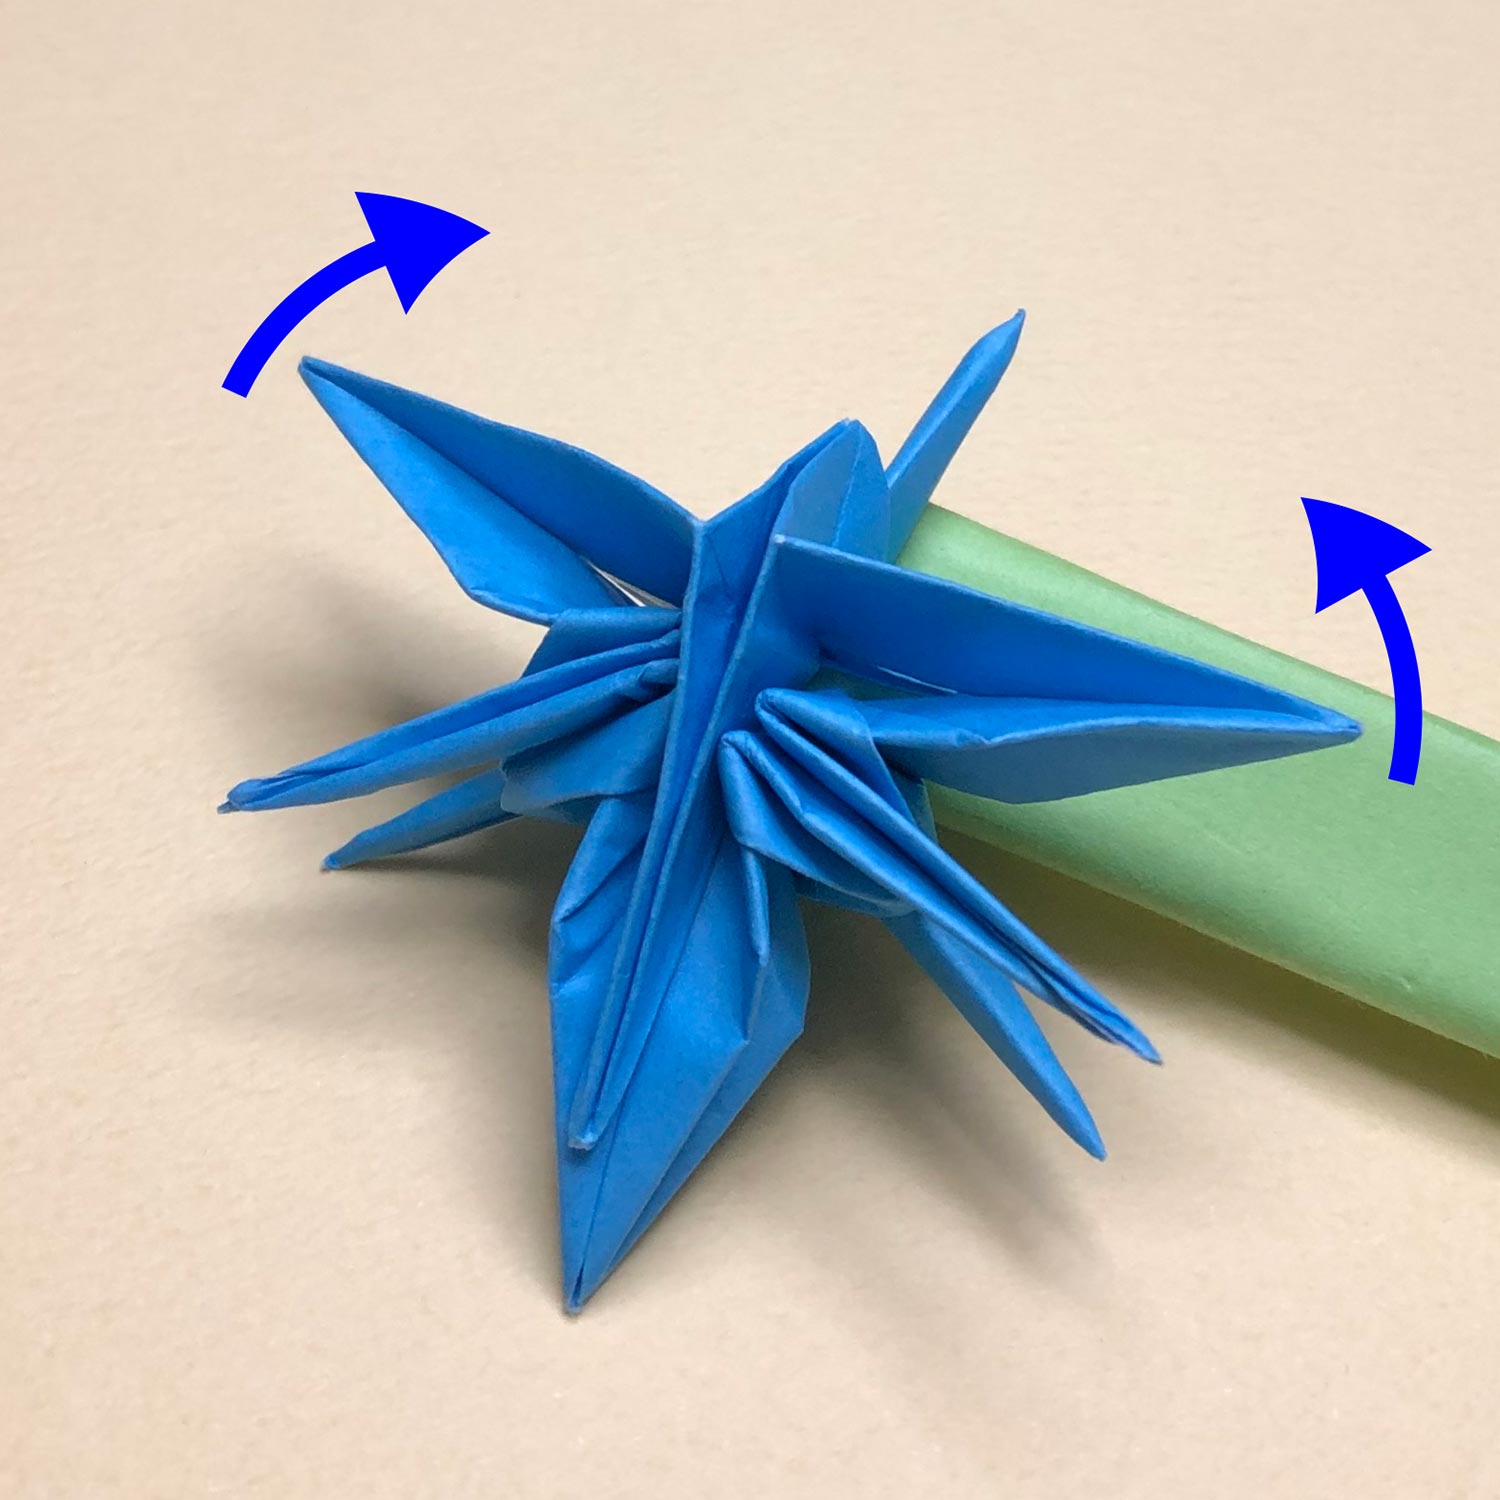
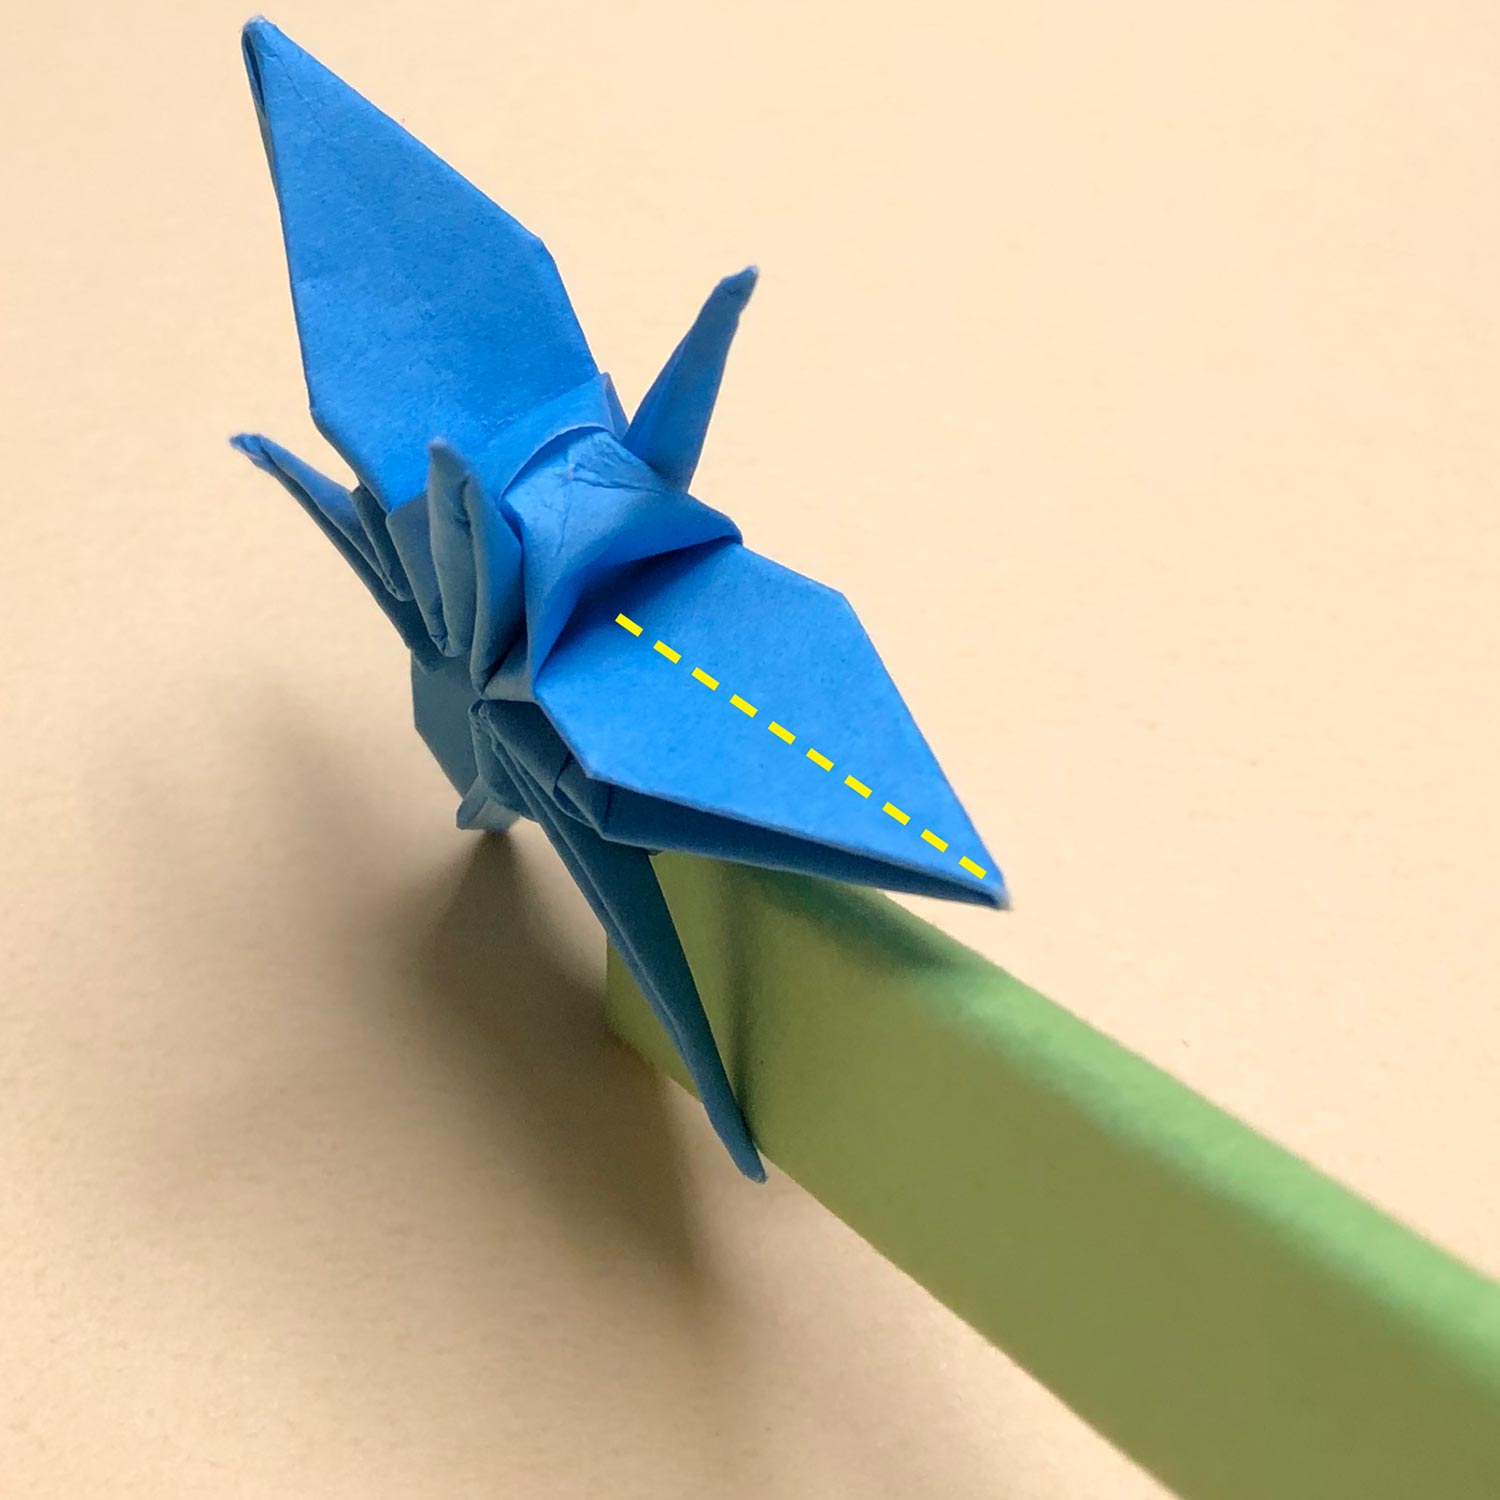
Then make beaks so that cranes face in the same direction.
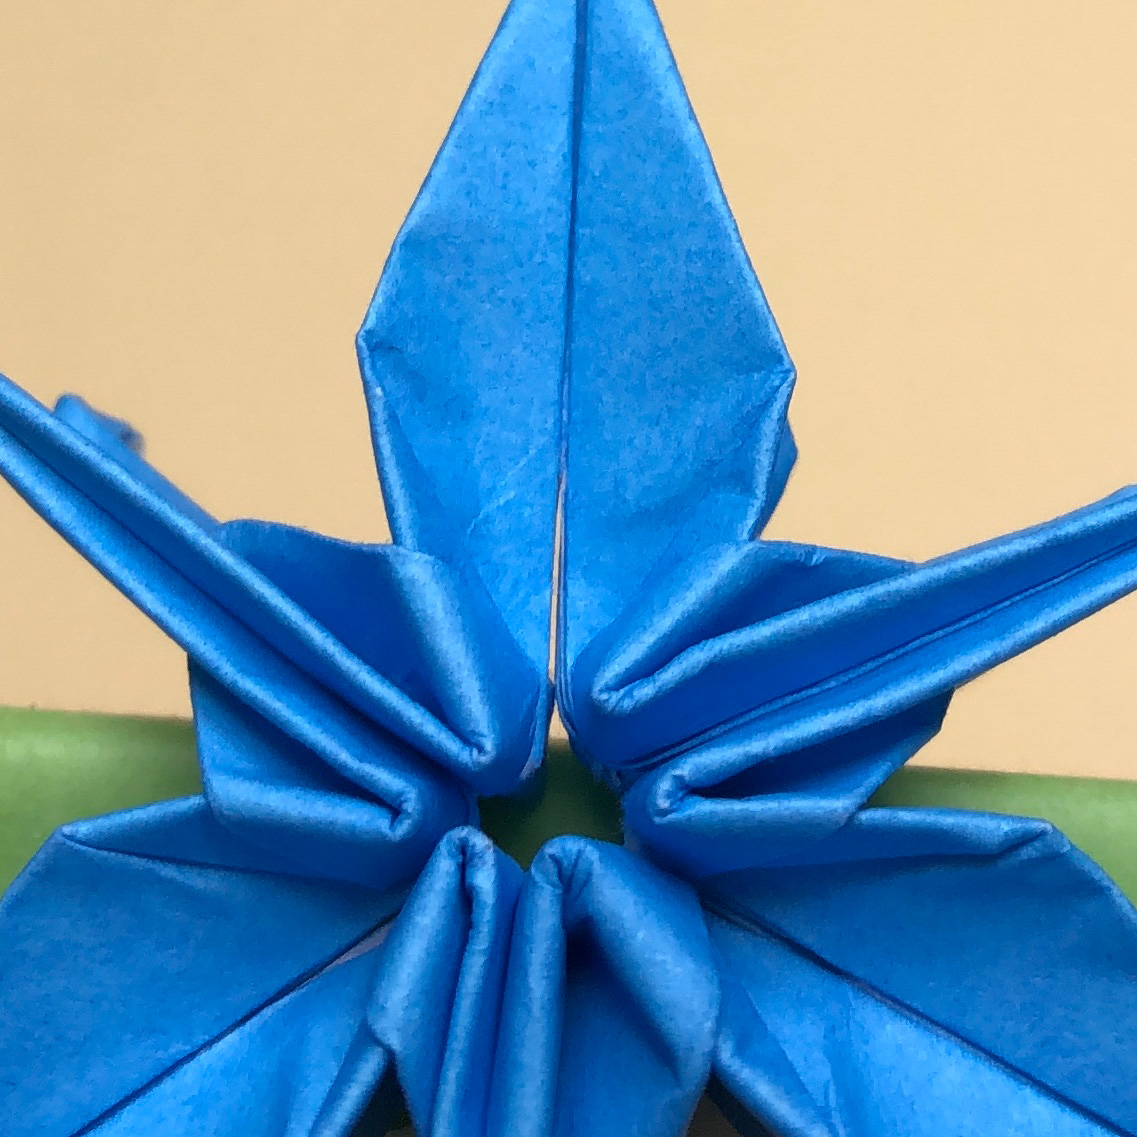
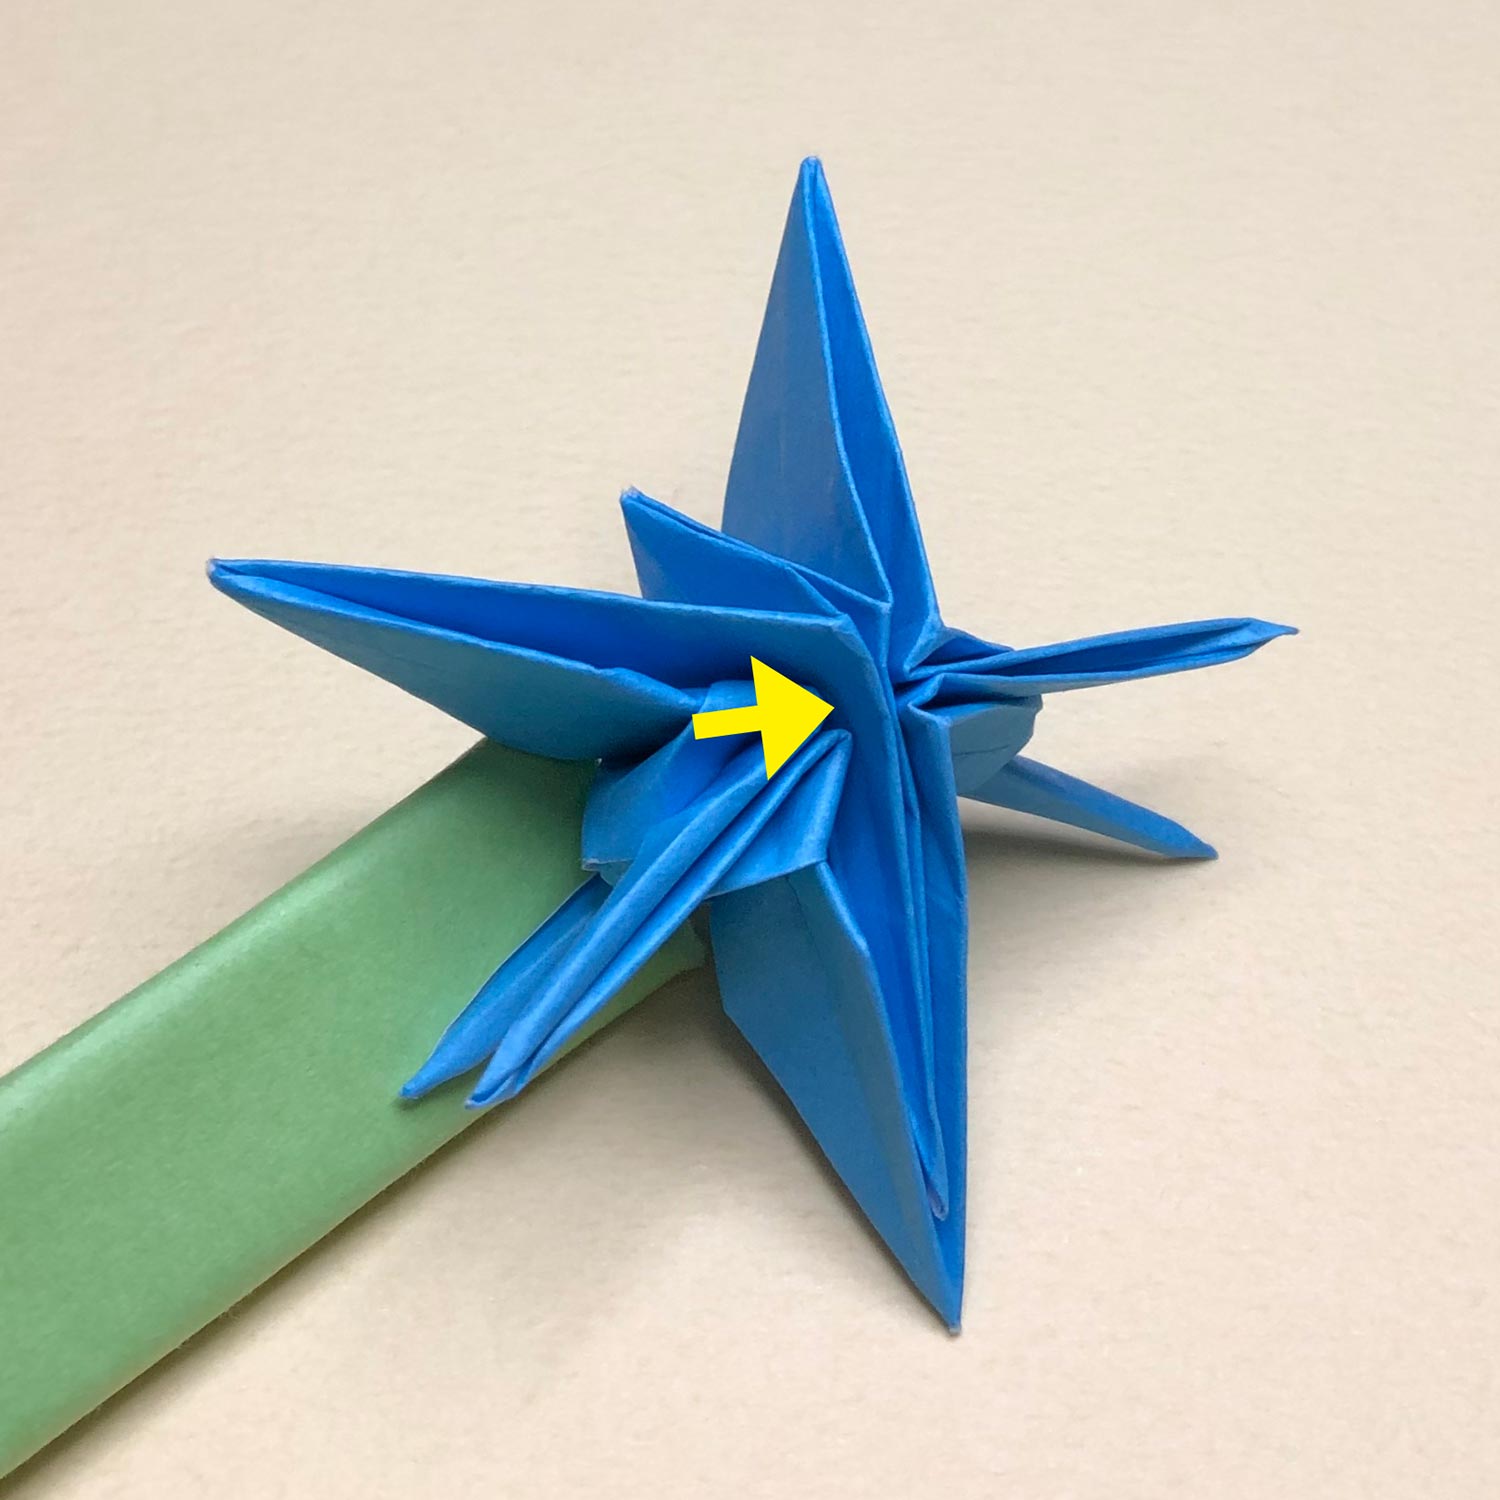
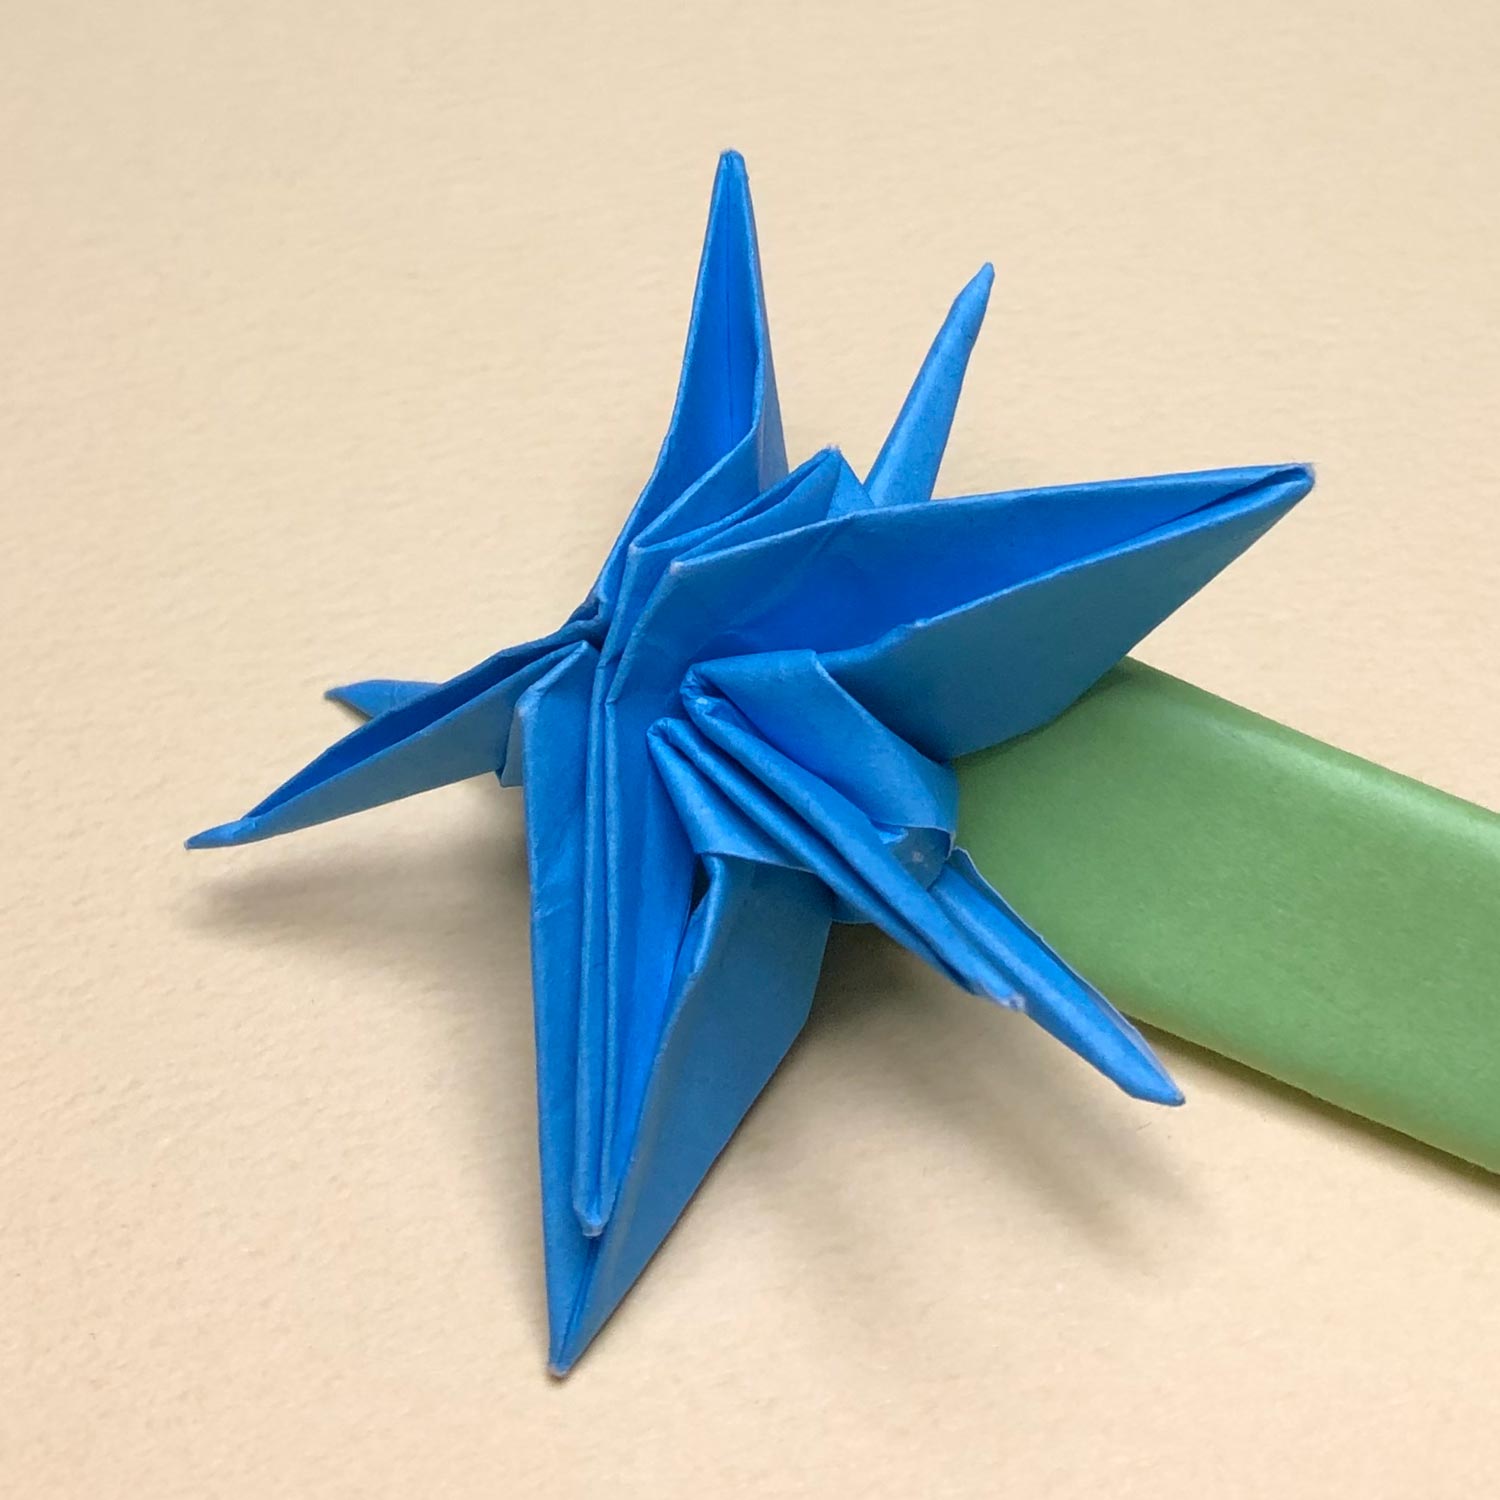
(173)
This is an enlarged picture of connecting parts.
Omodaka is complete!
When you post pictures of your completed Renzuru works on social media,
please write my website’s name – “Tsuru-no-Goshiki” or paste the link!
On Instagram, if you write “@ritsu_cranes”,
I will be able to see your works and glad!😀
If you liked this Renzuru model,
please click the button below and share this pages on Twitter!