(105)
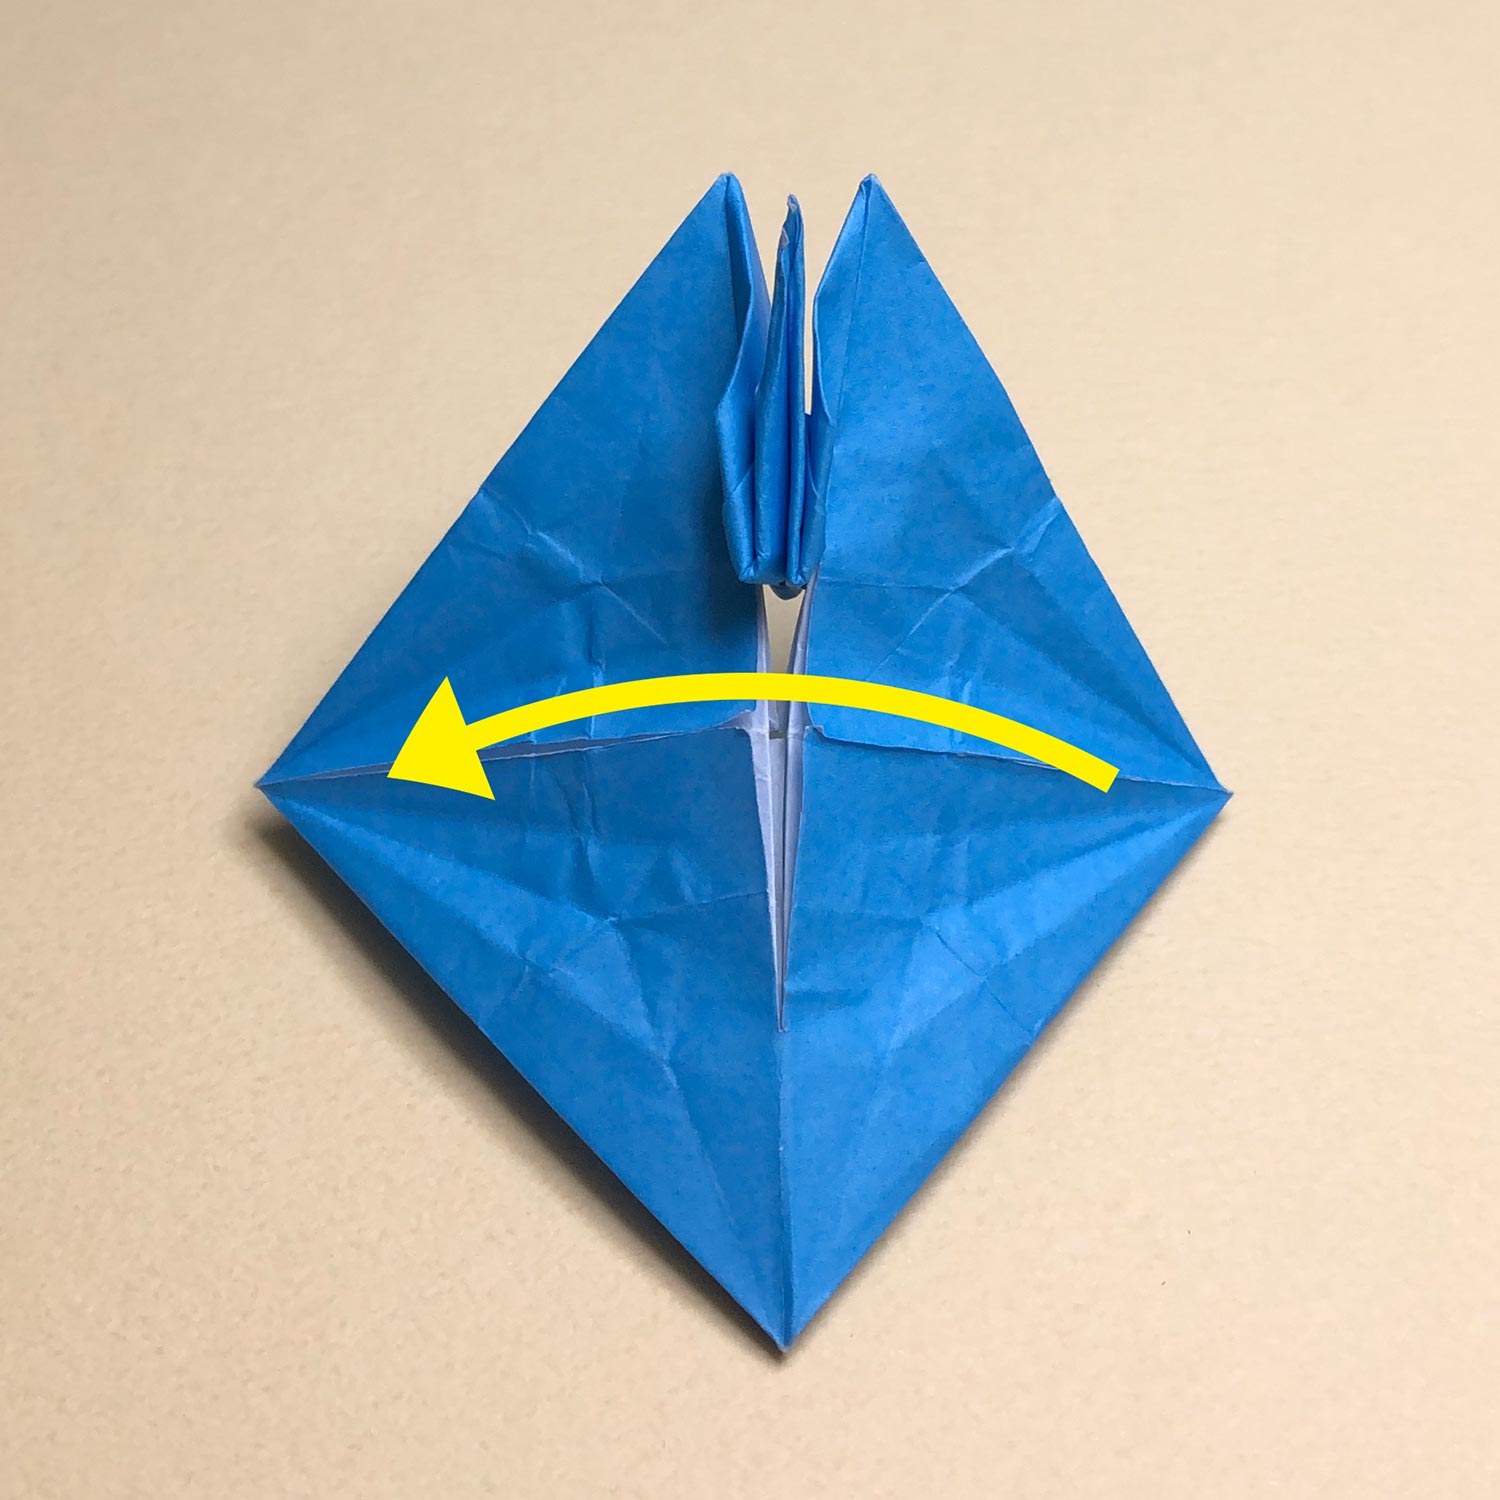
Put the paper like this picture.
Then take only the top flap in the right and move it in the direction of the arrow.
(106)
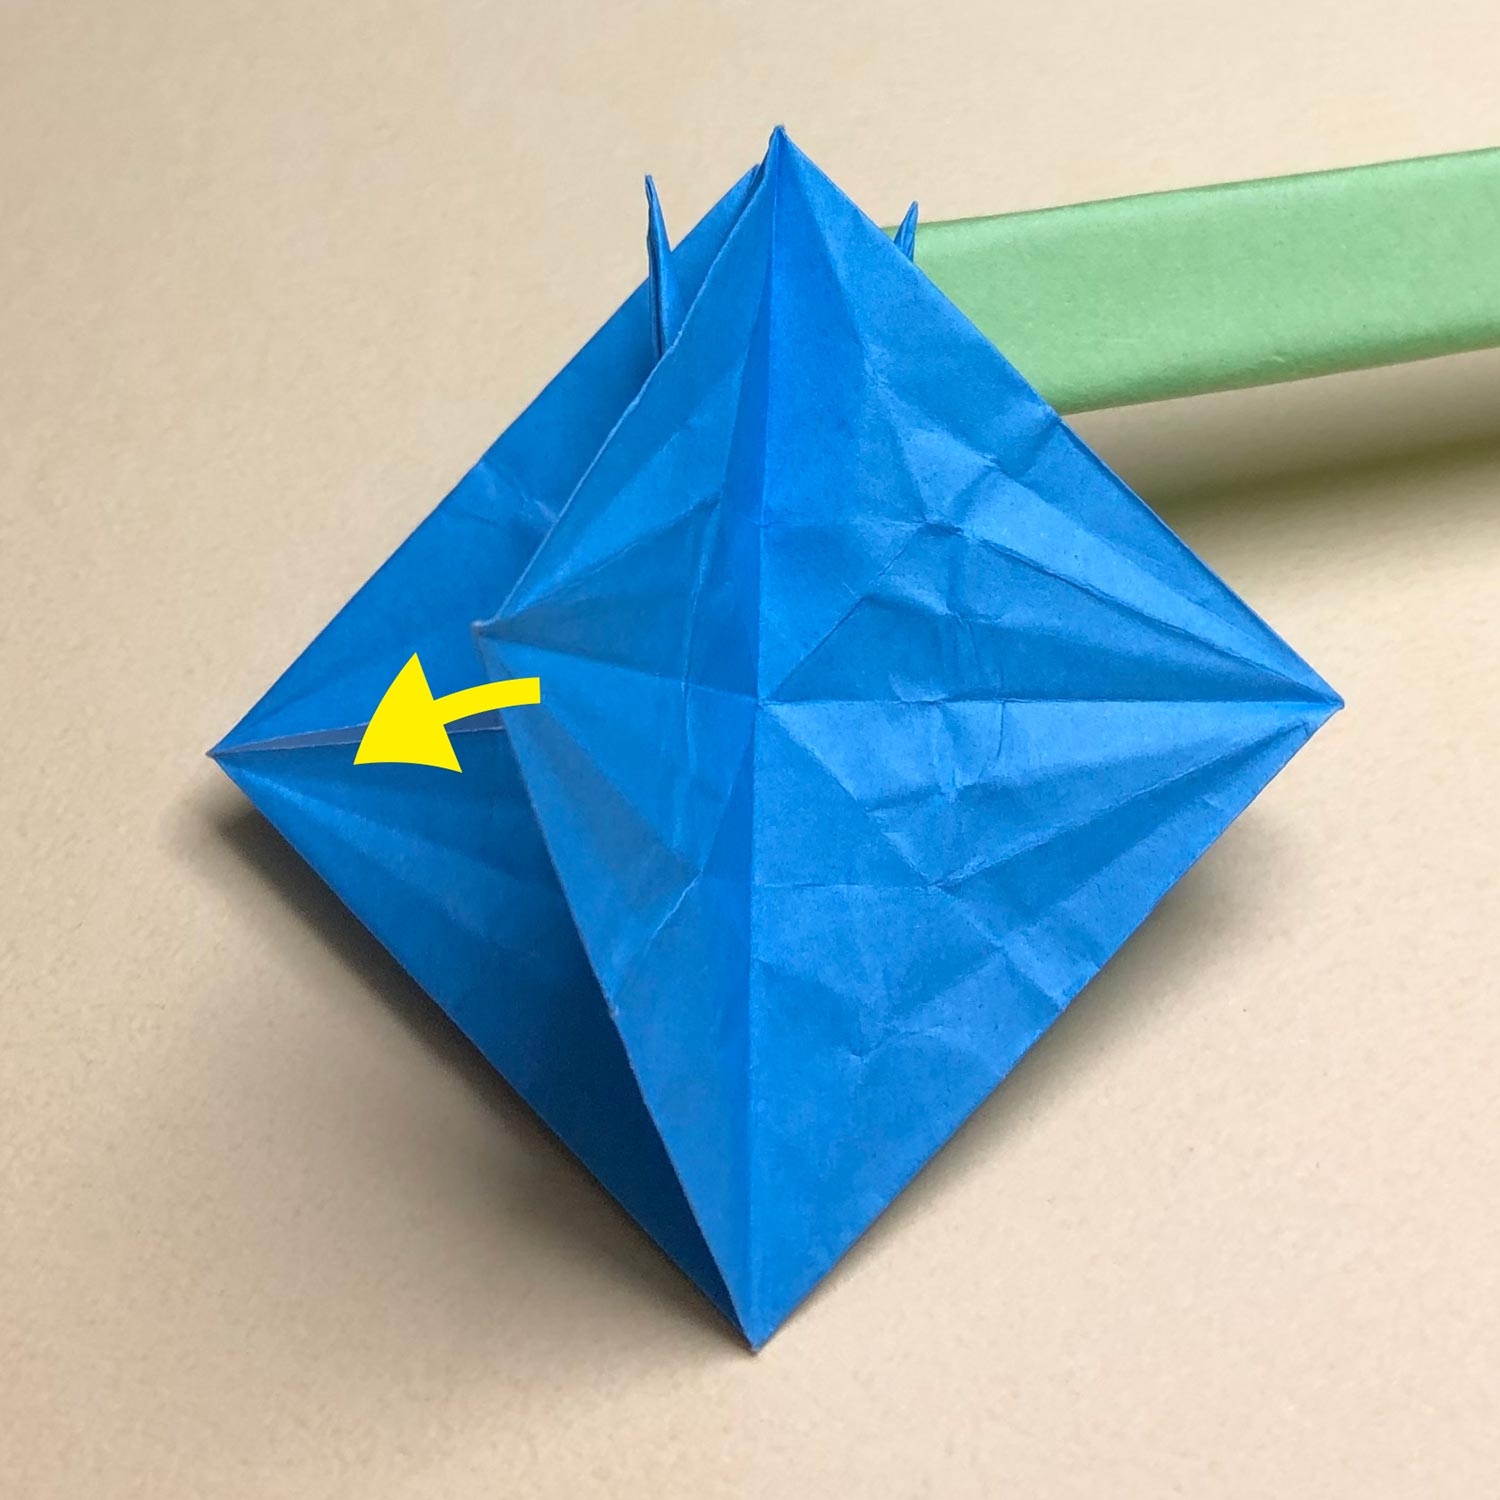
This picture is halfway through.
(107)
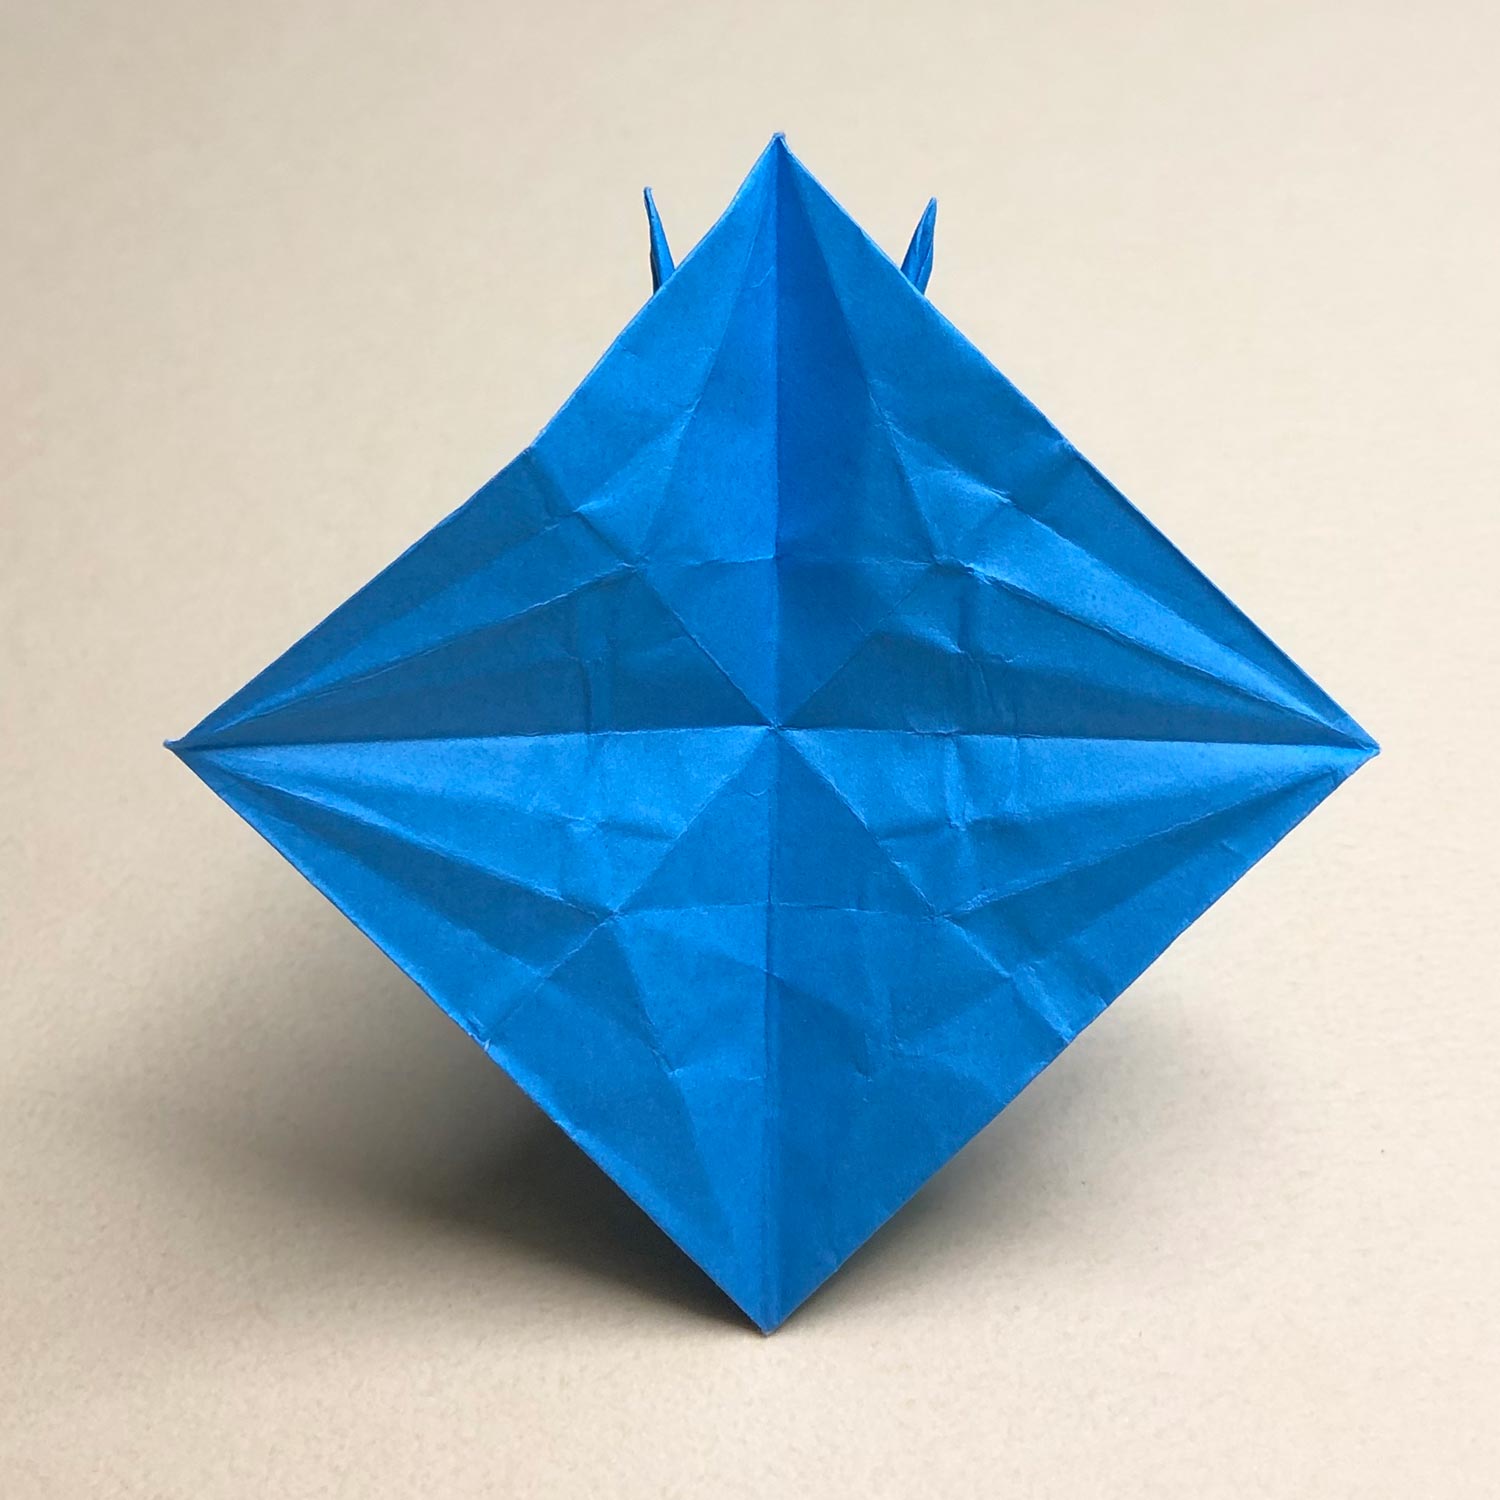
Move the flap like this picture.
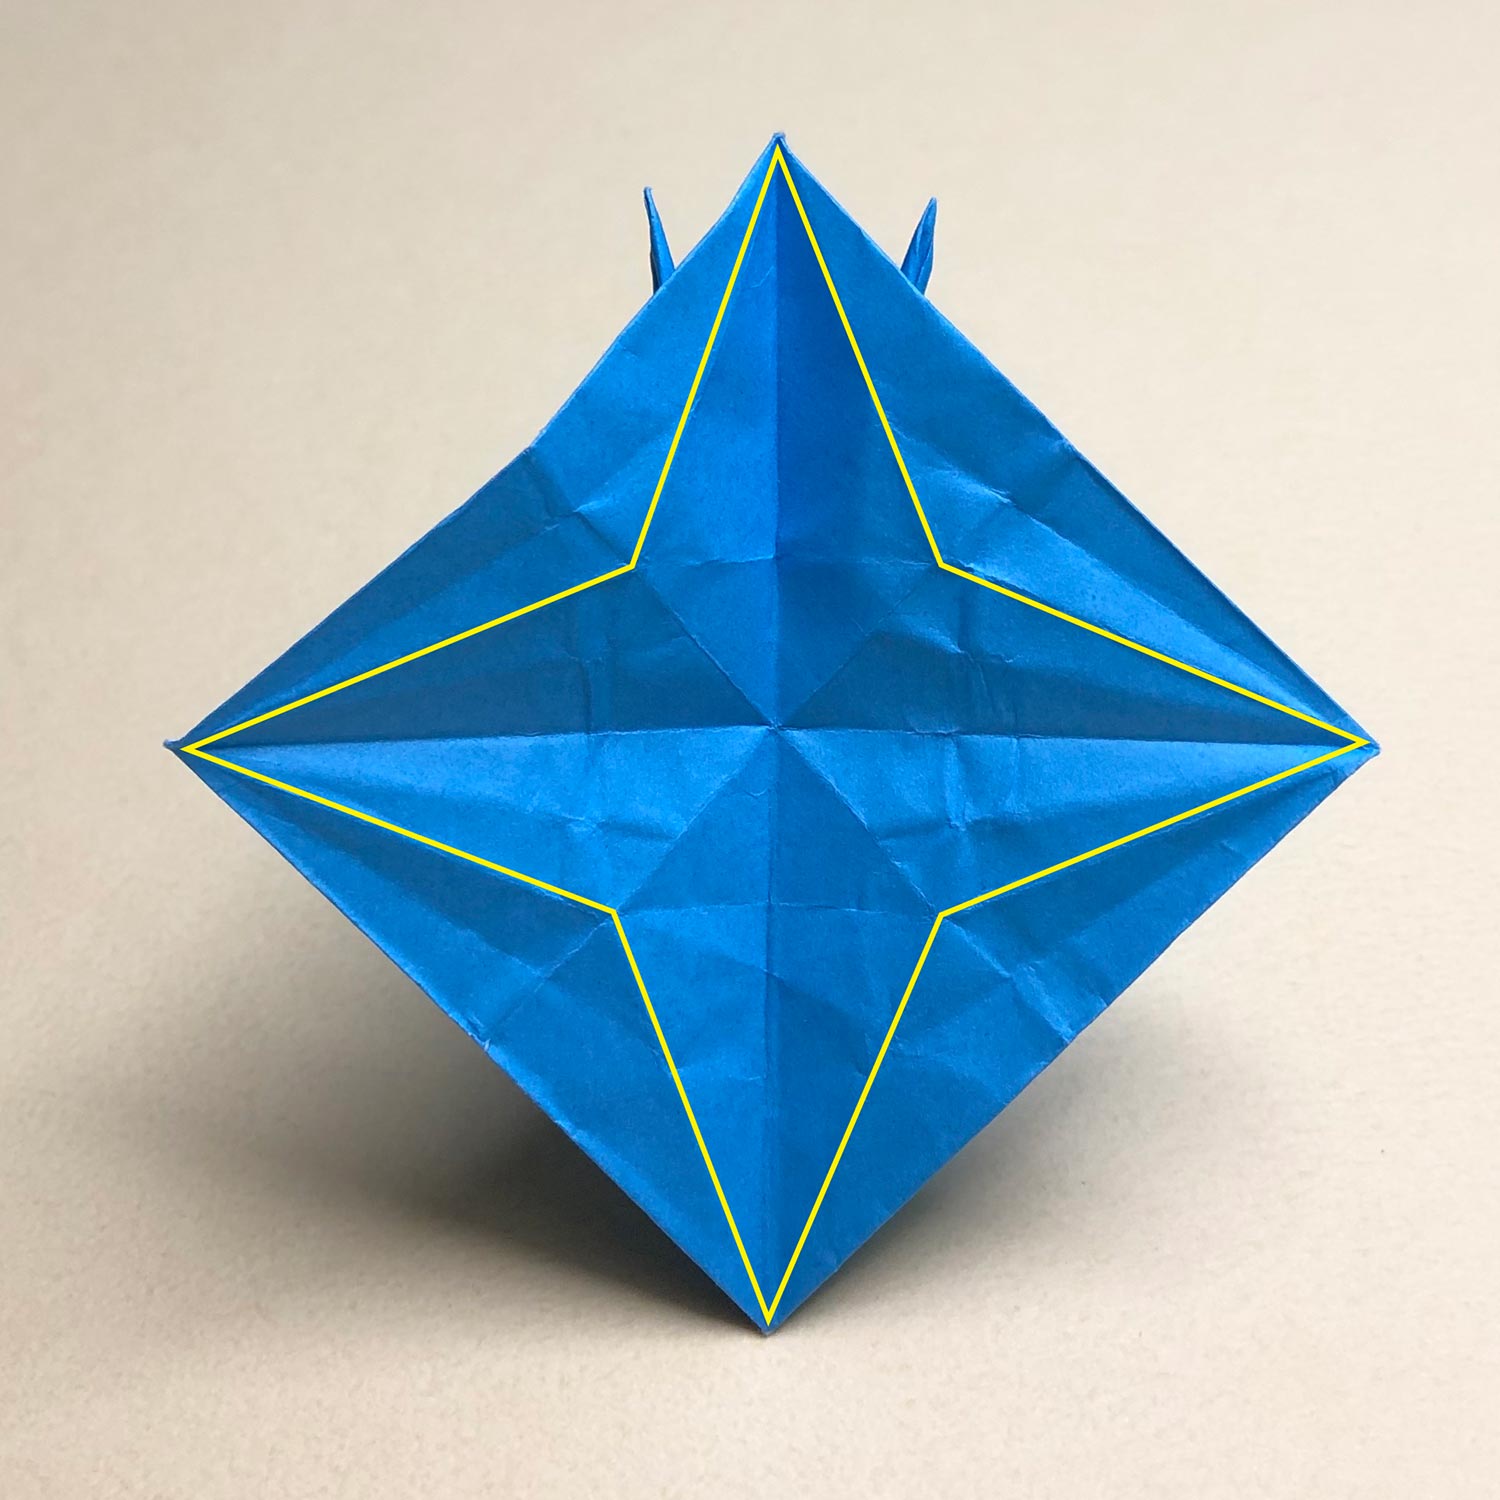
(108)
Then make mountain-folds on the yellow lines.
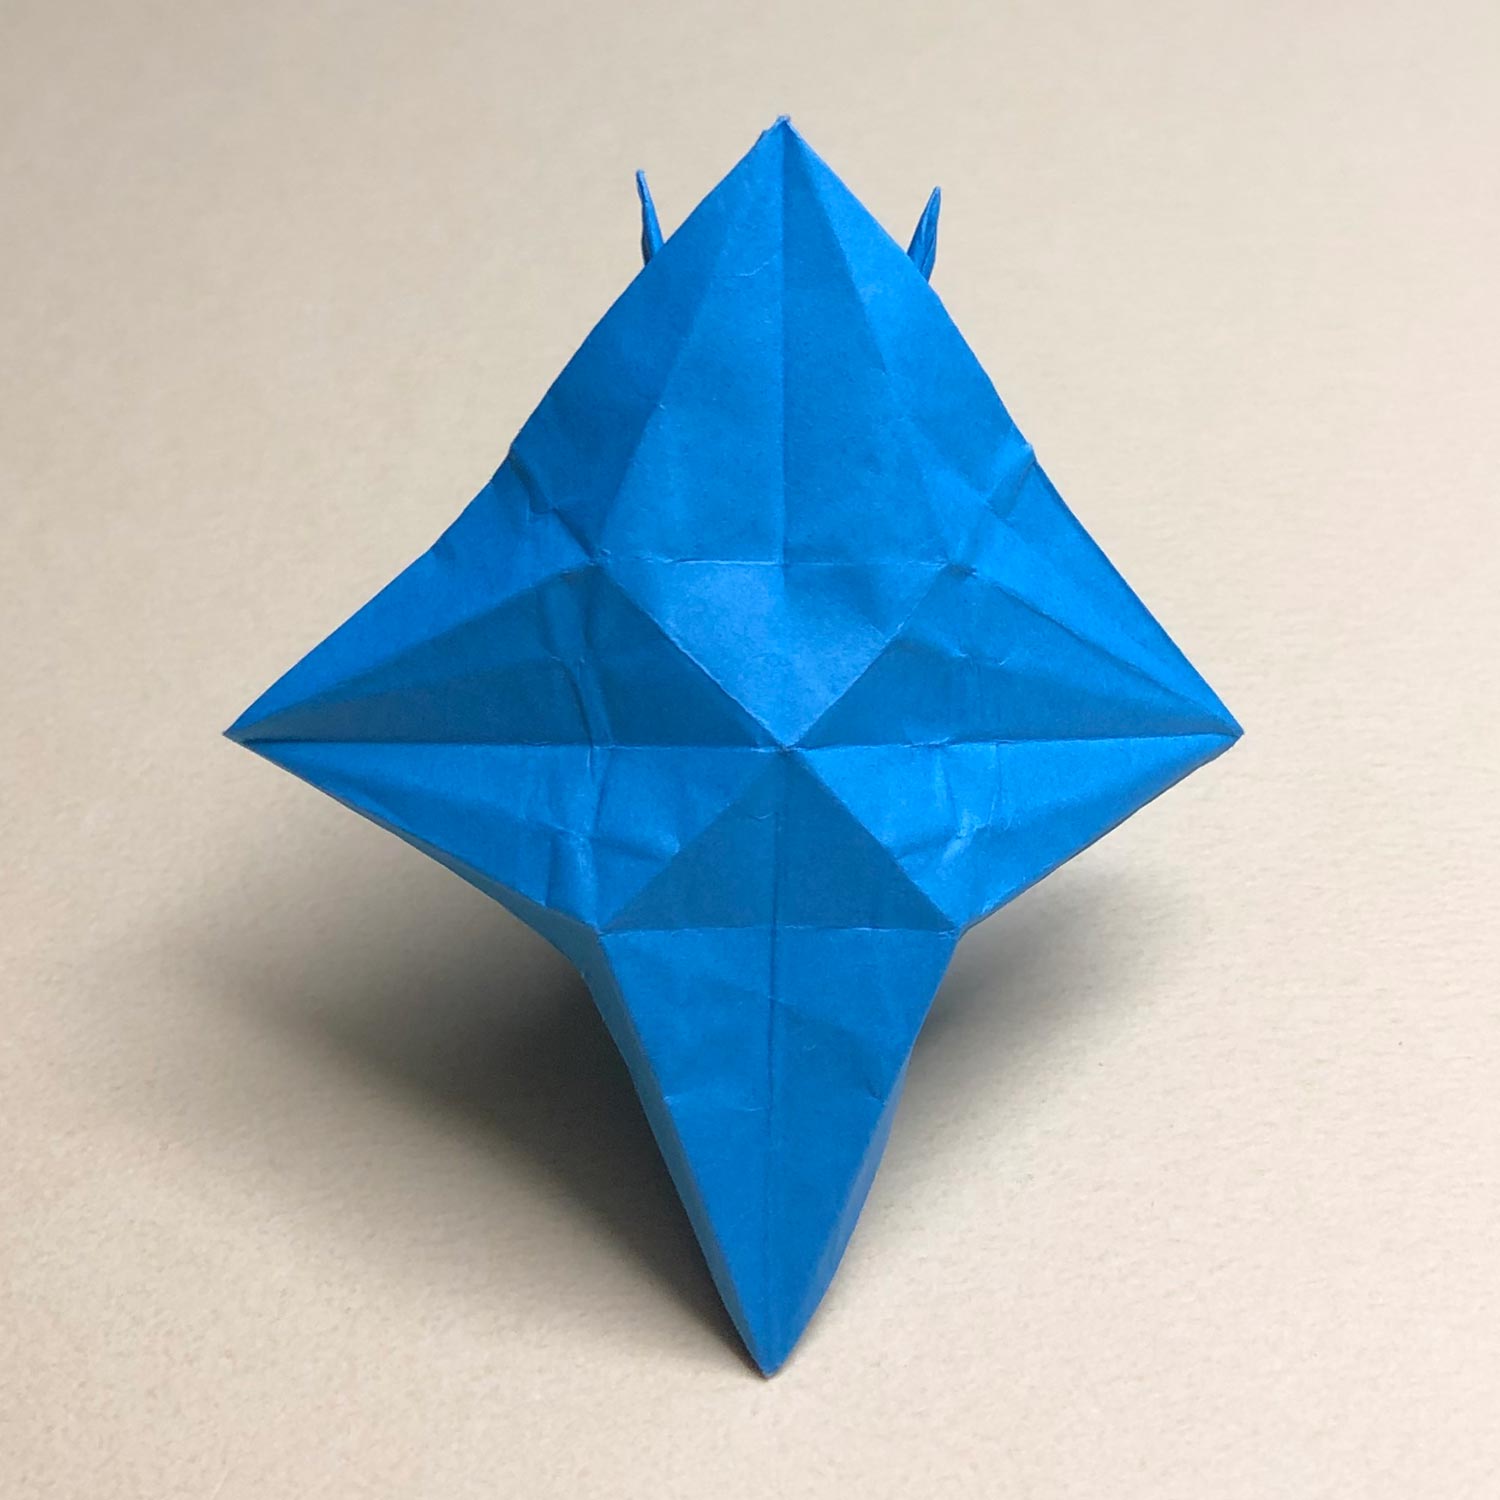
(109)
Make mountain-folds like this picture.

(110)
Then while making a valley-fold on the dotted line, fold the edge in the direction of the arrow so that the edge get caught on the completed crane.
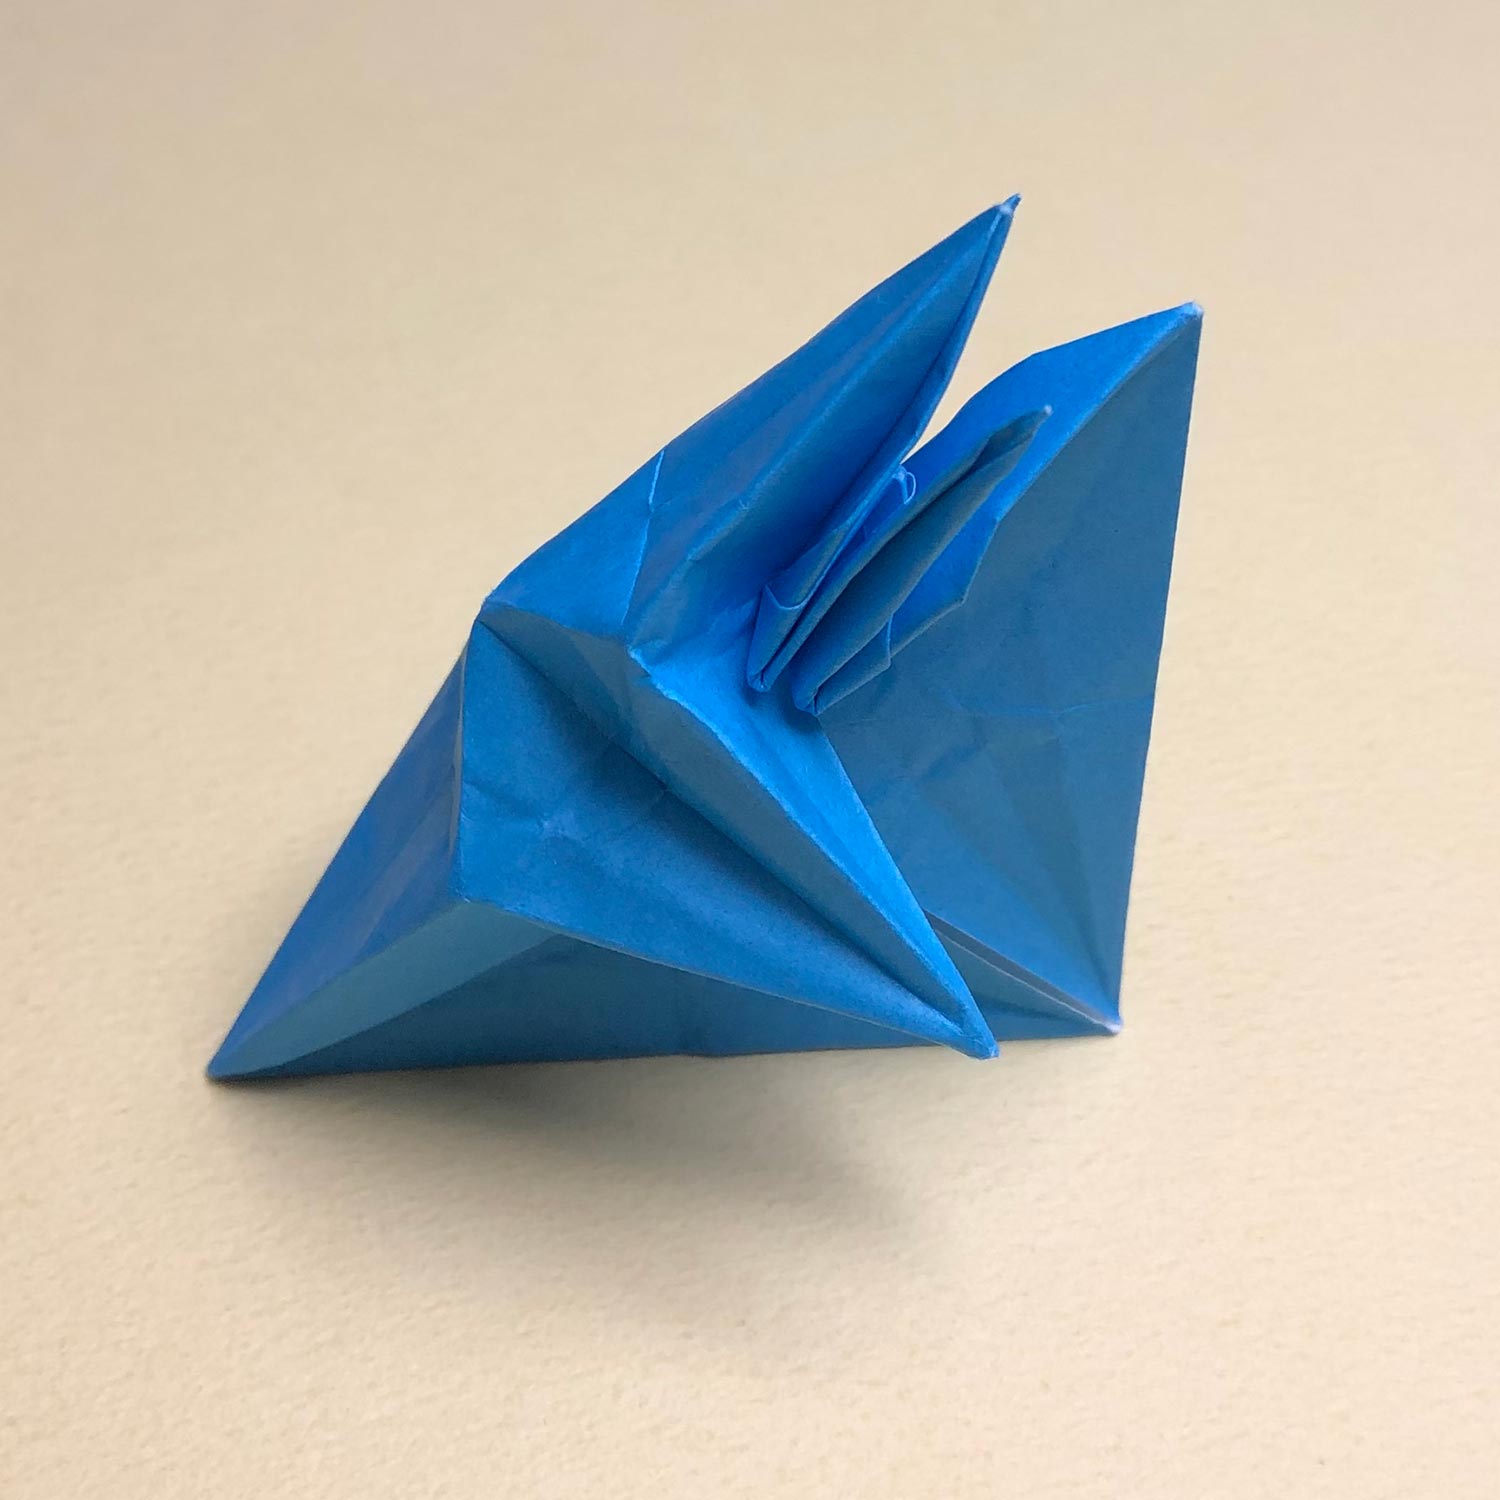
(111)
Fold the edge like this picture.
(so that the edge get caught on the completed crane.)
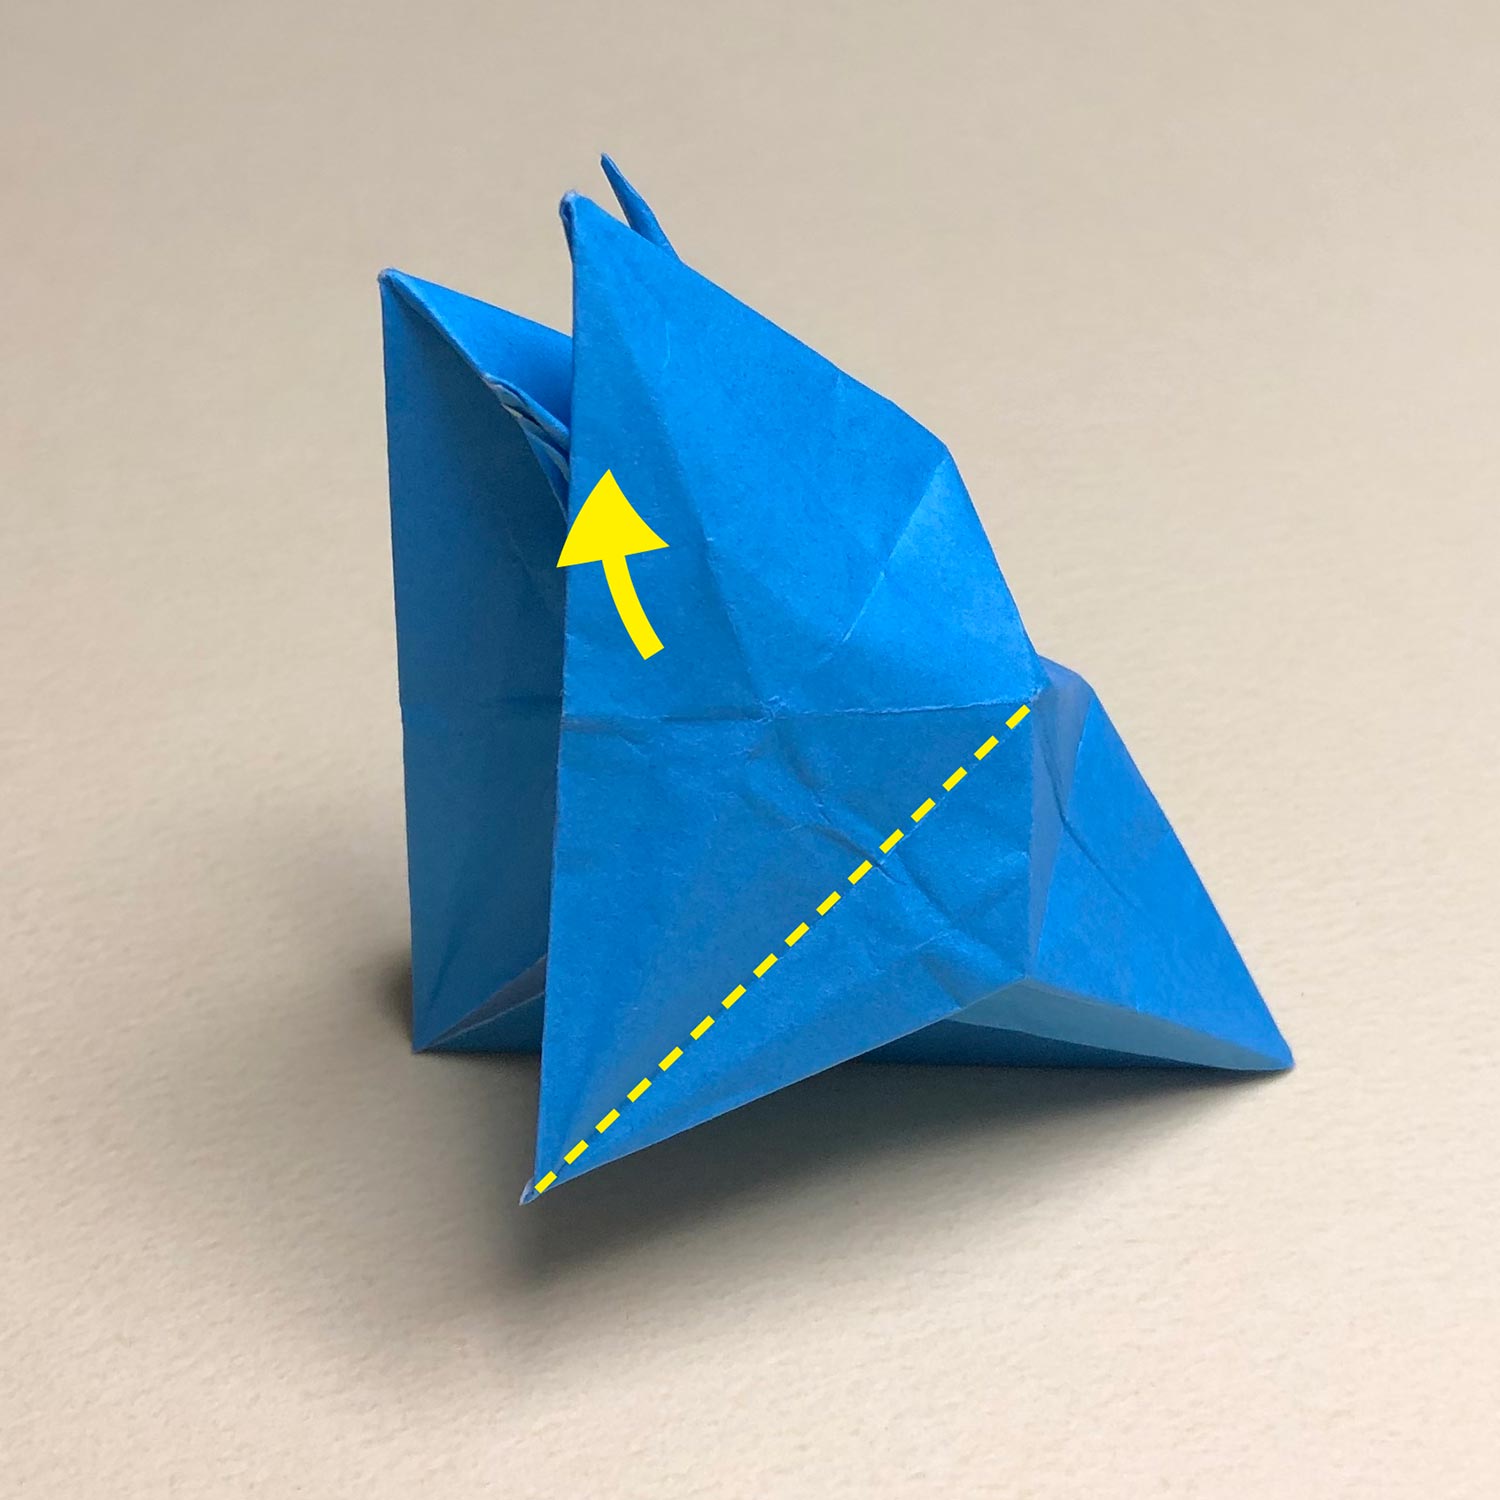
(112)
On the opposite side too, while making a valley-fold on the dotted line, fold the edge in the direction of the arrow so that the edge get caught on the completed crane.

(113)
Fold the edge like this picture.
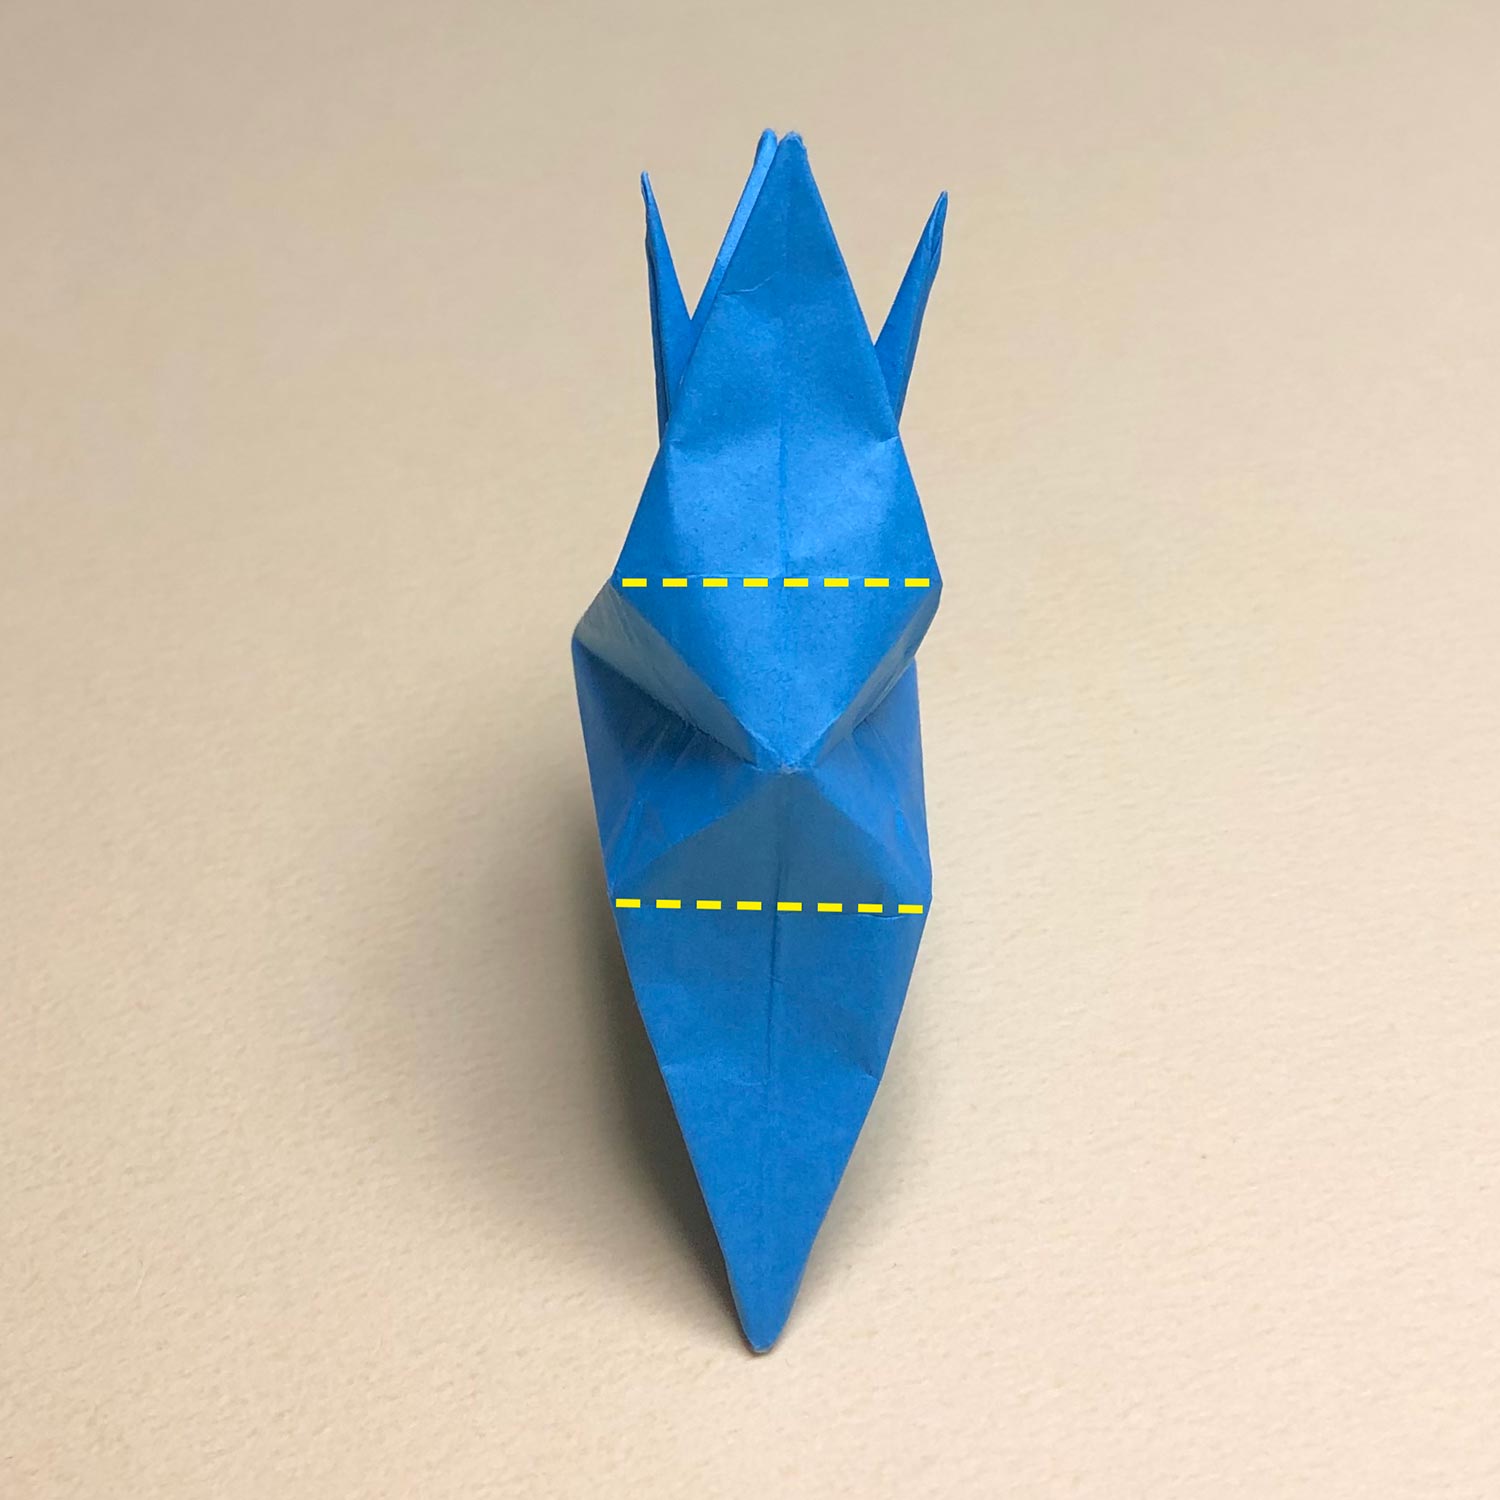
(114)
After that, the parts that the dotted lines are would be swollen.
Push the parts from top and make creases at the dotted lines.
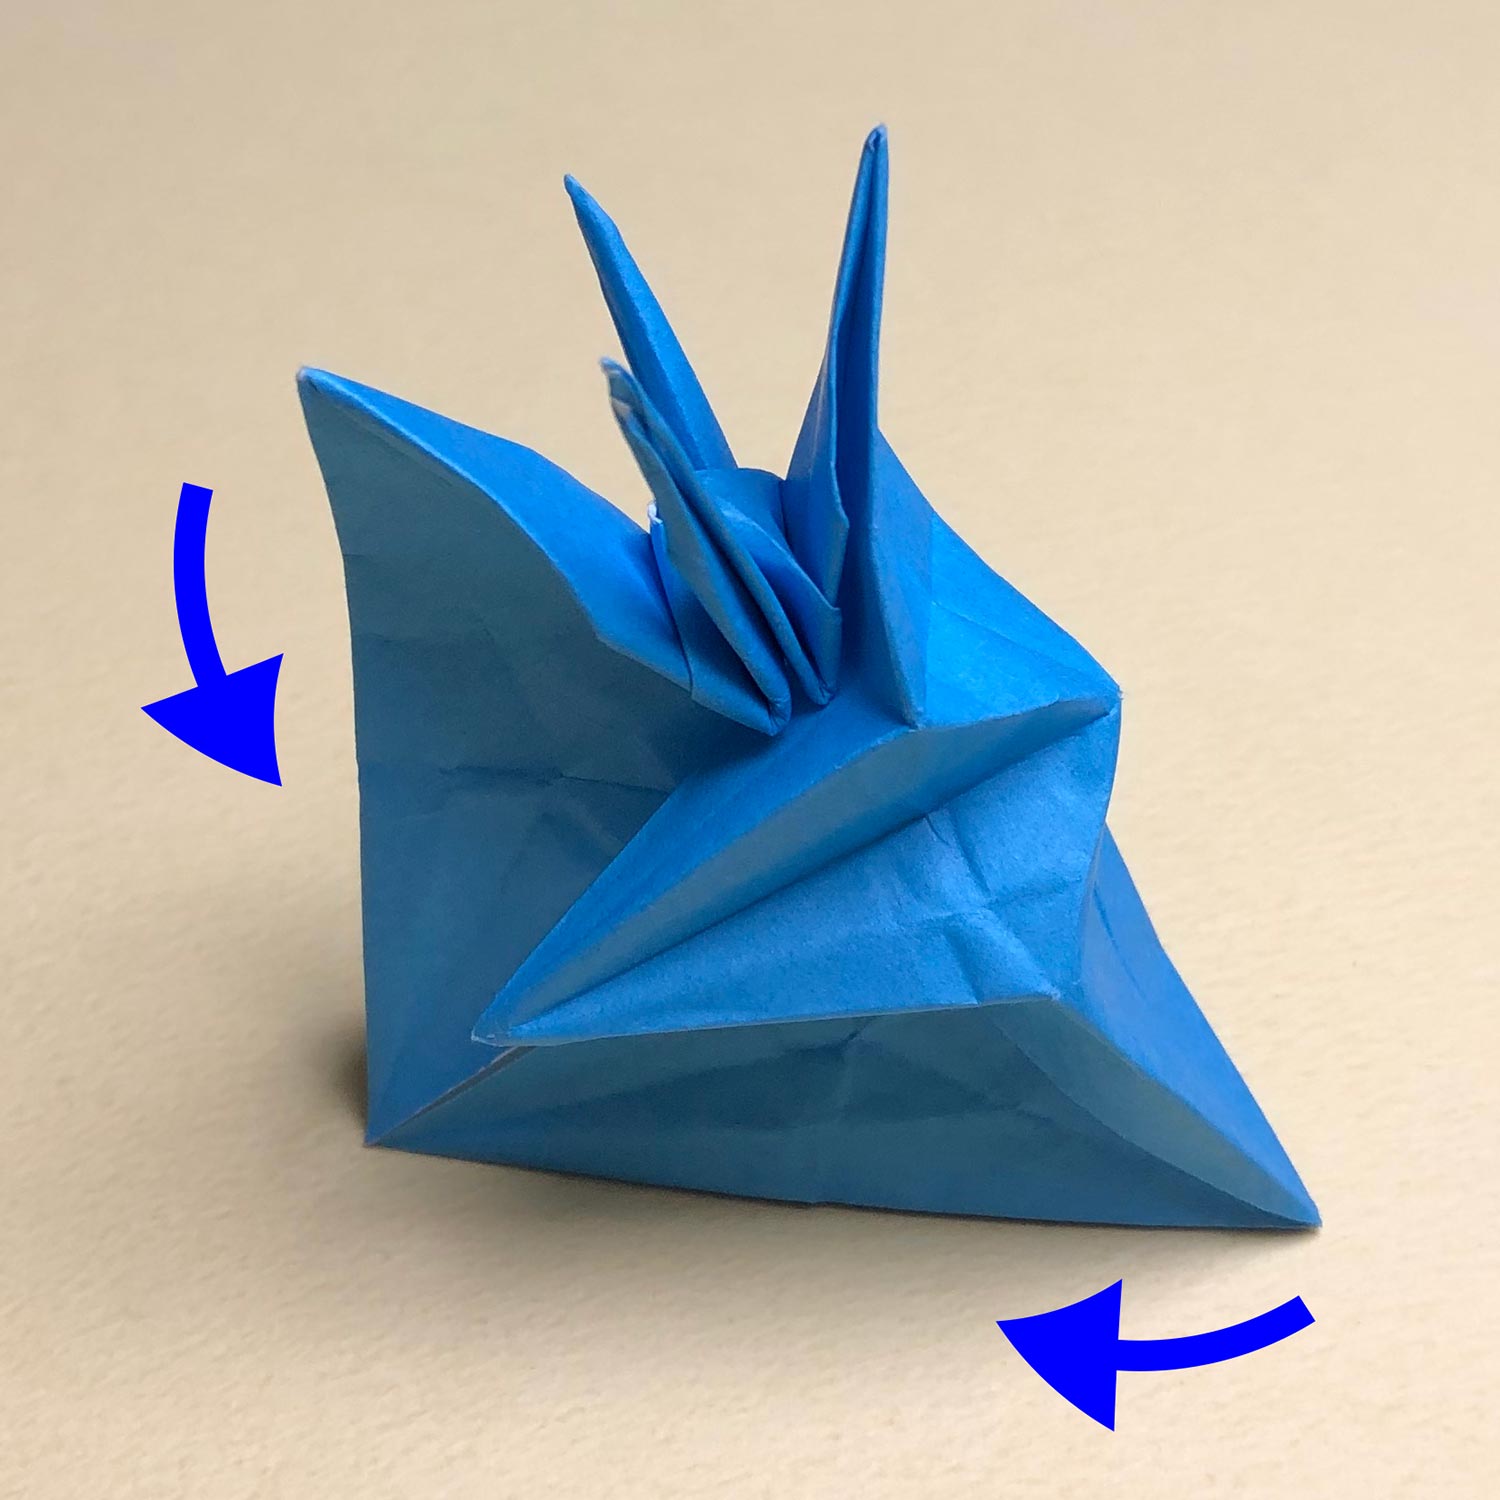
(115)
Then move both sides in the direction of the arrows.
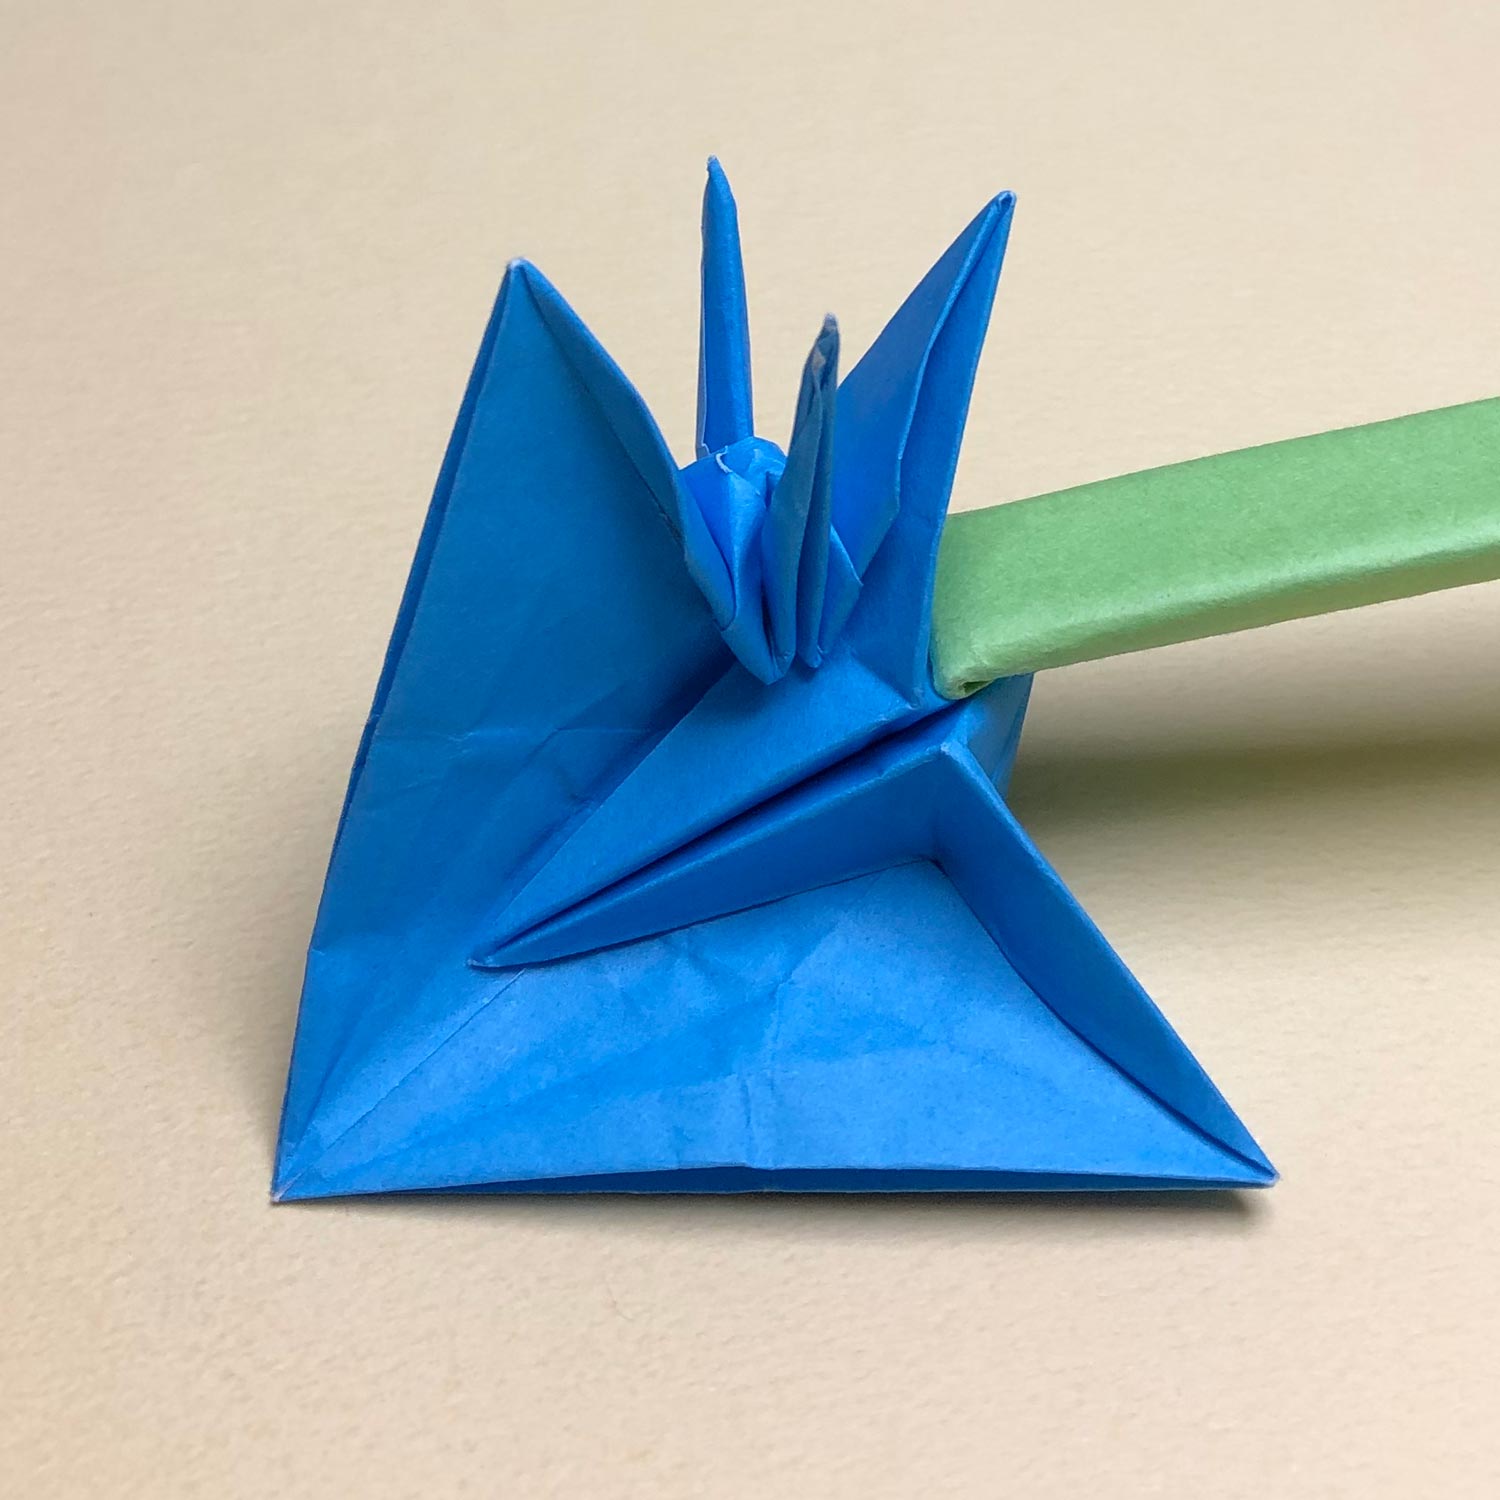
(116)
Move both sides like this picture.
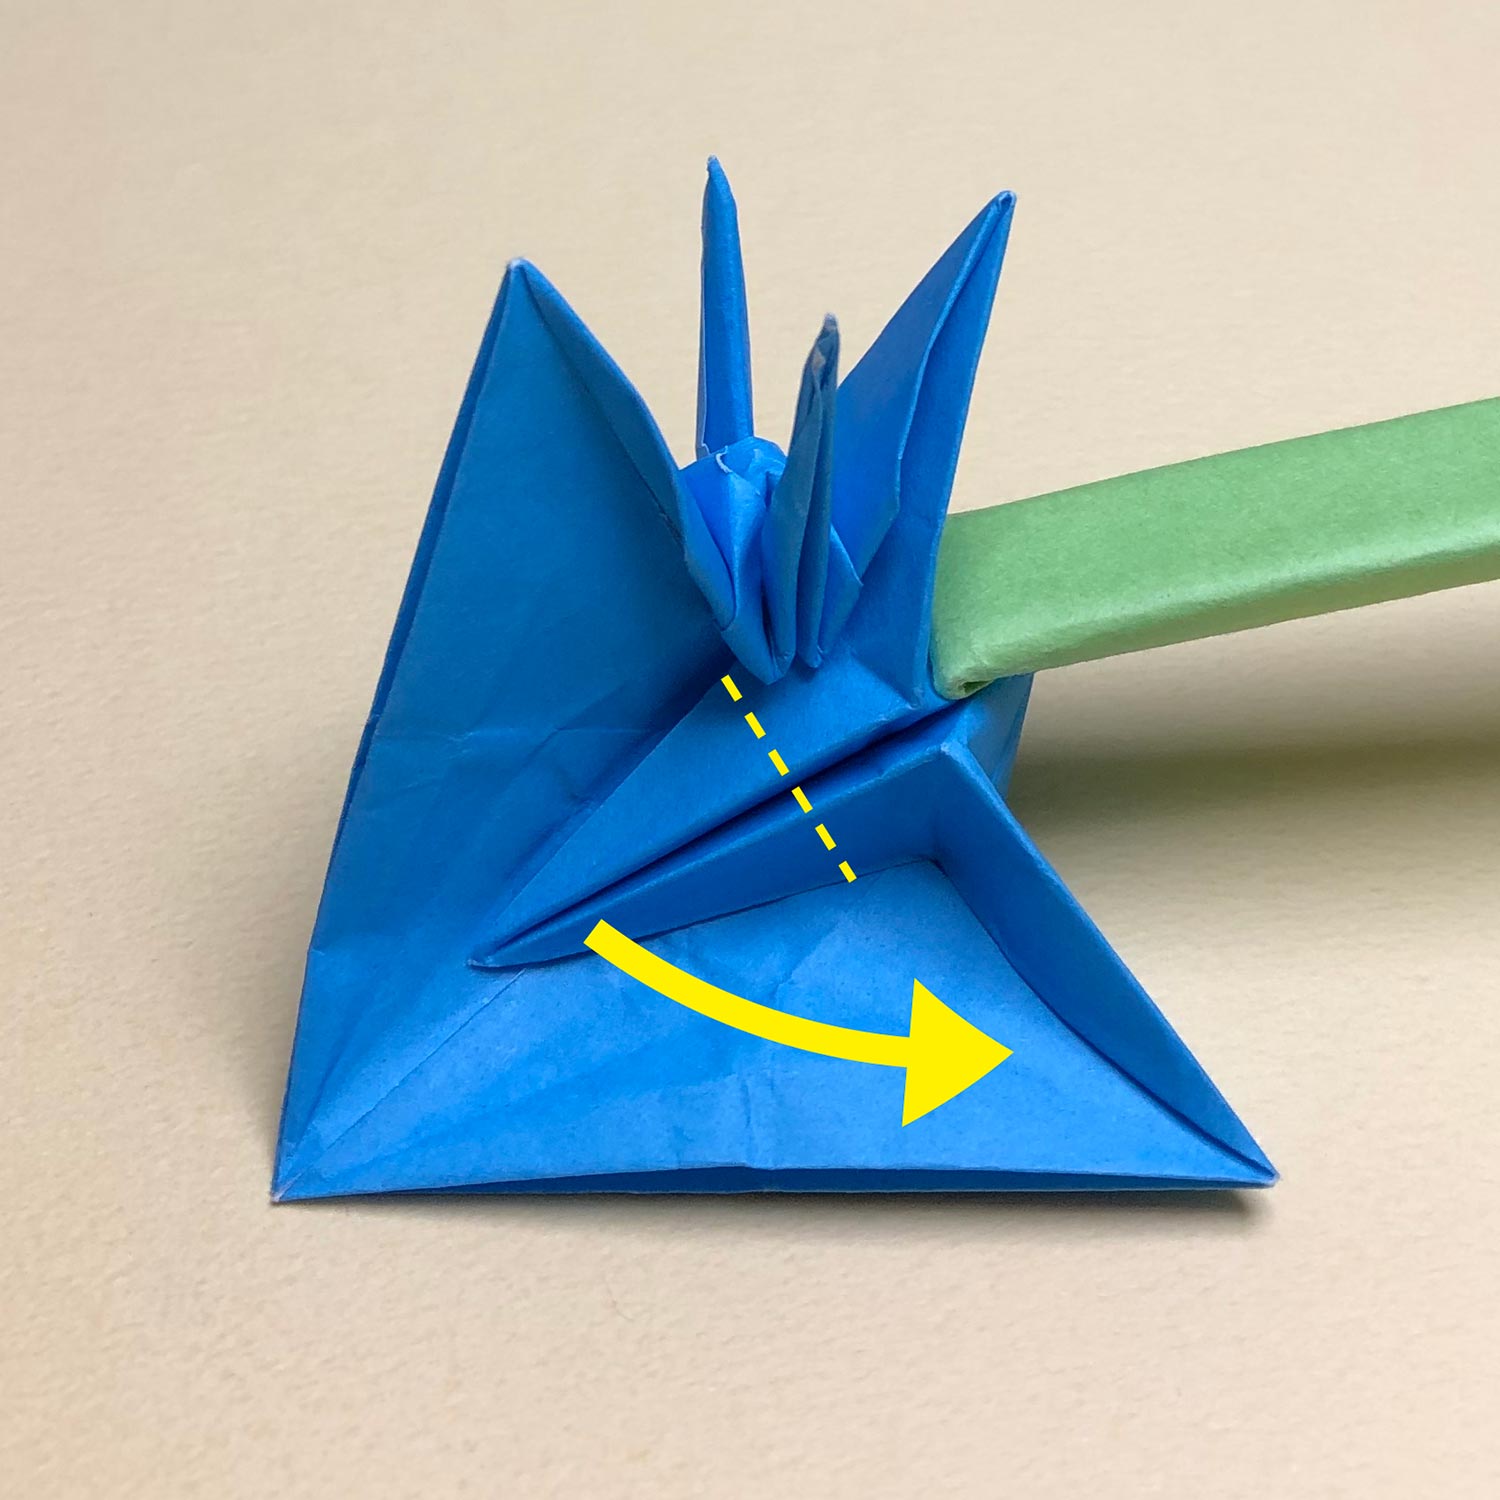
(117)
In the state of that, move the head/tail in the direction of the arrow.
(fold the head/tail to the side.)
(*In this picture, I put the green stick to take a picture.
When moving the head/tail, hold both sides.)

(118)
Move the head/tail like this picture.
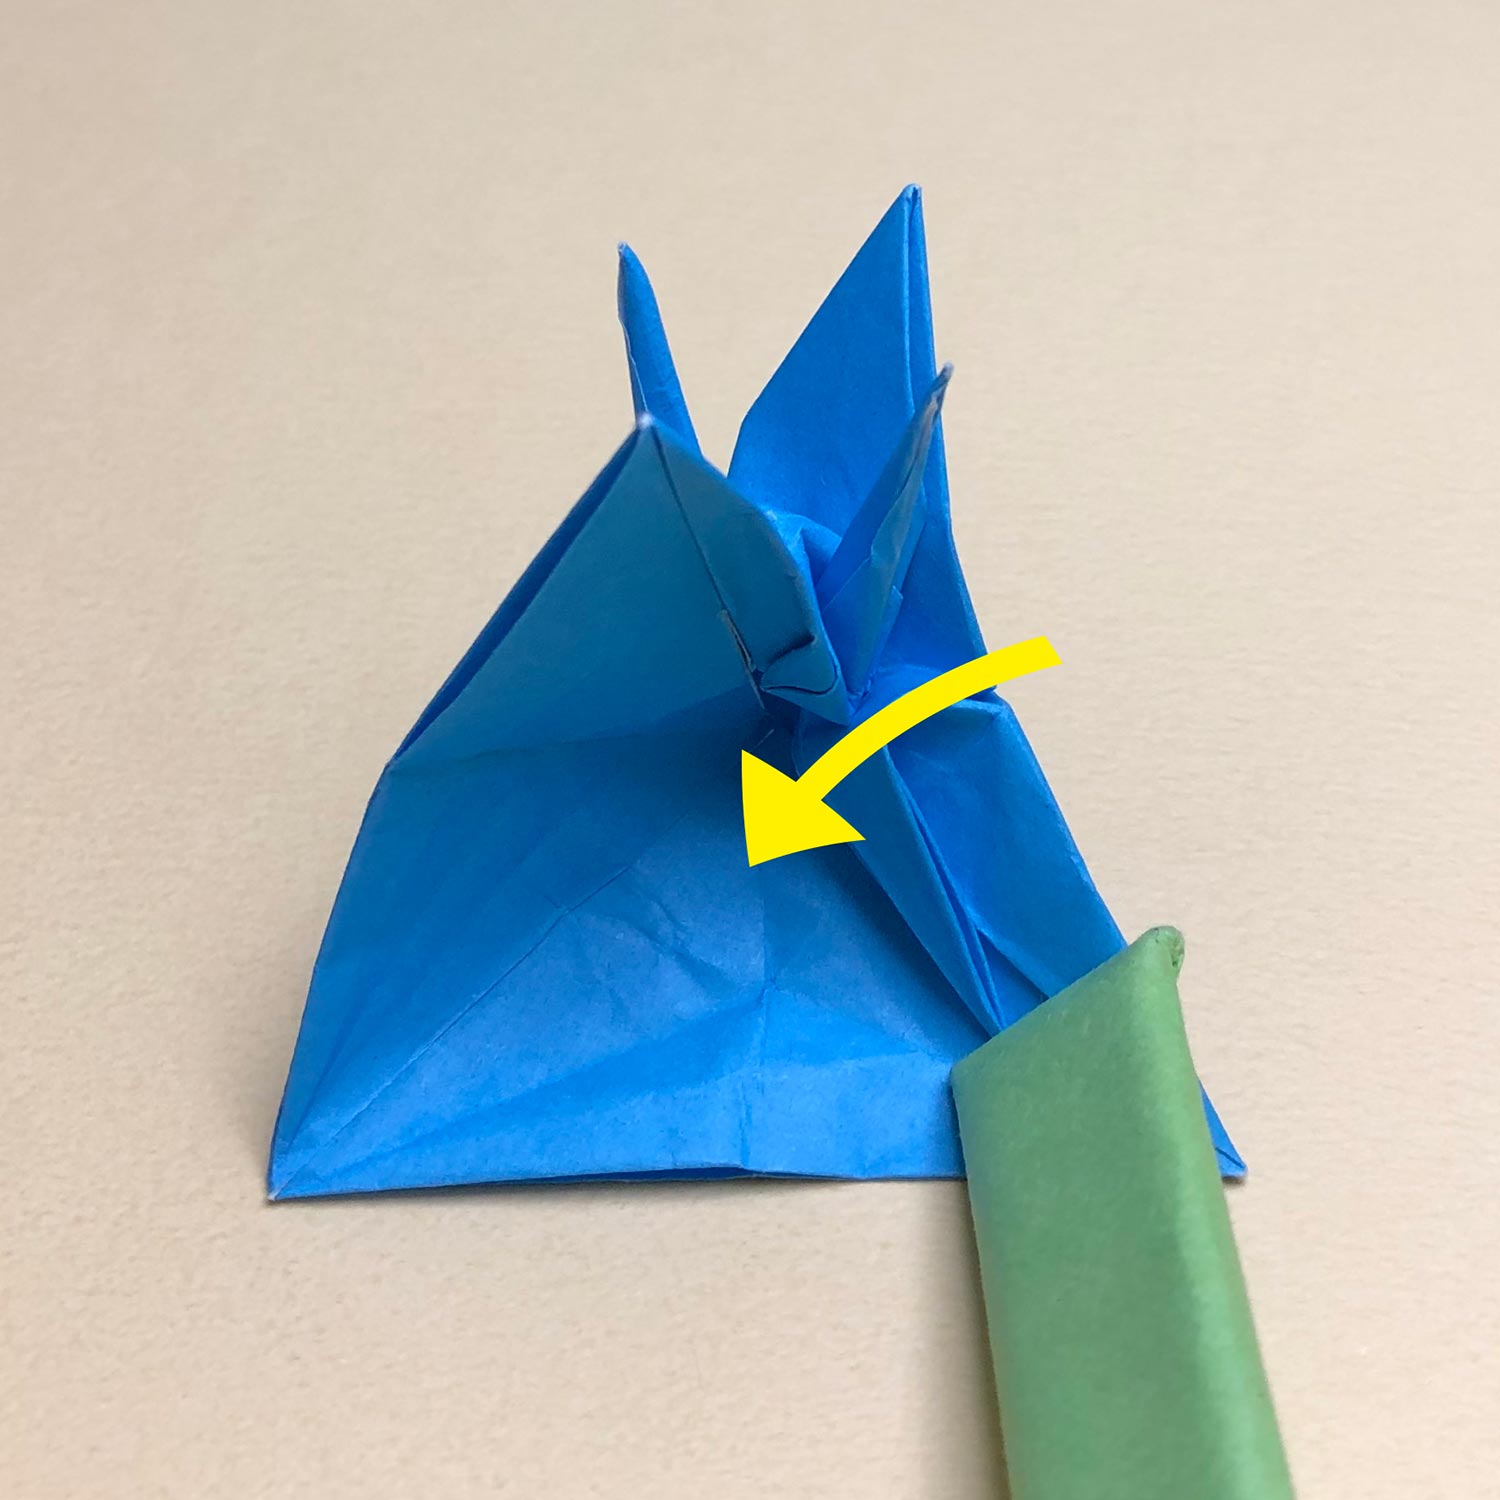
(119)
Then move the completed crane and uncompleted crane in the direction of the arrow.
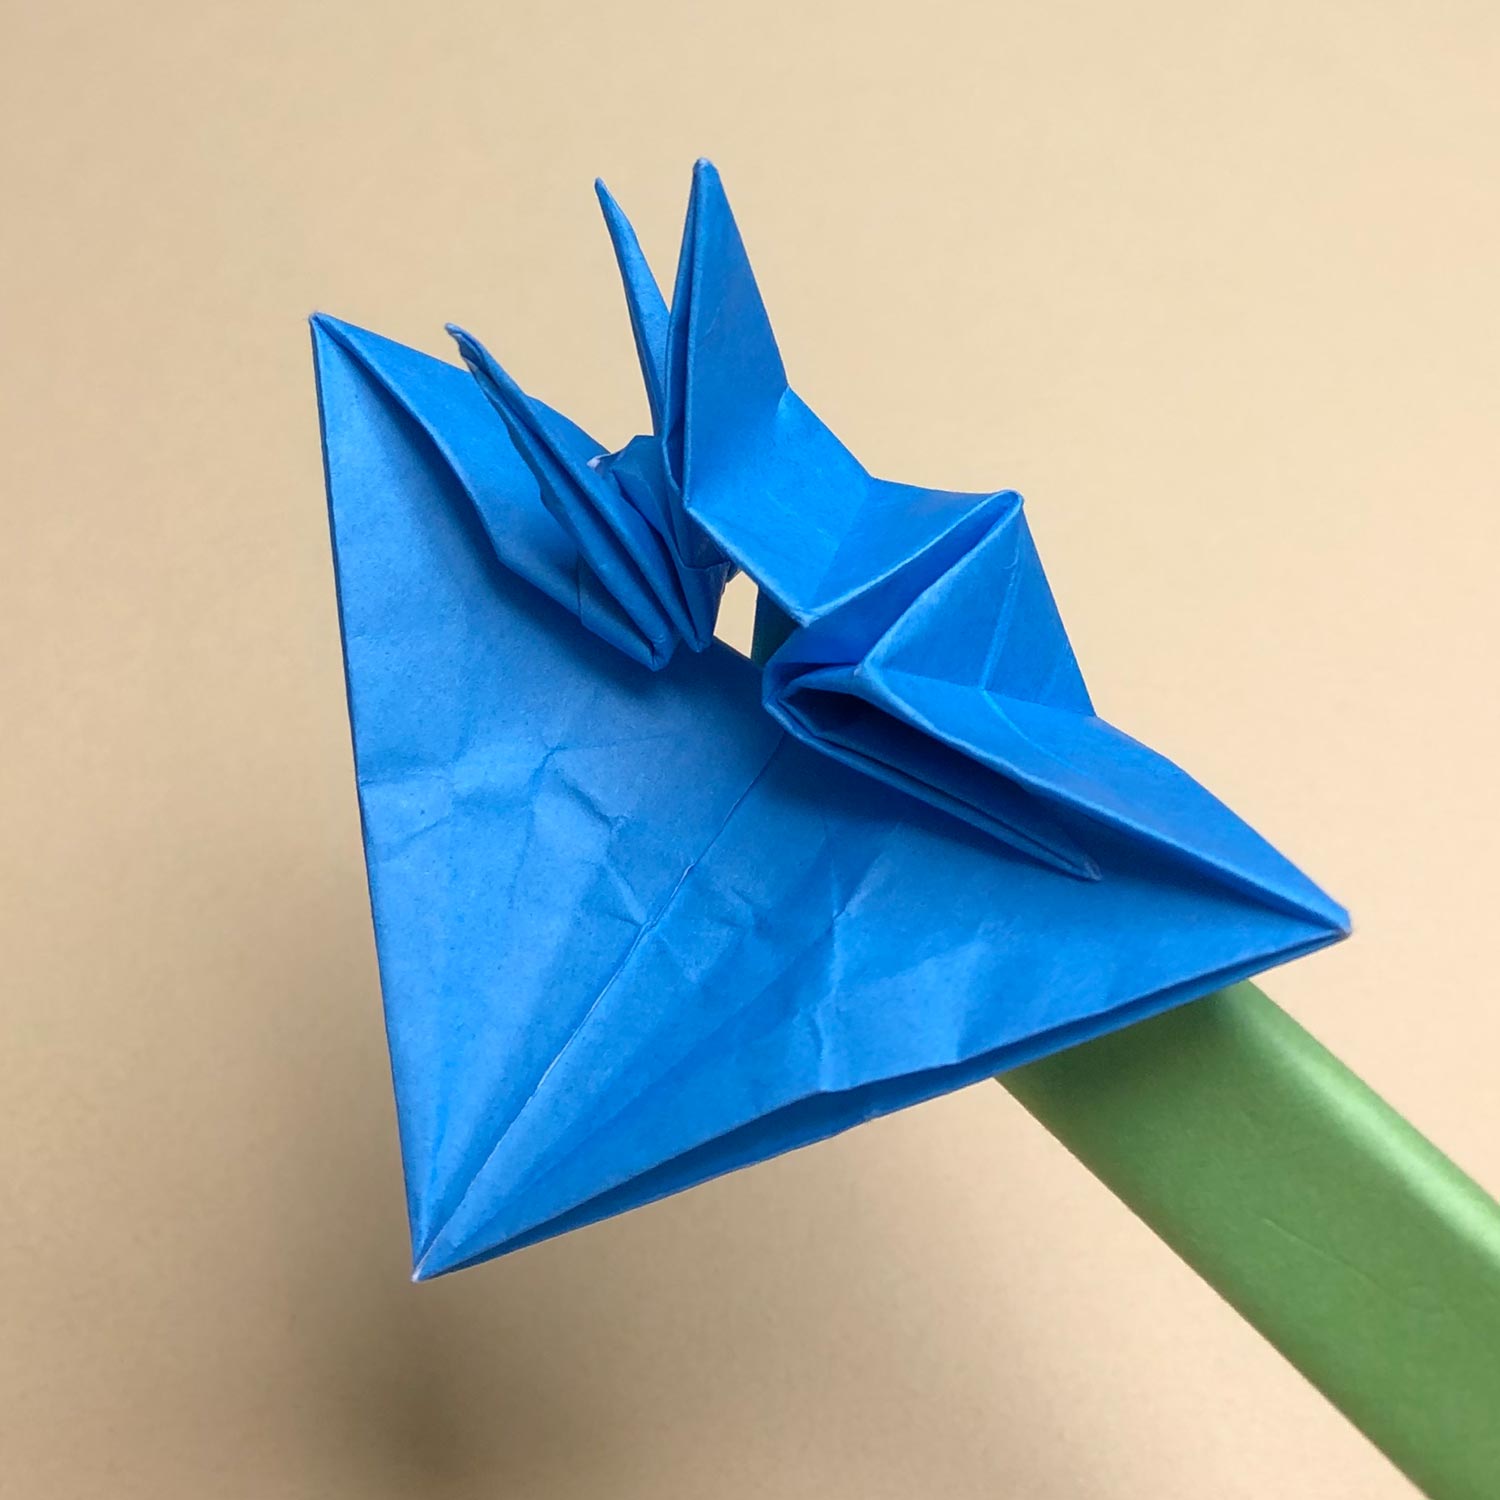
(120)
Move them like this picture.
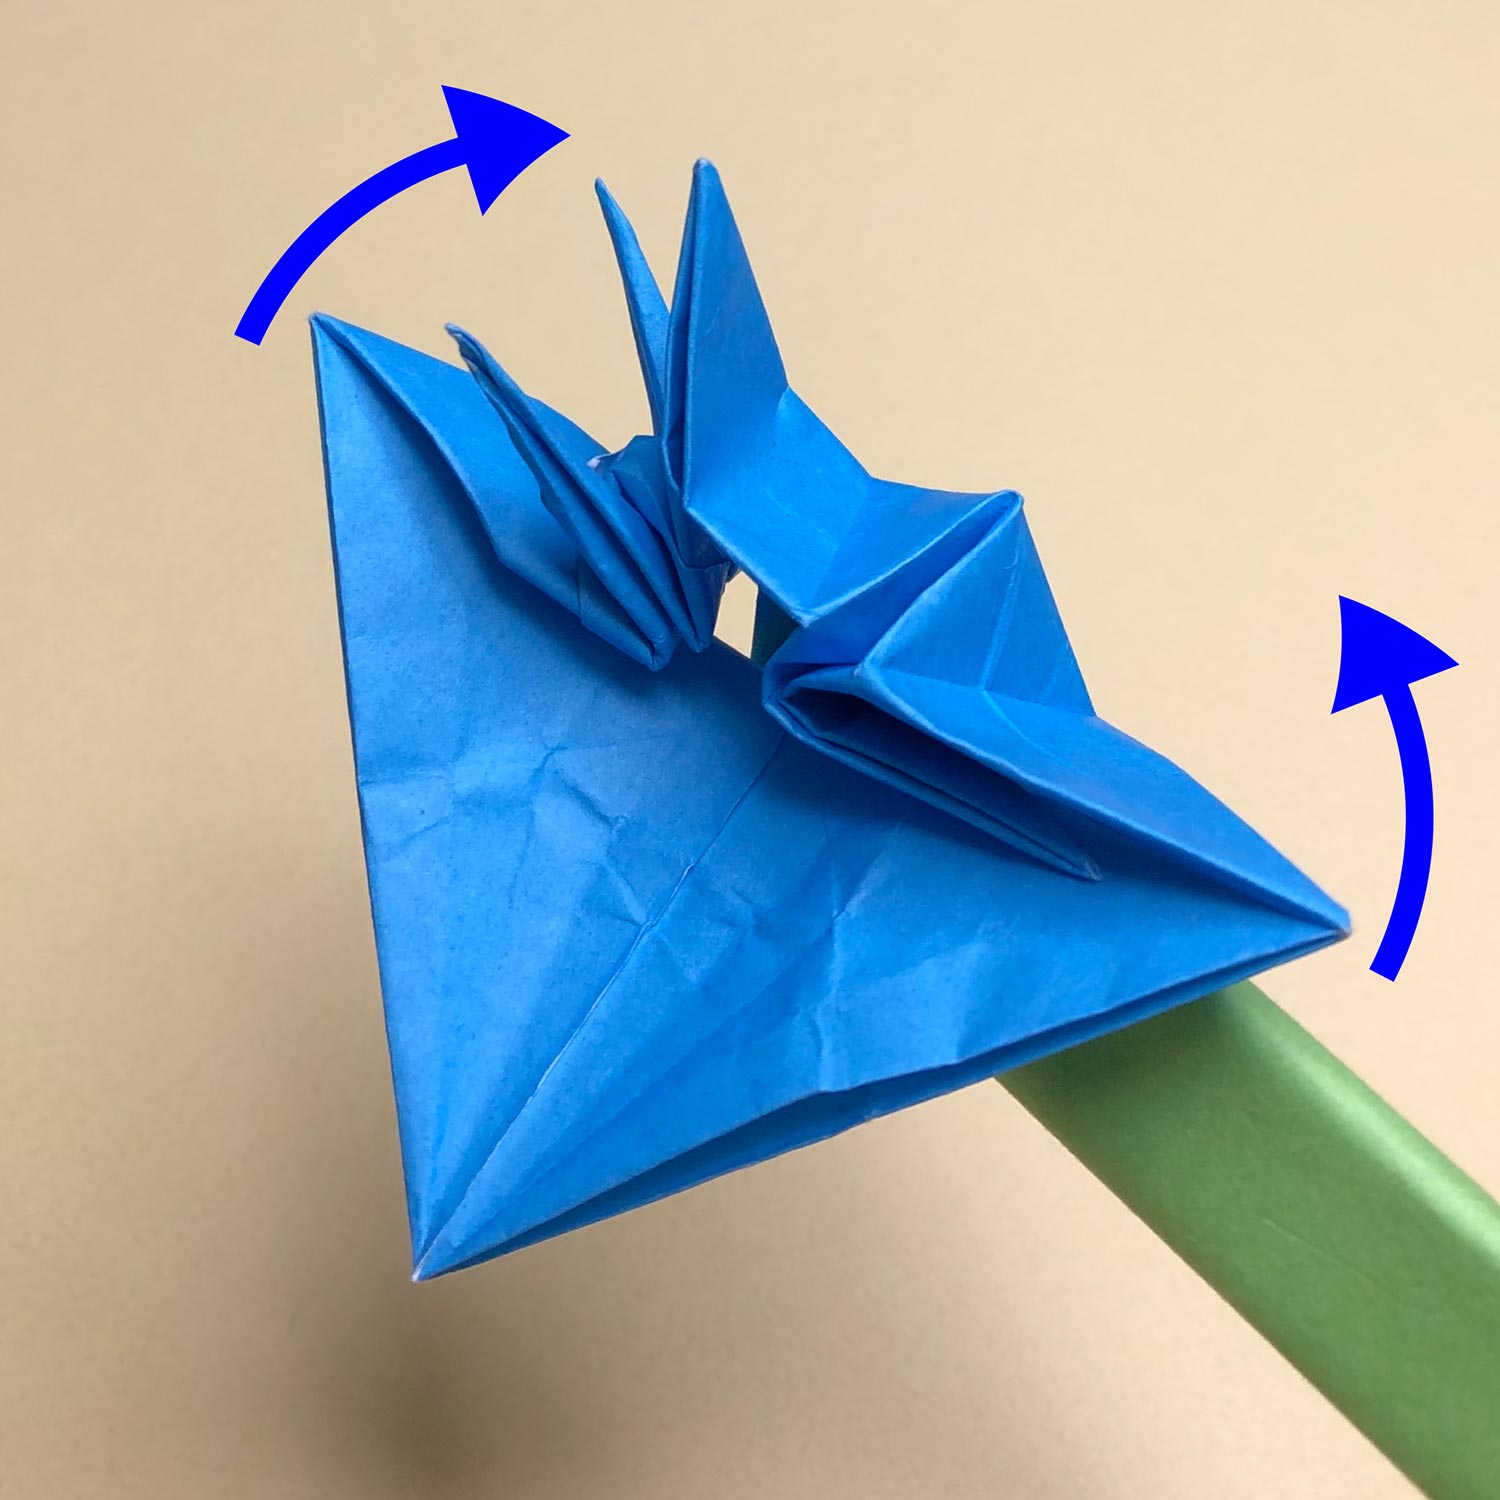
(121)
Then move both sides in the direction of the arrows and fold them.
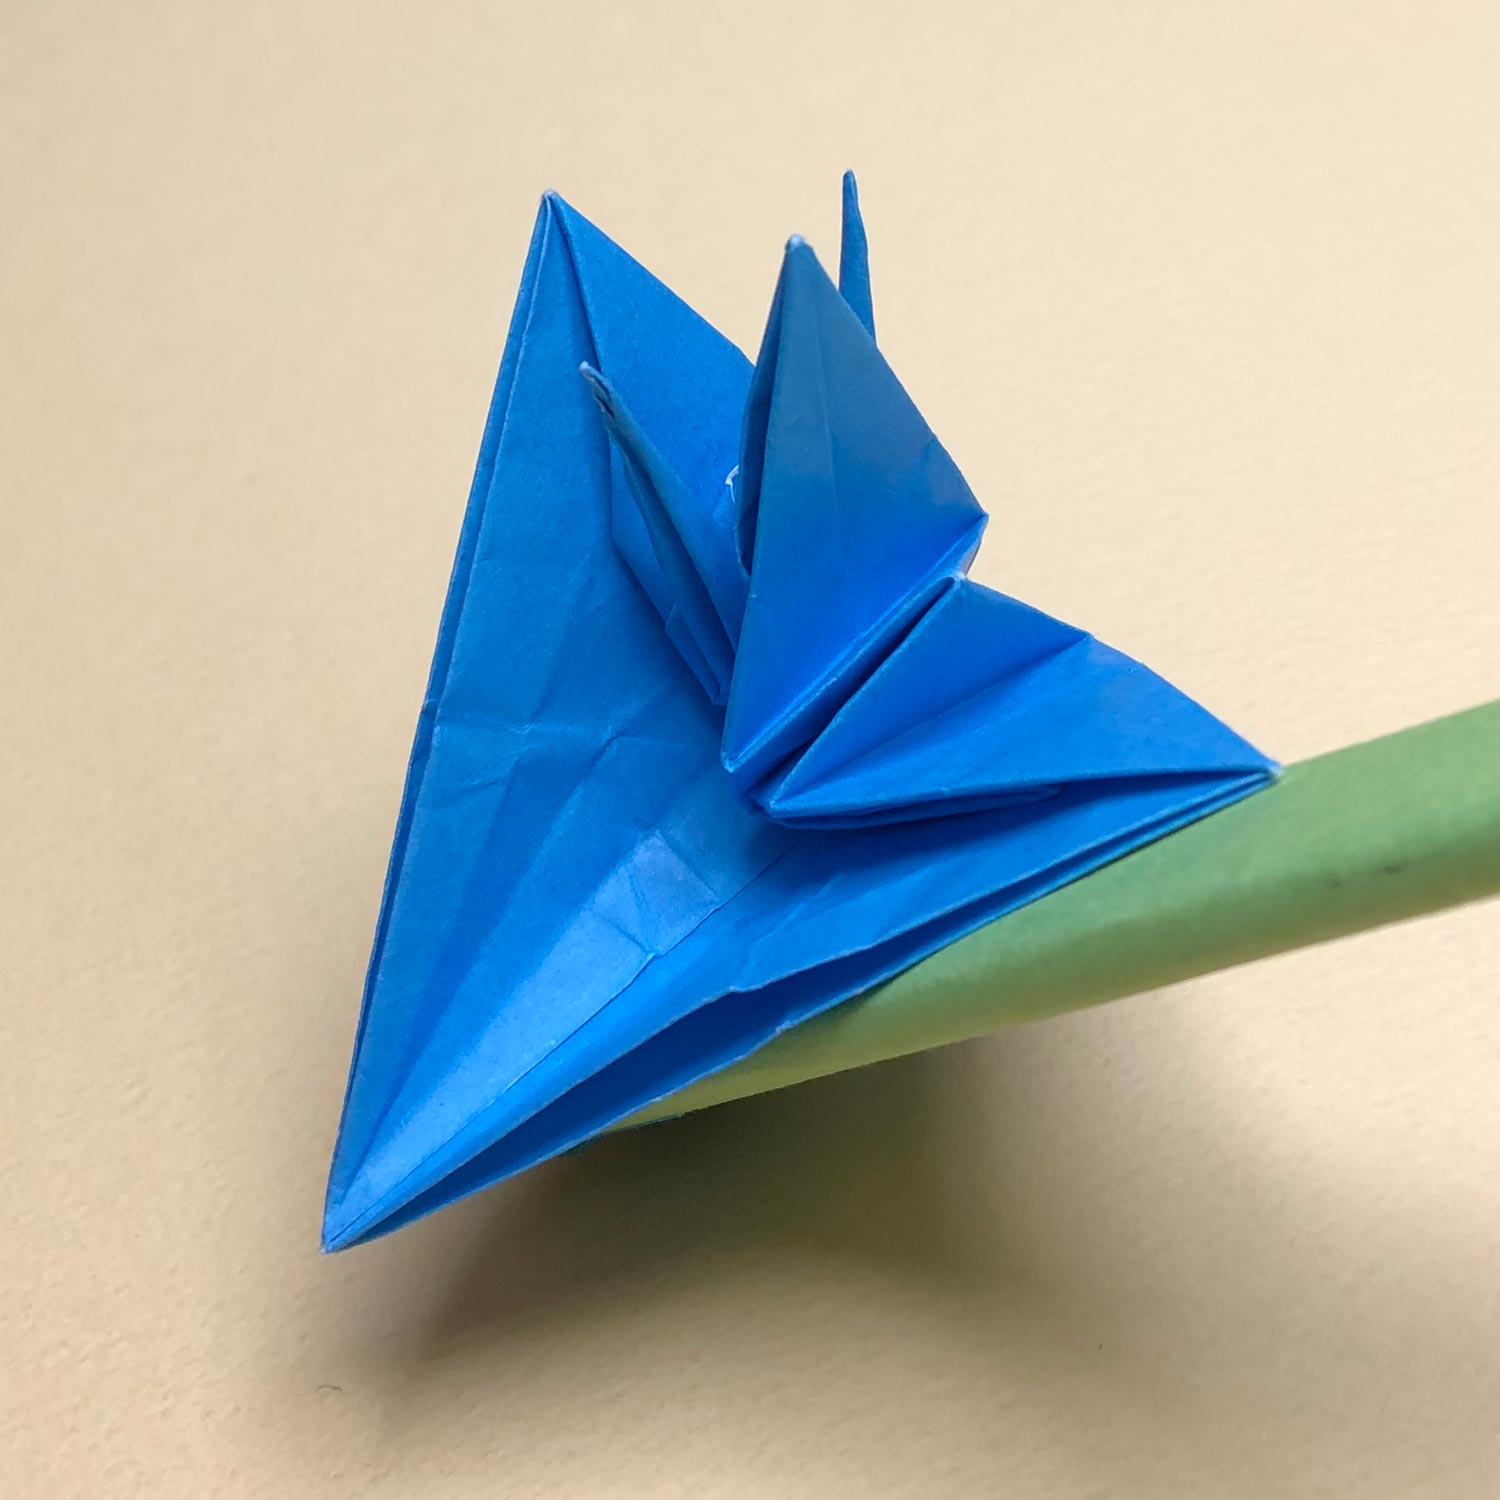
(122)
Fold them like this picture.

(123)
You become able to make creases for one side of a bird-base.
Make creases neatly.
After that, raise the head/tail as it is without folding it to the center.
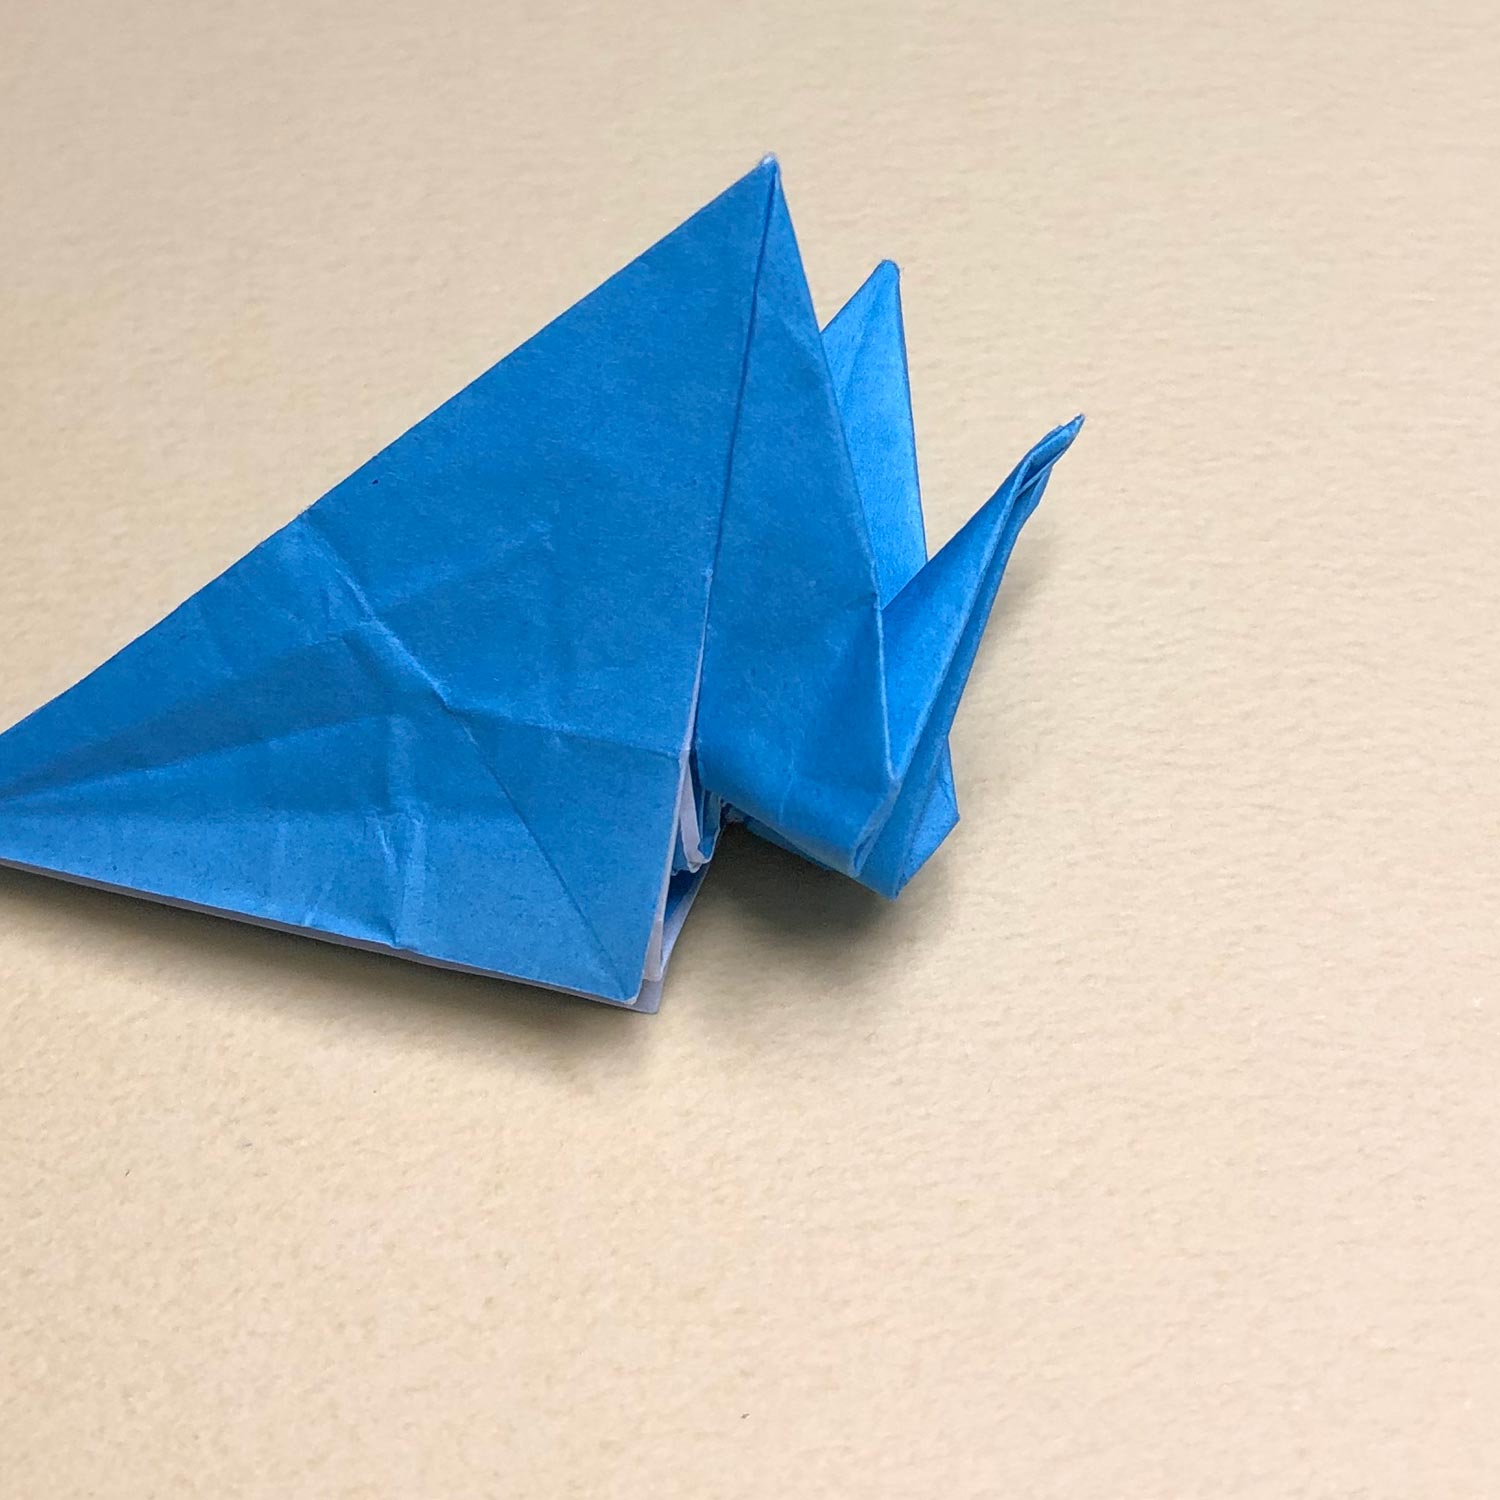
(124)
Raise the head/tail as it is like this picture.
